<?xml version="1.0" encoding="utf-8"?>
<feed xmlns="http://www.w3.org/2005/Atom">
    <title>FlowFuse</title>
    <link href="https://flowfuse.com/blog/index.xml" rel="self"/>
    <link href="https://flowfuse.com/blog"/>
    <updated>2026-08-14T00:00:00.000Z</updated>
    <id>https://flowfuse.com/blog</id>
    <entry>
        <id>https://flowfuse.com/blog/2026/08/layered-process-audit/</id>
        <title>Layered Process Audit (LPA): A Practical Guide + Checklist</title>
        <summary>Layered process audits verify that critical process controls are being followed while production is running, before defects are made. Learn how the layers work, what to put on the checklist, and download a free LPA template for the shop floor.</summary>
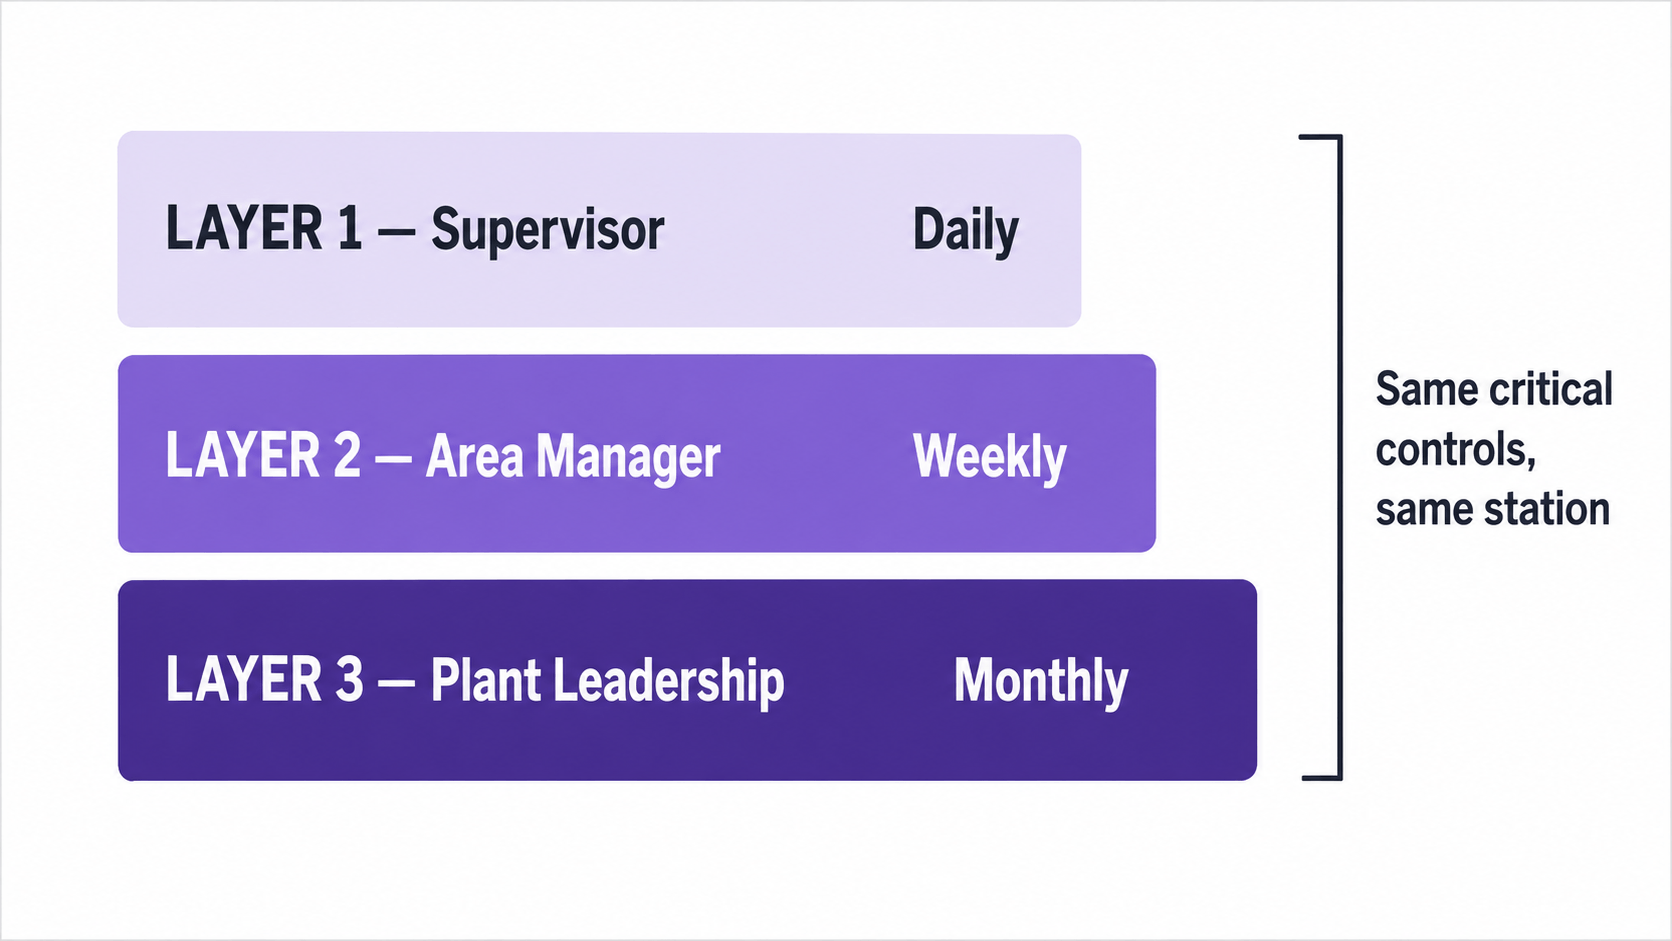
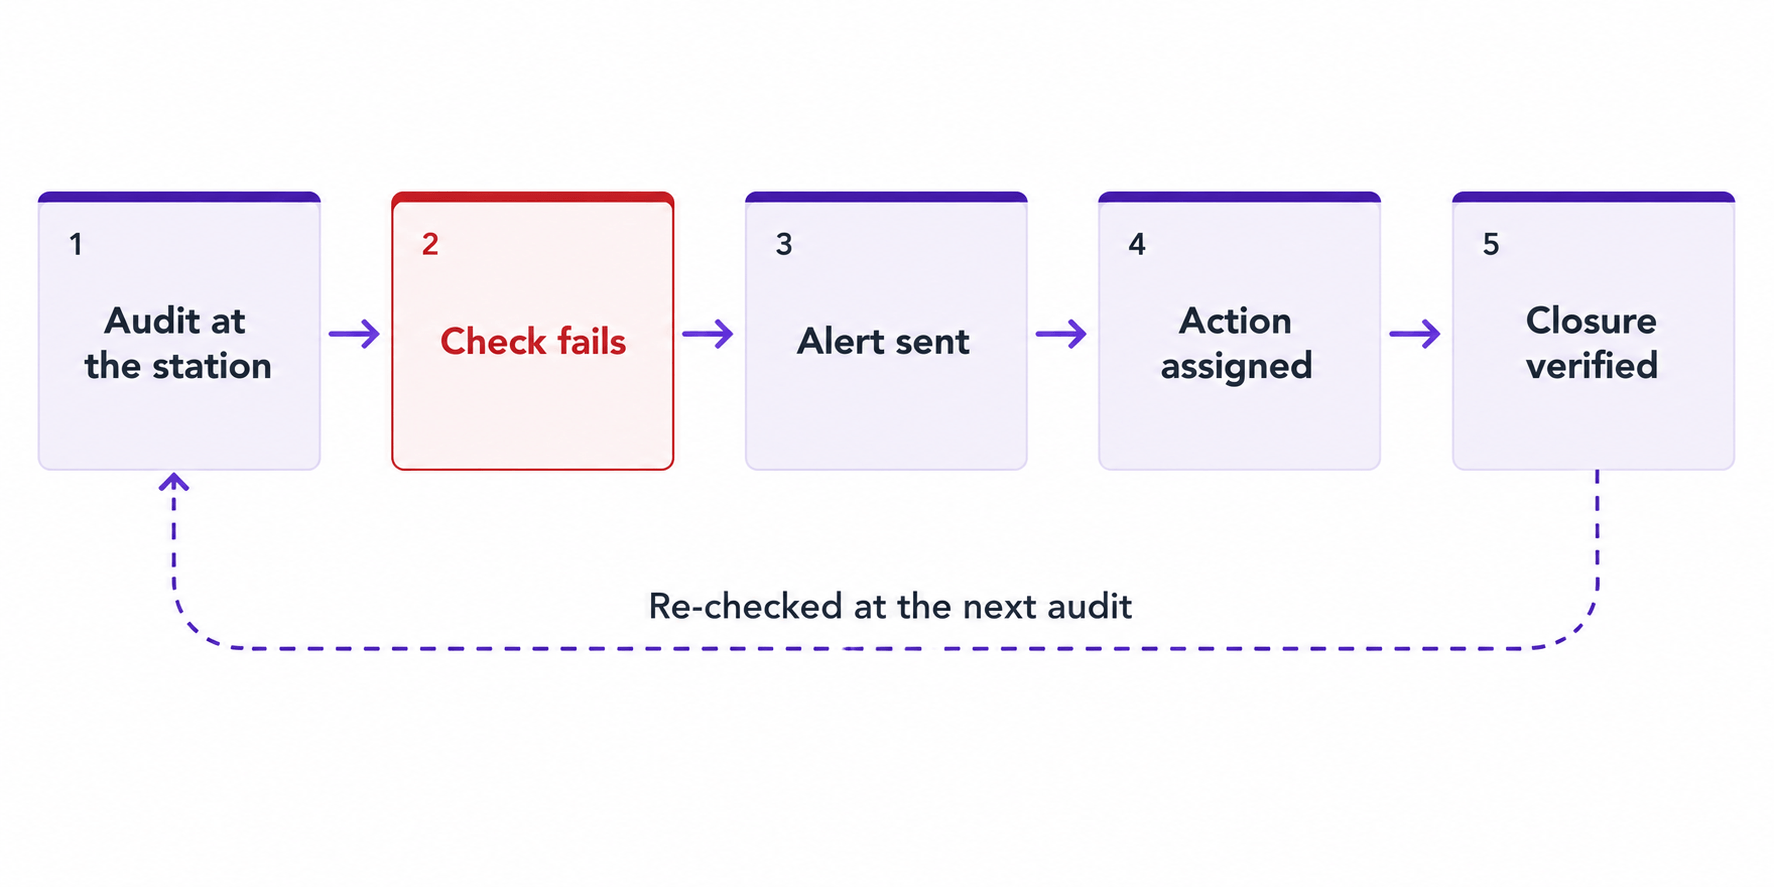
        <content type="html"><![CDATA[<p>Most plants discover process problems after the parts are made. A defect appears at final inspection, a customer reports an issue, and the plant begins sorting, rework, and investigation. So how do you catch those problems while the line is still running? This guide shows you how, using a Layered Process Audit. It includes a checklist template you can take straight to the shop floor.</p><p>A Layered Process Audit works earlier than that. Supervisors, engineers, and managers check the process while production is running and while they are standing at the workstation. These short, regular audits help catch problems before defects are produced, reinforce standard work, and keep communication active between shifts and departments.</p><p>This guide explains what an LPA is, how manufacturers use it, how to run one, and includes a practical checklist you can use on the shop floor.</p><h2 id="layered-process-audit-lpa-definition-and-meaning">Layered Process Audit (LPA): Definition and Meaning</h2><p>A Layered Process Audit (LPA) is a structured manufacturing audit used to verify that a process is being performed according to the defined standard. The audit focuses on how the work is done, not on inspecting finished parts.</p><p>In practice, an LPA is performed at the workstation. The auditor observes the operation, asks a small set of standard questions, and records whether each requirement is being followed. The same process is checked repeatedly by different levels of management, which is where the term layered comes from.</p><p>The layers are organizational levels, not stages of production. A typical program includes:</p><ul><li><strong>Layer 1:</strong> Supervisor or team leader</li><li><strong>Layer 2:</strong> Area manager</li><li><strong>Layer 3:</strong> Plant leadership</li></ul><p>All three may audit the same station, but at different frequencies.</p><p>A useful way to think about an LPA is as a routine health check for production. Final inspection tells you a part is bad; an LPA is intended to find the missing setup check, incorrect material, bypassed <a href="https://flowfuse.com/blog/2025/09/poka-yoke-mistake-proofing/">error-proofing device</a>, or <a href="https://flowfuse.com/blog/2026/07/what-is-instrument-calibration/">out-of-calibration tool</a> before bad parts are made.</p><p>LPAs are common in <a href="https://flowfuse.com/industries/automotive/">automotive manufacturing</a> and other industries with strict quality requirements. They do not replace product audits, process audits, or the plant's quality management system; they add a frequent, practical layer of process verification where the work happens.</p><a href="https://flowfuse.com/book-demo/"><img src="https://flowfuse.com/images/cta/power-workplace-book-demo.png" alt="Power Workplace relies on FlowFuse for scalability, reliability and security audits - book a demo"/></a><h2 id="why-manufacturers-run-lpas">Why Manufacturers Run LPAs</h2><p>Historically, LPAs spread through automotive manufacturing on the back of OEM supplier requirements. DaimlerChrysler and General Motors developed the common approach under the Automotive Industry Action Group, which published the first edition of the <a href="https://www.aiag.org/training-and-resources/manuals/details/CQI-8" rel="nofollow">CQI-8 Layered Process Audit Guideline</a> in 2005 and a second edition in 2014. Today those requirements reach suppliers through customer-specific documents from OEMs such as General Motors and Stellantis, and CQI-8 remains the guidance most plants reference.</p><p>The purpose is simple: verify that critical process controls are being followed while production is running. Finding a bypassed sensor today is far less expensive than sorting suspect parts weeks later.</p><p>LPAs support the intent of <a href="https://www.iatfglobaloversight.org/" rel="nofollow">IATF 16949</a>, but they do not replace the internal, process, or product audits required by the quality management system.</p><p>Manufacturers typically use LPAs to reinforce standard work, verify critical process settings, reduce repeat quality problems, improve accountability, and increase management presence on the shop floor.</p><p>The value of an LPA comes from consistent observation and quick correction, not from the checklist itself.</p><h2 id="how-the-layers-work">How the Layers Work</h2><p>The same process is checked by different levels of management at different frequencies. Lower layers audit more often and in greater detail; higher layers audit less often and across a broader area.</p><p>The table below is a common starting point rather than a rule. CQI-8 deliberately leaves audit frequency and question topics to each organization, so set yours based on process risk and expect them to change as you learn which stations need more attention.</p><table><thead><tr><th>Layer</th><th>Typical role</th><th>Typical frequency</th></tr></thead><tbody><tr><td>Layer 1</td><td>Supervisor / Team leader</td><td>Daily</td></tr><tr><td>Layer 2</td><td>Area manager</td><td>Weekly</td></tr><tr><td>Layer 3</td><td>Plant manager / Director</td><td>Monthly</td></tr></tbody></table><p><img alt="Three layers of a layered process audit showing a supervisor auditing daily, an area manager weekly, and plant leadership monthly, all checking the same station" src="https://flowfuse.com/blog/2026/08/images/layered-process-audit-level.png"/></p><h3 id="layer-1-supervisor-audit">Layer 1: Supervisor Audit</h3><p>The supervisor audits the station or line they manage. The focus is operator practice, standard work, tooling, materials, and immediate process controls. Simple problems are usually corrected immediately.</p><h3 id="layer-2-manager-audit">Layer 2: Manager Audit</h3><p>The area manager audits across several lines. In addition to the checklist itself, they verify that Layer 1 audits are being completed and that previous findings have been closed.</p><h3 id="layer-3-plant-leadership-audit">Layer 3: Plant Leadership Audit</h3><p>Plant leadership audits less often and across a wider scope. The focus is whether the LPA system is functioning: audits completed, repeat issues addressed, and no critical controls quietly abandoned.</p><p>A practical rule is: the higher the layer, the wider the scope and the lower the frequency. That overlap creates accountability across the organization.</p><h2 id="how-to-run-a-layered-process-audit">How to Run a Layered Process Audit</h2><ol><li><strong>Select the process.</strong> Start with a high-risk operation such as one with customer complaints, scrap, rework, safety exposure, or critical process parameters. A <a href="https://flowfuse.com/blog/2025/08/pareto-chart-manufacturing-guide/">Pareto chart</a> is a useful way to identify the stations causing the largest share of defects.</li><li><strong>Create the checklist.</strong> Use the <a href="https://www.aiag.org/quality/automotive-core-tools/fmea" rel="nofollow">PFMEA</a>, control plan, work instructions, and recent quality issues. Ten to fifteen objective questions is usually enough.</li><li><strong>Define the schedule.</strong> Decide which layer audits each area and how often.</li><li><strong>Train the auditors.</strong> Auditors should observe the process, ask factual questions, and record evidence rather than opinions.</li><li><strong>Perform the audit at the station.</strong> Watch the operation and record answers while standing at the workstation.</li><li><strong>Correct immediate issues.</strong> Fix simple problems during the audit whenever possible.</li><li><strong>Assign corrective actions.</strong> Give each finding an owner and a due date.</li><li><strong>Verify closure.</strong> Confirm that the action was completed and remains effective during the next audit cycle.</li></ol><p>Most LPAs take 5 to 15 minutes. If an audit takes much longer, the checklist is usually too large for a routine layered audit.</p><p>Many plants start LPAs with paper checklists or spreadsheets. As the program expands, they often <a href="#layered-process-audit-software-moving-lpas-off-paper">digitize the same workflow</a> so audits can be scheduled automatically, findings can trigger alerts, and corrective actions can be tracked across shifts and plants.</p><h2 id="what-to-put-on-the-lpa-checklist">What to Put on the LPA Checklist</h2><p>An LPA checklist should verify the few process controls that matter most. Keep it short and focused.</p><p>Good questions usually come from:</p><ul><li>PFMEA high-risk items</li><li>Control plan checks</li><li>Customer complaints</li><li>Scrap and rework data</li><li>Past audit findings</li></ul><p>Write questions so they can be answered <em>Yes</em> or <em>No</em> by observing the process.</p><table><thead><tr><th>Avoid</th><th>Better question</th></tr></thead><tbody><tr><td>"Is quality good?"</td><td>"Is the approved work instruction available at the station?"</td></tr><tr><td>"Are tools OK?"</td><td>"Is the torque tool within calibration date?"</td></tr><tr><td>"Is the operator following the process?"</td><td>"Is the operator performing step 4 as defined in the standard work?"</td></tr></tbody></table><h3 id="example-lpa-questions">Example LPA Questions</h3><p><strong>Standard work</strong></p><ul><li>Is the latest work instruction displayed?</li><li>Is the operator following the defined sequence?</li><li>Is the correct revision of the process sheet in use?</li></ul><p><strong>Materials</strong></p><ul><li>Is the material label correct and readable?</li><li>Is <a href="https://en.wikipedia.org/wiki/FIFO_(computing_and_electronics)" rel="nofollow">FIFO</a> being followed?</li><li>Is the approved material being used?</li></ul><p><strong>Tooling and equipment</strong></p><ul><li>Is the torque tool within calibration date?</li><li>Is the machine parameter within the approved range?</li><li>Is the gauge identified and available at the station?</li></ul><p>A calibration date on a checklist is only as good as the record behind it. For what that record should contain and how intervals are set, see <a href="https://flowfuse.com/blog/2026/07/what-is-instrument-calibration/">What Is Instrument Calibration (Equipment Calibration)?</a>; for turning that register into overdue and due-soon status the auditor can check in seconds, see <a href="https://flowfuse.com/blog/2026/07/calibration-management-dashboard/">Tracking Instrument Calibration with a Digital Dashboard</a>.</p><p><strong>Error-proofing</strong></p><ul><li>Is the poka-yoke device active and not bypassed?</li><li>Does the sensor stop the process when a fault is introduced?</li></ul><p><strong>Traceability</strong></p><ul><li>Is the batch or serial number recorded correctly?</li><li>Can the current part be traced to its material lot?</li></ul><p><strong>Safety and workplace condition</strong></p><ul><li>Are required PPE items being worn?</li><li>Is the workstation free from oil, scrap, and obstructions?</li><li>Are safety guards in place?</li></ul><p>A useful checklist usually fits on one page and can be completed while standing at the station.</p><p>The workplace-condition questions overlap with <a href="https://flowfuse.com/blog/2025/09/what-is-5s-checklist/">5S</a>. Keep only the few conditions that affect the process directly and handle broader housekeeping through a separate 5S audit.</p><h2 id="download-the-lpa-checklist-template">Download the LPA Checklist Template</h2><p>Download the <a href="https://drive.google.com/file/d/19plwlUo8vKPunGl7LRF1TMFjqGBZoih4/view?usp=sharing" rel="nofollow">one-page Layered Process Audit checklist template</a> and use it on the shop floor as a starting point for your LPA program. The sample questions can be adapted to your own PFMEA, control plan, and process requirements.</p><h2 id="layered-process-audit-software-moving-lpas-off-paper">Layered Process Audit Software: Moving LPAs Off Paper</h2><p>Paper LPAs are easy to start, but they become difficult to manage as the program grows. Finding repeat issues, overdue actions, or missed audits usually means searching through forms or spreadsheets.</p><p>A digital LPA keeps the same audit process while making results immediately available. Auditors can complete checklists on a phone or tablet, attach photos, trigger alerts for failed checks, and assign corrective actions from the workstation.</p><p>The bigger advantage is connecting LPA results with <strong>production data</strong>. With FlowFuse, audit applications can connect to machines, PLCs, sensors, databases, and other industrial systems. This lets teams compare failed audit checks with downtime, scrap, machine states, or process parameters to understand what was happening on the line.</p><p>With <a href="https://flowfuse.com/blog/2024/03/dashboard-getting-started/">FlowFuse Dashboard</a>, plants can build LPA forms, track findings and corrective actions, and visualize audit results alongside production data.</p><p><img alt="Process diagram showing the five steps after a failed layered process audit check: audit at the station, check fails, alert sent, action assigned, and closure verified, with the finding re-checked at the next audit" src="https://flowfuse.com/blog/2026/08/images/pa-escalation-loop.png"/></p><p>A useful starting point is the <a href="https://flowfuse.com/blueprints/manufacturing/5s-checklist/">5S Checklist Blueprint</a>, which can be adapted for an LPA program by replacing the 5S questions with LPA questions.</p><h2 id="where-lpa-programs-break-down">Where LPA Programs Break Down</h2><p>Most LPA programs do not fail suddenly; they become mechanical.</p><p>A common problem is pencil-whipping, where audits are marked complete without anyone visiting the workstation. Another is that higher management layers gradually stop performing their scheduled audits, so the layered system weakens over time.</p><p>Plants also struggle with findings that remain open for too long and checklists that are not updated when the process changes.</p><p>A healthy LPA program stays short, focused, and regularly reviewed. If audits become long and repetitive, people will eventually rush through them or skip them.</p><h2 id="measure-the-program-not-just-the-audits">Measure the Program, Not Just the Audits</h2><p>Treat the LPA as a managed program, not just a checklist activity. Review it monthly by checking whether each layer completed its audits, how quickly findings were closed, whether the same issue is appearing repeatedly at the same station, and whether corrective actions were documented and verified.</p><p>If a finding keeps returning, use a structured method such as a <a href="https://flowfuse.com/blog/2025/12/five-whys-root-cause-analysis-definition-examples/">Five Whys analysis</a> to investigate the root cause rather than repeating the same corrective action.</p><p><strong>Digitize your shop-floor audits</strong></p><p>Talk to us about building LPA forms, alerts, and corrective action tracking on your existing industrial data infrastructure.</p><p><a href="https://flowfuse.com/contact-us/">Contact Us</a></p>]]></content>
        <updated>2026-08-14T00:00:00.000Z</updated>
        <link href="https://flowfuse.com/blog/2026/08/layered-process-audit/"/>
        
    </entry>
    <entry>
        <id>https://flowfuse.com/blog/2026/08/connect-agvs-vda-5050-mqtt/</id>
        <title>VDA 5050 Tutorial: Connect AGVs to Factory Systems over MQTT</title>
        <summary>VDA 5050 explained: how the standard structures AGV communication over MQTT, and how to build a working master control flow in FlowFuse.</summary>
        <content type="html"><![CDATA[<p>If you run AGVs from more than one vendor, you already know the problem. Each vendor ships its own fleet manager. Those fleet managers don't talk to each other.</p><p>Two fleets under separate control can't share an intersection. So you either accept deadlocks, or you split the floor into separate lanes and waste space. Each fleet manager also needs its own link to your ERP, MES, or WMS. Adding a vehicle from a new vendor means <a href="https://flowfuse.com/blog/2024/11/why-point-to-point-connection-is-dead/">another integration project</a>. And because no single system sees all the work, one vendor's AGVs sit idle while the other's are backed up.</p><p>VDA 5050 solves that. FlowFuse gives you somewhere to build the master control system that uses it.</p><a href="https://flowfuse.com/book-demo/"><img src="https://flowfuse.com/images/cta/book-a-demo.png" alt="Walk through your FlowFuse setup with our team - book a demo"/></a><h2 id="why-vda-5050">Why VDA 5050?</h2><p>VDA 5050 is an open communication standard. The VDA (the German automotive association) and the VDMA (the machinery association) publish it together. The Institute for Material Handling and Logistics (IFL) at KIT leads the technical work.</p><p>It first appeared in 2019. It sets out how a master control system sends transport orders to a vehicle, and how that vehicle reports back. Messages travel over MQTT as JSON.</p><p>Most AGVs and AMRs on factory floors today speak the 2.x version. Version 3.0 came out on 19 March 2026 and adds support for freely navigating robots.</p><h3 id="one-interface-any-vehicle">One interface, any vehicle</h3><p>A master control system that speaks VDA 5050 can drive vehicles from different makers. You don't write a new integration for each one.</p><p>The standard fixes the message contract, not the vehicle. How an AGV avoids obstacles or plans its path is still up to the manufacturer. What you get is a shared order format and a shared status format.</p><p>If you already run <a href="https://flowfuse.com/blog/2026/06/mqtt-vs-sparkplug-b/">Sparkplug B</a> on the same broker, the two solve different problems. Sparkplug standardizes telemetry from any device. VDA 5050 standardizes a command-and-report contract for one class of device, so it says what an order looks like as well as what a status message looks like.</p><p>Safety stays out of scope. Emergency stops and person detection live on the vehicle and follow standards like ISO 3691-4. VDA 5050 reports safety state. It does not implement it.</p><h3 id="real-detail-not-just-a-heartbeat">Real detail, not just a heartbeat</h3><p>The messages carry operational data. A <code>state</code> message includes position, battery charge, order progress, and any active errors. An <code>order</code> describes a route of nodes and edges with actions attached, such as pick, drop, wait, or charge.</p><p>That detail is what lets master control make dispatch decisions, instead of just knowing a vehicle is online.</p><h3 id="built-on-mqtt">Built on MQTT</h3><p>MQTT suits a fleet well. It is lightweight, it uses <a href="https://flowfuse.com/blog/2024/06/how-to-use-mqtt-in-node-red/">publish and subscribe</a>, and it copes with devices that drop off the network. Vehicles report when something changes rather than waiting to be polled, which is <a href="https://flowfuse.com/blog/2026/02/what-is-event-driven-architecture-in-manufacturing/">event-driven architecture</a> applied to a floor full of moving hardware.</p><p>Every VDA 5050 topic follows the same pattern. So one wildcard subscription hears from every vehicle on the floor, whoever built it.</p><h2 id="the-six-topics">The six topics</h2><table><thead><tr><th>Topic</th><th>Sent by</th><th>Read by</th><th>What it carries</th></tr></thead><tbody><tr><td><code>order</code></td><td>Master control</td><td>AGV</td><td>A route of nodes and edges, with actions</td></tr><tr><td><code>instantActions</code></td><td>Master control</td><td>AGV</td><td>Immediate commands: pause, resume, cancel, start charging</td></tr><tr><td><code>state</code></td><td>AGV</td><td>Master control</td><td>Full status: position, battery, order progress, errors</td></tr><tr><td><code>visualization</code></td><td>AGV</td><td>Map displays</td><td>Position and velocity only, sent more often than <code>state</code></td></tr><tr><td><code>connection</code></td><td>AGV, or the broker for it</td><td>Master control</td><td>Online and offline at the MQTT level</td></tr><tr><td><code>factsheet</code></td><td>AGV</td><td>Master control</td><td>What the vehicle can do: size, load types, supported actions</td></tr></tbody></table><p>Both <code>state</code> and <code>visualization</code> carry position. That is on purpose.</p><p><code>state</code> is the full picture. A vehicle sends it when something changes, and at least once every 30 seconds. <code>visualization</code> is a small message with just position and velocity, so it can go out far more often, typically once a second or faster.</p><p>Use <code>state</code> for anything master control acts on. Use <code>visualization</code> only to draw a smooth live map. Note that <code>visualization</code> is optional in the standard, so some vehicles never send it. Version 3.0 widens its job: it now carries the planned path too, so traffic control can read it rather than just a map display.</p><h3 id="how-topics-are-named">How topics are named</h3><pre class="language-text" code="&lt;interfaceName&gt;/&lt;majorVersion&gt;/&lt;manufacturer&gt;/&lt;serialNumber&gt;/&lt;topic&gt;
" language="text"><code __ignore-map="">&lt;interfaceName&gt;/&lt;majorVersion&gt;/&lt;manufacturer&gt;/&lt;serialNumber&gt;/&lt;topic&gt;
</code></pre><p>For example: <code>uagv/v2/AcmeRobotics/AGV-042/state</code></p><p><code>uagv</code> is the interface name the standard uses in its own examples, and most people read it as short for "universal AGV". The standard itself only calls it the name of the interface, and each site can set its own. But nearly every 2.x deployment uses <code>uagv</code>, including the vehicles you are likely to buy. Treat it as fixed unless the vehicle's manual says otherwise.</p><p>The same caveat applies to the levels around it. The standard mandates the topic names in the final segment, <code>order</code>, <code>state</code>, and so on. It calls the <a href="https://flowfuse.com/blog/2025/01/designing-topic-hierarchy-for-your-uns/">five-level structure</a> a suggestion for a local broker, because cloud brokers impose their own topic rules. On-premise fleets follow it anyway, so build against it and adapt only if your broker forces you to.</p><p>The version segment is the major version only. So <code>v2</code>, not <code>v2.0.0</code>. The full version number goes in the <code>version</code> field inside the payload.</p><p>Because the maker and serial number sit in the topic, master control can subscribe once to <code>uagv/v2/+/+/state</code> and hear from every vehicle. Restrict each vehicle to its own topic path, using an allowlist on your broker.</p><h3 id="a-note-on-version-30">A note on version 3.0</h3><p>This tutorial uses version 2.x names, because that is what most vehicles speak today. Version 3.0 renames a lot:</p><ul><li>The example topic prefix moves to <code>vda5050/v3/...</code></li><li><code>agvPosition</code> becomes <code>mobileRobotPosition</code></li><li><code>batteryState</code> becomes <code>powerSupply</code>, and <code>batteryCharge</code> becomes <code>stateOfCharge</code></li><li><code>positionInitialized</code> becomes <code>localized</code></li><li><code>safetyState.eStop</code> becomes <code>activeEmergencyStop</code>, and the <code>AUTOACK</code> value is gone</li><li><code>actionStates</code> splits into <code>actionStates</code>, <code>instantActionStates</code>, and <code>zoneActionStates</code>, each cleared by its own instant action</li><li>Edges drop <code>startNodeId</code> and <code>endNodeId</code>. Position in the sequence alone now says which nodes an edge connects</li><li>Errors gain two levels, <code>CRITICAL</code> and <code>URGENT</code></li><li>Every robot must support <code>startPause</code>, <code>stopPause</code>, and <code>cancelOrder</code></li><li><code>timestamp</code> moves from hundredths of a second to milliseconds</li><li>Version 3.0 adds two optional topics, <code>zoneSet</code> and <code>responses</code>, and a fourth blocking type, <code>SINGLE</code></li><li><code>CONNECTIONBROKEN</code> becomes <code>CONNECTION_BROKEN</code>, and <code>HIBERNATING</code> is added</li><li>It also adds the operating modes <code>STARTUP</code> and <code>INTERVENED</code></li><li>The wording changes from "AGV" to "mobile robot" throughout</li></ul><p>Version 3.0 also strips abbreviations out of parameter names across the whole document, which is a breaking change. The <a href="https://github.com/VDA5050/VDA5050/releases/tag/3.0.0" rel="nofollow">3.0.0 release notes</a> link a <a href="https://github.com/VDA5050/VDA5050/pull/465" rel="nofollow">table of every rename</a>, so check that before you port a 2.x integration.</p><p>If your vehicle ships with 3.0 support, swap the names. The topic structure and the ideas below stay the same.</p><h3 id="what-a-state-message-looks-like">What a state message looks like</h3><pre class="language-json shiki shiki-themes material-theme-lighter material-theme material-theme-palenight" code="{
  "headerId": 42,
  "timestamp": "2026-08-10T09:15:00.000Z",
  "version": "2.1.0",
  "manufacturer": "AcmeRobotics",
  "serialNumber": "AGV-042",
  "orderId": "order-1001",
  "orderUpdateId": 0,
  "lastNodeId": "node7",
  "lastNodeSequenceId": 6,
  "nodeStates": [
    { "nodeId": "node8", "sequenceId": 8, "released": true }
  ],
  "edgeStates": [
    { "edgeId": "node7-8", "sequenceId": 7, "released": true }
  ],
  "agvPosition": {
    "x": 12.4,
    "y": 3.1,
    "theta": 0.0,
    "mapId": "floor1",
    "positionInitialized": true
  },
  "velocity": { "vx": 0.5, "vy": 0.0, "omega": 0.0 },
  "batteryState": { "batteryCharge": 76.5, "charging": false },
  "driving": true,
  "actionStates": [
    { "actionId": "drop-42", "actionStatus": "WAITING" }
  ],
  "operatingMode": "AUTOMATIC",
  "errors": [],
  "safetyState": { "eStop": "NONE", "fieldViolation": false }
}
" language="json" meta="" style=""><code __ignore-map=""><span class="line" line="1"><span class="sMK4o">{
</span></span><span class="line" line="2"><span class="sMK4o">  "</span><span class="spNyl">headerId</span><span class="sMK4o">"</span><span class="sMK4o">:</span><span class="sbssI"> 42</span><span class="sMK4o">,
</span></span><span class="line" line="3"><span class="sMK4o">  "</span><span class="spNyl">timestamp</span><span class="sMK4o">"</span><span class="sMK4o">:</span><span class="sMK4o"> "</span><span class="sfazB">2026-08-10T09:15:00.000Z</span><span class="sMK4o">"</span><span class="sMK4o">,
</span></span><span class="line" line="4"><span class="sMK4o">  "</span><span class="spNyl">version</span><span class="sMK4o">"</span><span class="sMK4o">:</span><span class="sMK4o"> "</span><span class="sfazB">2.1.0</span><span class="sMK4o">"</span><span class="sMK4o">,
</span></span><span class="line" line="5"><span class="sMK4o">  "</span><span class="spNyl">manufacturer</span><span class="sMK4o">"</span><span class="sMK4o">:</span><span class="sMK4o"> "</span><span class="sfazB">AcmeRobotics</span><span class="sMK4o">"</span><span class="sMK4o">,
</span></span><span class="line" line="6"><span class="sMK4o">  "</span><span class="spNyl">serialNumber</span><span class="sMK4o">"</span><span class="sMK4o">:</span><span class="sMK4o"> "</span><span class="sfazB">AGV-042</span><span class="sMK4o">"</span><span class="sMK4o">,
</span></span><span class="line" line="7"><span class="sMK4o">  "</span><span class="spNyl">orderId</span><span class="sMK4o">"</span><span class="sMK4o">:</span><span class="sMK4o"> "</span><span class="sfazB">order-1001</span><span class="sMK4o">"</span><span class="sMK4o">,
</span></span><span class="line" line="8"><span class="sMK4o">  "</span><span class="spNyl">orderUpdateId</span><span class="sMK4o">"</span><span class="sMK4o">:</span><span class="sbssI"> 0</span><span class="sMK4o">,
</span></span><span class="line" line="9"><span class="sMK4o">  "</span><span class="spNyl">lastNodeId</span><span class="sMK4o">"</span><span class="sMK4o">:</span><span class="sMK4o"> "</span><span class="sfazB">node7</span><span class="sMK4o">"</span><span class="sMK4o">,
</span></span><span class="line" line="10"><span class="sMK4o">  "</span><span class="spNyl">lastNodeSequenceId</span><span class="sMK4o">"</span><span class="sMK4o">:</span><span class="sbssI"> 6</span><span class="sMK4o">,
</span></span><span class="line" line="11"><span class="sMK4o">  "</span><span class="spNyl">nodeStates</span><span class="sMK4o">"</span><span class="sMK4o">:</span><span class="sMK4o"> [
</span></span><span class="line" line="12"><span class="sMK4o">    {</span><span class="sMK4o"> "</span><span class="sBMFI">nodeId</span><span class="sMK4o">"</span><span class="sMK4o">:</span><span class="sMK4o"> "</span><span class="sfazB">node8</span><span class="sMK4o">"</span><span class="sMK4o">,</span><span class="sMK4o"> "</span><span class="sBMFI">sequenceId</span><span class="sMK4o">"</span><span class="sMK4o">:</span><span class="sbssI"> 8</span><span class="sMK4o">,</span><span class="sMK4o"> "</span><span class="sBMFI">released</span><span class="sMK4o">"</span><span class="sMK4o">:</span><span class="sMK4o"> true</span><span class="sMK4o"> }
</span></span><span class="line" line="13"><span class="sMK4o">  ],
</span></span><span class="line" line="14"><span class="sMK4o">  "</span><span class="spNyl">edgeStates</span><span class="sMK4o">"</span><span class="sMK4o">:</span><span class="sMK4o"> [
</span></span><span class="line" line="15"><span class="sMK4o">    {</span><span class="sMK4o"> "</span><span class="sBMFI">edgeId</span><span class="sMK4o">"</span><span class="sMK4o">:</span><span class="sMK4o"> "</span><span class="sfazB">node7-8</span><span class="sMK4o">"</span><span class="sMK4o">,</span><span class="sMK4o"> "</span><span class="sBMFI">sequenceId</span><span class="sMK4o">"</span><span class="sMK4o">:</span><span class="sbssI"> 7</span><span class="sMK4o">,</span><span class="sMK4o"> "</span><span class="sBMFI">released</span><span class="sMK4o">"</span><span class="sMK4o">:</span><span class="sMK4o"> true</span><span class="sMK4o"> }
</span></span><span class="line" line="16"><span class="sMK4o">  ],
</span></span><span class="line" line="17"><span class="sMK4o">  "</span><span class="spNyl">agvPosition</span><span class="sMK4o">"</span><span class="sMK4o">:</span><span class="sMK4o"> {
</span></span><span class="line" line="18"><span class="sMK4o">    "</span><span class="sBMFI">x</span><span class="sMK4o">"</span><span class="sMK4o">:</span><span class="sbssI"> 12.4</span><span class="sMK4o">,
</span></span><span class="line" line="19"><span class="sMK4o">    "</span><span class="sBMFI">y</span><span class="sMK4o">"</span><span class="sMK4o">:</span><span class="sbssI"> 3.1</span><span class="sMK4o">,
</span></span><span class="line" line="20"><span class="sMK4o">    "</span><span class="sBMFI">theta</span><span class="sMK4o">"</span><span class="sMK4o">:</span><span class="sbssI"> 0.0</span><span class="sMK4o">,
</span></span><span class="line" line="21"><span class="sMK4o">    "</span><span class="sBMFI">mapId</span><span class="sMK4o">"</span><span class="sMK4o">:</span><span class="sMK4o"> "</span><span class="sfazB">floor1</span><span class="sMK4o">"</span><span class="sMK4o">,
</span></span><span class="line" line="22"><span class="sMK4o">    "</span><span class="sBMFI">positionInitialized</span><span class="sMK4o">"</span><span class="sMK4o">:</span><span class="sMK4o"> true
</span></span><span class="line" line="23"><span class="sMK4o">  },
</span></span><span class="line" line="24"><span class="sMK4o">  "</span><span class="spNyl">velocity</span><span class="sMK4o">"</span><span class="sMK4o">:</span><span class="sMK4o"> {</span><span class="sMK4o"> "</span><span class="sBMFI">vx</span><span class="sMK4o">"</span><span class="sMK4o">:</span><span class="sbssI"> 0.5</span><span class="sMK4o">,</span><span class="sMK4o"> "</span><span class="sBMFI">vy</span><span class="sMK4o">"</span><span class="sMK4o">:</span><span class="sbssI"> 0.0</span><span class="sMK4o">,</span><span class="sMK4o"> "</span><span class="sBMFI">omega</span><span class="sMK4o">"</span><span class="sMK4o">:</span><span class="sbssI"> 0.0</span><span class="sMK4o"> },
</span></span><span class="line" line="25"><span class="sMK4o">  "</span><span class="spNyl">batteryState</span><span class="sMK4o">"</span><span class="sMK4o">:</span><span class="sMK4o"> {</span><span class="sMK4o"> "</span><span class="sBMFI">batteryCharge</span><span class="sMK4o">"</span><span class="sMK4o">:</span><span class="sbssI"> 76.5</span><span class="sMK4o">,</span><span class="sMK4o"> "</span><span class="sBMFI">charging</span><span class="sMK4o">"</span><span class="sMK4o">:</span><span class="sMK4o"> false</span><span class="sMK4o"> },
</span></span><span class="line" line="26"><span class="sMK4o">  "</span><span class="spNyl">driving</span><span class="sMK4o">"</span><span class="sMK4o">:</span><span class="sMK4o"> true,
</span></span><span class="line" line="27"><span class="sMK4o">  "</span><span class="spNyl">actionStates</span><span class="sMK4o">"</span><span class="sMK4o">:</span><span class="sMK4o"> [
</span></span><span class="line" line="28"><span class="sMK4o">    {</span><span class="sMK4o"> "</span><span class="sBMFI">actionId</span><span class="sMK4o">"</span><span class="sMK4o">:</span><span class="sMK4o"> "</span><span class="sfazB">drop-42</span><span class="sMK4o">"</span><span class="sMK4o">,</span><span class="sMK4o"> "</span><span class="sBMFI">actionStatus</span><span class="sMK4o">"</span><span class="sMK4o">:</span><span class="sMK4o"> "</span><span class="sfazB">WAITING</span><span class="sMK4o">"</span><span class="sMK4o"> }
</span></span><span class="line" line="29"><span class="sMK4o">  ],
</span></span><span class="line" line="30"><span class="sMK4o">  "</span><span class="spNyl">operatingMode</span><span class="sMK4o">"</span><span class="sMK4o">:</span><span class="sMK4o"> "</span><span class="sfazB">AUTOMATIC</span><span class="sMK4o">"</span><span class="sMK4o">,
</span></span><span class="line" line="31"><span class="sMK4o">  "</span><span class="spNyl">errors</span><span class="sMK4o">"</span><span class="sMK4o">:</span><span class="sMK4o"> [],
</span></span><span class="line" line="32"><span class="sMK4o">  "</span><span class="spNyl">safetyState</span><span class="sMK4o">"</span><span class="sMK4o">:</span><span class="sMK4o"> {</span><span class="sMK4o"> "</span><span class="sBMFI">eStop</span><span class="sMK4o">"</span><span class="sMK4o">:</span><span class="sMK4o"> "</span><span class="sfazB">NONE</span><span class="sMK4o">"</span><span class="sMK4o">,</span><span class="sMK4o"> "</span><span class="sBMFI">fieldViolation</span><span class="sMK4o">"</span><span class="sMK4o">:</span><span class="sMK4o"> false</span><span class="sMK4o"> }
</span></span><span class="line" line="33"><span class="sMK4o">}
</span></span></code></pre><p>That vehicle is driving from <code>node7</code> to <code>node8</code>, with a drop waiting at the end of it. Three things to know before you write code against this.</p><p><strong>Some fields are always there.</strong> <code>orderId</code>, <code>orderUpdateId</code>, <code>lastNodeId</code>, <code>lastNodeSequenceId</code>, <code>nodeStates</code>, <code>edgeStates</code>, <code>driving</code>, <code>actionStates</code>, <code>batteryState</code>, <code>operatingMode</code>, <code>errors</code>, and <code>safetyState</code> are required. An idle vehicle sends empty <code>nodeStates</code> and <code>edgeStates</code> arrays. It does not drop the fields.</p><p><strong>Position is not, but read the exception carefully.</strong> <code>agvPosition</code> and <code>velocity</code> are optional. The standard only lets a vehicle omit <code>agvPosition</code> if it cannot localize itself at all, such as a line-guided AGV. A vehicle that can localize but hasn't finished yet still sends the field, with <code>positionInitialized</code> set to <code>false</code>.</p><p>So master control needs two checks, not one. Confirm <code>agvPosition</code> is there, then confirm <code>positionInitialized</code> is <code>true</code> before you trust the numbers. Code like <code>msg.payload.agvPosition.x</code> crashes on a line-guided vehicle. Code that skips the second check will route a truck using coordinates the truck itself doesn't stand behind.</p><p><strong>Watch the <a href="https://flowfuse.com/blog/2026/07/time-synchronization-edge-devices/">timestamp</a> precision.</strong> 2.x writes <code>timestamp</code> with hundredths of a second, while JavaScript's <code>toISOString()</code> gives you milliseconds. Vehicles accept it in practice, and 3.0 moves to milliseconds officially, but a strict schema validator flags it.</p><p>The standard ships <a href="https://github.com/VDA5050/VDA5050/tree/main/json_schemas" rel="nofollow">JSON schemas</a> for all six topics. Point a validator at them and you can check a payload before you send it, rather than finding out from the vehicle.</p><h2 id="build-it">Build it</h2><h3 id="what-you-need">What you need</h3><ul><li>A running FlowFuse instance on your edge device. If you do not have an account, <a href="https://app.flowfuse.com/account/create" rel="nofollow">sign up for a free trial</a> and set up your instance following the instructions in this <a href="https://flowfuse.com/docs/device-agent/quickstart/">guide</a>.</li><li>An MQTT broker your AGVs (or an AGV simulator) already publish to, or FlowFuse's <a href="https://flowfuse.com/docs/user/teambroker/">built-in team broker</a> if you're prototyping. If you're still <a href="https://flowfuse.com/blog/2024/01/unified-namespace-what-broker/">choosing a broker</a>, any one with retained messages, last will, and per-client topic permissions will do.</li><li>At least one vehicle or simulator publishing VDA 5050 topics, so you have real messages to work with.</li></ul><h3 id="step-1-connect-to-your-broker">Step 1: Connect to your broker</h3><ol><li>Drag an <strong>mqtt in</strong> node onto the canvas. Double-click it.</li><li>Click the pencil icon next to <strong>Server</strong> to add a broker.</li><li>Enter your broker's host and port. <a href="https://flowfuse.com/blog/2024/11/getting-the-most-out-of-mqtt-for-industrial-iot/">Use 8883 and tick <strong>Use TLS</strong></a> on the <strong>Connection</strong> tab. Only use plain port 1883 on an isolated test network.</li><li>On the same tab, set <strong>Keep alive</strong> to 15 seconds. The standard suggests around that, because the keep alive decides how fast the broker notices a vehicle has vanished. Node-RED defaults to 60, which leaves a dead AGV looking alive for up to a minute and a half.</li><li>If your broker needs a login, open the <strong>Security</strong> tab and enter the username and password.</li><li>Leave the topic empty for now. You'll fill it in next.</li></ol><p>The <a href="https://flowfuse.com/docs/user/mqtt-nodes/">FlowFuse MQTT nodes</a> replace steps 2 to 5 if you're pointing at the <a href="https://flowfuse.com/docs/user/teambroker/">FlowFuse broker</a>. They create the client and fill in the credentials themselves.</p><h3 id="step-2-subscribe-to-fleet-state">Step 2: Subscribe to fleet state</h3><ol><li>In the <strong>mqtt in</strong> node, set <strong>Topic</strong> to <code>uagv/v2/+/+/state</code>. Each <code>+</code> stands for one topic level. Here they cover manufacturer and serial number, so this one subscription picks up every vehicle.</li><li>Set <strong>QoS</strong> to 0. VDA 5050 asks for QoS 0 on <code>order</code>, <code>instantActions</code>, <code>state</code>, <code>factsheet</code>, and <code>visualization</code>, and QoS 1 only on <code>connection</code>. Setting a higher QoS on your side doesn't help anyway. MQTT delivers at the lower of the two values.</li><li>Set <strong>Output</strong> to "a parsed JSON object". You then get a JavaScript object instead of raw bytes. If a vehicle sends broken JSON, the node logs an error and drops the message.</li><li>Add a <strong>function</strong> node (the one from step 3 below) and a <strong>debug</strong> node after it.</li><li>Deploy. Check that the <strong>mqtt in</strong> node says "connected", then watch messages arrive in the debug sidebar.</li></ol><pre class="language-json shiki shiki-themes material-theme-lighter material-theme material-theme-palenight" code="[{"id":"vda-mqtt-in","type":"mqtt in","z":"vda-flow","name":"Fleet state","topic":"uagv/v2/+/+/state","qos":"0","datatype":"json","broker":"vda-broker","nl":false,"rap":true,"rh":0,"inputs":0,"x":210,"y":160,"wires":[["vda-parse"]]},{"id":"vda-parse","type":"function","z":"vda-flow","name":"Identify vehicle","func":"const parts = msg.topic.split('/');\nif (parts.length !== 5) {\n    node.warn('Unexpected VDA 5050 topic: ' + msg.topic);\n    return null;\n}\n\nmsg.manufacturer = parts[2];\nmsg.serialNumber = parts[3];\n\nconst p = msg.payload;\nif (p.manufacturer !== msg.manufacturer || p.serialNumber !== msg.serialNumber) {\n    node.warn('Topic and payload disagree on ' + msg.topic);\n}\n\nreturn msg;","outputs":1,"noerr":0,"initialize":"","finalize":"","libs":[],"x":430,"y":160,"wires":[["vda-debug"]]},{"id":"vda-debug","type":"debug","z":"vda-flow","name":"State debug","active":true,"tosidebar":true,"console":false,"tostatus":false,"complete":"payload","targetType":"msg","statusVal":"","statusType":"auto","x":650,"y":160,"wires":[]},{"id":"vda-broker","type":"mqtt-broker","name":"VDA 5050 broker","broker":"your-broker.example.com","port":"8883","clientid":"","autoConnect":true,"usetls":true,"verifyservercert":true,"protocolVersion":"4","keepalive":"15","cleansession":true,"autoUnsubscribe":true,"birthTopic":"","birthQos":"0","birthPayload":"","birthMsg":{},"closeTopic":"","closeQos":"0","closePayload":"","closeMsg":{},"willTopic":"","willQos":"0","willPayload":"","willMsg":{},"sessionExpiry":""}]
" language="json" meta="" style=""><code __ignore-map=""><span class="line" line="1"><span class="sMK4o">[{</span><span class="sMK4o">"</span><span class="spNyl">id</span><span class="sMK4o">"</span><span class="sMK4o">:</span><span class="sMK4o">"</span><span class="sfazB">vda-mqtt-in</span><span class="sMK4o">"</span><span class="sMK4o">,</span><span class="sMK4o">"</span><span class="spNyl">type</span><span class="sMK4o">"</span><span class="sMK4o">:</span><span class="sMK4o">"</span><span class="sfazB">mqtt in</span><span class="sMK4o">"</span><span class="sMK4o">,</span><span class="sMK4o">"</span><span class="spNyl">z</span><span class="sMK4o">"</span><span class="sMK4o">:</span><span class="sMK4o">"</span><span class="sfazB">vda-flow</span><span class="sMK4o">"</span><span class="sMK4o">,</span><span class="sMK4o">"</span><span class="spNyl">name</span><span class="sMK4o">"</span><span class="sMK4o">:</span><span class="sMK4o">"</span><span class="sfazB">Fleet state</span><span class="sMK4o">"</span><span class="sMK4o">,</span><span class="sMK4o">"</span><span class="spNyl">topic</span><span class="sMK4o">"</span><span class="sMK4o">:</span><span class="sMK4o">"</span><span class="sfazB">uagv/v2/+/+/state</span><span class="sMK4o">"</span><span class="sMK4o">,</span><span class="sMK4o">"</span><span class="spNyl">qos</span><span class="sMK4o">"</span><span class="sMK4o">:</span><span class="sMK4o">"</span><span class="sfazB">0</span><span class="sMK4o">"</span><span class="sMK4o">,</span><span class="sMK4o">"</span><span class="spNyl">datatype</span><span class="sMK4o">"</span><span class="sMK4o">:</span><span class="sMK4o">"</span><span class="sfazB">json</span><span class="sMK4o">"</span><span class="sMK4o">,</span><span class="sMK4o">"</span><span class="spNyl">broker</span><span class="sMK4o">"</span><span class="sMK4o">:</span><span class="sMK4o">"</span><span class="sfazB">vda-broker</span><span class="sMK4o">"</span><span class="sMK4o">,</span><span class="sMK4o">"</span><span class="spNyl">nl</span><span class="sMK4o">"</span><span class="sMK4o">:false,</span><span class="sMK4o">"</span><span class="spNyl">rap</span><span class="sMK4o">"</span><span class="sMK4o">:true,</span><span class="sMK4o">"</span><span class="spNyl">rh</span><span class="sMK4o">"</span><span class="sMK4o">:</span><span class="sbssI">0</span><span class="sMK4o">,</span><span class="sMK4o">"</span><span class="spNyl">inputs</span><span class="sMK4o">"</span><span class="sMK4o">:</span><span class="sbssI">0</span><span class="sMK4o">,</span><span class="sMK4o">"</span><span class="spNyl">x</span><span class="sMK4o">"</span><span class="sMK4o">:</span><span class="sbssI">210</span><span class="sMK4o">,</span><span class="sMK4o">"</span><span class="spNyl">y</span><span class="sMK4o">"</span><span class="sMK4o">:</span><span class="sbssI">160</span><span class="sMK4o">,</span><span class="sMK4o">"</span><span class="spNyl">wires</span><span class="sMK4o">"</span><span class="sMK4o">:[[</span><span class="sMK4o">"</span><span class="sfazB">vda-parse</span><span class="sMK4o">"</span><span class="sMK4o">]]},{</span><span class="sMK4o">"</span><span class="spNyl">id</span><span class="sMK4o">"</span><span class="sMK4o">:</span><span class="sMK4o">"</span><span class="sfazB">vda-parse</span><span class="sMK4o">"</span><span class="sMK4o">,</span><span class="sMK4o">"</span><span class="spNyl">type</span><span class="sMK4o">"</span><span class="sMK4o">:</span><span class="sMK4o">"</span><span class="sfazB">function</span><span class="sMK4o">"</span><span class="sMK4o">,</span><span class="sMK4o">"</span><span class="spNyl">z</span><span class="sMK4o">"</span><span class="sMK4o">:</span><span class="sMK4o">"</span><span class="sfazB">vda-flow</span><span class="sMK4o">"</span><span class="sMK4o">,</span><span class="sMK4o">"</span><span class="spNyl">name</span><span class="sMK4o">"</span><span class="sMK4o">:</span><span class="sMK4o">"</span><span class="sfazB">Identify vehicle</span><span class="sMK4o">"</span><span class="sMK4o">,</span><span class="sMK4o">"</span><span class="spNyl">func</span><span class="sMK4o">"</span><span class="sMK4o">:</span><span class="sMK4o">"</span><span class="sfazB">const parts = msg.topic.split('/');</span><span class="sTEyZ">\n</span><span class="sfazB">if (parts.length !== 5) {</span><span class="sTEyZ">\n</span><span class="sfazB">    node.warn('Unexpected VDA 5050 topic: ' + msg.topic);</span><span class="sTEyZ">\n</span><span class="sfazB">    return null;</span><span class="sTEyZ">\n</span><span class="sfazB">}</span><span class="sTEyZ">\n\n</span><span class="sfazB">msg.manufacturer = parts[2];</span><span class="sTEyZ">\n</span><span class="sfazB">msg.serialNumber = parts[3];</span><span class="sTEyZ">\n\n</span><span class="sfazB">const p = msg.payload;</span><span class="sTEyZ">\n</span><span class="sfazB">if (p.manufacturer !== msg.manufacturer || p.serialNumber !== msg.serialNumber) {</span><span class="sTEyZ">\n</span><span class="sfazB">    node.warn('Topic and payload disagree on ' + msg.topic);</span><span class="sTEyZ">\n</span><span class="sfazB">}</span><span class="sTEyZ">\n\n</span><span class="sfazB">return msg;</span><span class="sMK4o">"</span><span class="sMK4o">,</span><span class="sMK4o">"</span><span class="spNyl">outputs</span><span class="sMK4o">"</span><span class="sMK4o">:</span><span class="sbssI">1</span><span class="sMK4o">,</span><span class="sMK4o">"</span><span class="spNyl">noerr</span><span class="sMK4o">"</span><span class="sMK4o">:</span><span class="sbssI">0</span><span class="sMK4o">,</span><span class="sMK4o">"</span><span class="spNyl">initialize</span><span class="sMK4o">"</span><span class="sMK4o">:</span><span class="sMK4o">""</span><span class="sMK4o">,</span><span class="sMK4o">"</span><span class="spNyl">finalize</span><span class="sMK4o">"</span><span class="sMK4o">:</span><span class="sMK4o">""</span><span class="sMK4o">,</span><span class="sMK4o">"</span><span class="spNyl">libs</span><span class="sMK4o">"</span><span class="sMK4o">:[],</span><span class="sMK4o">"</span><span class="spNyl">x</span><span class="sMK4o">"</span><span class="sMK4o">:</span><span class="sbssI">430</span><span class="sMK4o">,</span><span class="sMK4o">"</span><span class="spNyl">y</span><span class="sMK4o">"</span><span class="sMK4o">:</span><span class="sbssI">160</span><span class="sMK4o">,</span><span class="sMK4o">"</span><span class="spNyl">wires</span><span class="sMK4o">"</span><span class="sMK4o">:[[</span><span class="sMK4o">"</span><span class="sfazB">vda-debug</span><span class="sMK4o">"</span><span class="sMK4o">]]},{</span><span class="sMK4o">"</span><span class="spNyl">id</span><span class="sMK4o">"</span><span class="sMK4o">:</span><span class="sMK4o">"</span><span class="sfazB">vda-debug</span><span class="sMK4o">"</span><span class="sMK4o">,</span><span class="sMK4o">"</span><span class="spNyl">type</span><span class="sMK4o">"</span><span class="sMK4o">:</span><span class="sMK4o">"</span><span class="sfazB">debug</span><span class="sMK4o">"</span><span class="sMK4o">,</span><span class="sMK4o">"</span><span class="spNyl">z</span><span class="sMK4o">"</span><span class="sMK4o">:</span><span class="sMK4o">"</span><span class="sfazB">vda-flow</span><span class="sMK4o">"</span><span class="sMK4o">,</span><span class="sMK4o">"</span><span class="spNyl">name</span><span class="sMK4o">"</span><span class="sMK4o">:</span><span class="sMK4o">"</span><span class="sfazB">State debug</span><span class="sMK4o">"</span><span class="sMK4o">,</span><span class="sMK4o">"</span><span class="spNyl">active</span><span class="sMK4o">"</span><span class="sMK4o">:true,</span><span class="sMK4o">"</span><span class="spNyl">tosidebar</span><span class="sMK4o">"</span><span class="sMK4o">:true,</span><span class="sMK4o">"</span><span class="spNyl">console</span><span class="sMK4o">"</span><span class="sMK4o">:false,</span><span class="sMK4o">"</span><span class="spNyl">tostatus</span><span class="sMK4o">"</span><span class="sMK4o">:false,</span><span class="sMK4o">"</span><span class="spNyl">complete</span><span class="sMK4o">"</span><span class="sMK4o">:</span><span class="sMK4o">"</span><span class="sfazB">payload</span><span class="sMK4o">"</span><span class="sMK4o">,</span><span class="sMK4o">"</span><span class="spNyl">targetType</span><span class="sMK4o">"</span><span class="sMK4o">:</span><span class="sMK4o">"</span><span class="sfazB">msg</span><span class="sMK4o">"</span><span class="sMK4o">,</span><span class="sMK4o">"</span><span class="spNyl">statusVal</span><span class="sMK4o">"</span><span class="sMK4o">:</span><span class="sMK4o">""</span><span class="sMK4o">,</span><span class="sMK4o">"</span><span class="spNyl">statusType</span><span class="sMK4o">"</span><span class="sMK4o">:</span><span class="sMK4o">"</span><span class="sfazB">auto</span><span class="sMK4o">"</span><span class="sMK4o">,</span><span class="sMK4o">"</span><span class="spNyl">x</span><span class="sMK4o">"</span><span class="sMK4o">:</span><span class="sbssI">650</span><span class="sMK4o">,</span><span class="sMK4o">"</span><span class="spNyl">y</span><span class="sMK4o">"</span><span class="sMK4o">:</span><span class="sbssI">160</span><span class="sMK4o">,</span><span class="sMK4o">"</span><span class="spNyl">wires</span><span class="sMK4o">"</span><span class="sMK4o">:[]},{</span><span class="sMK4o">"</span><span class="spNyl">id</span><span class="sMK4o">"</span><span class="sMK4o">:</span><span class="sMK4o">"</span><span class="sfazB">vda-broker</span><span class="sMK4o">"</span><span class="sMK4o">,</span><span class="sMK4o">"</span><span class="spNyl">type</span><span class="sMK4o">"</span><span class="sMK4o">:</span><span class="sMK4o">"</span><span class="sfazB">mqtt-broker</span><span class="sMK4o">"</span><span class="sMK4o">,</span><span class="sMK4o">"</span><span class="spNyl">name</span><span class="sMK4o">"</span><span class="sMK4o">:</span><span class="sMK4o">"</span><span class="sfazB">VDA 5050 broker</span><span class="sMK4o">"</span><span class="sMK4o">,</span><span class="sMK4o">"</span><span class="spNyl">broker</span><span class="sMK4o">"</span><span class="sMK4o">:</span><span class="sMK4o">"</span><span class="sfazB">your-broker.example.com</span><span class="sMK4o">"</span><span class="sMK4o">,</span><span class="sMK4o">"</span><span class="spNyl">port</span><span class="sMK4o">"</span><span class="sMK4o">:</span><span class="sMK4o">"</span><span class="sfazB">8883</span><span class="sMK4o">"</span><span class="sMK4o">,</span><span class="sMK4o">"</span><span class="spNyl">clientid</span><span class="sMK4o">"</span><span class="sMK4o">:</span><span class="sMK4o">""</span><span class="sMK4o">,</span><span class="sMK4o">"</span><span class="spNyl">autoConnect</span><span class="sMK4o">"</span><span class="sMK4o">:true,</span><span class="sMK4o">"</span><span class="spNyl">usetls</span><span class="sMK4o">"</span><span class="sMK4o">:true,</span><span class="sMK4o">"</span><span class="spNyl">verifyservercert</span><span class="sMK4o">"</span><span class="sMK4o">:true,</span><span class="sMK4o">"</span><span class="spNyl">protocolVersion</span><span class="sMK4o">"</span><span class="sMK4o">:</span><span class="sMK4o">"</span><span class="sfazB">4</span><span class="sMK4o">"</span><span class="sMK4o">,</span><span class="sMK4o">"</span><span class="spNyl">keepalive</span><span class="sMK4o">"</span><span class="sMK4o">:</span><span class="sMK4o">"</span><span class="sfazB">15</span><span class="sMK4o">"</span><span class="sMK4o">,</span><span class="sMK4o">"</span><span class="spNyl">cleansession</span><span class="sMK4o">"</span><span class="sMK4o">:true,</span><span class="sMK4o">"</span><span class="spNyl">autoUnsubscribe</span><span class="sMK4o">"</span><span class="sMK4o">:true,</span><span class="sMK4o">"</span><span class="spNyl">birthTopic</span><span class="sMK4o">"</span><span class="sMK4o">:</span><span class="sMK4o">""</span><span class="sMK4o">,</span><span class="sMK4o">"</span><span class="spNyl">birthQos</span><span class="sMK4o">"</span><span class="sMK4o">:</span><span class="sMK4o">"</span><span class="sfazB">0</span><span class="sMK4o">"</span><span class="sMK4o">,</span><span class="sMK4o">"</span><span class="spNyl">birthPayload</span><span class="sMK4o">"</span><span class="sMK4o">:</span><span class="sMK4o">""</span><span class="sMK4o">,</span><span class="sMK4o">"</span><span class="spNyl">birthMsg</span><span class="sMK4o">"</span><span class="sMK4o">:{},</span><span class="sMK4o">"</span><span class="spNyl">closeTopic</span><span class="sMK4o">"</span><span class="sMK4o">:</span><span class="sMK4o">""</span><span class="sMK4o">,</span><span class="sMK4o">"</span><span class="spNyl">closeQos</span><span class="sMK4o">"</span><span class="sMK4o">:</span><span class="sMK4o">"</span><span class="sfazB">0</span><span class="sMK4o">"</span><span class="sMK4o">,</span><span class="sMK4o">"</span><span class="spNyl">closePayload</span><span class="sMK4o">"</span><span class="sMK4o">:</span><span class="sMK4o">""</span><span class="sMK4o">,</span><span class="sMK4o">"</span><span class="spNyl">closeMsg</span><span class="sMK4o">"</span><span class="sMK4o">:{},</span><span class="sMK4o">"</span><span class="spNyl">willTopic</span><span class="sMK4o">"</span><span class="sMK4o">:</span><span class="sMK4o">""</span><span class="sMK4o">,</span><span class="sMK4o">"</span><span class="spNyl">willQos</span><span class="sMK4o">"</span><span class="sMK4o">:</span><span class="sMK4o">"</span><span class="sfazB">0</span><span class="sMK4o">"</span><span class="sMK4o">,</span><span class="sMK4o">"</span><span class="spNyl">willPayload</span><span class="sMK4o">"</span><span class="sMK4o">:</span><span class="sMK4o">""</span><span class="sMK4o">,</span><span class="sMK4o">"</span><span class="spNyl">willMsg</span><span class="sMK4o">"</span><span class="sMK4o">:{},</span><span class="sMK4o">"</span><span class="spNyl">sessionExpiry</span><span class="sMK4o">"</span><span class="sMK4o">:</span><span class="sMK4o">""</span><span class="sMK4o">}]
</span></span></code></pre><p>Flow exports never include passwords. After importing, open the broker node and enter your own host and login.</p><h3 id="step-3-tell-the-vehicles-apart">Step 3: Tell the vehicles apart</h3><p>The <code>state</code> message tells you what is happening. You also need to know who sent it.</p><p><code>manufacturer</code> and <code>serialNumber</code> appear twice: in the payload, and in the topic. Read them from the topic. Here's why.</p><p>The topic is the message's address. It is what your broker rules are written against, so it's the right value to route and store by.</p><p>Comparing the two is also a free sanity check. If a vehicle's payload disagrees with its topic, it is misconfigured. Better to see that in a log line than to find out when an order goes to the wrong truck.</p><p>Put a <strong>function</strong> node between the <strong>mqtt in</strong> node and whatever comes next:</p><pre class="language-javascript shiki shiki-themes material-theme-lighter material-theme material-theme-palenight" code="const parts = msg.topic.split('/');
if (parts.length !== 5) {
    node.warn('Unexpected VDA 5050 topic: ' + msg.topic);
    return null;
}

msg.manufacturer = parts[2];
msg.serialNumber = parts[3];

const p = msg.payload;
if (p.manufacturer !== msg.manufacturer || p.serialNumber !== msg.serialNumber) {
    node.warn('Topic and payload disagree on ' + msg.topic);
}

return msg;
" language="javascript" meta="" style=""><code __ignore-map=""><span class="line" line="1"><span class="spNyl">const</span><span class="sTEyZ"> parts </span><span class="sMK4o">=</span><span class="sTEyZ"> msg</span><span class="sMK4o">.</span><span class="sTEyZ">topic</span><span class="sMK4o">.</span><span class="s2Zo4">split</span><span class="sTEyZ">(</span><span class="sMK4o">'</span><span class="sfazB">/</span><span class="sMK4o">'</span><span class="sTEyZ">)</span><span class="sMK4o">;
</span></span><span class="line" line="2"><span class="s7zQu">if</span><span class="sTEyZ"> (parts</span><span class="sMK4o">.</span><span class="sTEyZ">length </span><span class="sMK4o">!==</span><span class="sbssI"> 5</span><span class="sTEyZ">) </span><span class="sMK4o">{
</span></span><span class="line" line="3"><span class="sTEyZ">    node</span><span class="sMK4o">.</span><span class="s2Zo4">warn</span><span class="swJcz">(</span><span class="sMK4o">'</span><span class="sfazB">Unexpected VDA 5050 topic: </span><span class="sMK4o">'</span><span class="sMK4o"> +</span><span class="sTEyZ"> msg</span><span class="sMK4o">.</span><span class="sTEyZ">topic</span><span class="swJcz">)</span><span class="sMK4o">;
</span></span><span class="line" line="4"><span class="s7zQu">    return</span><span class="sMK4o"> null;
</span></span><span class="line" line="5"><span class="sMK4o">}
</span></span><span class="line" line="6"><span empty-line-placeholder>
</span></span><span class="line" line="7"><span class="sTEyZ">msg</span><span class="sMK4o">.</span><span class="sTEyZ">manufacturer </span><span class="sMK4o">=</span><span class="sTEyZ"> parts[</span><span class="sbssI">2</span><span class="sTEyZ">]</span><span class="sMK4o">;
</span></span><span class="line" line="8"><span class="sTEyZ">msg</span><span class="sMK4o">.</span><span class="sTEyZ">serialNumber </span><span class="sMK4o">=</span><span class="sTEyZ"> parts[</span><span class="sbssI">3</span><span class="sTEyZ">]</span><span class="sMK4o">;
</span></span><span class="line" line="9"><span empty-line-placeholder>
</span></span><span class="line" line="10"><span class="spNyl">const</span><span class="sTEyZ"> p </span><span class="sMK4o">=</span><span class="sTEyZ"> msg</span><span class="sMK4o">.</span><span class="sTEyZ">payload</span><span class="sMK4o">;
</span></span><span class="line" line="11"><span class="s7zQu">if</span><span class="sTEyZ"> (p</span><span class="sMK4o">.</span><span class="sTEyZ">manufacturer </span><span class="sMK4o">!==</span><span class="sTEyZ"> msg</span><span class="sMK4o">.</span><span class="sTEyZ">manufacturer </span><span class="sMK4o">||</span><span class="sTEyZ"> p</span><span class="sMK4o">.</span><span class="sTEyZ">serialNumber </span><span class="sMK4o">!==</span><span class="sTEyZ"> msg</span><span class="sMK4o">.</span><span class="sTEyZ">serialNumber) </span><span class="sMK4o">{
</span></span><span class="line" line="12"><span class="sTEyZ">    node</span><span class="sMK4o">.</span><span class="s2Zo4">warn</span><span class="swJcz">(</span><span class="sMK4o">'</span><span class="sfazB">Topic and payload disagree on </span><span class="sMK4o">'</span><span class="sMK4o"> +</span><span class="sTEyZ"> msg</span><span class="sMK4o">.</span><span class="sTEyZ">topic</span><span class="swJcz">)</span><span class="sMK4o">;
</span></span><span class="line" line="13"><span class="sMK4o">}
</span></span><span class="line" line="14"><span empty-line-placeholder>
</span></span><span class="line" line="15"><span class="s7zQu">return</span><span class="sTEyZ"> msg</span><span class="sMK4o">;
</span></span></code></pre><p>Now <code>msg.payload</code> holds the state object, and <code>msg.manufacturer</code> and <code>msg.serialNumber</code> tell you which AGV sent it.</p><h3 id="step-4-catch-vehicles-going-offline">Step 4: Catch vehicles going offline</h3><p>Repeat the same pattern for one more topic, pointing it at the broker you already set up.</p><p>Subscribe to <strong><code>uagv/v2/+/+/connection</code></strong> at QoS 1. This tells you when a vehicle drops off the broker. The payload has a <code>connectionState</code> field with one of three values in 2.x:</p><ul><li><code>ONLINE</code></li><li><code>OFFLINE</code> for a clean, deliberate disconnect</li><li><code>CONNECTIONBROKEN</code> for an unexpected drop</li></ul><p>The vehicle registers that last value as its MQTT last will when it connects. So if it vanishes without saying goodbye, the broker publishes it for the vehicle. Vehicles publish every <code>connection</code> message with the retained flag set, so a new subscriber picks up each vehicle's last known status straight away.</p><p>This is where the keep alive from step 1 earns its place. The broker only fires the last will once the heartbeat lapses, so a 60-second keep alive can hide a dead vehicle for well over a minute.</p><p>One warning. <code>connection</code> is a network check, not a health check. Version 3.0 states that outright in its topic table, and 2.1 works the same way without saying it as plainly. It tells you the link dropped. It tells you nothing about a vehicle that is still connected but faulted, stuck, or lost. For that, watch <code>errors</code>, <code>operatingMode</code>, and <code>safetyState</code> in <code>state</code>. Also treat any <code>state</code> message older than 30 seconds as stale, since that is the longest gap the standard allows.</p><h3 id="putting-it-on-a-screen">Putting it on a screen</h3><p>None of this is visible to anyone on the floor yet. You can build a screen from these same flows with <a href="https://flowfuse.com/docs/user/dashboards/">FlowFuse Dashboard</a>, <a href="https://flowfuse.com/blog/2024/03/dashboard-getting-started/">without writing any HTML</a>: a table of vehicles with battery level and current order, an alert when a vehicle drops off the network, and a live map of where everything is.</p><a href="https://flowfuse.com/book-demo/"><img src="https://flowfuse.com/images/cta/wenco-book-demo.png" alt="Wenco deploys new dashboard pages in days with FlowFuse - book a demo"/></a><h3 id="step-5-send-an-order">Step 5: Send an order</h3><p>Three rules decide whether the vehicle accepts your order at all. Get these wrong and it refuses.</p><p><strong>The first node must be where the vehicle already is.</strong> The standard says the AGV has to be standing on the first node, or inside its deviation range. Send an order that starts anywhere else and the vehicle rejects it. A rejected order shows up as a <code>validationError</code> warning in the vehicle's <code>state</code>, and the warning stays there until it accepts a valid order. Read <code>lastNodeId</code> and <code>agvPosition</code> from the vehicle's current state, and build the order from there.</p><p><strong><code>orderId</code> and <code>orderUpdateId</code> together must be new.</strong> Use a fresh <code>orderId</code> for each job. Start <code>orderUpdateId</code> at 0, and only raise it when you extend that same order. A 2.x vehicle checks the incoming <code>orderUpdateId</code> against the one it already holds, treating a lower one as deprecated and an equal one as already received. Version 3.0 draws the line more precisely: resending an identical message is fine, but reusing an <code>orderUpdateId</code> with different content is an error.</p><p><strong>The vehicle must support the actions you send.</strong> <code>pick</code> and <code>drop</code> are standard action types, but supporting them is optional. Ask for the vehicle's <code>factsheet</code> first, using the <code>factsheetRequest</code> instant action, and check its list of supported actions.</p><p>Then wire it up:</p><ol><li>Add an <strong>mqtt out</strong> node pointing at your broker. Leave <strong>Topic</strong> empty so the flow can set <code>msg.topic</code> per vehicle. Leave <strong>Retain</strong> off. The broker re-delivers a retained order every time the vehicle reconnects, which is how you move a truck at 3am by accident.</li><li>Feed it a payload matching the order schema: a <code>nodes</code> array and an <code>edges</code> array.</li><li>Trigger it with a dashboard button for manual dispatch, or from an <a href="https://flowfuse.com/blog/2022/12/create-http-trigger-with-authentication/"><strong>http in</strong> endpoint</a> if orders come from your WMS.</li></ol><p>Here is a real pick-and-drop order:</p><pre class="language-javascript shiki shiki-themes material-theme-lighter material-theme material-theme-palenight" code="const manufacturer = 'AcmeRobotics';
const serialNumber = 'AGV-042';

msg.topic = `uagv/v2/${manufacturer}/${serialNumber}/order`;

// headerId counts per topic, so key the counter by topic and raise it
// by one for every message you send to that topic
const headerKey = `headerId:${msg.topic}`;
const headerId = (flow.get(headerKey) || 0) + 1;
flow.set(headerKey, headerId);

msg.payload = {
  headerId,
  timestamp: new Date().toISOString(),
  version: "2.1.0",
  manufacturer,
  serialNumber,
  orderId: `order-${Date.now()}`,
  orderUpdateId: 0,
  nodes: [
    {
      // The AGV must already be at this node, or within its deviation range
      nodeId: "station-1",
      sequenceId: 0,
      released: true,
      nodePosition: { x: 0, y: 0, mapId: "floor1" },
      actions: [{
        actionId: `pick-${headerId}`,
        actionType: "pick",
        blockingType: "HARD",
        actionParameters: [
          { key: "stationType", value: "floor" },
          { key: "loadType", value: "EPAL" }
        ]
      }]
    },
    {
      nodeId: "station-2",
      sequenceId: 2,
      released: true,
      nodePosition: { x: 12, y: 4, mapId: "floor1" },
      actions: [{
        actionId: `drop-${headerId}`,
        actionType: "drop",
        blockingType: "HARD",
        actionParameters: [
          { key: "stationType", value: "floor" },
          { key: "loadType", value: "EPAL" }
        ]
      }]
    }
  ],
  edges: [{
    edgeId: "station-1-2",
    sequenceId: 1,
    startNodeId: "station-1",
    endNodeId: "station-2",
    released: true,
    actions: []
  }]
};
return msg;
" language="javascript" meta="" style=""><code __ignore-map=""><span class="line" line="1"><span class="spNyl">const</span><span class="sTEyZ"> manufacturer </span><span class="sMK4o">=</span><span class="sMK4o"> '</span><span class="sfazB">AcmeRobotics</span><span class="sMK4o">'</span><span class="sMK4o">;
</span></span><span class="line" line="2"><span class="spNyl">const</span><span class="sTEyZ"> serialNumber </span><span class="sMK4o">=</span><span class="sMK4o"> '</span><span class="sfazB">AGV-042</span><span class="sMK4o">'</span><span class="sMK4o">;
</span></span><span class="line" line="3"><span empty-line-placeholder>
</span></span><span class="line" line="4"><span class="sTEyZ">msg</span><span class="sMK4o">.</span><span class="sTEyZ">topic </span><span class="sMK4o">=</span><span class="sMK4o"> `</span><span class="sfazB">uagv/v2/</span><span class="sMK4o">${</span><span class="sTEyZ">manufacturer</span><span class="sMK4o">}</span><span class="sfazB">/</span><span class="sMK4o">${</span><span class="sTEyZ">serialNumber</span><span class="sMK4o">}</span><span class="sfazB">/order</span><span class="sMK4o">`</span><span class="sMK4o">;
</span></span><span class="line" line="5"><span empty-line-placeholder>
</span></span><span class="line" line="6"><span class="sHwdD">// headerId counts per topic, so key the counter by topic and raise it
</span></span><span class="line" line="7"><span class="sHwdD">// by one for every message you send to that topic
</span></span><span class="line" line="8"><span class="spNyl">const</span><span class="sTEyZ"> headerKey </span><span class="sMK4o">=</span><span class="sMK4o"> `</span><span class="sfazB">headerId:</span><span class="sMK4o">${</span><span class="sTEyZ">msg</span><span class="sMK4o">.</span><span class="sTEyZ">topic</span><span class="sMK4o">}`</span><span class="sMK4o">;
</span></span><span class="line" line="9"><span class="spNyl">const</span><span class="sTEyZ"> headerId </span><span class="sMK4o">=</span><span class="sTEyZ"> (flow</span><span class="sMK4o">.</span><span class="s2Zo4">get</span><span class="sTEyZ">(headerKey) </span><span class="sMK4o">||</span><span class="sbssI"> 0</span><span class="sTEyZ">) </span><span class="sMK4o">+</span><span class="sbssI"> 1</span><span class="sMK4o">;
</span></span><span class="line" line="10"><span class="sTEyZ">flow</span><span class="sMK4o">.</span><span class="s2Zo4">set</span><span class="sTEyZ">(headerKey</span><span class="sMK4o">,</span><span class="sTEyZ"> headerId)</span><span class="sMK4o">;
</span></span><span class="line" line="11"><span empty-line-placeholder>
</span></span><span class="line" line="12"><span class="sTEyZ">msg</span><span class="sMK4o">.</span><span class="sTEyZ">payload </span><span class="sMK4o">=</span><span class="sMK4o"> {
</span></span><span class="line" line="13"><span class="sTEyZ">  headerId</span><span class="sMK4o">,
</span></span><span class="line" line="14"><span class="swJcz">  timestamp</span><span class="sMK4o">:</span><span class="sMK4o"> new</span><span class="s2Zo4"> Date</span><span class="sTEyZ">()</span><span class="sMK4o">.</span><span class="s2Zo4">toISOString</span><span class="sTEyZ">()</span><span class="sMK4o">,
</span></span><span class="line" line="15"><span class="swJcz">  version</span><span class="sMK4o">:</span><span class="sMK4o"> "</span><span class="sfazB">2.1.0</span><span class="sMK4o">"</span><span class="sMK4o">,
</span></span><span class="line" line="16"><span class="sTEyZ">  manufacturer</span><span class="sMK4o">,
</span></span><span class="line" line="17"><span class="sTEyZ">  serialNumber</span><span class="sMK4o">,
</span></span><span class="line" line="18"><span class="swJcz">  orderId</span><span class="sMK4o">:</span><span class="sMK4o"> `</span><span class="sfazB">order-</span><span class="sMK4o">${</span><span class="sTEyZ">Date</span><span class="sMK4o">.</span><span class="s2Zo4">now</span><span class="sTEyZ">()</span><span class="sMK4o">}`</span><span class="sMK4o">,
</span></span><span class="line" line="19"><span class="swJcz">  orderUpdateId</span><span class="sMK4o">:</span><span class="sbssI"> 0</span><span class="sMK4o">,
</span></span><span class="line" line="20"><span class="swJcz">  nodes</span><span class="sMK4o">:</span><span class="sTEyZ"> [
</span></span><span class="line" line="21"><span class="sMK4o">    {
</span></span><span class="line" line="22"><span class="sHwdD">      // The AGV must already be at this node, or within its deviation range
</span></span><span class="line" line="23"><span class="swJcz">      nodeId</span><span class="sMK4o">:</span><span class="sMK4o"> "</span><span class="sfazB">station-1</span><span class="sMK4o">"</span><span class="sMK4o">,
</span></span><span class="line" line="24"><span class="swJcz">      sequenceId</span><span class="sMK4o">:</span><span class="sbssI"> 0</span><span class="sMK4o">,
</span></span><span class="line" line="25"><span class="swJcz">      released</span><span class="sMK4o">:</span><span class="sfNiH"> true</span><span class="sMK4o">,
</span></span><span class="line" line="26"><span class="swJcz">      nodePosition</span><span class="sMK4o">:</span><span class="sMK4o"> {</span><span class="swJcz"> x</span><span class="sMK4o">:</span><span class="sbssI"> 0</span><span class="sMK4o">,</span><span class="swJcz"> y</span><span class="sMK4o">:</span><span class="sbssI"> 0</span><span class="sMK4o">,</span><span class="swJcz"> mapId</span><span class="sMK4o">:</span><span class="sMK4o"> "</span><span class="sfazB">floor1</span><span class="sMK4o">"</span><span class="sMK4o"> },
</span></span><span class="line" line="27"><span class="swJcz">      actions</span><span class="sMK4o">:</span><span class="sTEyZ"> [</span><span class="sMK4o">{
</span></span><span class="line" line="28"><span class="swJcz">        actionId</span><span class="sMK4o">:</span><span class="sMK4o"> `</span><span class="sfazB">pick-</span><span class="sMK4o">${</span><span class="sTEyZ">headerId</span><span class="sMK4o">}`</span><span class="sMK4o">,
</span></span><span class="line" line="29"><span class="swJcz">        actionType</span><span class="sMK4o">:</span><span class="sMK4o"> "</span><span class="sfazB">pick</span><span class="sMK4o">"</span><span class="sMK4o">,
</span></span><span class="line" line="30"><span class="swJcz">        blockingType</span><span class="sMK4o">:</span><span class="sMK4o"> "</span><span class="sfazB">HARD</span><span class="sMK4o">"</span><span class="sMK4o">,
</span></span><span class="line" line="31"><span class="swJcz">        actionParameters</span><span class="sMK4o">:</span><span class="sTEyZ"> [
</span></span><span class="line" line="32"><span class="sMK4o">          {</span><span class="swJcz"> key</span><span class="sMK4o">:</span><span class="sMK4o"> "</span><span class="sfazB">stationType</span><span class="sMK4o">"</span><span class="sMK4o">,</span><span class="swJcz"> value</span><span class="sMK4o">:</span><span class="sMK4o"> "</span><span class="sfazB">floor</span><span class="sMK4o">"</span><span class="sMK4o"> },
</span></span><span class="line" line="33"><span class="sMK4o">          {</span><span class="swJcz"> key</span><span class="sMK4o">:</span><span class="sMK4o"> "</span><span class="sfazB">loadType</span><span class="sMK4o">"</span><span class="sMK4o">,</span><span class="swJcz"> value</span><span class="sMK4o">:</span><span class="sMK4o"> "</span><span class="sfazB">EPAL</span><span class="sMK4o">"</span><span class="sMK4o"> }
</span></span><span class="line" line="34"><span class="sTEyZ">        ]
</span></span><span class="line" line="35"><span class="sMK4o">      }</span><span class="sTEyZ">]
</span></span><span class="line" line="36"><span class="sMK4o">    },
</span></span><span class="line" line="37"><span class="sMK4o">    {
</span></span><span class="line" line="38"><span class="swJcz">      nodeId</span><span class="sMK4o">:</span><span class="sMK4o"> "</span><span class="sfazB">station-2</span><span class="sMK4o">"</span><span class="sMK4o">,
</span></span><span class="line" line="39"><span class="swJcz">      sequenceId</span><span class="sMK4o">:</span><span class="sbssI"> 2</span><span class="sMK4o">,
</span></span><span class="line" line="40"><span class="swJcz">      released</span><span class="sMK4o">:</span><span class="sfNiH"> true</span><span class="sMK4o">,
</span></span><span class="line" line="41"><span class="swJcz">      nodePosition</span><span class="sMK4o">:</span><span class="sMK4o"> {</span><span class="swJcz"> x</span><span class="sMK4o">:</span><span class="sbssI"> 12</span><span class="sMK4o">,</span><span class="swJcz"> y</span><span class="sMK4o">:</span><span class="sbssI"> 4</span><span class="sMK4o">,</span><span class="swJcz"> mapId</span><span class="sMK4o">:</span><span class="sMK4o"> "</span><span class="sfazB">floor1</span><span class="sMK4o">"</span><span class="sMK4o"> },
</span></span><span class="line" line="42"><span class="swJcz">      actions</span><span class="sMK4o">:</span><span class="sTEyZ"> [</span><span class="sMK4o">{
</span></span><span class="line" line="43"><span class="swJcz">        actionId</span><span class="sMK4o">:</span><span class="sMK4o"> `</span><span class="sfazB">drop-</span><span class="sMK4o">${</span><span class="sTEyZ">headerId</span><span class="sMK4o">}`</span><span class="sMK4o">,
</span></span><span class="line" line="44"><span class="swJcz">        actionType</span><span class="sMK4o">:</span><span class="sMK4o"> "</span><span class="sfazB">drop</span><span class="sMK4o">"</span><span class="sMK4o">,
</span></span><span class="line" line="45"><span class="swJcz">        blockingType</span><span class="sMK4o">:</span><span class="sMK4o"> "</span><span class="sfazB">HARD</span><span class="sMK4o">"</span><span class="sMK4o">,
</span></span><span class="line" line="46"><span class="swJcz">        actionParameters</span><span class="sMK4o">:</span><span class="sTEyZ"> [
</span></span><span class="line" line="47"><span class="sMK4o">          {</span><span class="swJcz"> key</span><span class="sMK4o">:</span><span class="sMK4o"> "</span><span class="sfazB">stationType</span><span class="sMK4o">"</span><span class="sMK4o">,</span><span class="swJcz"> value</span><span class="sMK4o">:</span><span class="sMK4o"> "</span><span class="sfazB">floor</span><span class="sMK4o">"</span><span class="sMK4o"> },
</span></span><span class="line" line="48"><span class="sMK4o">          {</span><span class="swJcz"> key</span><span class="sMK4o">:</span><span class="sMK4o"> "</span><span class="sfazB">loadType</span><span class="sMK4o">"</span><span class="sMK4o">,</span><span class="swJcz"> value</span><span class="sMK4o">:</span><span class="sMK4o"> "</span><span class="sfazB">EPAL</span><span class="sMK4o">"</span><span class="sMK4o"> }
</span></span><span class="line" line="49"><span class="sTEyZ">        ]
</span></span><span class="line" line="50"><span class="sMK4o">      }</span><span class="sTEyZ">]
</span></span><span class="line" line="51"><span class="sMK4o">    }
</span></span><span class="line" line="52"><span class="sTEyZ">  ]</span><span class="sMK4o">,
</span></span><span class="line" line="53"><span class="swJcz">  edges</span><span class="sMK4o">:</span><span class="sTEyZ"> [</span><span class="sMK4o">{
</span></span><span class="line" line="54"><span class="swJcz">    edgeId</span><span class="sMK4o">:</span><span class="sMK4o"> "</span><span class="sfazB">station-1-2</span><span class="sMK4o">"</span><span class="sMK4o">,
</span></span><span class="line" line="55"><span class="swJcz">    sequenceId</span><span class="sMK4o">:</span><span class="sbssI"> 1</span><span class="sMK4o">,
</span></span><span class="line" line="56"><span class="swJcz">    startNodeId</span><span class="sMK4o">:</span><span class="sMK4o"> "</span><span class="sfazB">station-1</span><span class="sMK4o">"</span><span class="sMK4o">,
</span></span><span class="line" line="57"><span class="swJcz">    endNodeId</span><span class="sMK4o">:</span><span class="sMK4o"> "</span><span class="sfazB">station-2</span><span class="sMK4o">"</span><span class="sMK4o">,
</span></span><span class="line" line="58"><span class="swJcz">    released</span><span class="sMK4o">:</span><span class="sfNiH"> true</span><span class="sMK4o">,
</span></span><span class="line" line="59"><span class="swJcz">    actions</span><span class="sMK4o">:</span><span class="sTEyZ"> []
</span></span><span class="line" line="60"><span class="sMK4o">  }</span><span class="sTEyZ">]
</span></span><span class="line" line="61"><span class="sMK4o">};
</span></span><span class="line" line="62"><span class="s7zQu">return</span><span class="sTEyZ"> msg</span><span class="sMK4o">;
</span></span></code></pre><p>Set <code>version</code> to the version your vehicle actually runs. Its <code>factsheet</code> and its own <code>state</code> messages both tell you.</p><p>Note the counter keyed by topic. <code>headerId</code> is defined per topic and rises by one per message, so a single shared counter across two vehicles leaves gaps in both their sequences.</p><p>Four more details matter. <code>sequenceId</code> counts across nodes and edges together, which is why the edge is <code>1</code>, sitting between nodes <code>0</code> and <code>2</code>. <code>released: true</code> marks the base, the part of the plan the vehicle should run now, as opposed to the horizon, which is work it knows about but hasn't been told to start. And <code>actionId</code> has to be unique, because that is how the vehicle reports progress back to you in <code>actionStates</code>.</p><p><code>blockingType</code> is the one worth reading twice. It decides whether the vehicle can drive, and whether other actions can run at the same time. <code>HARD</code> means the action runs alone, with no driving and no other actions. <code>SOFT</code> allows other actions but still stops the vehicle. <code>NONE</code> allows both. For a pick or drop you want <code>HARD</code>, and note that <code>SOFT</code> does not let the AGV keep driving, which is the one people get backwards. Version 3.0 adds a fourth, <code>SINGLE</code>, which allows driving but no other actions.</p><pre class="language-json shiki shiki-themes material-theme-lighter material-theme material-theme-palenight" code="[{"id":"vda-order-trigger","type":"inject","z":"vda-flow","name":"Dispatch order","props":[{"p":"payload"}],"repeat":"","crontab":"","once":false,"onceDelay":0.1,"topic":"","payload":"","payloadType":"date","x":210,"y":320,"wires":[["vda-order-build"]]},{"id":"vda-order-build","type":"function","z":"vda-flow","name":"Build order payload","func":"const manufacturer = 'AcmeRobotics';\nconst serialNumber = 'AGV-042';\n\nmsg.topic = `uagv/v2/${manufacturer}/${serialNumber}/order`;\n\n// headerId counts per topic, so key the counter by topic\nconst headerKey = `headerId:${msg.topic}`;\nconst headerId = (flow.get(headerKey) || 0) + 1;\nflow.set(headerKey, headerId);\n\nmsg.payload = {\n  headerId,\n  timestamp: new Date().toISOString(),\n  version: \"2.1.0\",\n  manufacturer,\n  serialNumber,\n  orderId: `order-${Date.now()}`,\n  orderUpdateId: 0,\n  nodes: [\n    { nodeId: \"station-1\", sequenceId: 0, released: true, nodePosition: { x: 0, y: 0, mapId: \"floor1\" }, actions: [{ actionId: `pick-${headerId}`, actionType: \"pick\", blockingType: \"HARD\", actionParameters: [{ key: \"stationType\", value: \"floor\" }, { key: \"loadType\", value: \"EPAL\" }] }] },\n    { nodeId: \"station-2\", sequenceId: 2, released: true, nodePosition: { x: 12, y: 4, mapId: \"floor1\" }, actions: [{ actionId: `drop-${headerId}`, actionType: \"drop\", blockingType: \"HARD\", actionParameters: [{ key: \"stationType\", value: \"floor\" }, { key: \"loadType\", value: \"EPAL\" }] }] }\n  ],\n  edges: [\n    { edgeId: \"station-1-2\", sequenceId: 1, startNodeId: \"station-1\", endNodeId: \"station-2\", released: true, actions: [] }\n  ]\n};\nreturn msg;","outputs":1,"noerr":0,"initialize":"","finalize":"","libs":[],"x":440,"y":320,"wires":[["vda-order-out"]]},{"id":"vda-order-out","type":"mqtt out","z":"vda-flow","name":"Send order","topic":"","qos":"0","retain":"false","respTopic":"","contentType":"","userProps":"","correl":"","expiry":"","broker":"vda-broker","x":680,"y":320,"wires":[]},{"id":"vda-broker","type":"mqtt-broker","name":"VDA 5050 broker","broker":"your-broker.example.com","port":"8883","clientid":"","autoConnect":true,"usetls":true,"verifyservercert":true,"protocolVersion":"4","keepalive":"15","cleansession":true,"autoUnsubscribe":true,"birthTopic":"","birthQos":"0","birthPayload":"","birthMsg":{},"closeTopic":"","closeQos":"0","closePayload":"","closeMsg":{},"willTopic":"","willQos":"0","willPayload":"","willMsg":{},"sessionExpiry":""}]
" language="json" meta="" style=""><code __ignore-map=""><span class="line" line="1"><span class="sMK4o">[{</span><span class="sMK4o">"</span><span class="spNyl">id</span><span class="sMK4o">"</span><span class="sMK4o">:</span><span class="sMK4o">"</span><span class="sfazB">vda-order-trigger</span><span class="sMK4o">"</span><span class="sMK4o">,</span><span class="sMK4o">"</span><span class="spNyl">type</span><span class="sMK4o">"</span><span class="sMK4o">:</span><span class="sMK4o">"</span><span class="sfazB">inject</span><span class="sMK4o">"</span><span class="sMK4o">,</span><span class="sMK4o">"</span><span class="spNyl">z</span><span class="sMK4o">"</span><span class="sMK4o">:</span><span class="sMK4o">"</span><span class="sfazB">vda-flow</span><span class="sMK4o">"</span><span class="sMK4o">,</span><span class="sMK4o">"</span><span class="spNyl">name</span><span class="sMK4o">"</span><span class="sMK4o">:</span><span class="sMK4o">"</span><span class="sfazB">Dispatch order</span><span class="sMK4o">"</span><span class="sMK4o">,</span><span class="sMK4o">"</span><span class="spNyl">props</span><span class="sMK4o">"</span><span class="sMK4o">:[{</span><span class="sMK4o">"</span><span class="sBMFI">p</span><span class="sMK4o">"</span><span class="sMK4o">:</span><span class="sMK4o">"</span><span class="sfazB">payload</span><span class="sMK4o">"</span><span class="sMK4o">}],</span><span class="sMK4o">"</span><span class="spNyl">repeat</span><span class="sMK4o">"</span><span class="sMK4o">:</span><span class="sMK4o">""</span><span class="sMK4o">,</span><span class="sMK4o">"</span><span class="spNyl">crontab</span><span class="sMK4o">"</span><span class="sMK4o">:</span><span class="sMK4o">""</span><span class="sMK4o">,</span><span class="sMK4o">"</span><span class="spNyl">once</span><span class="sMK4o">"</span><span class="sMK4o">:false,</span><span class="sMK4o">"</span><span class="spNyl">onceDelay</span><span class="sMK4o">"</span><span class="sMK4o">:</span><span class="sbssI">0.1</span><span class="sMK4o">,</span><span class="sMK4o">"</span><span class="spNyl">topic</span><span class="sMK4o">"</span><span class="sMK4o">:</span><span class="sMK4o">""</span><span class="sMK4o">,</span><span class="sMK4o">"</span><span class="spNyl">payload</span><span class="sMK4o">"</span><span class="sMK4o">:</span><span class="sMK4o">""</span><span class="sMK4o">,</span><span class="sMK4o">"</span><span class="spNyl">payloadType</span><span class="sMK4o">"</span><span class="sMK4o">:</span><span class="sMK4o">"</span><span class="sfazB">date</span><span class="sMK4o">"</span><span class="sMK4o">,</span><span class="sMK4o">"</span><span class="spNyl">x</span><span class="sMK4o">"</span><span class="sMK4o">:</span><span class="sbssI">210</span><span class="sMK4o">,</span><span class="sMK4o">"</span><span class="spNyl">y</span><span class="sMK4o">"</span><span class="sMK4o">:</span><span class="sbssI">320</span><span class="sMK4o">,</span><span class="sMK4o">"</span><span class="spNyl">wires</span><span class="sMK4o">"</span><span class="sMK4o">:[[</span><span class="sMK4o">"</span><span class="sfazB">vda-order-build</span><span class="sMK4o">"</span><span class="sMK4o">]]},{</span><span class="sMK4o">"</span><span class="spNyl">id</span><span class="sMK4o">"</span><span class="sMK4o">:</span><span class="sMK4o">"</span><span class="sfazB">vda-order-build</span><span class="sMK4o">"</span><span class="sMK4o">,</span><span class="sMK4o">"</span><span class="spNyl">type</span><span class="sMK4o">"</span><span class="sMK4o">:</span><span class="sMK4o">"</span><span class="sfazB">function</span><span class="sMK4o">"</span><span class="sMK4o">,</span><span class="sMK4o">"</span><span class="spNyl">z</span><span class="sMK4o">"</span><span class="sMK4o">:</span><span class="sMK4o">"</span><span class="sfazB">vda-flow</span><span class="sMK4o">"</span><span class="sMK4o">,</span><span class="sMK4o">"</span><span class="spNyl">name</span><span class="sMK4o">"</span><span class="sMK4o">:</span><span class="sMK4o">"</span><span class="sfazB">Build order payload</span><span class="sMK4o">"</span><span class="sMK4o">,</span><span class="sMK4o">"</span><span class="spNyl">func</span><span class="sMK4o">"</span><span class="sMK4o">:</span><span class="sMK4o">"</span><span class="sfazB">const manufacturer = 'AcmeRobotics';</span><span class="sTEyZ">\n</span><span class="sfazB">const serialNumber = 'AGV-042';</span><span class="sTEyZ">\n\n</span><span class="sfazB">msg.topic = `uagv/v2/${manufacturer}/${serialNumber}/order`;</span><span class="sTEyZ">\n\n</span><span class="sfazB">// headerId counts per topic, so key the counter by topic</span><span class="sTEyZ">\n</span><span class="sfazB">const headerKey = `headerId:${msg.topic}`;</span><span class="sTEyZ">\n</span><span class="sfazB">const headerId = (flow.get(headerKey) || 0) + 1;</span><span class="sTEyZ">\n</span><span class="sfazB">flow.set(headerKey, headerId);</span><span class="sTEyZ">\n\n</span><span class="sfazB">msg.payload = {</span><span class="sTEyZ">\n</span><span class="sfazB">  headerId,</span><span class="sTEyZ">\n</span><span class="sfazB">  timestamp: new Date().toISOString(),</span><span class="sTEyZ">\n</span><span class="sfazB">  version: </span><span class="sTEyZ">\"</span><span class="sfazB">2.1.0</span><span class="sTEyZ">\"</span><span class="sfazB">,</span><span class="sTEyZ">\n</span><span class="sfazB">  manufacturer,</span><span class="sTEyZ">\n</span><span class="sfazB">  serialNumber,</span><span class="sTEyZ">\n</span><span class="sfazB">  orderId: `order-${Date.now()}`,</span><span class="sTEyZ">\n</span><span class="sfazB">  orderUpdateId: 0,</span><span class="sTEyZ">\n</span><span class="sfazB">  nodes: [</span><span class="sTEyZ">\n</span><span class="sfazB">    { nodeId: </span><span class="sTEyZ">\"</span><span class="sfazB">station-1</span><span class="sTEyZ">\"</span><span class="sfazB">, sequenceId: 0, released: true, nodePosition: { x: 0, y: 0, mapId: </span><span class="sTEyZ">\"</span><span class="sfazB">floor1</span><span class="sTEyZ">\"</span><span class="sfazB"> }, actions: [{ actionId: `pick-${headerId}`, actionType: </span><span class="sTEyZ">\"</span><span class="sfazB">pick</span><span class="sTEyZ">\"</span><span class="sfazB">, blockingType: </span><span class="sTEyZ">\"</span><span class="sfazB">HARD</span><span class="sTEyZ">\"</span><span class="sfazB">, actionParameters: [{ key: </span><span class="sTEyZ">\"</span><span class="sfazB">stationType</span><span class="sTEyZ">\"</span><span class="sfazB">, value: </span><span class="sTEyZ">\"</span><span class="sfazB">floor</span><span class="sTEyZ">\"</span><span class="sfazB"> }, { key: </span><span class="sTEyZ">\"</span><span class="sfazB">loadType</span><span class="sTEyZ">\"</span><span class="sfazB">, value: </span><span class="sTEyZ">\"</span><span class="sfazB">EPAL</span><span class="sTEyZ">\"</span><span class="sfazB"> }] }] },</span><span class="sTEyZ">\n</span><span class="sfazB">    { nodeId: </span><span class="sTEyZ">\"</span><span class="sfazB">station-2</span><span class="sTEyZ">\"</span><span class="sfazB">, sequenceId: 2, released: true, nodePosition: { x: 12, y: 4, mapId: </span><span class="sTEyZ">\"</span><span class="sfazB">floor1</span><span class="sTEyZ">\"</span><span class="sfazB"> }, actions: [{ actionId: `drop-${headerId}`, actionType: </span><span class="sTEyZ">\"</span><span class="sfazB">drop</span><span class="sTEyZ">\"</span><span class="sfazB">, blockingType: </span><span class="sTEyZ">\"</span><span class="sfazB">HARD</span><span class="sTEyZ">\"</span><span class="sfazB">, actionParameters: [{ key: </span><span class="sTEyZ">\"</span><span class="sfazB">stationType</span><span class="sTEyZ">\"</span><span class="sfazB">, value: </span><span class="sTEyZ">\"</span><span class="sfazB">floor</span><span class="sTEyZ">\"</span><span class="sfazB"> }, { key: </span><span class="sTEyZ">\"</span><span class="sfazB">loadType</span><span class="sTEyZ">\"</span><span class="sfazB">, value: </span><span class="sTEyZ">\"</span><span class="sfazB">EPAL</span><span class="sTEyZ">\"</span><span class="sfazB"> }] }] }</span><span class="sTEyZ">\n</span><span class="sfazB">  ],</span><span class="sTEyZ">\n</span><span class="sfazB">  edges: [</span><span class="sTEyZ">\n</span><span class="sfazB">    { edgeId: </span><span class="sTEyZ">\"</span><span class="sfazB">station-1-2</span><span class="sTEyZ">\"</span><span class="sfazB">, sequenceId: 1, startNodeId: </span><span class="sTEyZ">\"</span><span class="sfazB">station-1</span><span class="sTEyZ">\"</span><span class="sfazB">, endNodeId: </span><span class="sTEyZ">\"</span><span class="sfazB">station-2</span><span class="sTEyZ">\"</span><span class="sfazB">, released: true, actions: [] }</span><span class="sTEyZ">\n</span><span class="sfazB">  ]</span><span class="sTEyZ">\n</span><span class="sfazB">};</span><span class="sTEyZ">\n</span><span class="sfazB">return msg;</span><span class="sMK4o">"</span><span class="sMK4o">,</span><span class="sMK4o">"</span><span class="spNyl">outputs</span><span class="sMK4o">"</span><span class="sMK4o">:</span><span class="sbssI">1</span><span class="sMK4o">,</span><span class="sMK4o">"</span><span class="spNyl">noerr</span><span class="sMK4o">"</span><span class="sMK4o">:</span><span class="sbssI">0</span><span class="sMK4o">,</span><span class="sMK4o">"</span><span class="spNyl">initialize</span><span class="sMK4o">"</span><span class="sMK4o">:</span><span class="sMK4o">""</span><span class="sMK4o">,</span><span class="sMK4o">"</span><span class="spNyl">finalize</span><span class="sMK4o">"</span><span class="sMK4o">:</span><span class="sMK4o">""</span><span class="sMK4o">,</span><span class="sMK4o">"</span><span class="spNyl">libs</span><span class="sMK4o">"</span><span class="sMK4o">:[],</span><span class="sMK4o">"</span><span class="spNyl">x</span><span class="sMK4o">"</span><span class="sMK4o">:</span><span class="sbssI">440</span><span class="sMK4o">,</span><span class="sMK4o">"</span><span class="spNyl">y</span><span class="sMK4o">"</span><span class="sMK4o">:</span><span class="sbssI">320</span><span class="sMK4o">,</span><span class="sMK4o">"</span><span class="spNyl">wires</span><span class="sMK4o">"</span><span class="sMK4o">:[[</span><span class="sMK4o">"</span><span class="sfazB">vda-order-out</span><span class="sMK4o">"</span><span class="sMK4o">]]},{</span><span class="sMK4o">"</span><span class="spNyl">id</span><span class="sMK4o">"</span><span class="sMK4o">:</span><span class="sMK4o">"</span><span class="sfazB">vda-order-out</span><span class="sMK4o">"</span><span class="sMK4o">,</span><span class="sMK4o">"</span><span class="spNyl">type</span><span class="sMK4o">"</span><span class="sMK4o">:</span><span class="sMK4o">"</span><span class="sfazB">mqtt out</span><span class="sMK4o">"</span><span class="sMK4o">,</span><span class="sMK4o">"</span><span class="spNyl">z</span><span class="sMK4o">"</span><span class="sMK4o">:</span><span class="sMK4o">"</span><span class="sfazB">vda-flow</span><span class="sMK4o">"</span><span class="sMK4o">,</span><span class="sMK4o">"</span><span class="spNyl">name</span><span class="sMK4o">"</span><span class="sMK4o">:</span><span class="sMK4o">"</span><span class="sfazB">Send order</span><span class="sMK4o">"</span><span class="sMK4o">,</span><span class="sMK4o">"</span><span class="spNyl">topic</span><span class="sMK4o">"</span><span class="sMK4o">:</span><span class="sMK4o">""</span><span class="sMK4o">,</span><span class="sMK4o">"</span><span class="spNyl">qos</span><span class="sMK4o">"</span><span class="sMK4o">:</span><span class="sMK4o">"</span><span class="sfazB">0</span><span class="sMK4o">"</span><span class="sMK4o">,</span><span class="sMK4o">"</span><span class="spNyl">retain</span><span class="sMK4o">"</span><span class="sMK4o">:</span><span class="sMK4o">"</span><span class="sfazB">false</span><span class="sMK4o">"</span><span class="sMK4o">,</span><span class="sMK4o">"</span><span class="spNyl">respTopic</span><span class="sMK4o">"</span><span class="sMK4o">:</span><span class="sMK4o">""</span><span class="sMK4o">,</span><span class="sMK4o">"</span><span class="spNyl">contentType</span><span class="sMK4o">"</span><span class="sMK4o">:</span><span class="sMK4o">""</span><span class="sMK4o">,</span><span class="sMK4o">"</span><span class="spNyl">userProps</span><span class="sMK4o">"</span><span class="sMK4o">:</span><span class="sMK4o">""</span><span class="sMK4o">,</span><span class="sMK4o">"</span><span class="spNyl">correl</span><span class="sMK4o">"</span><span class="sMK4o">:</span><span class="sMK4o">""</span><span class="sMK4o">,</span><span class="sMK4o">"</span><span class="spNyl">expiry</span><span class="sMK4o">"</span><span class="sMK4o">:</span><span class="sMK4o">""</span><span class="sMK4o">,</span><span class="sMK4o">"</span><span class="spNyl">broker</span><span class="sMK4o">"</span><span class="sMK4o">:</span><span class="sMK4o">"</span><span class="sfazB">vda-broker</span><span class="sMK4o">"</span><span class="sMK4o">,</span><span class="sMK4o">"</span><span class="spNyl">x</span><span class="sMK4o">"</span><span class="sMK4o">:</span><span class="sbssI">680</span><span class="sMK4o">,</span><span class="sMK4o">"</span><span class="spNyl">y</span><span class="sMK4o">"</span><span class="sMK4o">:</span><span class="sbssI">320</span><span class="sMK4o">,</span><span class="sMK4o">"</span><span class="spNyl">wires</span><span class="sMK4o">"</span><span class="sMK4o">:[]},{</span><span class="sMK4o">"</span><span class="spNyl">id</span><span class="sMK4o">"</span><span class="sMK4o">:</span><span class="sMK4o">"</span><span class="sfazB">vda-broker</span><span class="sMK4o">"</span><span class="sMK4o">,</span><span class="sMK4o">"</span><span class="spNyl">type</span><span class="sMK4o">"</span><span class="sMK4o">:</span><span class="sMK4o">"</span><span class="sfazB">mqtt-broker</span><span class="sMK4o">"</span><span class="sMK4o">,</span><span class="sMK4o">"</span><span class="spNyl">name</span><span class="sMK4o">"</span><span class="sMK4o">:</span><span class="sMK4o">"</span><span class="sfazB">VDA 5050 broker</span><span class="sMK4o">"</span><span class="sMK4o">,</span><span class="sMK4o">"</span><span class="spNyl">broker</span><span class="sMK4o">"</span><span class="sMK4o">:</span><span class="sMK4o">"</span><span class="sfazB">your-broker.example.com</span><span class="sMK4o">"</span><span class="sMK4o">,</span><span class="sMK4o">"</span><span class="spNyl">port</span><span class="sMK4o">"</span><span class="sMK4o">:</span><span class="sMK4o">"</span><span class="sfazB">8883</span><span class="sMK4o">"</span><span class="sMK4o">,</span><span class="sMK4o">"</span><span class="spNyl">clientid</span><span class="sMK4o">"</span><span class="sMK4o">:</span><span class="sMK4o">""</span><span class="sMK4o">,</span><span class="sMK4o">"</span><span class="spNyl">autoConnect</span><span class="sMK4o">"</span><span class="sMK4o">:true,</span><span class="sMK4o">"</span><span class="spNyl">usetls</span><span class="sMK4o">"</span><span class="sMK4o">:true,</span><span class="sMK4o">"</span><span class="spNyl">verifyservercert</span><span class="sMK4o">"</span><span class="sMK4o">:true,</span><span class="sMK4o">"</span><span class="spNyl">protocolVersion</span><span class="sMK4o">"</span><span class="sMK4o">:</span><span class="sMK4o">"</span><span class="sfazB">4</span><span class="sMK4o">"</span><span class="sMK4o">,</span><span class="sMK4o">"</span><span class="spNyl">keepalive</span><span class="sMK4o">"</span><span class="sMK4o">:</span><span class="sMK4o">"</span><span class="sfazB">15</span><span class="sMK4o">"</span><span class="sMK4o">,</span><span class="sMK4o">"</span><span class="spNyl">cleansession</span><span class="sMK4o">"</span><span class="sMK4o">:true,</span><span class="sMK4o">"</span><span class="spNyl">autoUnsubscribe</span><span class="sMK4o">"</span><span class="sMK4o">:true,</span><span class="sMK4o">"</span><span class="spNyl">birthTopic</span><span class="sMK4o">"</span><span class="sMK4o">:</span><span class="sMK4o">""</span><span class="sMK4o">,</span><span class="sMK4o">"</span><span class="spNyl">birthQos</span><span class="sMK4o">"</span><span class="sMK4o">:</span><span class="sMK4o">"</span><span class="sfazB">0</span><span class="sMK4o">"</span><span class="sMK4o">,</span><span class="sMK4o">"</span><span class="spNyl">birthPayload</span><span class="sMK4o">"</span><span class="sMK4o">:</span><span class="sMK4o">""</span><span class="sMK4o">,</span><span class="sMK4o">"</span><span class="spNyl">birthMsg</span><span class="sMK4o">"</span><span class="sMK4o">:{},</span><span class="sMK4o">"</span><span class="spNyl">closeTopic</span><span class="sMK4o">"</span><span class="sMK4o">:</span><span class="sMK4o">""</span><span class="sMK4o">,</span><span class="sMK4o">"</span><span class="spNyl">closeQos</span><span class="sMK4o">"</span><span class="sMK4o">:</span><span class="sMK4o">"</span><span class="sfazB">0</span><span class="sMK4o">"</span><span class="sMK4o">,</span><span class="sMK4o">"</span><span class="spNyl">closePayload</span><span class="sMK4o">"</span><span class="sMK4o">:</span><span class="sMK4o">""</span><span class="sMK4o">,</span><span class="sMK4o">"</span><span class="spNyl">closeMsg</span><span class="sMK4o">"</span><span class="sMK4o">:{},</span><span class="sMK4o">"</span><span class="spNyl">willTopic</span><span class="sMK4o">"</span><span class="sMK4o">:</span><span class="sMK4o">""</span><span class="sMK4o">,</span><span class="sMK4o">"</span><span class="spNyl">willQos</span><span class="sMK4o">"</span><span class="sMK4o">:</span><span class="sMK4o">"</span><span class="sfazB">0</span><span class="sMK4o">"</span><span class="sMK4o">,</span><span class="sMK4o">"</span><span class="spNyl">willPayload</span><span class="sMK4o">"</span><span class="sMK4o">:</span><span class="sMK4o">""</span><span class="sMK4o">,</span><span class="sMK4o">"</span><span class="spNyl">willMsg</span><span class="sMK4o">"</span><span class="sMK4o">:{},</span><span class="sMK4o">"</span><span class="spNyl">sessionExpiry</span><span class="sMK4o">"</span><span class="sMK4o">:</span><span class="sMK4o">""</span><span class="sMK4o">}]
</span></span></code></pre><p>This snippet brings its own broker node so it imports on its own. If you paste it into the same tab as the flow from step 2, you'll end up with two. Point this flow at the one you already set up and delete the spare, or the two clients will fight over the same login.</p><p>The <strong>inject</strong> node keeps the import simple. Swap it for a <strong>ui-button</strong> once your dashboard exists.</p><h2 id="before-this-touches-real-agvs">Before this touches real AGVs</h2><p>A flow that works on a test rig is not a production system. Check these first.</p><ul><li><strong>Lock down the broker.</strong> Restrict each AGV to its own topic path. Give the wildcard subscription to master control only. Use an allowlist, not a blocklist.</li><li><strong><a href="https://flowfuse.com/blog/2023/04/securing-node-red-in-production/">Use TLS.</a></strong> Factory networks are shared. Fleet commands should not travel in clear text, and leave certificate checking on.</li><li><strong>Never retain <code>order</code> or <code>instantActions</code>.</strong> The broker replays retained commands to every vehicle that reconnects. <code>connection</code> and <code>factsheet</code> are the two topics that <em>should</em> be retained.</li><li><strong>Match the standard's QoS levels.</strong> QoS 0 for <code>order</code>, <code>instantActions</code>, <code>state</code>, <code>factsheet</code>, and <code>visualization</code>. QoS 1 for <code>connection</code>. If your site does something different, change it on both ends, since MQTT delivers at the lower of the two.</li><li><strong>Set the keep alive to around 15 seconds.</strong> It sets the floor on how fast you can detect a vehicle dropping off, so a long keep alive quietly undoes your offline alerting.</li><li><strong>Watch state freshness, not just <code>connection</code>.</strong> A vehicle can hold its connection open while stuck or faulted. Alert on <code>errors</code>, on <code>operatingMode</code> leaving <code>AUTOMATIC</code>, and on <code>state</code> messages older than 30 seconds.</li><li><strong><a href="https://flowfuse.com/blog/2025/11/industrial-data-validation-guide/">Validate orders before you send them.</a></strong> Check the first node against the vehicle's current position, keep <code>orderId</code> and <code>orderUpdateId</code> unique, and check every action type against the factsheet.</li><li><strong>Cap message size on the broker</strong> to what VDA 5050 payloads actually need. It limits the damage a misbehaving client can do.</li></ul><h2 id="whats-next">What's next</h2><p>You now have the basics: subscribe to fleet state, tell vehicles apart, spot vehicles going offline, and send orders. That's enough for a pilot with two or three AGVs.</p><p>The next thing most teams do is replace the button with <a href="https://flowfuse.com/blog/2025/06/connect-shop-floor-to-odoo-erp-flowfuse/">the WMS or ERP</a>, so orders arrive from whatever already decides what needs moving. After that comes order updates and cancellation, because a job that can't be extended or pulled back mid-route is not much use on a real floor. Both of those need the vehicle's <code>factsheet</code>, so it's worth requesting and storing it early. Master control can then check load capacity, size, and supported actions before it dispatches anything.</p><p>Two bigger pieces usually wait until the pilot has proved itself. <a href="https://flowfuse.com/blog/2026/02/mqtt-influxdb-tutorial/">Logging state history</a> gives you throughput and utilization numbers, which is normally what makes the case for expanding. Publishing that state into a <a href="https://flowfuse.com/blog/2024/11/building-uns-with-flowfuse/">Unified Namespace</a> puts it alongside the rest of your production data, so the systems that plan the work can see where the vehicles are. Traffic rules come last, and only once vehicles from different vendors start sharing aisles, because that is the point where a single master control system stops being a convenience and starts being the reason the floor works at all.</p><p>When the pilot becomes a deployment, FlowFuse adds the parts a real fleet system needs: remote device management for edge gateways, <a href="https://flowfuse.com/blog/2024/09/node-red-version-control-with-snapshots/">snapshots and instant rollback</a>, audit logs, <a href="https://flowfuse.com/blog/2024/10/how-to-build-automate-devops-pipelines-node-red-deployments/">DevOps Pipelines</a>, <a href="https://flowfuse.com/blog/2024/04/role-based-access-control-rbac-for-node-red-with-flowfuse/">team access control</a>, and high availability.</p><style>html pre.shiki code .sMK4o, html code.shiki .sMK4o{--shiki-light:#39ADB5;--shiki-default:#89DDFF;--shiki-dark:#89DDFF}html pre.shiki code .spNyl, html code.shiki .spNyl{--shiki-light:#9C3EDA;--shiki-default:#C792EA;--shiki-dark:#C792EA}html pre.shiki code .sbssI, html code.shiki .sbssI{--shiki-light:#F76D47;--shiki-default:#F78C6C;--shiki-dark:#F78C6C}html pre.shiki code .sfazB, html code.shiki .sfazB{--shiki-light:#91B859;--shiki-default:#C3E88D;--shiki-dark:#C3E88D}html pre.shiki code .sBMFI, html code.shiki .sBMFI{--shiki-light:#E2931D;--shiki-default:#FFCB6B;--shiki-dark:#FFCB6B}html .light .shiki span {color: var(--shiki-light);background: var(--shiki-light-bg);font-style: var(--shiki-light-font-style);font-weight: var(--shiki-light-font-weight);text-decoration: var(--shiki-light-text-decoration);}html.light .shiki span {color: var(--shiki-light);background: var(--shiki-light-bg);font-style: var(--shiki-light-font-style);font-weight: var(--shiki-light-font-weight);text-decoration: var(--shiki-light-text-decoration);}html .default .shiki span {color: var(--shiki-default);background: var(--shiki-default-bg);font-style: var(--shiki-default-font-style);font-weight: var(--shiki-default-font-weight);text-decoration: var(--shiki-default-text-decoration);}html .shiki span {color: var(--shiki-default);background: var(--shiki-default-bg);font-style: var(--shiki-default-font-style);font-weight: var(--shiki-default-font-weight);text-decoration: var(--shiki-default-text-decoration);}html .dark .shiki span {color: var(--shiki-dark);background: var(--shiki-dark-bg);font-style: var(--shiki-dark-font-style);font-weight: var(--shiki-dark-font-weight);text-decoration: var(--shiki-dark-text-decoration);}html.dark .shiki span {color: var(--shiki-dark);background: var(--shiki-dark-bg);font-style: var(--shiki-dark-font-style);font-weight: var(--shiki-dark-font-weight);text-decoration: var(--shiki-dark-text-decoration);}html pre.shiki code .sTEyZ, html code.shiki .sTEyZ{--shiki-light:#90A4AE;--shiki-default:#EEFFFF;--shiki-dark:#BABED8}html pre.shiki code .s2Zo4, html code.shiki .s2Zo4{--shiki-light:#6182B8;--shiki-default:#82AAFF;--shiki-dark:#82AAFF}html pre.shiki code .s7zQu, html code.shiki .s7zQu{--shiki-light:#39ADB5;--shiki-light-font-style:italic;--shiki-default:#89DDFF;--shiki-default-font-style:italic;--shiki-dark:#89DDFF;--shiki-dark-font-style:italic}html pre.shiki code .swJcz, html code.shiki .swJcz{--shiki-light:#E53935;--shiki-default:#F07178;--shiki-dark:#F07178}html pre.shiki code .sHwdD, html code.shiki .sHwdD{--shiki-light:#90A4AE;--shiki-light-font-style:italic;--shiki-default:#546E7A;--shiki-default-font-style:italic;--shiki-dark:#676E95;--shiki-dark-font-style:italic}html pre.shiki code .sfNiH, html code.shiki .sfNiH{--shiki-light:#FF5370;--shiki-default:#FF9CAC;--shiki-dark:#FF9CAC}</style><p><strong>Run Every AGV From One System</strong></p><p>See how FlowFuse connects AGVs from any vendor over VDA 5050, takes orders from your WMS, and rolls the same master control setup out to every site you run.</p><p><a href="https://flowfuse.com/contact-us/">Contact Us</a></p>]]></content>
        <updated>2026-08-12T00:00:00.000Z</updated>
        <link href="https://flowfuse.com/blog/2026/08/connect-agvs-vda-5050-mqtt/"/>
        
    </entry>
    <entry>
        <id>https://flowfuse.com/blog/2026/08/manufacturing-dashboard-examples/</id>
        <title>5 Manufacturing Dashboard Examples for Production, OEE &amp; Quality</title>
        <summary>Manufacturing dashboards give teams real-time visibility into production, OEE, downtime, quality, and calibration. Explore five dashboard examples and the key metrics that help manufacturers improve operations.</summary>
        <content type="html"><![CDATA[<p>A manufacturing dashboard brings machine data, production metrics, downtime, and quality information into one real-time view, so teams can understand what's happening on the shop floor and act on it.</p><p>This guide covers what manufacturing dashboards do, the metrics they should track, and five dashboard examples, for production, OEE, downtime, quality, and calibration, built with <a href="https://flowfuse.com/">FlowFuse</a>.</p><h2 id="what-is-a-manufacturing-dashboard">What Is a Manufacturing Dashboard?</h2><p>A manufacturing dashboard is a visual interface for monitoring production performance in real time. It pulls data from factory equipment and business systems (<a href="https://flowfuse.com/blog/2025/12/what-is-plc/">PLCs</a>, <a href="https://flowfuse.com/use-cases/scada/">SCADA</a>, <a href="https://flowfuse.com/blog/2025/06/what-is-mes/">MES</a>, <a href="https://flowfuse.com/blog/2025/06/connect-shop-floor-to-odoo-erp-flowfuse/">ERP</a>, <a href="https://flowfuse.com/blog/2025/08/getting-started-with-flowfuse-tables/">databases</a>, sensors, or operator input) into a single view built around production output, machine status, downtime, OEE, quality, and targets. FlowFuse's own <a href="https://flowfuse.com/platform/dashboard/">Dashboard platform</a> is built specifically for assembling these views without writing custom front-end code.</p><p>The key difference between a dashboard and a report is timing. A report tells you what happened after the shift ends. A dashboard shows you what's happening now, while there's still time to change the outcome.</p><p>That's also what separates a good dashboard from a cluttered one: it doesn't try to show everything. It shows the specific person using it what they need in order to act, which is exactly why dashboards have become so central to how manufacturers run production.</p><h2 id="why-dashboards-matter-in-manufacturing">Why Dashboards Matter in Manufacturing</h2><p>Production problems get expensive when they stay invisible. A machine that stops, a line falling behind target, or a defect that goes unnoticed can quietly erode throughput, cost, and delivery schedules before anyone catches it.</p><p>A shared dashboard closes that gap. Operators see production status as it happens, supervisors track performance across the line, and maintenance teams spot equipment issues sooner. The value isn't the dashboard itself; it's the time saved between a problem occurring and someone responding to it. That's the shift FlowFuse is built to support: turning raw factory data into faster decisions on the floor, whether the source is an MES system or a SCADA historian.</p><p>Knowing dashboards matter is one thing. Knowing what belongs on them is another, and that comes down to the metrics behind the view.</p><h2 id="key-metrics-every-manufacturing-dashboard-should-track">Key Metrics Every Manufacturing Dashboard Should Track</h2><p>The right KPIs depend on the role and the goal, but most production dashboards center on <a href="https://flowfuse.com/blog/2025/06/shop-floor-kpis-for-mes/">four categories: output, equipment performance, downtime, and quality</a>.</p><ul><li><strong>Production output:</strong> actual output against the planned target</li><li><strong>OEE:</strong> equipment effectiveness across availability, performance, and quality</li><li><strong>Downtime:</strong> lost production time and its biggest contributing causes</li><li><strong>Cycle time:</strong> whether machines and processes are running at expected speed</li><li><strong>Quality performance:</strong> defects, scrap, rework, and first-pass yield</li><li><strong>WIP levels:</strong> where bottlenecks are forming in the production flow</li></ul><p>These metrics exist to answer a small set of operational questions: Are we producing at the required rate? Are machines running effectively? Where is time being lost? Are we producing quality parts? If a dashboard can't answer those quickly, it's showing too much, or the wrong things.</p><p>What that looks like in practice varies by where the metrics are applied. Here's how these same building blocks show up across five common manufacturing dashboards.</p><a href="https://flowfuse.com/book-demo/"><img src="https://flowfuse.com/images/cta/wenco-book-demo.png" alt="Wenco deploys new dashboard pages in days with FlowFuse - book a demo"/></a><h2 id="manufacturing-dashboard-examples">Manufacturing Dashboard Examples</h2><p>Dashboards work best when they're designed around a specific decision, not a general audience. A production team needs visibility into output and downtime; quality and maintenance teams need a different lens entirely. The five examples below show common patterns, all built with FlowFuse using data from machines, production systems, databases, and industrial protocols, but for using it purpose it uses demo data</p><h3 id="_1-production-dashboard-andon-live">1. Production Dashboard (Andon Live)</h3><p>A production dashboard answers one question in real time: is the line hitting its target? FlowFuse's <strong>Andon Live Dashboard</strong> gives operators and supervisors a shop-floor view of actual output against target, shift progress, and current line status, so a gap can be caught and addressed before it grows.</p><p><img alt="FlowFuse Andon Live dashboard showing a target of 100 against an actual count of 84, a delta of 16, stoppage timers, and the current shift for Production Line 33" src="https://flowfuse.com/blog/2026/08/images/andon-live-dashboard.png"/><em>FlowFuse Andon Live dashboard showing a target of 100 against an actual count of 84, a delta of 16, stoppage timers, and the current shift for Production Line 33</em></p><p>It typically shows actual production count, target vs. actual output, shift progress, and stoppage information, the same building blocks behind FlowFuse's <a href="https://flowfuse.com/blog/2025/06/building-andon-task-manager-dashboard-with-ff/">Andon Task Manager</a>. Because every production environment is different, FlowFuse connects this same dashboard pattern to whatever data sources are already in place, including PLCs, MES systems, production counters, <a href="https://flowfuse.com/blog/2024/06/how-to-use-mqtt-in-node-red/">MQTT</a>, and <a href="https://flowfuse.com/blog/2025/07/reading-and-writing-plc-data-using-opc-ua/">OPC UA</a>.</p><p><strong>Ready to deploy:</strong> <a href="https://flowfuse.com/blueprints/manufacturing/andon-live/">Andon Live Dashboard</a></p><h3 id="_2-oee-dashboard">2. OEE Dashboard</h3><p>Where a production dashboard tells you whether output is on target, an OEE dashboard explains <em>why</em> it isn't. FlowFuse's <strong>OEE Dashboard</strong> combines production and downtime data into one view covering OEE, availability losses, performance losses, quality losses, and trend data over time.</p><p><img alt="FlowFuse OEE dashboard with gauges for OEE, performance, availability and quality above a downtime summary, production totals, and a table of underperforming machines" src="https://flowfuse.com/blog/2026/08/images/oee-dashboard--1-f77f847f.png"/><em>FlowFuse OEE dashboard with gauges for OEE, performance, availability and quality above a downtime summary, production totals, and a table of underperforming machines</em></p><p>That breakdown matters because a low OEE score can come from very different root causes, frequent stops, slow cycle times, or defect rates, and each one needs a different fix. Separating them lets teams target the actual source of the loss instead of <a href="https://flowfuse.com/blog/2026/05/fixing-oee-measurement-in-manufacturing/">chasing a misleading number</a>.</p><p><strong>Ready to deploy:</strong> <a href="https://flowfuse.com/blueprints/manufacturing/oee-dashboard/">OEE Dashboard</a></p><h3 id="_3-downtime-dashboard">3. Downtime Dashboard</h3><p>Availability losses are usually the biggest piece of that OEE picture, which is why they tend to warrant a dedicated view of their own. Downtime is the single biggest drain on production capacity, and the real question isn't just <em>when</em> machines stop, it's <em>why</em>. FlowFuse's <strong>Downtime Tracking Dashboard</strong> captures stop events as they happen and turns them into a live view of downtime duration, causes, and impact on availability, rather than <a href="https://flowfuse.com/blog/2026/06/event-driven-downtime-escalation-workflow/">something pieced together from manual spreadsheets after the fact</a>.</p><p><img alt="FlowFuse downtime tracking dashboard listing open stoppages by machine with start times, how long each has been open, and a button to close the event and log a reason" src="https://flowfuse.com/blog/2026/08/images/downtime-logger.png"/><em>FlowFuse downtime tracking dashboard listing open stoppages by machine with start times, how long each has been open, and a button to close the event and log a reason</em></p><p>That shift, from reviewing downtime after a shift to tracking it in real time, is what lets teams move from reacting to failures toward reducing what causes them.</p><p><strong>Build it:</strong> <a href="https://flowfuse.com/blog/2026/07/build-downtime-logger/">Build a Machine Downtime Tracking Application</a></p><h3 id="_4-quality-dashboard-defect-quality-monitoring">4. Quality Dashboard (Defect &amp; Quality Monitoring)</h3><p>Quality losses need the same treatment. A quality dashboard shows where defects are happening and what's driving them. FlowFuse's <strong>Defect &amp; Quality Monitoring Dashboard</strong> combines defect data, production information, and quality KPIs, including defect trends, defect categories, first-pass yield, cost of poor quality, and a Pareto breakdown of causes, into one view.</p><p><img alt="FlowFuse defect and quality monitoring dashboard with a Pareto chart of defect types, a root cause breakdown, severity and disposition splits, and SLA resolution times" src="https://flowfuse.com/blog/2026/08/images/flowfuse-defect-monitoring-dashboard.png"/><em>FlowFuse defect and quality monitoring dashboard with a Pareto chart of defect types, a root cause breakdown, severity and disposition splits, and SLA resolution times</em></p><p>The <a href="https://flowfuse.com/blog/2025/09/creating-pareto-chart/">Pareto view</a> tends to be the most useful part: it isolates the small number of issues responsible for most of the quality loss, so improvement effort goes where it actually pays off, instead of spreading thin across every defect type. Pairing it with <a href="https://flowfuse.com/blog/2025/07/quality-control-automation-spc-charts/">statistical process control</a> catches quality drift before it produces a defect at all.</p><p><strong>Build it:</strong> <a href="https://flowfuse.com/blog/2026/07/defect-and-quality-monitoring/">Build a Defect Tracking and Quality Monitoring Dashboard</a></p><h3 id="_5-calibration-dashboard">5. Calibration Dashboard</h3><p>Defects aren't always caused by the process itself; sometimes the measurement equipment used to catch them is the problem. Where measurement accuracy affects product quality and compliance, <a href="https://flowfuse.com/blog/2026/07/what-is-instrument-calibration/">instrument calibration</a> tracking can't run on spreadsheets. FlowFuse's <strong>Calibration Management Dashboard</strong> gives teams a live view of measurement equipment status (what's ready, what's due, what's overdue) along with calibration history and compliance status, cutting the risk of equipment running outside its required window.</p><p><img alt="FlowFuse calibration management dashboard showing 120 instruments split into valid, due soon and overdue, a 73.3% compliance rate, and a table of overdue tools by department" src="https://flowfuse.com/blog/2026/08/images/calibration-management-dashboard.png"/><em>FlowFuse calibration management dashboard showing 120 instruments split into valid, due soon and overdue, a 73.3% compliance rate, and a table of overdue tools by department</em></p><p><strong>Build it:</strong> <a href="https://flowfuse.com/blog/2026/07/calibration-management-dashboard/">Tracking Instrument Calibration with a Digital Dashboard</a></p><h2 id="manufacturing-dashboard-design-best-practices">Manufacturing Dashboard Design Best Practices</h2><p>Having the right dashboard type for the job is only half the equation. How it's designed determines whether anyone actually uses it. A manufacturing dashboard should make decisions easier, not add more information to review, and the best dashboards are designed around the people using them and the actions they need to take.</p><p>Key principles include:</p><ul><li><strong>Design for the user:</strong> operators, supervisors, and managers need different views based on their responsibilities</li><li><strong>Focus on actionable metrics:</strong> every KPI should help identify a problem, measure progress, or support a decision</li><li><strong>Keep important information visible:</strong> production status, downtime, and quality issues should be clear without searching through multiple screens</li><li><strong>Avoid unnecessary complexity:</strong> too many charts and metrics make important information harder to find</li><li><strong>Support drill-downs:</strong> start with a clear overview, then allow users to investigate the details behind an issue</li></ul><p>A successful manufacturing dashboard is not the one with the most data. It is the one that helps the right person understand the situation and act quickly.</p><p>One design decision worth calling out on its own is timing: not every dashboard should show the same moment in time.</p><h2 id="real-time-vs-historical-manufacturing-dashboards">Real-Time vs. Historical Manufacturing Dashboards</h2><p>Not every manufacturing decision requires the same type of dashboard:</p><ul><li><strong>Real-time dashboards</strong> are built for immediate action, showing what is happening on the shop floor right now, such as current production output, machine status, downtime events, and quality issues</li><li><strong>Historical dashboards</strong> are <a href="https://flowfuse.com/blog/2025/08/time-series-dashboard-flowfuse-postgresql/">built for analysis</a>, helping teams identify trends, compare performance over time, and understand recurring problems</li></ul><p>Manufacturers often need both. Real-time dashboards keep production running today, while historical dashboards help improve how production runs tomorrow.</p><p>Timing is one axis a dashboard can vary on. Who it's built for is another, and that's a separate design decision entirely.</p><h2 id="single-source-of-truth-vs-user-specific-dashboards">Single Source of Truth vs. User-Specific Dashboards</h2><p>Manufacturing dashboards can follow two common <a href="https://dashboard.flowfuse.com/getting-started#design-patterns" rel="nofollow">design patterns</a> depending on how they are used.</p><p>A <strong>single source of truth dashboard</strong> gives everyone the same operational view. This works well for Andon boards, production displays, and OEE dashboards, where teams need a shared understanding of factory performance.</p><p><img alt="Single source of truth pattern: a device populates both a ui-chart and a database, and the chart displays the same dashboard to all clients" src="https://flowfuse.com/blog/2026/08/images/design-pattern-single.png"/><em>Single source of truth pattern: a device populates both a ui-chart and a database, and the chart displays the same dashboard to all clients</em></p><p>A <strong>user-specific dashboard</strong> provides different information based on the user's role or workflow. Operators, for example, may see production status and tasks, while maintenance teams see equipment issues and service information. This pattern relies on the dashboard knowing who's looking at it, which is what FlowFuse's <a href="https://flows.nodered.org/node/@flowfuse/node-red-dashboard-2-user-addon" rel="nofollow">multi-user addon</a> is built to support.</p><p><img alt="User-specific pattern: opening the dashboard fires a ui-event that queries the database using the viewer's client ID, so the chart displays data for that user only" src="https://flowfuse.com/blog/2026/08/images/design-pattern-multi-user.png"/><em>User-specific pattern: opening the dashboard fires a ui-event that queries the database using the viewer's client ID, so the chart displays data for that user only</em></p><p>The right approach depends on the decision the dashboard needs to support. Some manufacturing applications use one shared view; others combine shared visibility with role-specific information. Either way, someone has to actually connect the underlying data and build the thing, which is where FlowFuse comes in.</p><h2 id="building-manufacturing-dashboards-with-flowfuse">Building Manufacturing Dashboards with FlowFuse</h2><p>The challenge in manufacturing is rarely a lack of data. Most factories already generate information from machines, PLCs, sensors, and business systems. The real challenge is connecting that data and turning it into something teams can use, whether that's a single shared view or a set of role-specific ones.</p><p>FlowFuse helps manufacturers build operational dashboards by connecting industrial data sources, processing production information, and creating applications for the shop floor. A typical workflow includes:</p><ul><li><strong>Connect data:</strong> bring in data from PLCs, machines, databases, and protocols such as MQTT, OPC UA, and <a href="https://flowfuse.com/blog/2023/05/integrating-modbus-with-node-red/">Modbus</a></li><li><strong>Process data:</strong> convert production events, downtime, and quality records into useful metrics</li><li><strong>Build dashboards:</strong> create views for operators, supervisors, and managers</li></ul><p>Once a dashboard is built, teams can manage and deploy it across multiple lines, or facilities without rebuilding it from scratch, to keep every deployment in sync. The goal is simple: turn factory data into <a href="https://flowfuse.com/platform/features/">reusable applications that improve operational visibility</a>.</p><h2 id="conclusion">Conclusion</h2><p>Manufacturing dashboards give teams a shared view of what is happening on the shop floor. They help operators respond faster, supervisors understand performance, and engineers identify opportunities for improvement.</p><p>From production tracking and OEE monitoring to downtime analysis, quality management, and calibration control, the right dashboard connects operational data with the decisions teams need to make, whether that decision needs a real-time or historical view, a shared display or a role-specific one.</p><p>The goal is not to create more screens. It is to create better visibility into production and give teams the information they need to keep improving. With <a href="https://flowfuse.com/platform/why-flowfuse/">FlowFuse</a>, manufacturers can connect existing factory data, build operational applications, and scale successful dashboards across machines, lines, and facilities.</p><p><strong>Build Your Manufacturing Dashboard</strong></p><p>Connect factory data and create real-time dashboards for production, OEE, downtime, and quality with FlowFuse.</p><p><a href="https://flowfuse.com/book-demo/">Book a Demo</a></p>]]></content>
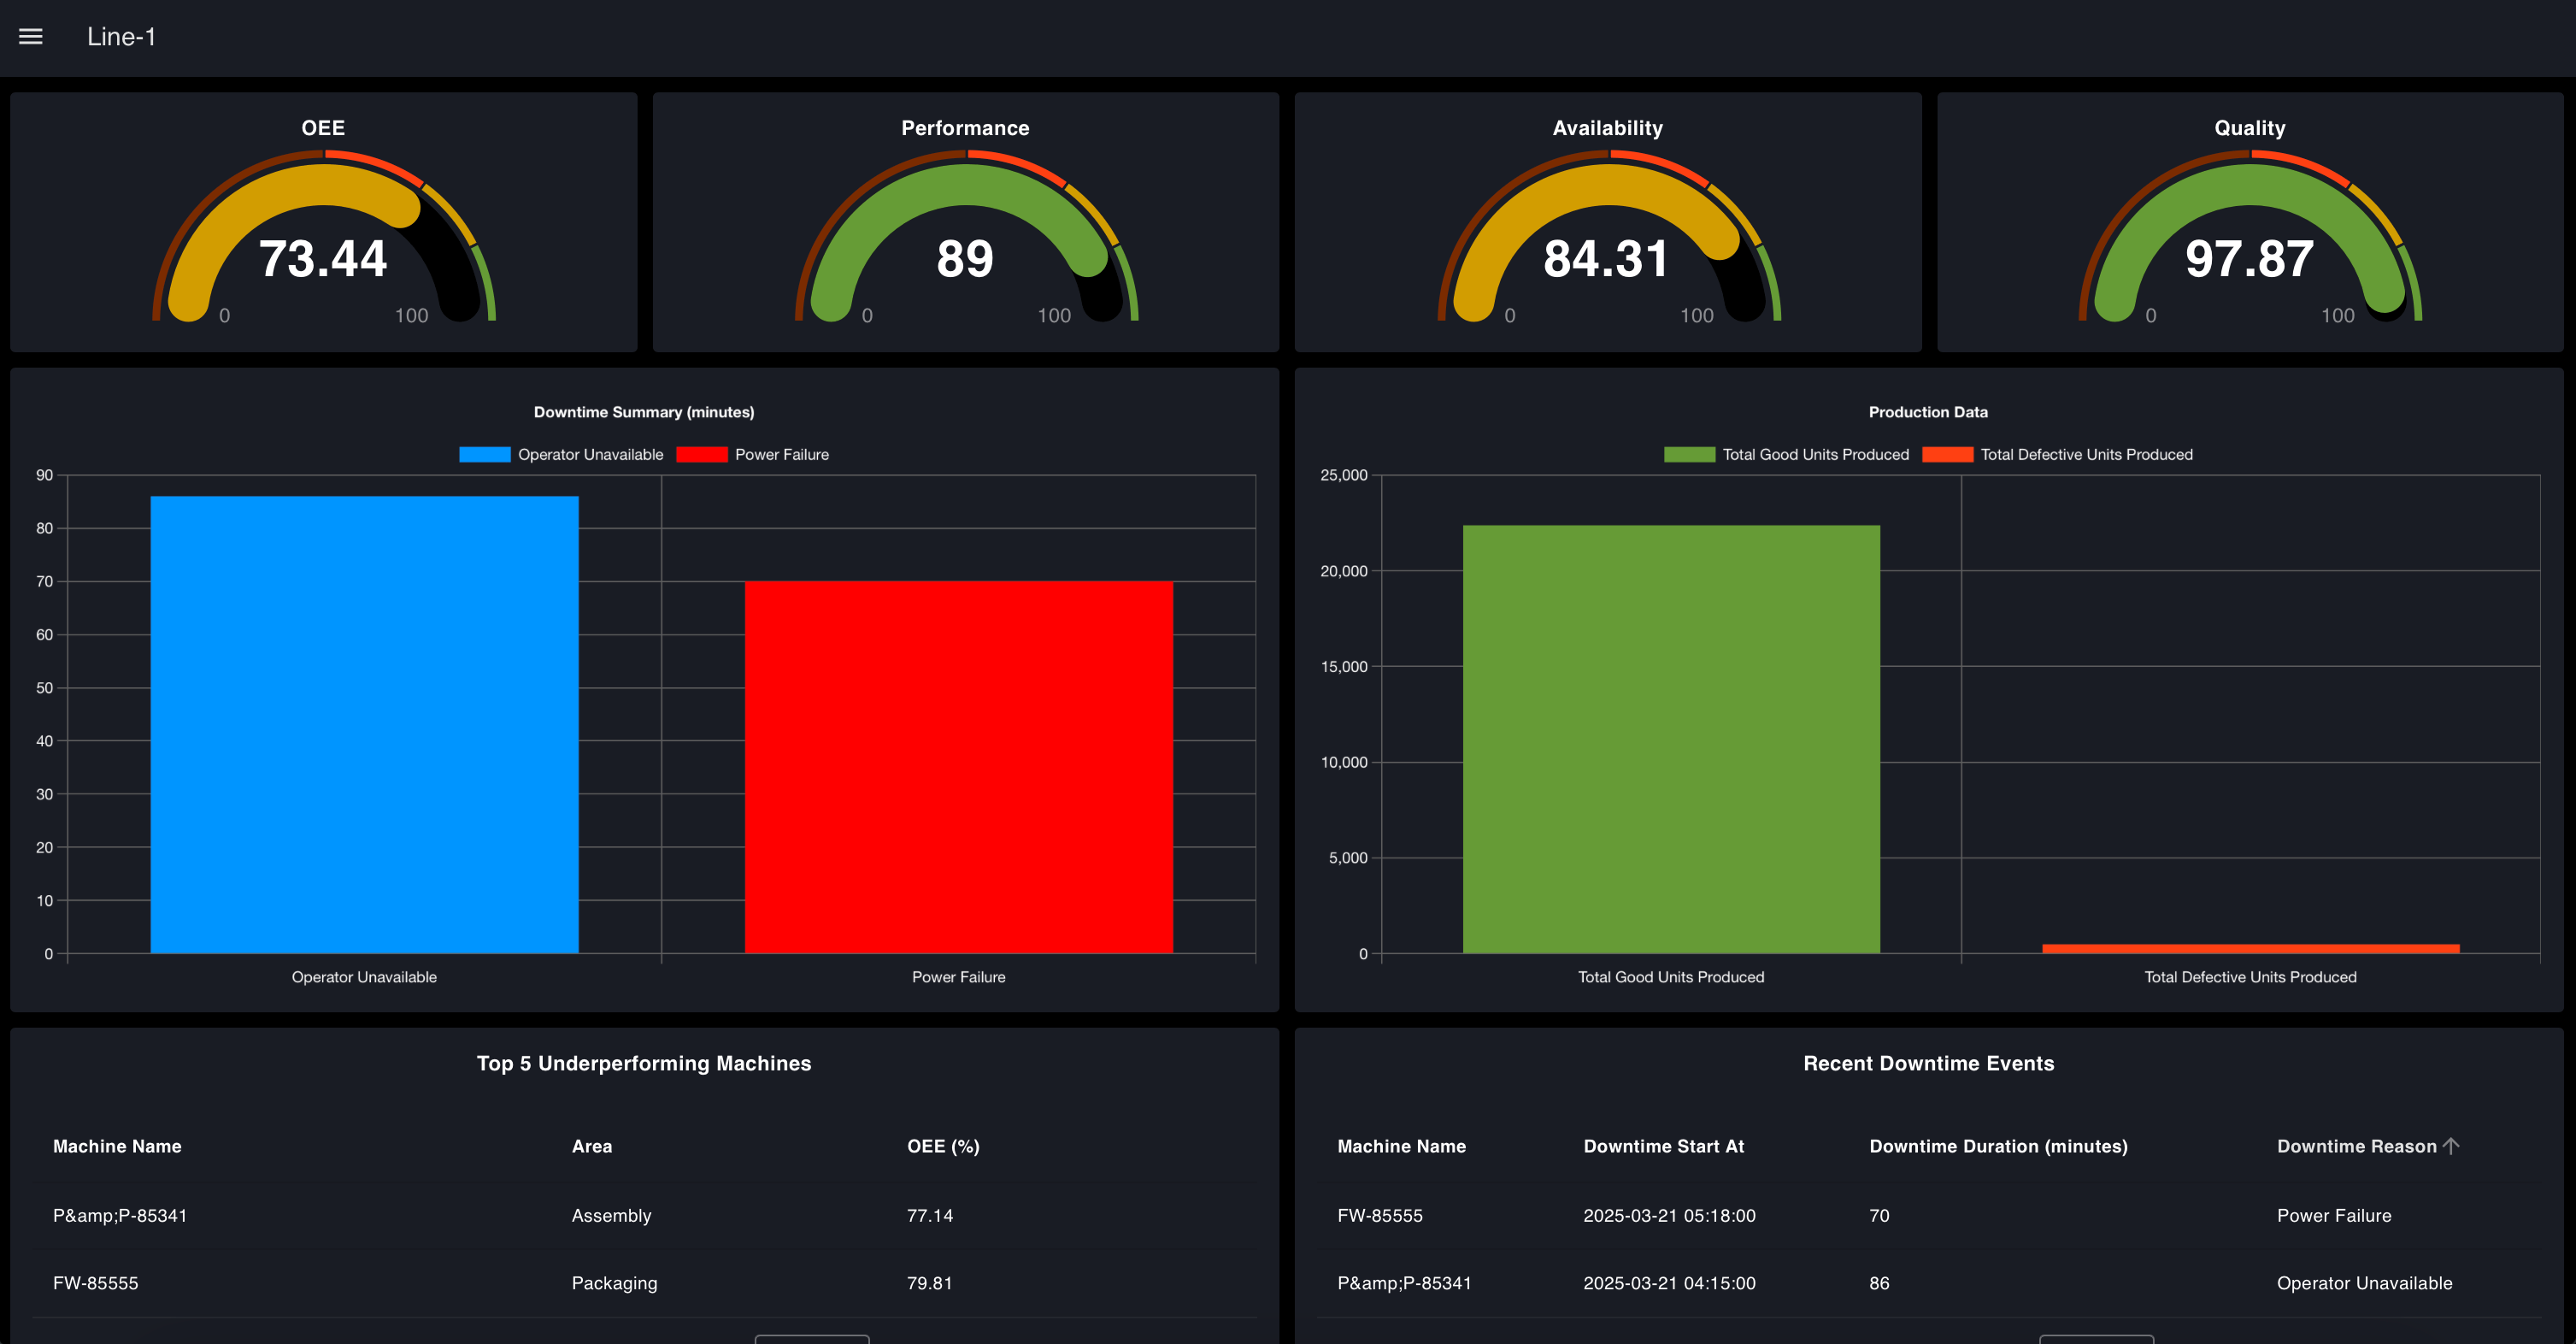
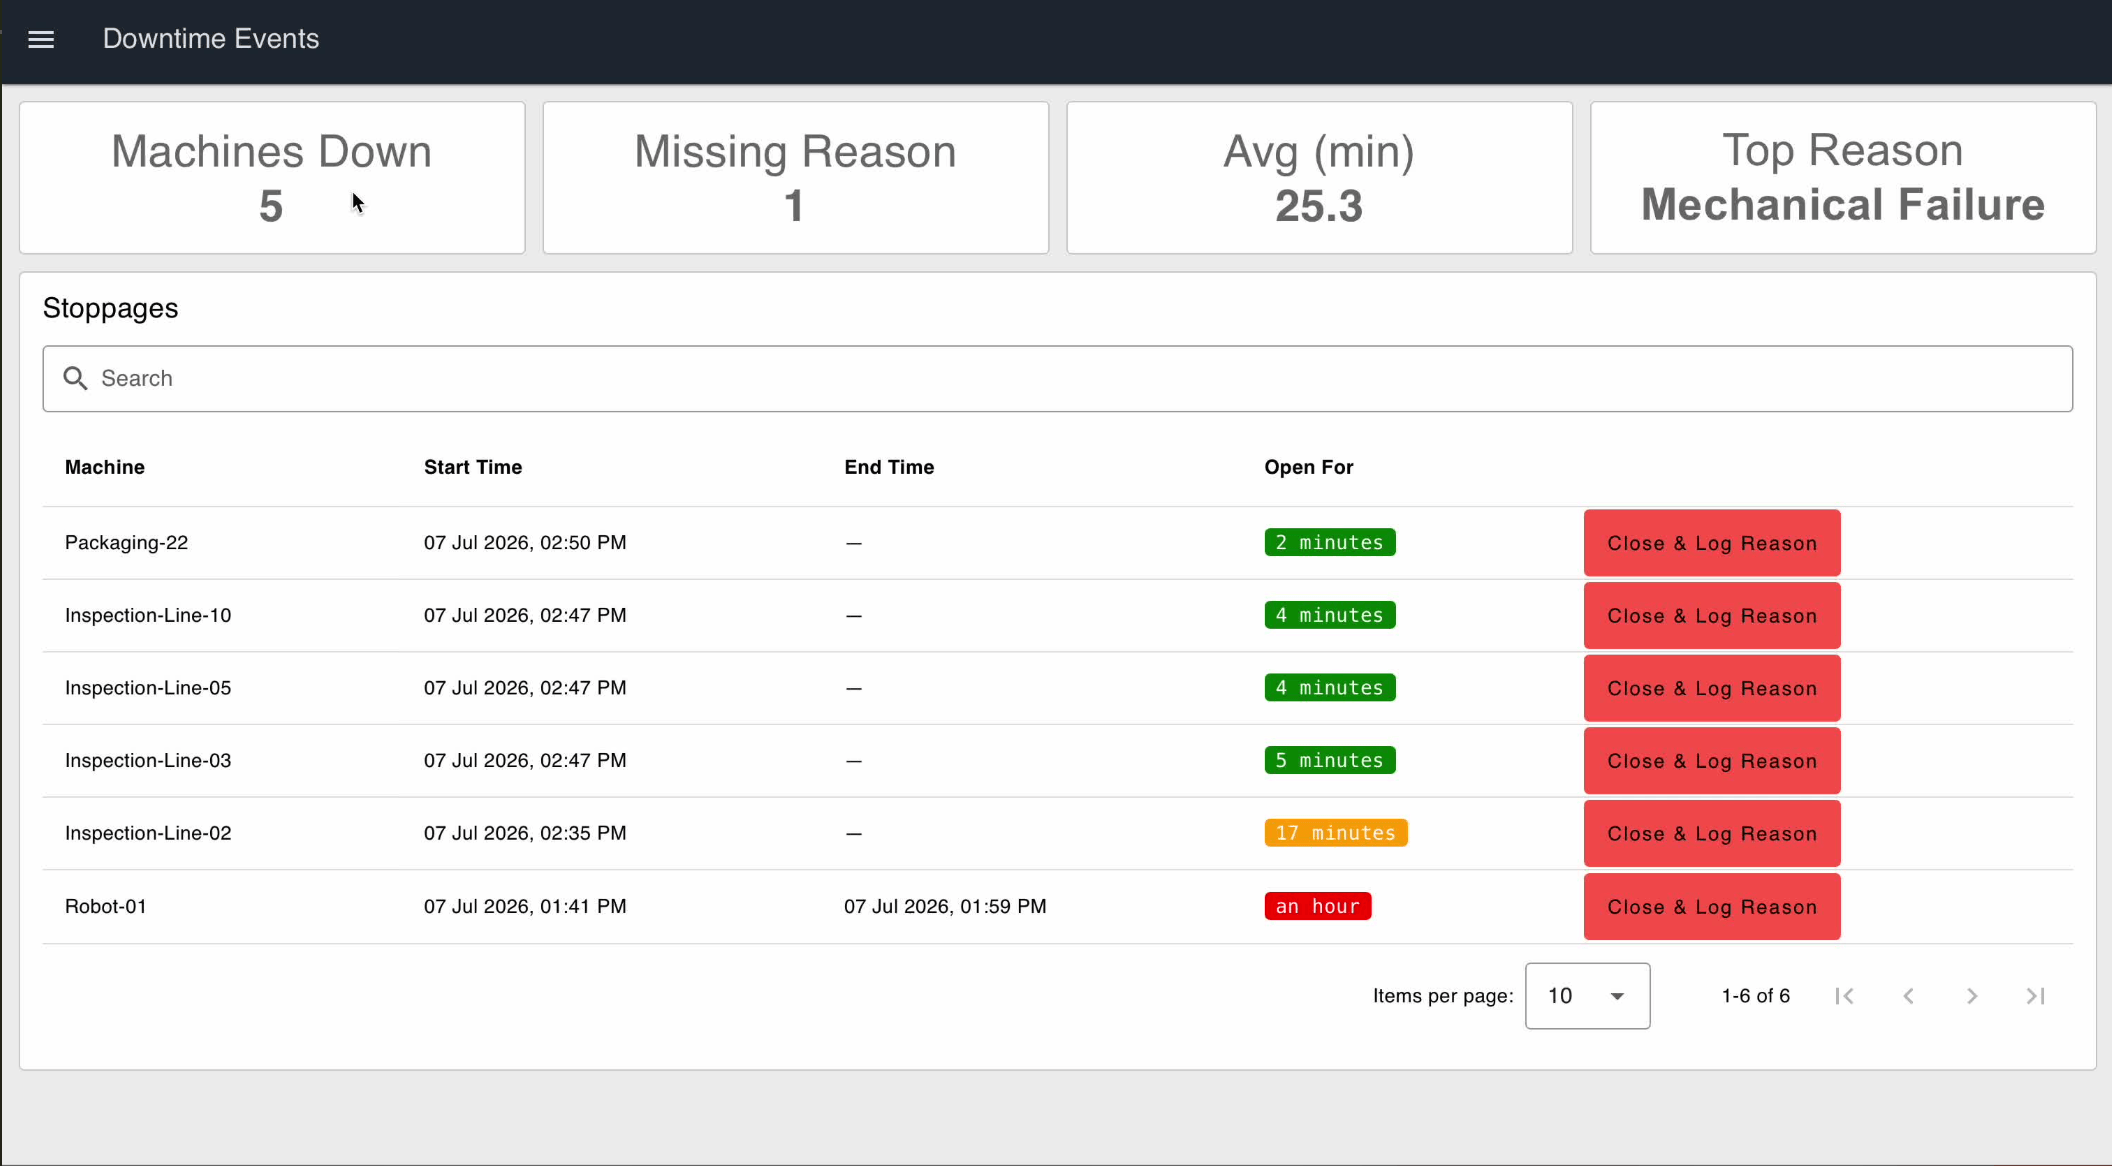
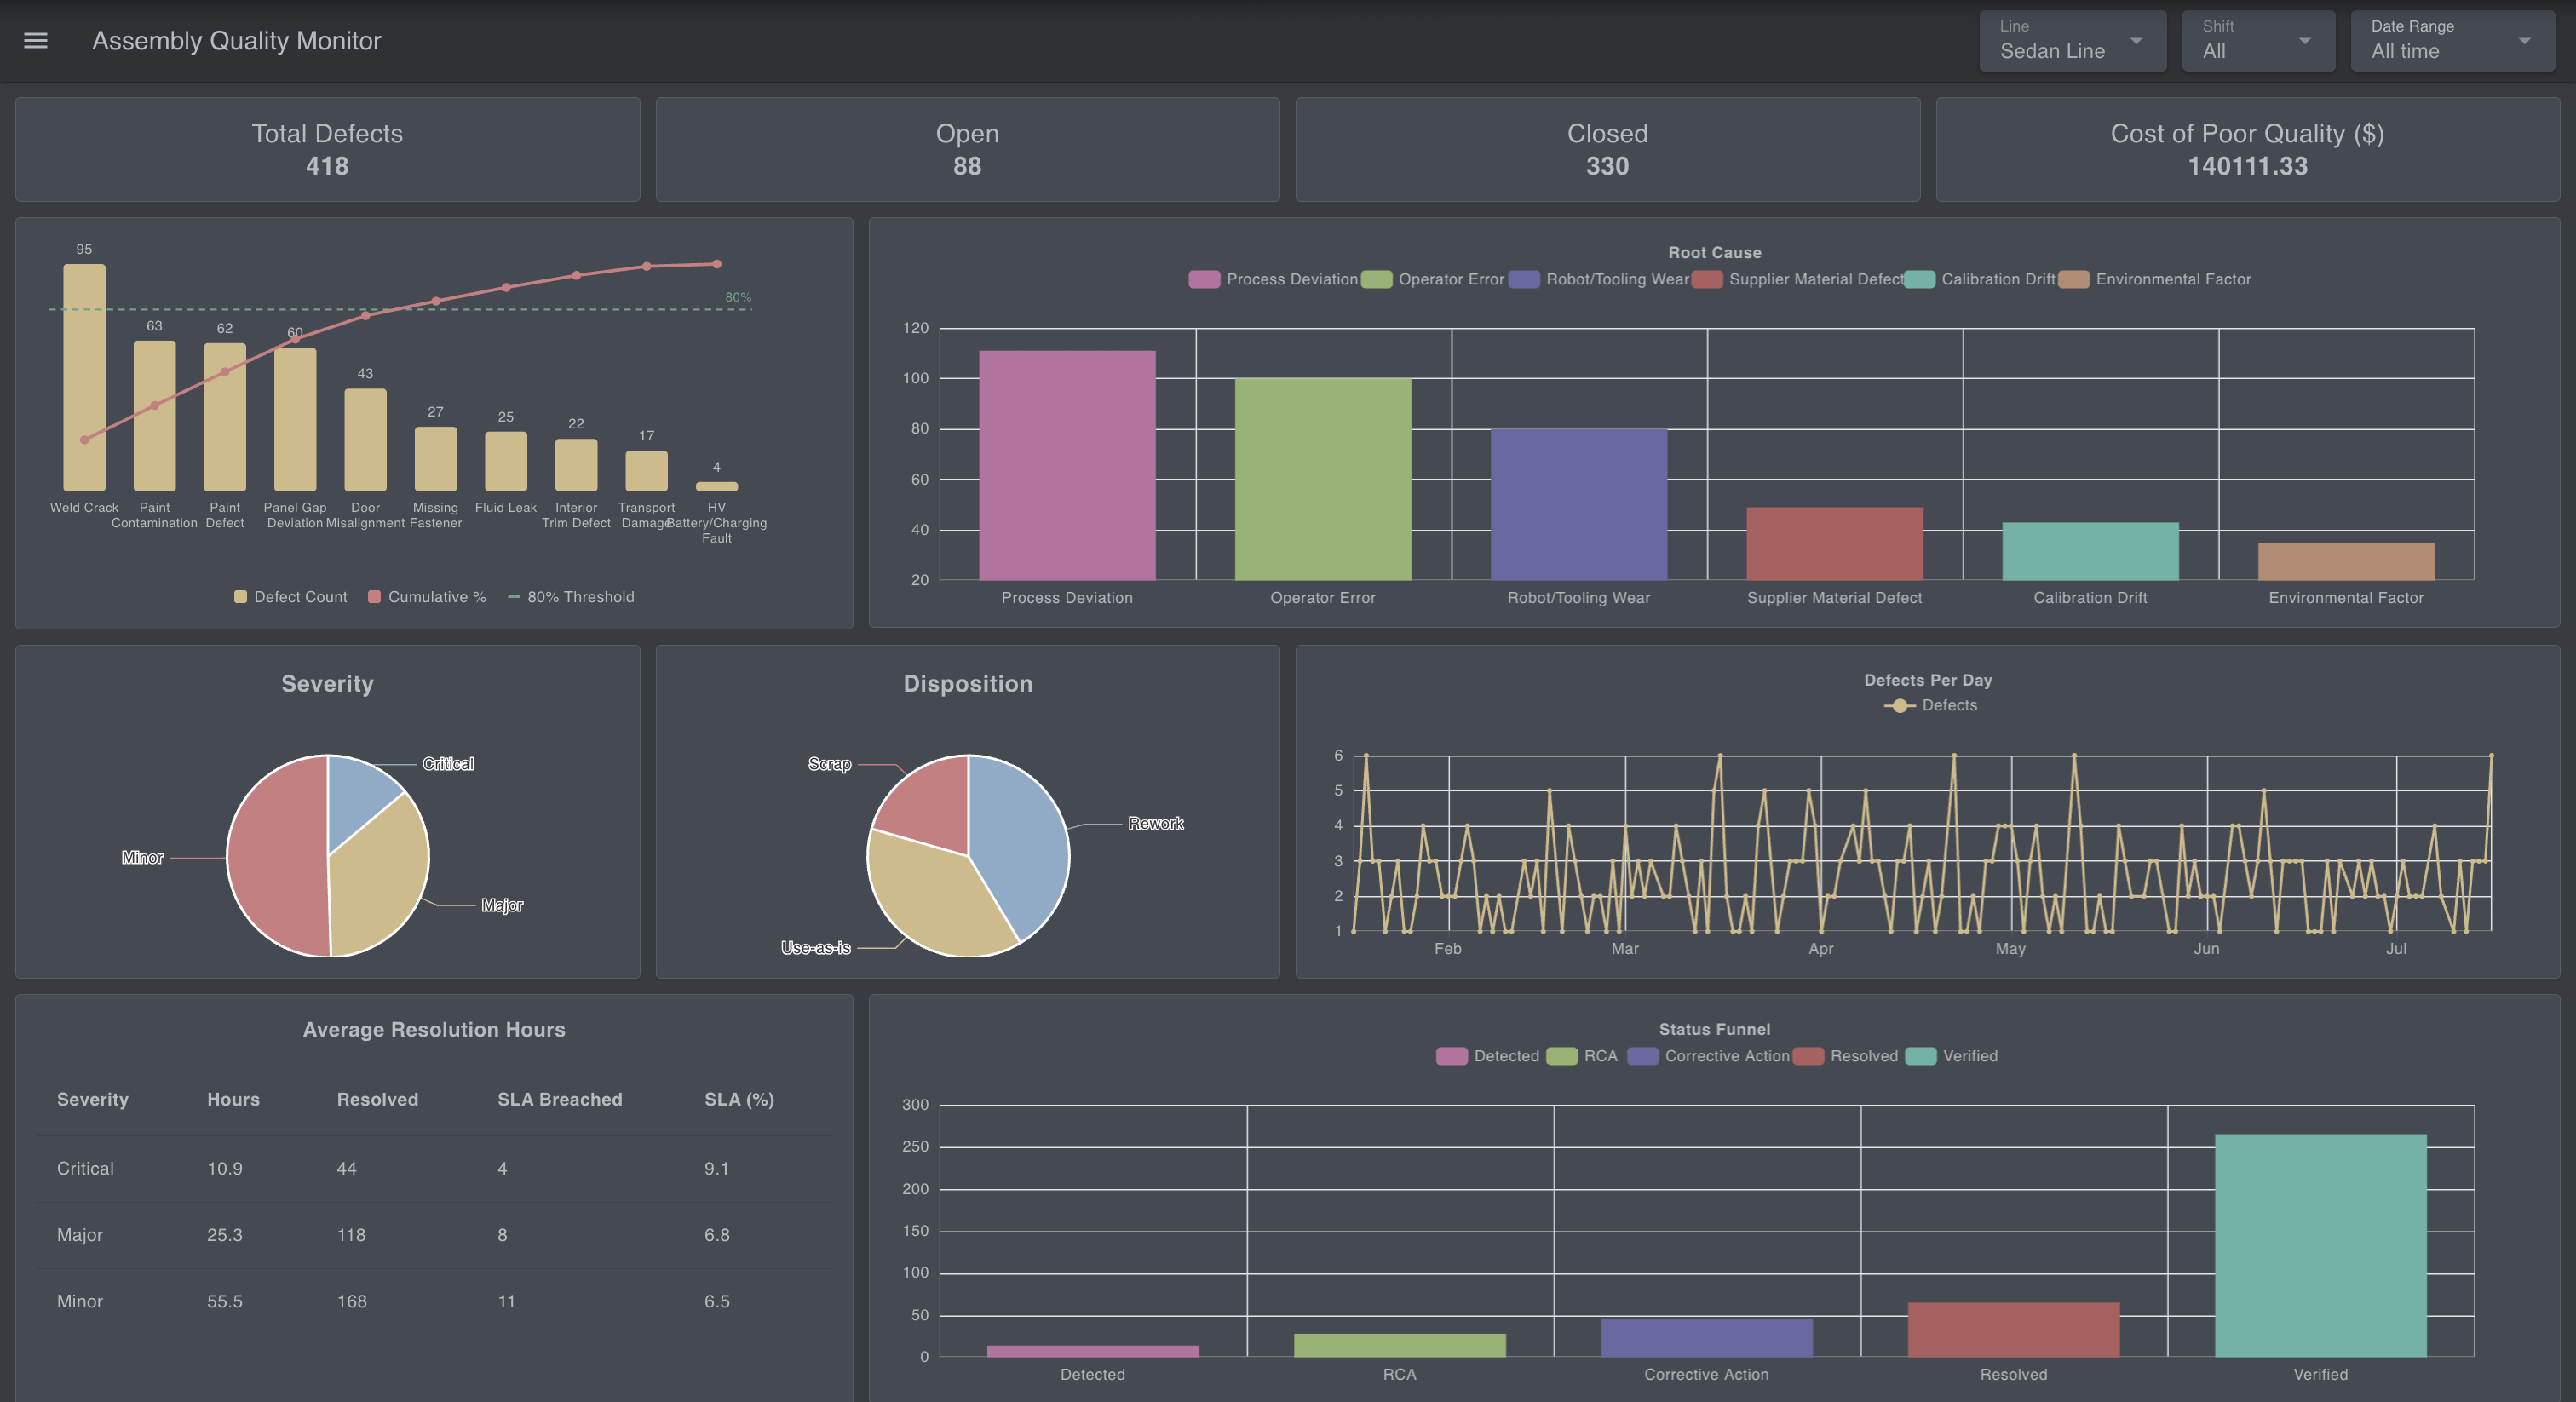
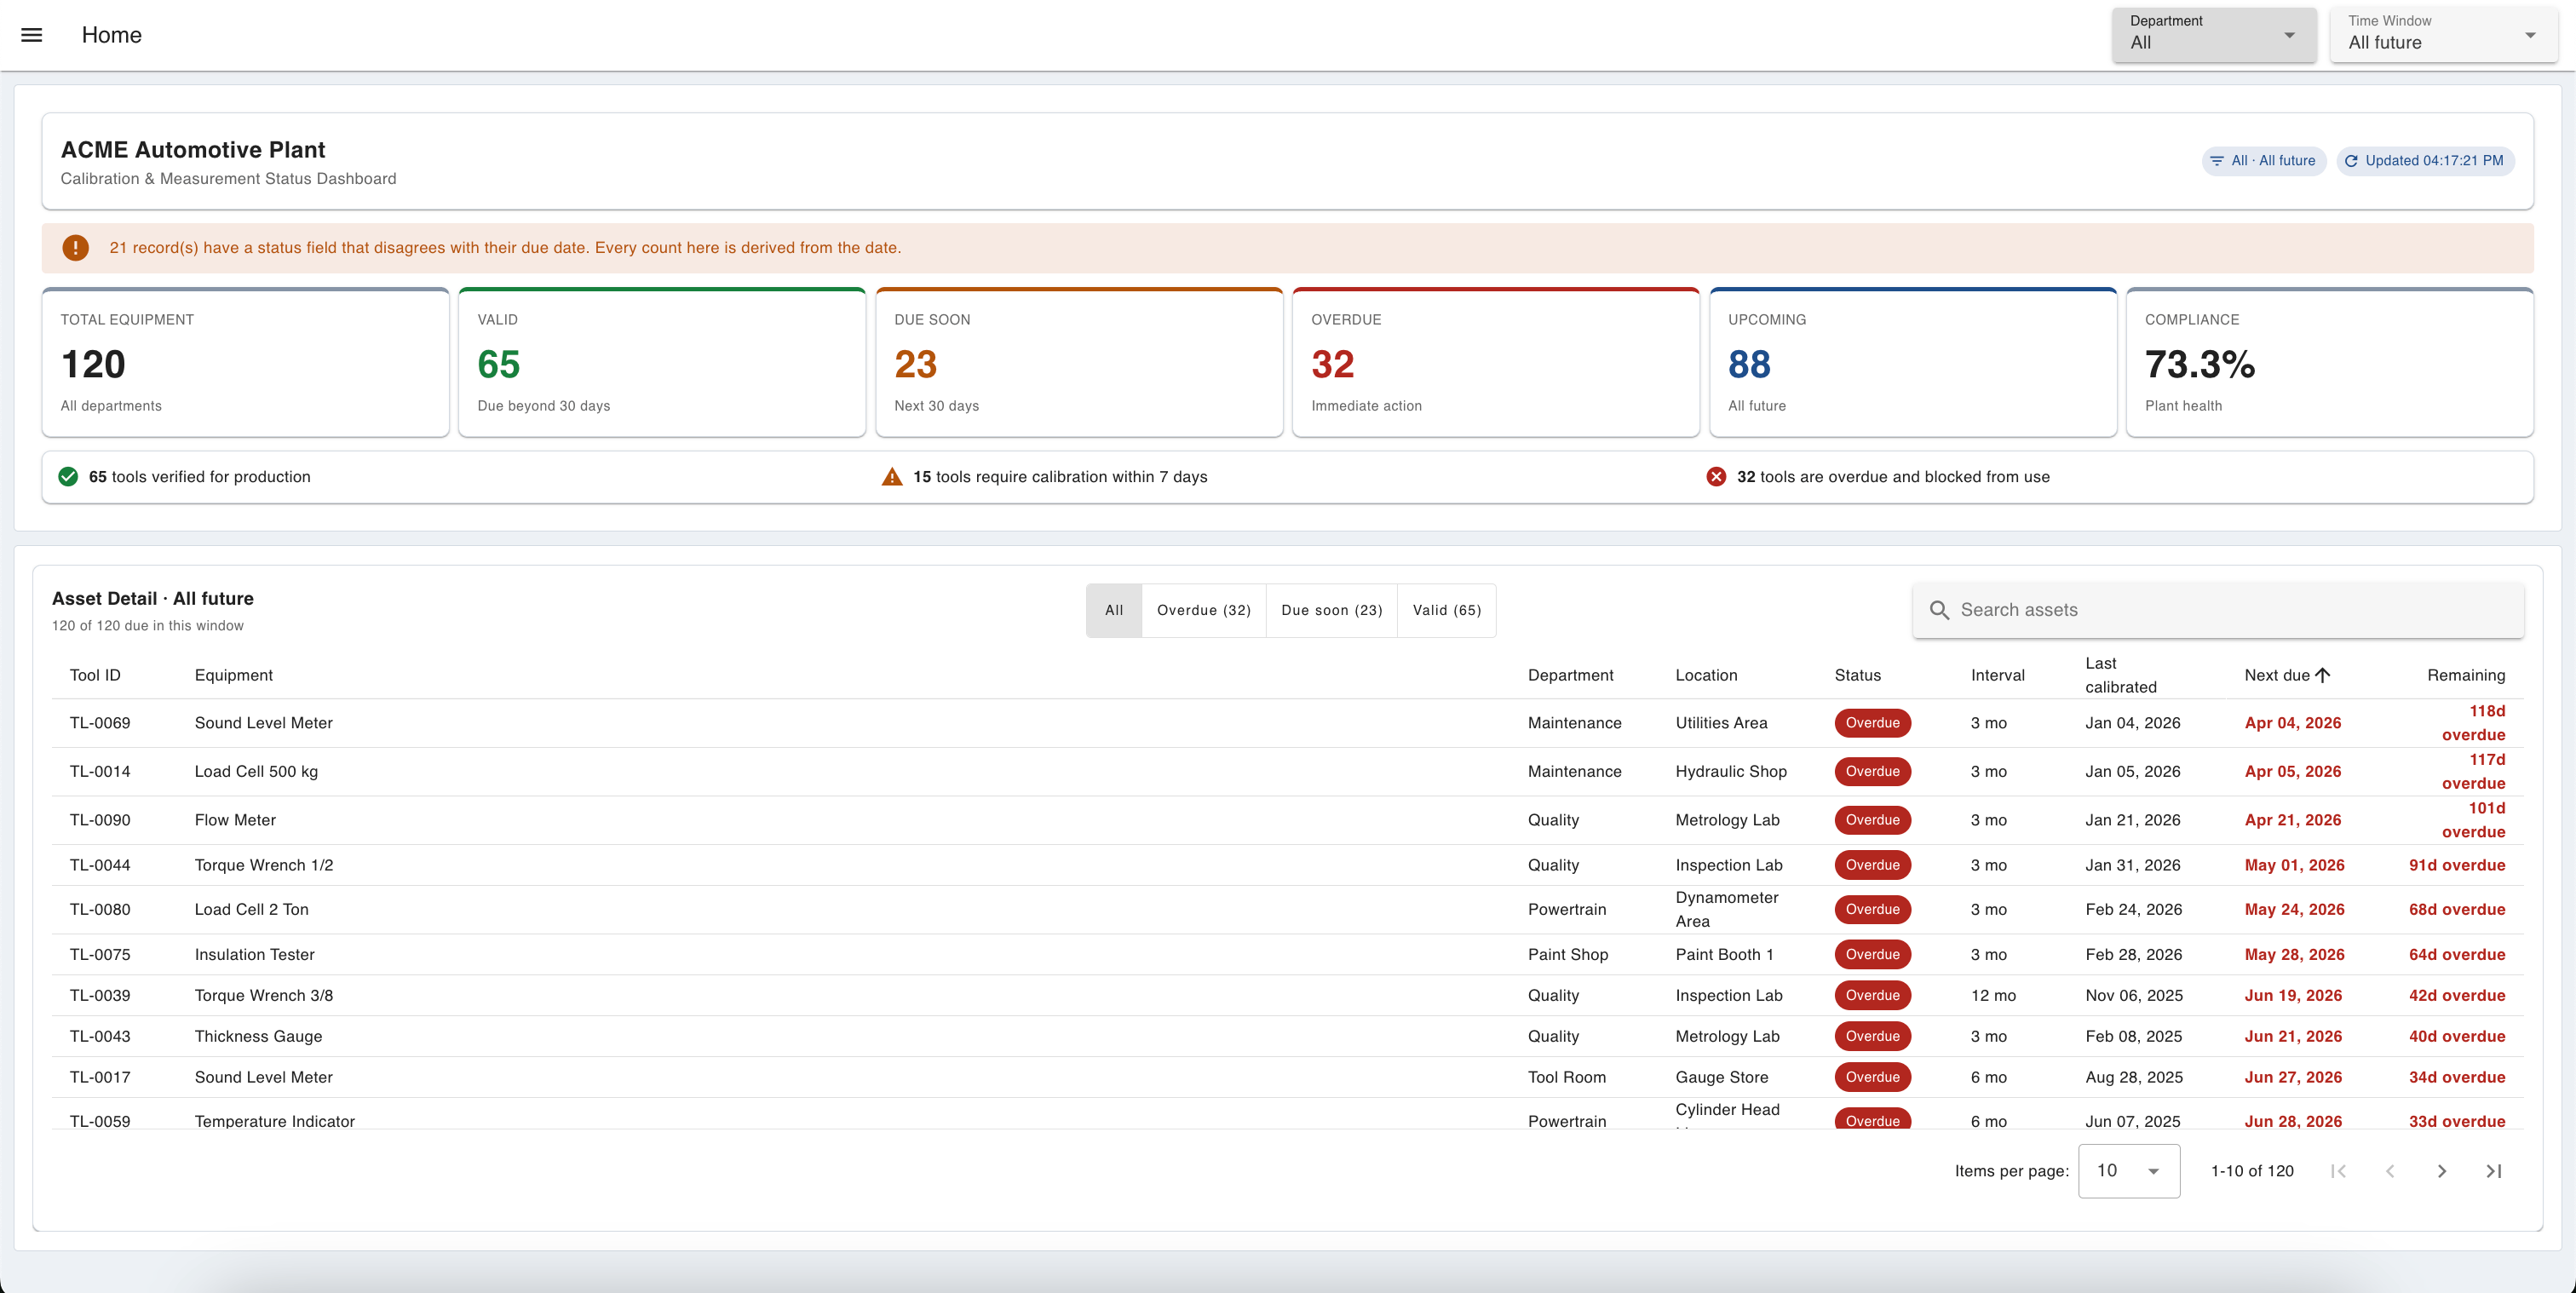
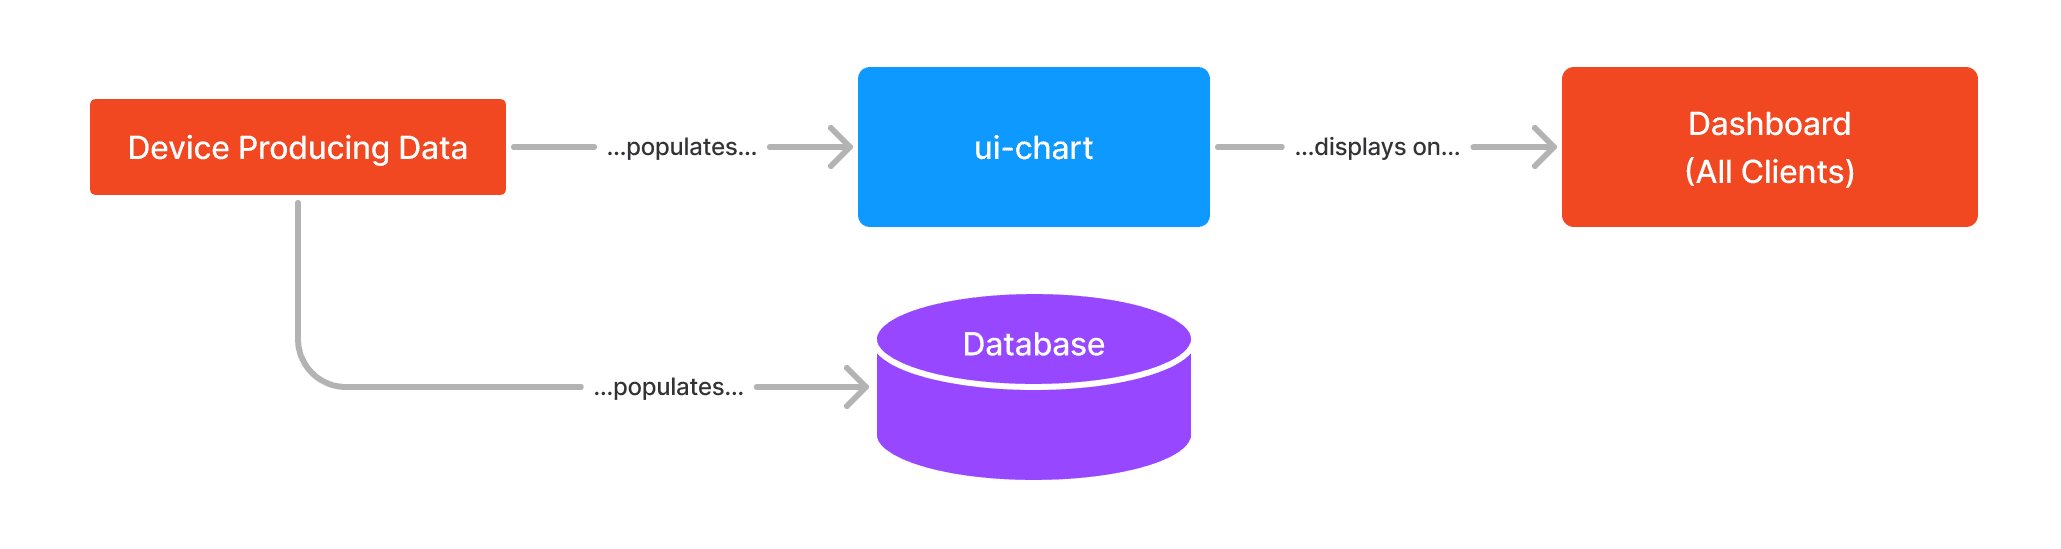
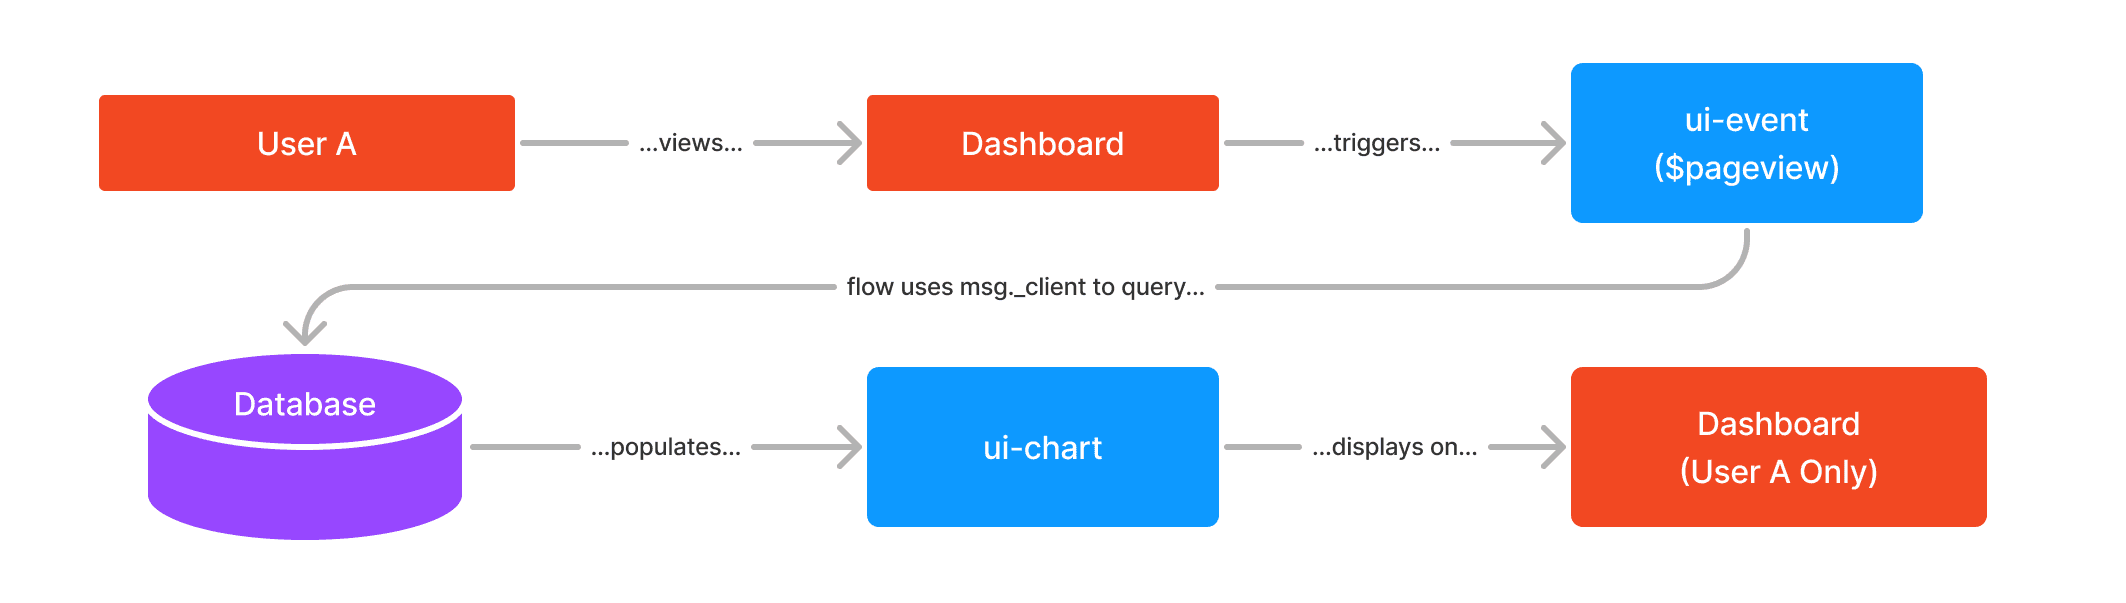
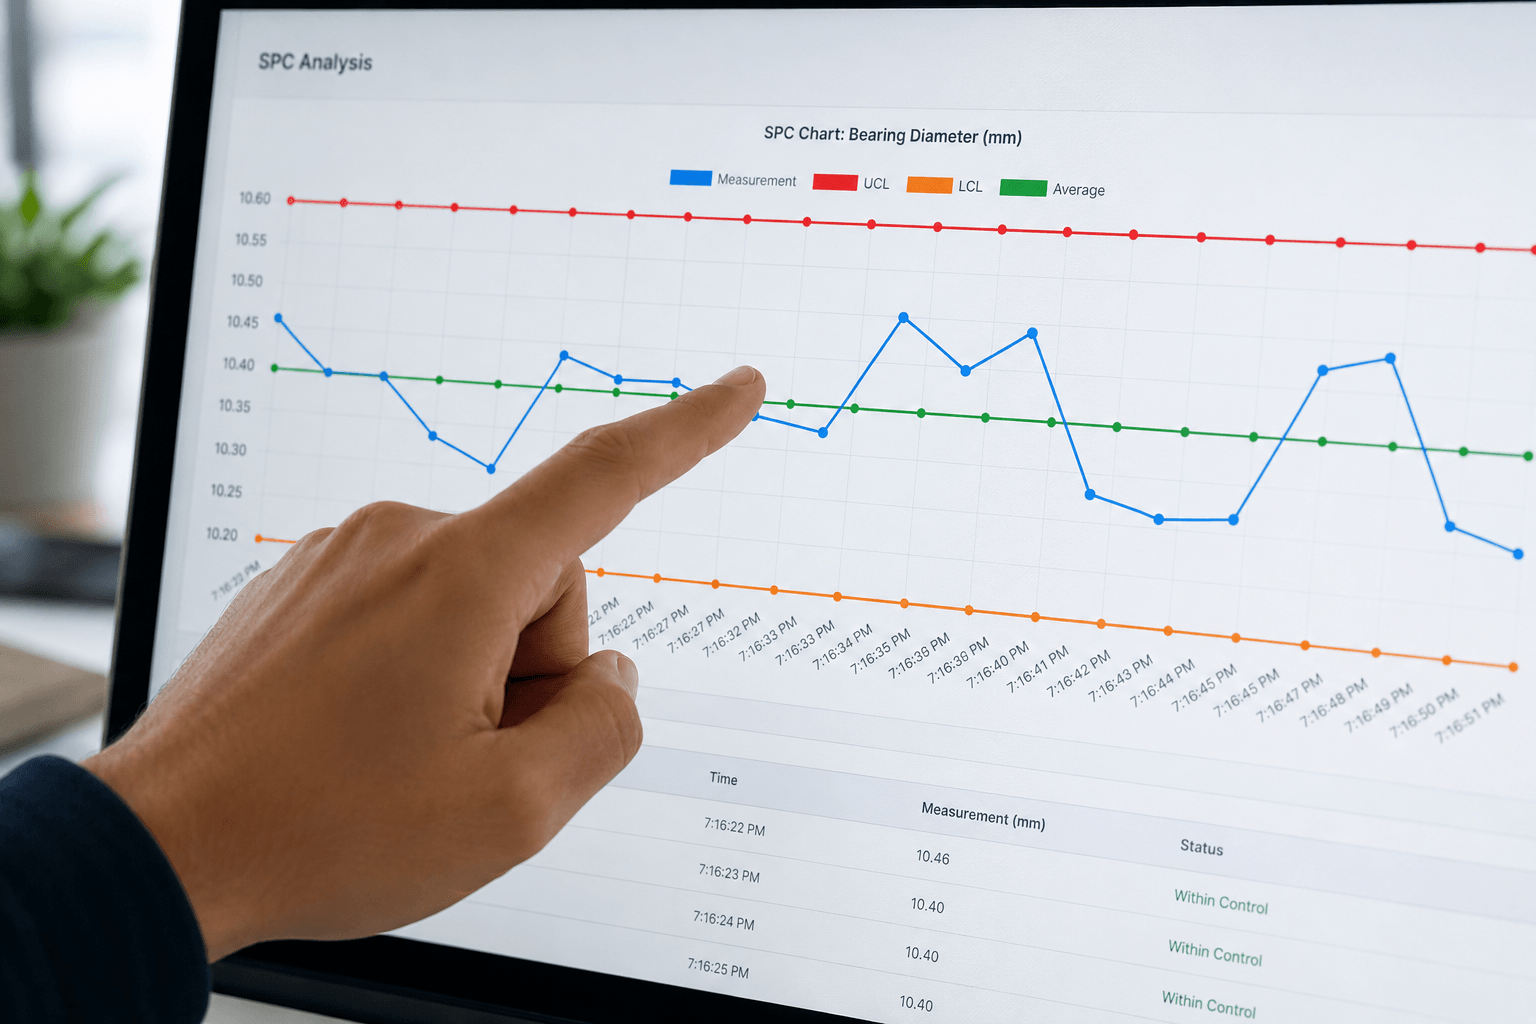
        <updated>2026-08-05T00:00:00.000Z</updated>
        <link href="https://flowfuse.com/blog/2026/08/manufacturing-dashboard-examples/"/>
        
    </entry>
    <entry>
        <id>https://flowfuse.com/blog/2026/08/statistical-process-control/</id>
        <title>What Is Statistical Process Control in Manufacturing</title>
        <summary>SPC Catches Problems Before They Become Scrap: Statistical process control plots measurements on a control chart as the process runs, so a shift or drift shows up while it is still correctable instead of surfacing in a quality report after the parts are made. Standardizing SPC Across Sites Beats Rebuilding It Every Time: FlowFuse customers deploy SPC monitoring using a build once, run everywhere approach, standardizing a workflow on one machine and scaling it across 20+ manufacturing sites from a single platform. SPC Works With Existing Systems, Not Against Them: SPC monitoring can extend a brownfield environment of legacy PLCs, MES, and SCADA systems through IT/OT connectivity, without requiring a full system replacement.</summary>
        <content type="html"><![CDATA[<p>A quality engineer flags a batch of parts three shifts after the process drifted. By then, the scrap is already built. The operational logic that drives throughput and quality still lives in custom code, isolated scripts, and one-off solutions, so problems often surface in a quality report long after they could have been caught.</p><p>FlowFuse is an industrial application platform that works with manufacturers who face this daily. Bosch, Cargill, Moderna, Worthington Steel, and 25+ other enterprise manufacturers use FlowFuse to build and standardize operational applications across sites, including the real-time monitoring that makes statistical process control practical at scale. Customers have documented a 50% reduction in scrap rate, and the platform is SOC 2 Type 1 and Type 2 certified.</p><p>This article covers what statistical process control is, how SPC charts and control charts work, how SPC applies across manufacturing sites, and where Six Sigma SPC and SPC software fit in.</p><p><img alt="SPC control chart with a table of measurements" src="https://flowfuse.com/blog/2026/08/images/spc-chart-data-analysis-close-up.png"/><em>SPC control chart with a table of measurements</em></p><h2 id="how-statistical-process-control-works-spc-charts-and-control-charts-explained">How Statistical Process Control Works: SPC Charts And Control Charts Explained</h2><p>Statistical process control is a method for monitoring a manufacturing process using data collected while it runs, rather than waiting to inspect the finished product. It works by plotting measurements from the process, such as part dimensions, temperature, or pressure, onto a control chart over time. That chart includes a center line at the process average and upper and lower control limits placed three sigma either side of it, derived from the short-term variation within the process itself rather than from a fixed specification. Control limits and specification limits are not the same thing: a process can run entirely inside its control limits and still make parts outside spec, which is why an SPC signal means the process changed, not that a given part is bad.</p><a href="https://flowfuse.com/book-demo/"><img src="https://flowfuse.com/images/cta/arch-systems-book-demo.png" alt="Arch Systems scales automation across complex manufacturing environments with FlowFuse - book a demo"/></a><p>The right control chart depends on how the data is collected. X-bar R and X-bar S charts are built from sample subgroups, small batches of readings pulled close together in time, and plot the subgroup average alongside its range (R) or standard deviation (S). When it isn't practical to pull parts into subgroups, an I-MR chart plots individual readings and the moving range between consecutive points instead. Picking the chart that matches how the data is actually collected is one of the more common places SPC implementations go wrong.</p><p>SPC charts make it possible to see the difference between common cause variation, which is expected and should not be adjusted for point by point, and special cause variation, which signals something has changed and needs investigation. A single point falling outside the control limits is one signal to intervene, but a non-random pattern building up over several points, such as a run drifting steadily in one direction or a cluster of points hugging one side of the center line, is also a signal. Quality teams formalize these checks using the Western Electric Rules or Nelson Rules, which pair the out-of-limit test with additional tests for runs, trends, and points clustering in the outer bands of the chart. Most of those tests fire on a sequence of points that are each individually inside the limits, which is why charts running these rules divide the space into one and two sigma bands rather than just plotting the outer limits. This is the core discipline behind statistical process control: catching drift while it is still correctable, not after a batch has already failed inspection.</p><p>Building and reading control charts by hand across dozens of machines and lines is slow and does not scale well across multiple sites. For a deeper look at how these charts are typically built and interpreted in practice, see <a href="https://flowfuse.com/blog/2025/07/quality-control-automation-spc-charts/">Statistical Process Control (SPC): Benefits and Implementation Guide</a>.</p><p><img alt="Manufacturing quality dashboard showing an SPC chart for bearing diameter and process capability metrics." src="https://flowfuse.com/blog/2026/08/images/manufacturing-quality-dashboard-spc-chart.png"/><em>Manufacturing quality dashboard showing an SPC chart for bearing diameter and process capability metrics.</em></p><h2 id="spc-in-manufacturing-turning-shop-floor-data-into-process-control">SPC In Manufacturing: Turning Shop Floor Data Into Process Control</h2><p>Statistical process control only works if it has a steady stream of accurate data from the process it is monitoring. In most plants, that data lives across <a href="https://flowfuse.com/blog/2025/12/what-is-plc/">PLCs</a>, sensors, <a href="https://flowfuse.com/blog/2025/06/what-is-mes/">MES systems</a>, and manual entry points that were never designed to talk to each other. Getting SPC to work at scale depends on solving that connectivity problem.</p><h3 id="where-spc-data-actually-comes-from">Where SPC Data Actually Comes From</h3><p>Process data for SPC charts typically comes from PLCs, edge devices, and sensors tracking variables like temperature, torque, or dimensional tolerances. Pulling that data into a usable chart requires IT/OT connectivity that moves it securely from the shop floor to wherever it is analyzed, without brittle point-to-point integrations that break every time equipment changes. FlowFuse provides that layer. It reads from PLCs, sensors, and MES over OPC UA, MQTT, or Modbus, so the chart updates from live process data rather than from manual entry.</p><h3 id="deploying-spc-across-multiple-sites-without-rebuilding">Deploying SPC Across Multiple Sites Without Rebuilding</h3><p>What works on one line will not scale to fifty unless the underlying logic can be standardized. FlowFuse customers deploy SPC monitoring using a build once, run everywhere approach, standardizing a proven workflow on one machine and rolling it out across 20+ manufacturing sites from a single platform, without rebuilding it at each new location.</p><h3 id="working-with-brownfield-systems-instead-of-replacing-them">Working With Brownfield Systems Instead Of Replacing Them</h3><p>Most plants run a mix of legacy PLCs, older MES installations, and newer edge hardware. Rather than requiring a full system replacement, SPC monitoring can extend a brownfield environment as-is. This staged approach avoids the all-or-nothing rollout risk described in <a href="https://flowfuse.com/blog/2026/05/manufacturing-software-built-in-stages/">All-or-Nothing Manufacturing Software Is Killing Your Agility</a>.</p><h2 id="six-sigma-spc-and-modern-spc-software-choosing-the-right-tools">Six Sigma SPC And Modern SPC Software: Choosing The Right Tools</h2><p>Statistical process control does not exist in isolation. It works alongside broader quality methodologies and depends on the right software to make the data usable at scale. Choosing how SPC fits into your quality program and which tools support it are two separate decisions that shape how much value you get from the practice.</p><h3 id="spcs-role-in-six-sigma-methodology">SPC's Role In Six Sigma Methodology</h3><p>Six Sigma SPC refers to using control charts within the Six Sigma framework, particularly during the Control phase of DMAIC. The chart provides the ongoing measurement that shows whether an improvement is holding, rather than a one-time check to declare the project complete.</p><h3 id="what-to-look-for-in-spc-software">What To Look For In SPC Software</h3><p>SPC software should connect directly to the data sources already on your shop floor rather than requiring manual data entry. Look for real-time monitoring, support for brownfield environments with existing PLCs and MES systems, and a way to deploy the same setup across multiple sites without reconfiguring it at each one. FlowFuse covers all three: connect the measurement over <a href="https://flowfuse.com/blog/2025/07/reading-and-writing-plc-data-using-opc-ua/">OPC UA</a>, <a href="https://flowfuse.com/blog/2024/06/how-to-use-mqtt-in-node-red/">MQTT</a>, or <a href="https://flowfuse.com/blog/2025/09/using-modbus-with-flowfuse/">Modbus</a>, chart it with calculated limits and alerts on a dashboard at the line, then roll that same setup out everywhere else.</p><h3 id="spc-alongside-other-root-cause-tools">SPC Alongside Other Root Cause Tools</h3><p>Control charts show you when a process has drifted, but they do not always explain why. Pairing SPC with other root cause analysis tools helps close that gap. For a breakdown of one commonly used tool for identifying the biggest contributors to a quality issue, see <a href="https://flowfuse.com/blog/2025/08/pareto-chart-manufacturing-guide/">Pareto Chart &amp; Diagram for Manufacturing</a>.</p><h2 id="final-thoughts">Final Thoughts</h2><p>Statistical process control gives manufacturers a way to catch problems while they are still cheap to fix, but only if the underlying data actually reaches the people and systems that need it. That is often the harder part. Most plants already have the sensors and PLCs generating the right signals; what is missing is a reliable way to move that data from the shop floor into a usable chart, consistently, across every line and every site.</p><p>This is where an industrial application platform like FlowFuse fits. It connects the equipment, and your team builds the chart and the alerts on top of that data by dragging nodes, not writing code. It runs on the line, and you deploy the same setup at the next plant instead of rebuilding it. For manufacturers managing quality across dozens of sites, that difference determines whether SPC becomes a routine part of operations or another initiative that never quite scales past the pilot line.</p><h2 id="sources">Sources</h2><ul><li>American Society for Quality (ASQ). <a href="https://asq.org/quality-resources/statistical-process-control" rel="nofollow">"What Is Statistical Process Control? SPC Quality Tools."</a></li><li>American Society for Quality (ASQ). <a href="https://asq.org/quality-progress/articles/understanding-variation?id=3415f81b6f9444c4a30e6bb03aff7903" rel="nofollow">"Understanding Variation."</a></li><li>American Society for Quality (ASQ). <a href="https://asq.org/quality-resources/control-chart" rel="nofollow">"Control Chart – Statistical Process Control Charts."</a></li><li>International Organization for Standardization. <a href="https://www.iso.org/standard/78859.html" rel="nofollow">"ISO 7870-2:2023 — Control Charts, Part 2: Shewhart Control Charts."</a></li><li>NIST/SEMATECH e-Handbook of Statistical Methods. <a href="https://www.itl.nist.gov/div898/handbook/pmc/section3/pmc321.htm" rel="nofollow">"Shewhart X-bar and R and S Control Charts."</a></li><li>NIST/SEMATECH e-Handbook of Statistical Methods. <a href="https://www.itl.nist.gov/div898/handbook/pmc/section3/pmc312.htm" rel="nofollow">"Individuals Control Charts."</a></li></ul><p><strong>Bring SPC To Every Line You Run</strong></p><p>See how FlowFuse connects your PLCs, MES, and SCADA systems, then builds real-time SPC charts and rolls out the same setup across every site.</p><p><a href="https://flowfuse.com/contact-us/">Contact Us</a></p>]]></content>
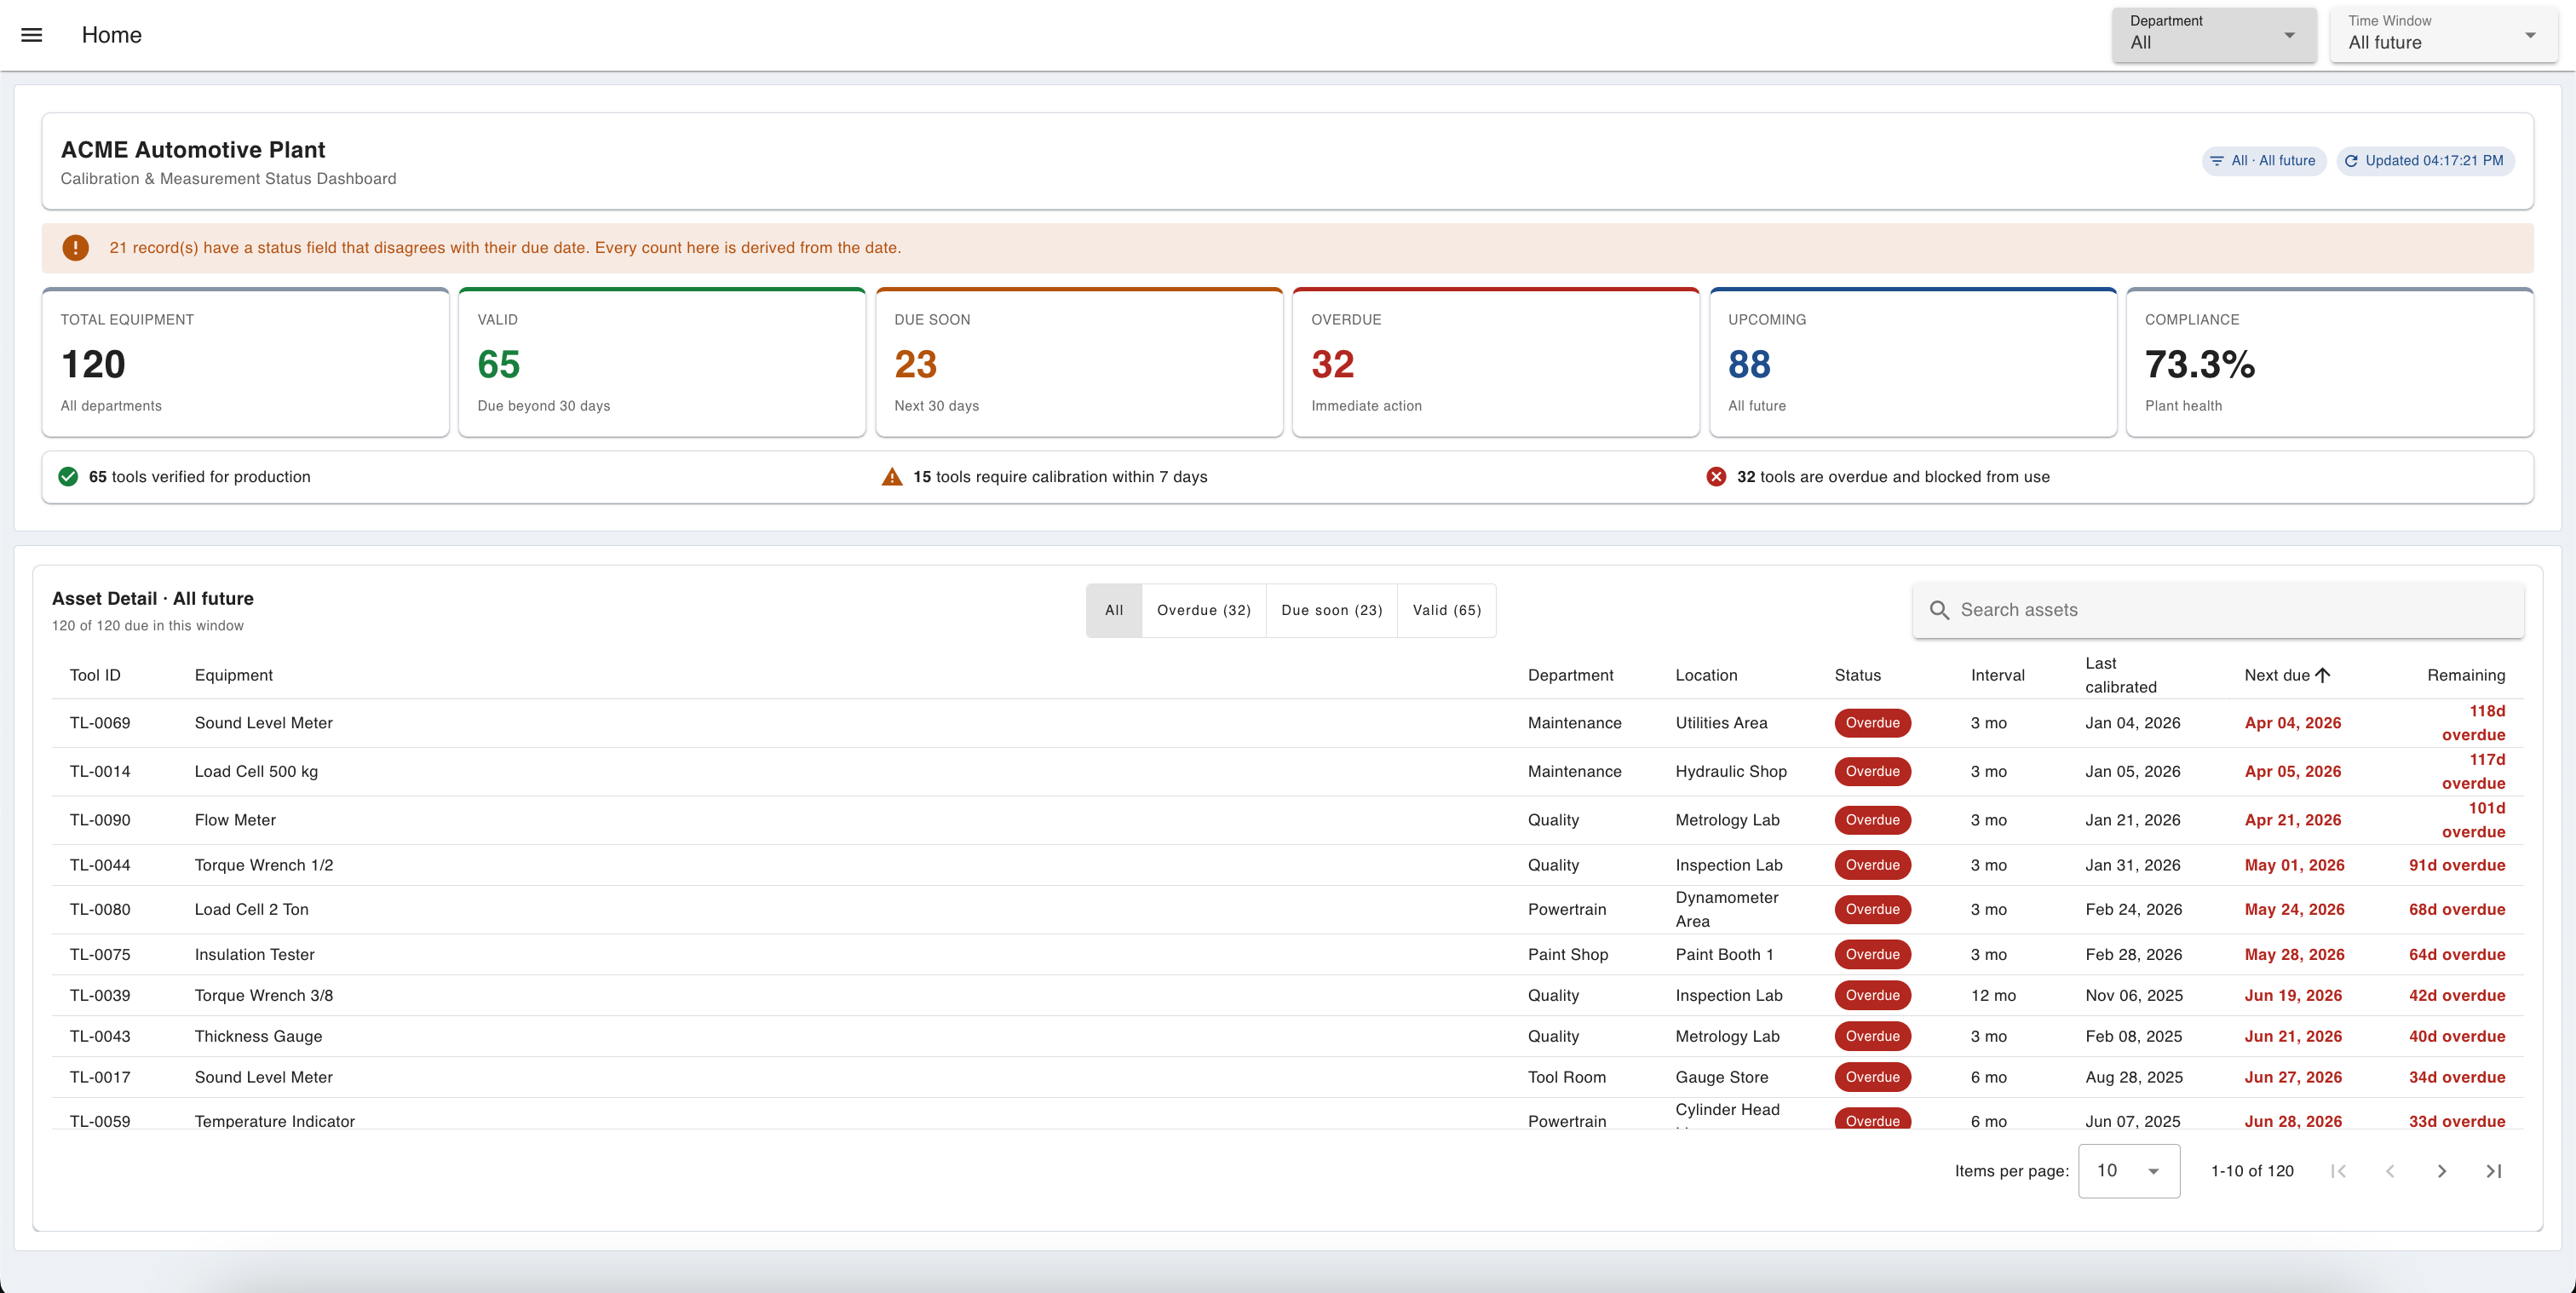
        <updated>2026-08-05T00:00:00.000Z</updated>
        <link href="https://flowfuse.com/blog/2026/08/statistical-process-control/"/>
        
    </entry>
    <entry>
        <id>https://flowfuse.com/blog/2026/07/calibration-management-dashboard/</id>
        <title>Tracking Instrument Calibration with a Digital Dashboard</title>
        <summary>Build a FlowFuse calibration dashboard that works out overdue, due-soon and compliance figures from the due dates instead of a stored status column, filters by department and time window from the app bar, lists every instrument due in that window with days remaining, and gives operators a camera-based tool check at the station.</summary>
        <content type="html"><![CDATA[<p>Most plants know their calibration status at two moments: when someone updates the spreadsheet, and when an auditor asks. The records already hold enough to do better than that: a last calibration date, an interval, and a next due date for every instrument.</p><p>Most registers also have a status field next to those dates, and reading it seems like the obvious move. But whatever writes that field can fall behind. Then the dashboard reports a compliant plant while due dates quietly pass. This build works out every figure from the due date instead, and counts how often the stored status disagrees with it.</p><p>For background on calibration records, including what they should contain, how calibration intervals are determined, and why overdue instruments matter, see <a href="https://flowfuse.com/blog/2026/07/what-is-instrument-calibration/">What Is Instrument Calibration (Equipment Calibration)?</a>.</p><p>A screen in the quality office is only half the job, though. The moment that matters is when someone picks up a torque wrench, and that person isn't looking at a dashboard. So the same check also runs behind a camera at the station: scan the label, get a verdict.</p><p><img alt="Calibration status dashboard showing KPI cards for total equipment, valid, due soon, overdue, upcoming, and compliance percentage" src="https://flowfuse.com/blog/2026/07/images/calibration-management-dashboard.png"/> <em>The finished dashboard: filters in the app bar, KPI row, and asset detail table on one page.</em></p><p>In this article, we'll build a calibration application in FlowFuse. It will show plant-level compliance figures, let you filter by department and time window, give an asset-level view of what's due and when, and offer a camera-based tool check for the shop floor.</p><blockquote><p><strong>Note:</strong> This tutorial reads from a <code>calibration_assets</code> table in FlowFuse Tables, filled with sample instruments. Everything here works the same against a real calibration register, a CMMS, or an ERP endpoint. Only the query nodes change.</p></blockquote><p>You can interact with the live demo here: .</p><h2 id="what-youll-need">What You'll Need</h2><p>Before you start building, get these ready:</p><ul><li><strong>A FlowFuse account.</strong> <a href="https://app.flowfuse.com/account/create" rel="nofollow">Sign up</a> for FlowFuse Cloud, or use a self-hosted instance.</li><li><strong>A FlowFuse instance up and running.</strong> If you don't have one yet, create a new instance from your FlowFuse Platform.</li><li><strong>FlowFuse Dashboard installed.</strong> This tutorial uses <code>@flowfuse/node-red-dashboard</code> nodes (<code>ui-template</code>, <code>ui-event</code>, <code>ui-button</code>, <code>ui-markdown</code>, <code>ui-notification</code>, <code>ui-page</code>, <code>ui-group</code>, <code>ui-theme</code>) to build both pages. Install it from the Palette Manager if it isn't already in your instance.</li><li><strong>A webcam node and an OCR node.</strong> The Tool Check page uses <code>@sumit_shinde_84/node-red-dashboard-2-ui-webcam</code> to capture the label and <code>@sumit_shinde_84/node-red-contrib-simple-ocr</code> to read it. Install both from the Palette Manager.</li><li><strong>A device with a camera</strong> for the Tool Check page, since the scanner works through the browser.</li></ul><blockquote><p><strong>Note:</strong> <a href="https://flowfuse.com/docs/user/ff-tables/">FlowFuse Tables</a> is available to Enterprise tier teams on FlowFuse Cloud, and to Enterprise licensed self-hosted teams running on Kubernetes. If you're on a different tier, use any external database instead, such as Postgres or MySQL, with the standard database nodes from the palette. The SQL here is standard PostgreSQL, and the widgets only care about the shape of the rows, not where they came from.</p></blockquote><h2 id="how-the-application-works">How the Application Works</h2><p>Before we build anything, let's walk through what the application does. There are two pages, and one idea holding them together.</p><ol><li><strong>Home.</strong> A quality engineer picks a department and how far ahead to look. Six figures across the top show how much equipment there is, and how much of it is valid, due soon, overdue, coming up in the chosen window, and compliant overall. Below that is a list of instruments due inside that window, most urgent first, each with its status, due date, and days remaining. The cards describe the whole register for the chosen department. Only the <strong>Upcoming</strong> figure and the table below respond to the time window.</li><li><strong>Tool Check.</strong> An operator holds a calibration label up to the camera and presses <strong>SCAN</strong>. The app reads the tool ID off the label, looks it up, and shows an answer in the middle of the screen: <strong>OK to use</strong>, <strong>Do not use</strong>, <strong>Not in register</strong>, or <strong>Label not readable</strong>. No numbers to interpret and no dashboard to search through.</li></ol><p>The due date is the single source of truth for the whole application. Every KPI figure, every status chip in the table, and the scanner's verdict all come from comparing that date to the current time. That is what stops the office screen and the station gate from ever telling two different stories about the same tool.</p><h2 id="importing-the-simulated-flow">Importing the Simulated Flow</h2><p>Instead of pointing the application at a live calibration register, we'll generate one.</p><ol><li>Import the following flow into FlowFuse and click <strong>Deploy</strong>.</li><li>Click the trigger on <strong>Create Table</strong>, then the trigger on <strong>Generate &amp; Insert Automotive Calibration Dataset</strong>. <strong>Drop Table</strong> is there for when you want to start over from scratch.</li></ol><p>That gives you 120 instruments with IDs from <code>TL-0001</code> to <code>TL-0120</code>, spread across eight departments: roughly 70% valid, 20% due soon, and 10% overdue. The eight department names are the same ones the filter dropdown offers later.</p><p>Everything we build reads from these columns:</p><table><thead><tr><th>Column</th><th>What the application does with it</th></tr></thead><tbody><tr><td><code>tool_id</code></td><td>Primary key, and the ID printed on the calibration label that the scanner matches against</td></tr><tr><td><code>next_due_ts</code></td><td>Every status figure, chip, and scanner verdict comes from comparing this against the current time</td></tr><tr><td><code>status</code></td><td>The stored label. We deliberately don't trust it, and use it only to spot drift from the dates</td></tr><tr><td><code>department</code></td><td>Drives the Department filter on the dashboard</td></tr><tr><td><code>equipment_name</code></td><td>Names the instrument in the table and in the scanner verdict</td></tr><tr><td><code>location</code>, <code>calibration_interval_months</code>, <code>last_calibration_ts</code></td><td>Table columns</td></tr><tr><td><code>serial_number</code>, <code>calibration_lab</code>, <code>certificate_no</code>, <code>created_at</code></td><td>Kept for reference; nothing in this build shows them</td></tr></tbody></table><blockquote><p><strong>Note:</strong> Your register will likely name these columns differently. Alias your columns in the <code>SELECT</code> list, as in <code>SELECT gauge_ref AS tool_id, cal_due_date AS next_due_ts, ...</code>, and every widget will still work. Only the due-date column is essential.</p></blockquote><p>Before running the generator, set its reference date near the top of the function, <code>const today = new Date('2026-07-28T10:00:00')</code>, to roughly today's date. Otherwise everything will land relative to a date in the past.</p><h2 id="setting-up-the-dashboard-layout">Setting Up the Dashboard Layout</h2><p>The application has two pages and four groups. Most widgets sit inside a named group. The filter bar is scoped to the page instead, because it appears in the app bar rather than in the grid. See the <a href="https://dashboard.flowfuse.com/getting-started" rel="nofollow">Dashboard layout docs</a> if you're new to how pages, groups, and bases relate.</p><ol><li>Create two <strong>ui-page</strong> nodes. The Dashboard automatically creates a base dashboard the first time you add a Dashboard node to the canvas.<ul><li><strong>Home</strong> (path: <code>/home</code>): the calibration status dashboard. Set the layout to <strong>Grid</strong>.</li><li><strong>Tool Check</strong> (path: <code>/tool-check</code>): the scanner. Set the layout to <strong>Notebook</strong>.</li></ul></li><li>On the <strong>Home</strong> page, create two <strong>ui-group</strong> nodes, both <strong>12 columns</strong> wide with <strong>Show title</strong> turned off:<ul><li><strong>KPIs</strong> (order 1)</li><li><strong>Asset Detail</strong> (order 2)</li></ul></li><li>On the <strong>Tool Check</strong> page, create two more <strong>ui-group</strong> nodes, also <strong>12 columns</strong> wide with titles off:<ul><li><strong>Scanner</strong> (order 1)</li><li><strong>Verdict</strong> (order 2)</li></ul></li><li>Open the <strong>ui-base</strong> node and set <strong>Header Content</strong> to <strong>page</strong>. This shows the app bar, which the filter widget needs.</li><li>Set up the ui-theme to suit your needs. The dashboard already comes with a default theme, which you can use for now.</li></ol><h2 id="building-the-filter-bar">Building the Filter Bar</h2><p>Two controls drive the page: which department, and how far ahead to look. Both sit in the app bar rather than the grid, so no row of the page is used up by a dropdown.</p><p>The department list is read from the register itself, not typed in by hand, so adding a department next year doesn't mean editing a flow. The time windows are fixed, because "next 30 days" is a choice this application makes rather than something the data tells you.</p><ol><li>Add a <code>ui-event</code> node named "Page Load / Refresh Event" and select your "My Dashboard" ui-base. It fires whenever a page loads.</li><li>Add a <code>tables-query</code> node named "Load Departments":</li></ol><blockquote><p><strong>Tip:</strong> You don't have to write the SQL yourself either. Use <a href="https://flowfuse.com/blog/2025/09/ai-assistant-flowfuse-tables/">FlowFuse Expert</a> and describe what you want the query to return in plain English, and it will generate the SQL for you.</p></blockquote><pre class="language-sql shiki shiki-themes material-theme-lighter material-theme material-theme-palenight" code="SELECT DISTINCT department

FROM calibration_assets
WHERE department IS NOT NULL
  AND btrim(department) &lt;&gt; ''
ORDER BY department;
" language="sql" meta="" style=""><code __ignore-map=""><span class="line" line="1"><span>SELECT DISTINCT department
</span></span><span class="line" line="2"><span>FROM calibration_assets
</span></span><span class="line" line="3"><span>WHERE department IS NOT NULL
</span></span><span class="line" line="4"><span>  AND btrim(department) &lt;&gt; ''
</span></span><span class="line" line="5"><span>ORDER BY department;
</span></span></code></pre><ol><li>Import the <strong>App Header Filters</strong> <code>ui-template</code> below, set its type to <strong>Widget (Page-Scoped)</strong>, select the <strong>Home</strong> page, and turn off <strong>Pass through messages from input to output</strong>. The complete component is provided below, so there's no need to build it yourself. It shows two dropdowns in the header using Vue's <a href="https://flowfuse.com/blog/2024/08/customise-theming-in-your-dashboards/#adding-elements-in-the-header">Teleport</a>: <strong>Department</strong>, filled from the query above, and <strong>Time Window</strong>. It opens on <em>All</em> departments and <em>Next 90 days</em>, sends <code>{ department, timeWindow }</code> on every change, and sends the same on load so the dropdowns and the data always agree.</li></ol><blockquote><p><strong>Tip:</strong> Whenever you need a custom Dashboard widget, you don't have to write the Vue code yourself. Use <a href="https://flowfuse.com/docs/user/expert/node-red-embedded-ai/#css-and-html-generation-for-flowfuse-dashboard">FlowFuse Expert</a> and describe the widget in plain English, and it will generate the <code>ui-template</code> for you.</p></blockquote><ol start="4"><li>Add a <code>change</code> node named "Save Filters to Global Context" and set the persistent global <code>filters</code> to <code>msg.payload</code>.</li><li>Add a <code>link out</code> node named "Filters Changed". This is what makes the page respond right away. Changing a dropdown writes the new selection to context, but nothing would redraw until the next poll tick, so the operator would be looking at stale numbers for up to fifteen seconds. The link carries the change straight into the next flow, which re-runs its query and refreshes the page.</li><li>Wire the nodes: <strong>Page Load / Refresh Event → Load Departments → App Header Filters → Save Filters to Global Context → Filters Changed</strong>.</li></ol><p><img alt="Placeholder: the app bar showing the Department and Time Window dropdowns" src="https://flowfuse.com/blog/2026/07/images/header-dropdown.png"/> <em>The Department and Time Window dropdowns shown in the app bar, with departments read from the register.</em></p><h2 id="working-out-the-kpi-figures-from-the-due-dates">Working Out the KPI Figures from the Due Dates</h2><p>This is where we stop using the register's <code>status</code> column. Every figure on the page comes from comparing <code>next_due_ts</code> against the current time, and one extra count reports how often the stored status disagrees with that comparison.</p><ol><li>Add an <code>inject</code> node named "Poll Data (15 sec)", set it to repeat every <strong>15</strong> seconds and to fire once shortly after deploy, so the page has data before the first tick.</li><li>Add a <code>link in</code> node named "Filters Changed" and point it at the link out from the filter bar.</li><li>Add a <code>change</code> node named "Set Params". This maps the saved filters onto the <code>$department</code> and <code>$timeWindow</code> parameters the SQL reads. Set three rules, in order:<ul><li>Set <code>queryParameters</code> to <code>{}</code> (JSON): starts clean so old values don't linger.</li><li>Set <code>queryParameters.department</code> to <code>filters.department</code> (global persistent).</li><li>Set <code>queryParameters.timeWindow</code> to <code>filters.timeWindow</code> (global persistent).</li></ul></li></ol><p><img alt="Set Params change node with its three rules" src="https://flowfuse.com/blog/2026/07/images/set-params.png"/> <em>The "Set Params" change node open in the edit panel, all three rules visible.</em></p><ol><li>Add a <code>tables-query</code> node named "KPI Query":</li></ol><pre class="language-sql shiki shiki-themes material-theme-lighter material-theme material-theme-palenight" code="SELECT
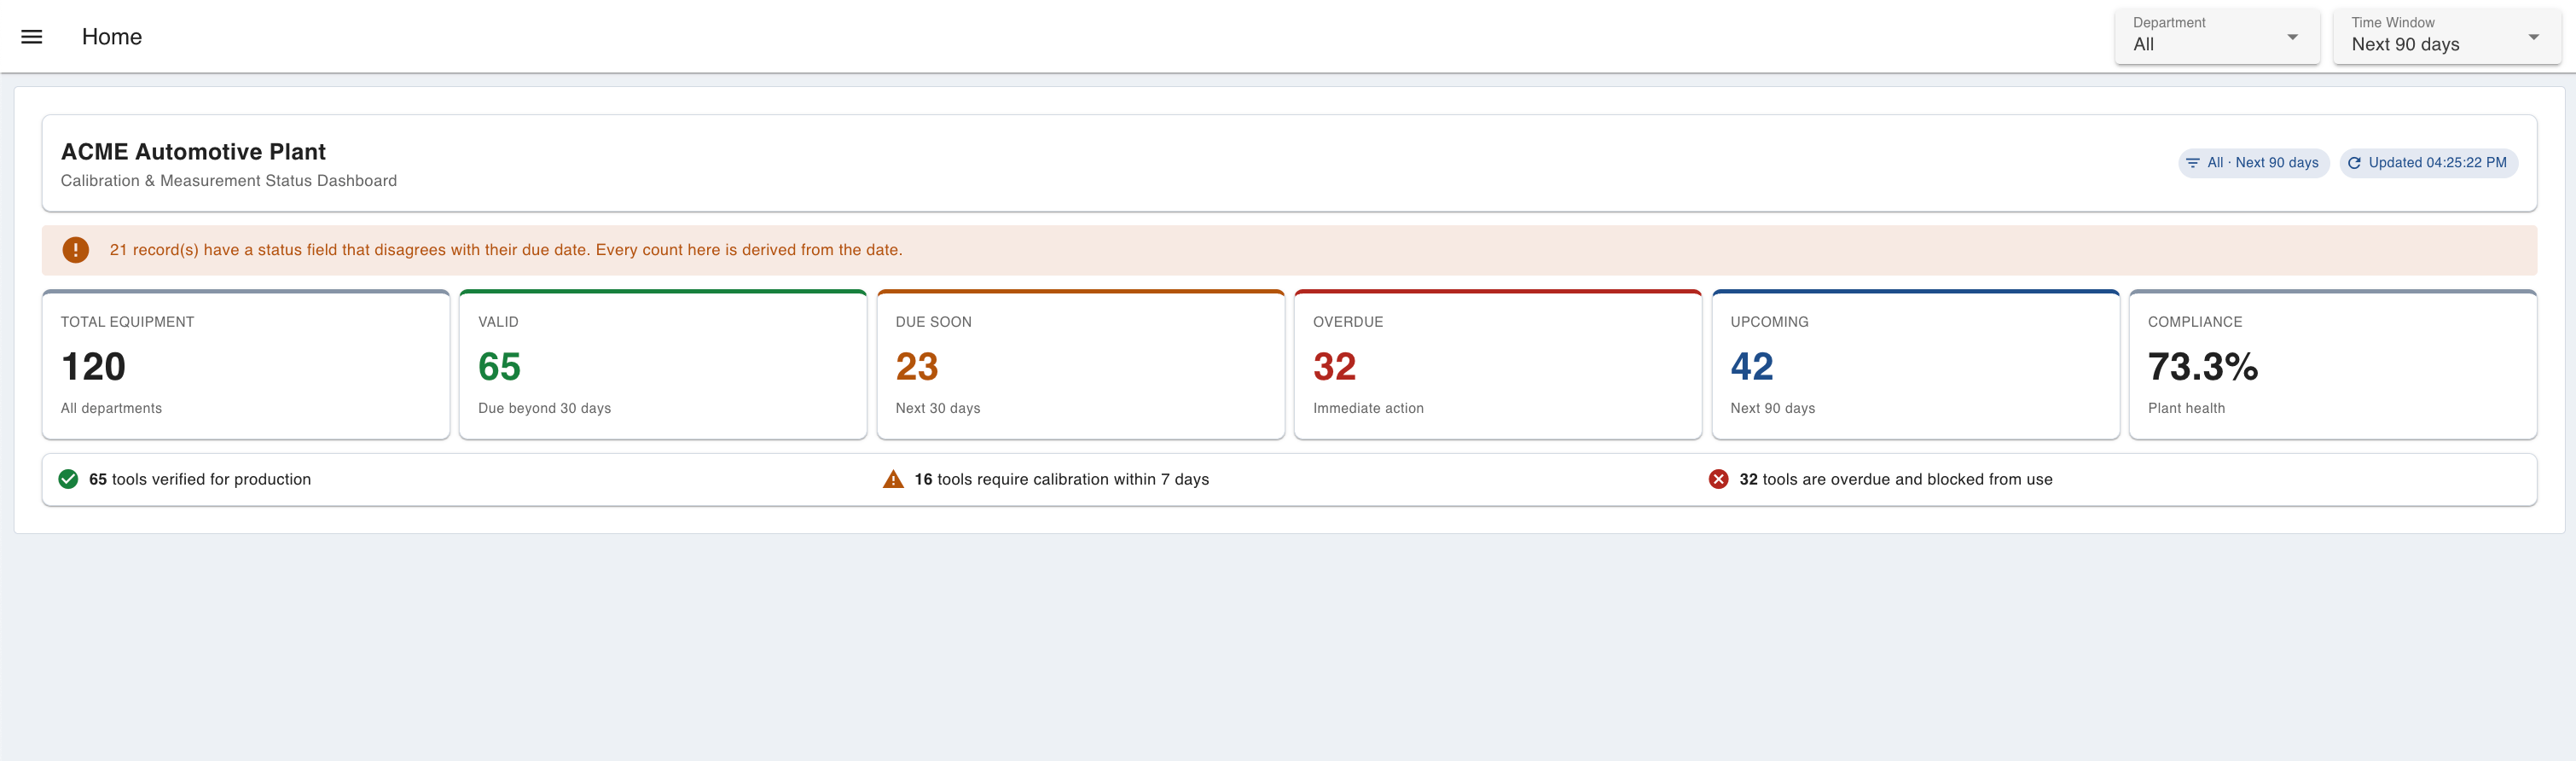
    -- Sent back so the cards label themselves from the data on screen,
    -- not from whatever the dropdowns happen to show. COALESCE covers the
    -- first poll after deploy, before any browser has sent a selection.
    COALESCE($department::text, 'All')          AS filter_department,
    COALESCE($timeWindow::text, 'Next 90 days') AS filter_window,

    COUNT(*) AS total_assets,

    -- Buckets worked out from next_due_ts instead of the stored status column,
    -- which drifts whenever whatever writes it falls behind. These three
    -- don't overlap, and add up to total_assets. The 30-day threshold is a
    -- policy decision, not a view setting: it does not change with the dropdown.
    COUNT(*) FILTER (
        WHERE next_due_ts &gt; NOW() + INTERVAL '30 days'
    ) AS valid_assets,

    COUNT(*) FILTER (
        WHERE next_due_ts &gt;= NOW()
          AND next_due_ts &lt;= NOW() + INTERVAL '30 days'
    ) AS due_soon_assets,

    COUNT(*) FILTER (
        WHERE next_due_ts &lt; NOW()
    ) AS overdue_assets,

    -- The only figure the Time Window dropdown affects. It sends a label, so
    -- it maps to an interval here; ELSE also catches an unrecognised label.
    COUNT(*) FILTER (
        WHERE next_due_ts &gt;= NOW()
          AND next_due_ts &lt;= NOW() + (
              CASE COALESCE($timeWindow::text, 'Next 90 days')
                  WHEN 'Next 7 days'  THEN INTERVAL '7 days'
                  WHEN 'Next 30 days' THEN INTERVAL '30 days'
                  WHEN 'Next 90 days' THEN INTERVAL '90 days'
                  WHEN 'All future'   THEN INTERVAL '100 years'
                  ELSE INTERVAL '90 days'
              END
          )
    ) AS due_in_window,

    COUNT(*) FILTER (
        WHERE next_due_ts BETWEEN NOW()
                            AND NOW() + INTERVAL '7 days'
    ) AS due_next_7_days,

    -- Compliance means "inside its calibration interval", which includes
    -- tools due soon, since they have not expired yet.
    ROUND(
        COUNT(*) FILTER (WHERE next_due_ts &gt;= NOW()) * 100.0
        / NULLIF(COUNT(*), 0),
        1
    ) AS valid_percentage,

    -- Counts records where the stored status and the live date disagree, so
    -- the drift shows up on the dashboard instead of staying hidden.
    COUNT(*) FILTER (
        WHERE (status = 'Overdue') &lt;&gt; (next_due_ts &lt; NOW())
    ) AS stale_status_count

FROM calibration_assets
-- Driven by the Department dropdown; 'All' turns the filter off.
WHERE (COALESCE($department::text, 'All') = 'All'
       OR department = $department::text);
" language="sql" meta="" style=""><code __ignore-map=""><span class="line" line="1"><span>SELECT
</span></span><span class="line" line="2"><span>    -- Sent back so the cards label themselves from the data on screen,
</span></span><span class="line" line="3"><span>    -- not from whatever the dropdowns happen to show. COALESCE covers the
</span></span><span class="line" line="4"><span>    -- first poll after deploy, before any browser has sent a selection.
</span></span><span class="line" line="5"><span>    COALESCE($department::text, 'All')          AS filter_department,
</span></span><span class="line" line="6"><span>    COALESCE($timeWindow::text, 'Next 90 days') AS filter_window,
</span></span><span class="line" line="7"><span empty-line-placeholder>
</span></span><span class="line" line="8"><span>    COUNT(*) AS total_assets,
</span></span><span class="line" line="9"><span empty-line-placeholder>
</span></span><span class="line" line="10"><span>    -- Buckets worked out from next_due_ts instead of the stored status column,
</span></span><span class="line" line="11"><span>    -- which drifts whenever whatever writes it falls behind. These three
</span></span><span class="line" line="12"><span>    -- don't overlap, and add up to total_assets. The 30-day threshold is a
</span></span><span class="line" line="13"><span>    -- policy decision, not a view setting: it does not change with the dropdown.
</span></span><span class="line" line="14"><span>    COUNT(*) FILTER (
</span></span><span class="line" line="15"><span>        WHERE next_due_ts &gt; NOW() + INTERVAL '30 days'
</span></span><span class="line" line="16"><span>    ) AS valid_assets,
</span></span><span class="line" line="17"><span empty-line-placeholder>
</span></span><span class="line" line="18"><span>    COUNT(*) FILTER (
</span></span><span class="line" line="19"><span>        WHERE next_due_ts &gt;= NOW()
</span></span><span class="line" line="20"><span>          AND next_due_ts &lt;= NOW() + INTERVAL '30 days'
</span></span><span class="line" line="21"><span>    ) AS due_soon_assets,
</span></span><span class="line" line="22"><span empty-line-placeholder>
</span></span><span class="line" line="23"><span>    COUNT(*) FILTER (
</span></span><span class="line" line="24"><span>        WHERE next_due_ts &lt; NOW()
</span></span><span class="line" line="25"><span>    ) AS overdue_assets,
</span></span><span class="line" line="26"><span empty-line-placeholder>
</span></span><span class="line" line="27"><span>    -- The only figure the Time Window dropdown affects. It sends a label, so
</span></span><span class="line" line="28"><span>    -- it maps to an interval here; ELSE also catches an unrecognised label.
</span></span><span class="line" line="29"><span>    COUNT(*) FILTER (
</span></span><span class="line" line="30"><span>        WHERE next_due_ts &gt;= NOW()
</span></span><span class="line" line="31"><span>          AND next_due_ts &lt;= NOW() + (
</span></span><span class="line" line="32"><span>              CASE COALESCE($timeWindow::text, 'Next 90 days')
</span></span><span class="line" line="33"><span>                  WHEN 'Next 7 days'  THEN INTERVAL '7 days'
</span></span><span class="line" line="34"><span>                  WHEN 'Next 30 days' THEN INTERVAL '30 days'
</span></span><span class="line" line="35"><span>                  WHEN 'Next 90 days' THEN INTERVAL '90 days'
</span></span><span class="line" line="36"><span>                  WHEN 'All future'   THEN INTERVAL '100 years'
</span></span><span class="line" line="37"><span>                  ELSE INTERVAL '90 days'
</span></span><span class="line" line="38"><span>              END
</span></span><span class="line" line="39"><span>          )
</span></span><span class="line" line="40"><span>    ) AS due_in_window,
</span></span><span class="line" line="41"><span empty-line-placeholder>
</span></span><span class="line" line="42"><span>    COUNT(*) FILTER (
</span></span><span class="line" line="43"><span>        WHERE next_due_ts BETWEEN NOW()
</span></span><span class="line" line="44"><span>                            AND NOW() + INTERVAL '7 days'
</span></span><span class="line" line="45"><span>    ) AS due_next_7_days,
</span></span><span class="line" line="46"><span empty-line-placeholder>
</span></span><span class="line" line="47"><span>    -- Compliance means "inside its calibration interval", which includes
</span></span><span class="line" line="48"><span>    -- tools due soon, since they have not expired yet.
</span></span><span class="line" line="49"><span>    ROUND(
</span></span><span class="line" line="50"><span>        COUNT(*) FILTER (WHERE next_due_ts &gt;= NOW()) * 100.0
</span></span><span class="line" line="51"><span>        / NULLIF(COUNT(*), 0),
</span></span><span class="line" line="52"><span>        1
</span></span><span class="line" line="53"><span>    ) AS valid_percentage,
</span></span><span class="line" line="54"><span empty-line-placeholder>
</span></span><span class="line" line="55"><span>    -- Counts records where the stored status and the live date disagree, so
</span></span><span class="line" line="56"><span>    -- the drift shows up on the dashboard instead of staying hidden.
</span></span><span class="line" line="57"><span>    COUNT(*) FILTER (
</span></span><span class="line" line="58"><span>        WHERE (status = 'Overdue') &lt;&gt; (next_due_ts &lt; NOW())
</span></span><span class="line" line="59"><span>    ) AS stale_status_count
</span></span><span class="line" line="60"><span empty-line-placeholder>
</span></span><span class="line" line="61"><span>FROM calibration_assets
</span></span><span class="line" line="62"><span>-- Driven by the Department dropdown; 'All' turns the filter off.
</span></span><span class="line" line="63"><span>WHERE (COALESCE($department::text, 'All') = 'All'
</span></span><span class="line" line="64"><span>       OR department = $department::text);
</span></span></code></pre><p><code>stale_status_count</code> is the figure worth watching. It counts the rows where the stored status and the due date disagree, which is the number that justifies leaving the status column out of every other calculation.</p><ol start="5"><li>Add a <code>link out</code> node named "Refresh Asset Table" and wire it from <strong>Set Params</strong>, so the table below runs on the same selection instead of working it out again.</li><li>Import the <strong>KPI Cards</strong> <code>ui-template</code> below and assign it to the <strong>KPIs</strong> group. The complete component is provided below, so there's no need to build it yourself. It shows a header with the active filter and a last-updated time, six cards for total equipment, valid, due soon, overdue, upcoming and compliance, and a three-line summary strip. When <code>stale_status_count</code> is above zero it also shows a warning banner naming the number of drifted records.</li></ol><ol start="7"><li>Wire the nodes: <strong>Poll Data (15 sec) → Set Params → KPI Query → KPI Cards</strong>, and <strong>Filters Changed → Set Params</strong>.</li></ol><p>Deploy and open <code>/home</code>. The six cards fill in, and on the seeded data the drift banner should appear right away, because the generator creates records whose stored status no longer matches their due date.</p><p><img alt="the KPI row showing six cards and the summary strip" src="https://flowfuse.com/blog/2026/07/images/kpi-cards-calibration.png"/> <em>Six figures worked out from the due dates, with the active filter and refresh time shown in the header.</em></p><h2 id="listing-every-instrument-with-days-remaining">Listing Every Instrument with Days Remaining</h2><p>The cards tell a supervisor how much is overdue. This table tells them which tools, so someone can actually go and collect them. It's a worklist rather than a full register dump, which is why the time window scopes it down.</p><ol><li>Add a <code>link in</code> node named "Refresh Asset Table" and point it at the link out from the KPI flow. Taking the filters from that message instead of reading context again is what keeps the table and the cards working from the same selection.</li><li>Add a <code>tables-query</code> node named "Asset Rows":</li></ol><pre class="language-sql shiki shiki-themes material-theme-lighter material-theme material-theme-palenight" code="SELECT
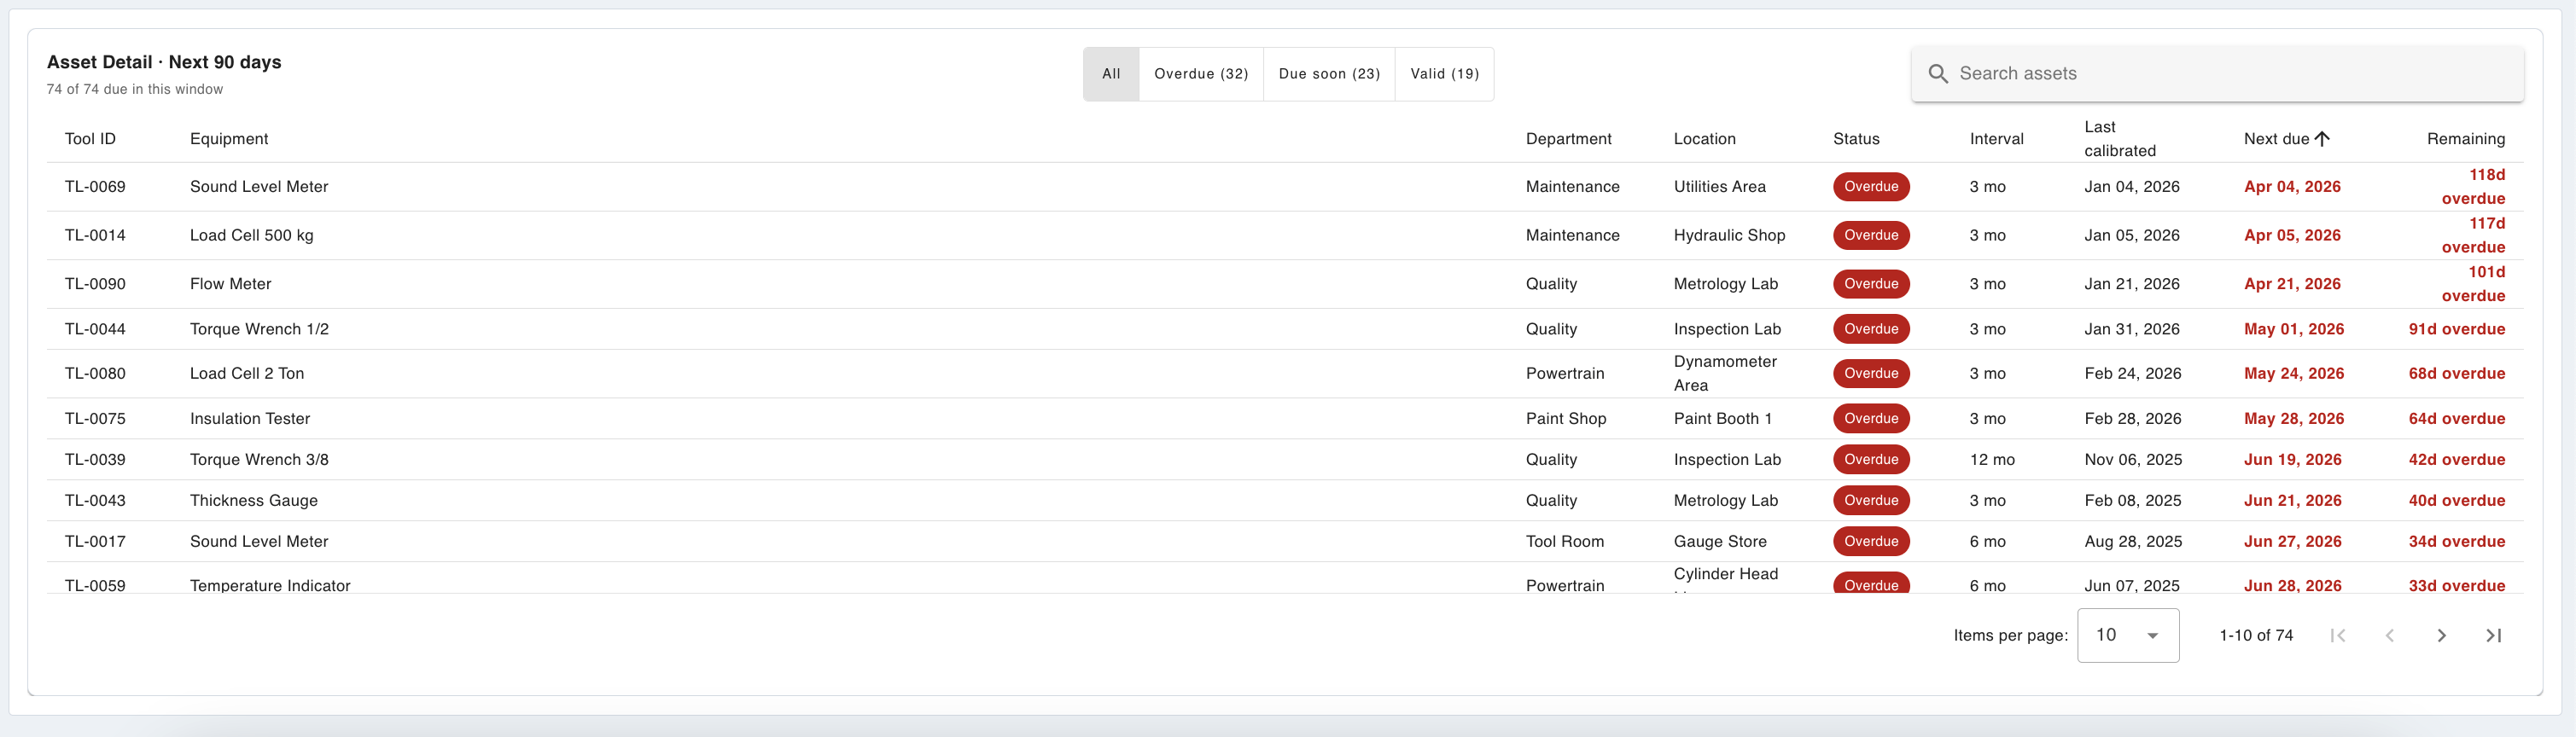
    -- Sent back so the table can state its own scope in the header.
    COALESCE($timeWindow::text, 'Next 90 days') AS filter_window,

    tool_id,
    equipment_name,
    department,
    location,
    serial_number,

    -- Same 30-day policy threshold as the KPI buckets, so a tool never reads
    -- one status here and another elsewhere. The bare column name still
    -- refers to the table column.
    CASE
        WHEN next_due_ts &lt; NOW() THEN 'Overdue'
        WHEN next_due_ts &lt;= NOW() + INTERVAL '30 days' THEN 'DueSoon'
        ELSE 'Valid'
    END AS status,
    status AS stored_status,

    last_calibration_ts,
    next_due_ts,
    calibration_interval_months,
    calibration_lab,
    certificate_no,

    -- Negative for anything already past due, which the widget shows as
    -- "12d overdue" rather than "-12d".
    (next_due_ts::date - CURRENT_DATE) AS days_remaining

FROM calibration_assets

-- This is a worklist, not the whole register: the window scopes it to what
-- needs attention. Overdue tools have a past due date, so the upper bound
-- already includes them; no separate clause needed.
WHERE (COALESCE($department::text, 'All') = 'All'
       OR department = $department::text)
  AND next_due_ts &lt;= NOW() + (
      CASE COALESCE($timeWindow::text, 'Next 90 days')
          WHEN 'Next 7 days'  THEN INTERVAL '7 days'
          WHEN 'Next 30 days' THEN INTERVAL '30 days'
          WHEN 'Next 90 days' THEN INTERVAL '90 days'
          WHEN 'All future'   THEN INTERVAL '100 years'
          ELSE INTERVAL '90 days'
      END
  )

ORDER BY next_due_ts ASC
LIMIT 500;
" language="sql" meta="" style=""><code __ignore-map=""><span class="line" line="1"><span>SELECT
</span></span><span class="line" line="2"><span>    -- Sent back so the table can state its own scope in the header.
</span></span><span class="line" line="3"><span>    COALESCE($timeWindow::text, 'Next 90 days') AS filter_window,
</span></span><span class="line" line="4"><span empty-line-placeholder>
</span></span><span class="line" line="5"><span>    tool_id,
</span></span><span class="line" line="6"><span>    equipment_name,
</span></span><span class="line" line="7"><span>    department,
</span></span><span class="line" line="8"><span>    location,
</span></span><span class="line" line="9"><span>    serial_number,
</span></span><span class="line" line="10"><span empty-line-placeholder>
</span></span><span class="line" line="11"><span>    -- Same 30-day policy threshold as the KPI buckets, so a tool never reads
</span></span><span class="line" line="12"><span>    -- one status here and another elsewhere. The bare column name still
</span></span><span class="line" line="13"><span>    -- refers to the table column.
</span></span><span class="line" line="14"><span>    CASE
</span></span><span class="line" line="15"><span>        WHEN next_due_ts &lt; NOW() THEN 'Overdue'
</span></span><span class="line" line="16"><span>        WHEN next_due_ts &lt;= NOW() + INTERVAL '30 days' THEN 'DueSoon'
</span></span><span class="line" line="17"><span>        ELSE 'Valid'
</span></span><span class="line" line="18"><span>    END AS status,
</span></span><span class="line" line="19"><span>    status AS stored_status,
</span></span><span class="line" line="20"><span empty-line-placeholder>
</span></span><span class="line" line="21"><span>    last_calibration_ts,
</span></span><span class="line" line="22"><span>    next_due_ts,
</span></span><span class="line" line="23"><span>    calibration_interval_months,
</span></span><span class="line" line="24"><span>    calibration_lab,
</span></span><span class="line" line="25"><span>    certificate_no,
</span></span><span class="line" line="26"><span empty-line-placeholder>
</span></span><span class="line" line="27"><span>    -- Negative for anything already past due, which the widget shows as
</span></span><span class="line" line="28"><span>    -- "12d overdue" rather than "-12d".
</span></span><span class="line" line="29"><span>    (next_due_ts::date - CURRENT_DATE) AS days_remaining
</span></span><span class="line" line="30"><span empty-line-placeholder>
</span></span><span class="line" line="31"><span>FROM calibration_assets
</span></span><span class="line" line="32"><span empty-line-placeholder>
</span></span><span class="line" line="33"><span>-- This is a worklist, not the whole register: the window scopes it to what
</span></span><span class="line" line="34"><span>-- needs attention. Overdue tools have a past due date, so the upper bound
</span></span><span class="line" line="35"><span>-- already includes them; no separate clause needed.
</span></span><span class="line" line="36"><span>WHERE (COALESCE($department::text, 'All') = 'All'
</span></span><span class="line" line="37"><span>       OR department = $department::text)
</span></span><span class="line" line="38"><span>  AND next_due_ts &lt;= NOW() + (
</span></span><span class="line" line="39"><span>      CASE COALESCE($timeWindow::text, 'Next 90 days')
</span></span><span class="line" line="40"><span>          WHEN 'Next 7 days'  THEN INTERVAL '7 days'
</span></span><span class="line" line="41"><span>          WHEN 'Next 30 days' THEN INTERVAL '30 days'
</span></span><span class="line" line="42"><span>          WHEN 'Next 90 days' THEN INTERVAL '90 days'
</span></span><span class="line" line="43"><span>          WHEN 'All future'   THEN INTERVAL '100 years'
</span></span><span class="line" line="44"><span>          ELSE INTERVAL '90 days'
</span></span><span class="line" line="45"><span>      END
</span></span><span class="line" line="46"><span>  )
</span></span><span class="line" line="47"><span empty-line-placeholder>
</span></span><span class="line" line="48"><span>ORDER BY next_due_ts ASC
</span></span><span class="line" line="49"><span>LIMIT 500;
</span></span></code></pre><p>Sorting by due date ascending puts the worst offenders at the top, which is the only order that makes a calibration list useful. <code>stored_status</code> is included but not used by the widget, so it's there when you want to see exactly which records have drifted rather than just how many.</p><ol start="3"><li>Import the <strong>Asset Table</strong> <code>ui-template</code> below and assign it to the <strong>Asset Detail</strong> group. The complete component is provided below, so there's no need to build it yourself. It shows a Vuetify data table with a status chip per row, formatted dates, and days remaining shown as "12d overdue" or "due today". Its header names the active window, so it's clear the list is scoped rather than the full register. Above the table sit a search box and a status toggle with live counts for Overdue, Due soon and Valid, filtering the rows already on the page without hitting the database again. The Department column hides itself when every row belongs to the same department, since a single-department view makes it a fixed value.</li></ol><ol start="4"><li>Wire the nodes: <strong>Refresh Asset Table → Asset Rows → Asset Table</strong>.</li></ol><p>Deploy and open <code>/home</code>. The table fills in below the cards, most urgent first, with its header naming the window it covers. Change a dropdown and both halves of the page update together.</p><p><img alt="the asset detail table with the status toggle and search box" src="https://flowfuse.com/blog/2026/07/images/calibration-asset-table.png"/> <em>Instruments due inside the selected window, soonest due first, with status chips and days remaining.</em></p><blockquote><p><strong>Note:</strong> The toggle counts describe the table, not the register, so they will read lower than the cards above. That's the point of the split: the cards answer "how are we doing," and the table answers "what needs collecting." Select <em>All future</em> and the two match.</p></blockquote><h2 id="checking-a-tool-at-the-station">Checking a Tool at the Station</h2><p>A dashboard in the quality office doesn't reach the person about to pick up a torque wrench. This page does: hold the calibration label to a camera, press one button, get one answer.</p><ol><li>Add a <code>ui-button</code> node named "Scan Label Button" in the <strong>Verdict</strong> group, order 1. Set the label to <code>SCAN</code> and the payload to the string <code>capture</code>, which tells the webcam to take a frame.</li><li>Add a <code>ui-webcam</code> node in the <strong>Scanner</strong> group, with <strong>Pass through</strong> and <strong>QR detection</strong> both off. Leave image width, height and quality blank to use the camera's defaults.</li><li>Add a <code>change</code> node that sets <code>msg.payload</code> to <code>msg.payload.image</code>. The webcam outputs an object; the OCR node just needs the image.</li><li>Add a <code>simple-ocr</code> node, then a <code>link out</code> / <code>link in</code> pair to carry the result down to the next row of the canvas.</li></ol><blockquote><p><strong>Tip:</strong> OCR keeps this tutorial hardware-free, but if your labels have a barcode or QR code, scanning one is faster and far more reliable than reading printed text. Swap the camera and OCR nodes for a <a href="https://flowfuse.com/node-red/peripheral/barcodescanner/">barcode scanner</a> and feed the decoded ID straight into "Set Tool ID," and everything downstream will keep working. You can also drop "Extract Tool ID" and "Scan Valid?", since a scanner either returns an ID or nothing.</p></blockquote><ol start="5"><li>Add a <code>function</code> node named "Extract Tool ID":</li></ol><blockquote><p><strong>Tip:</strong> The same goes for function node logic. Describe what you want the function to do in plain English, and <a href="https://flowfuse.com/docs/user/expert/node-red-embedded-ai/#function-node-creation">FlowFuse Expert</a> will generate the code for you.</p></blockquote><pre class="language-javascript shiki shiki-themes material-theme-lighter material-theme material-theme-palenight" code="// Stickers read TL followed by four digits. OCR loses the hyphen and swaps
// look-alike characters, so normalise before matching.
const text = String(msg.payload?.text || msg.payload || '');
const flat = text.toUpperCase().replace(/[^A-Z0-9]/g, '');

const FIXES = { O: '0', Q: '0', I: '1', L: '1', S: '5', B: '8', Z: '2', G: '6' };

const m = flat.match(/T[L1I]([A-Z0-9]{4})/);
const digits = m ? m[1].replace(/[A-Z]/g, c =&gt; FIXES[c] || c) : '';
const toolId = /^\d{4}$/.test(digits) ? 'TL-' + digits : null;

msg.payload = {
    success: !!toolId,
    toolId,
    // Shows what OCR actually read when a scan fails.
    rawText: text.replace(/\s+/g, ' ').trim()
};
return msg;
" language="javascript" meta="" style=""><code __ignore-map=""><span class="line" line="1"><span class="sHwdD">// Stickers read TL followed by four digits. OCR loses the hyphen and swaps
</span></span><span class="line" line="2"><span class="sHwdD">// look-alike characters, so normalise before matching.
</span></span><span class="line" line="3"><span class="spNyl">const</span><span class="sTEyZ"> text </span><span class="sMK4o">=</span><span class="s2Zo4"> String</span><span class="sTEyZ">(msg</span><span class="sMK4o">.</span><span class="sTEyZ">payload</span><span class="sMK4o">?.</span><span class="sTEyZ">text </span><span class="sMK4o">||</span><span class="sTEyZ"> msg</span><span class="sMK4o">.</span><span class="sTEyZ">payload </span><span class="sMK4o">||</span><span class="sMK4o"> ''</span><span class="sTEyZ">)</span><span class="sMK4o">;
</span></span><span class="line" line="4"><span class="spNyl">const</span><span class="sTEyZ"> flat </span><span class="sMK4o">=</span><span class="sTEyZ"> text</span><span class="sMK4o">.</span><span class="s2Zo4">toUpperCase</span><span class="sTEyZ">()</span><span class="sMK4o">.</span><span class="s2Zo4">replace</span><span class="sTEyZ">(</span><span class="sMK4o">/[^</span><span class="sfazB">A-Z0-9</span><span class="sMK4o">]/</span><span class="sbssI">g</span><span class="sMK4o">,</span><span class="sMK4o"> ''</span><span class="sTEyZ">)</span><span class="sMK4o">;
</span></span><span class="line" line="5"><span empty-line-placeholder>
</span></span><span class="line" line="6"><span class="spNyl">const</span><span class="sTEyZ"> FIXES </span><span class="sMK4o">=</span><span class="sMK4o"> {</span><span class="swJcz"> O</span><span class="sMK4o">:</span><span class="sMK4o"> '</span><span class="sfazB">0</span><span class="sMK4o">'</span><span class="sMK4o">,</span><span class="swJcz"> Q</span><span class="sMK4o">:</span><span class="sMK4o"> '</span><span class="sfazB">0</span><span class="sMK4o">'</span><span class="sMK4o">,</span><span class="swJcz"> I</span><span class="sMK4o">:</span><span class="sMK4o"> '</span><span class="sfazB">1</span><span class="sMK4o">'</span><span class="sMK4o">,</span><span class="swJcz"> L</span><span class="sMK4o">:</span><span class="sMK4o"> '</span><span class="sfazB">1</span><span class="sMK4o">'</span><span class="sMK4o">,</span><span class="swJcz"> S</span><span class="sMK4o">:</span><span class="sMK4o"> '</span><span class="sfazB">5</span><span class="sMK4o">'</span><span class="sMK4o">,</span><span class="swJcz"> B</span><span class="sMK4o">:</span><span class="sMK4o"> '</span><span class="sfazB">8</span><span class="sMK4o">'</span><span class="sMK4o">,</span><span class="swJcz"> Z</span><span class="sMK4o">:</span><span class="sMK4o"> '</span><span class="sfazB">2</span><span class="sMK4o">'</span><span class="sMK4o">,</span><span class="swJcz"> G</span><span class="sMK4o">:</span><span class="sMK4o"> '</span><span class="sfazB">6</span><span class="sMK4o">'</span><span class="sMK4o"> };
</span></span><span class="line" line="7"><span empty-line-placeholder>
</span></span><span class="line" line="8"><span class="spNyl">const</span><span class="sTEyZ"> m </span><span class="sMK4o">=</span><span class="sTEyZ"> flat</span><span class="sMK4o">.</span><span class="s2Zo4">match</span><span class="sTEyZ">(</span><span class="sMK4o">/</span><span class="sfazB">T</span><span class="sMK4o">[</span><span class="sfazB">L1I</span><span class="sMK4o">]([</span><span class="sfazB">A-Z0-9</span><span class="sMK4o">]{4})/</span><span class="sTEyZ">)</span><span class="sMK4o">;
</span></span><span class="line" line="9"><span class="spNyl">const</span><span class="sTEyZ"> digits </span><span class="sMK4o">=</span><span class="sTEyZ"> m </span><span class="sMK4o">?</span><span class="sTEyZ"> m[</span><span class="sbssI">1</span><span class="sTEyZ">]</span><span class="sMK4o">.</span><span class="s2Zo4">replace</span><span class="sTEyZ">(</span><span class="sMK4o">/[</span><span class="sfazB">A-Z</span><span class="sMK4o">]/</span><span class="sbssI">g</span><span class="sMK4o">,</span><span class="sHdIc"> c</span><span class="spNyl"> =&gt;</span><span class="sTEyZ"> FIXES[c] </span><span class="sMK4o">||</span><span class="sTEyZ"> c) </span><span class="sMK4o">:</span><span class="sMK4o"> ''</span><span class="sMK4o">;
</span></span><span class="line" line="10"><span class="spNyl">const</span><span class="sTEyZ"> toolId </span><span class="sMK4o">=</span><span class="sMK4o"> /</span><span class="s7zQu">^</span><span class="sfazB">\d</span><span class="sMK4o">{4}</span><span class="s7zQu">$</span><span class="sMK4o">/</span><span class="sMK4o">.</span><span class="s2Zo4">test</span><span class="sTEyZ">(digits) </span><span class="sMK4o">?</span><span class="sMK4o"> '</span><span class="sfazB">TL-</span><span class="sMK4o">'</span><span class="sMK4o"> +</span><span class="sTEyZ"> digits </span><span class="sMK4o">:</span><span class="sMK4o"> null;
</span></span><span class="line" line="11"><span empty-line-placeholder>
</span></span><span class="line" line="12"><span class="sTEyZ">msg</span><span class="sMK4o">.</span><span class="sTEyZ">payload </span><span class="sMK4o">=</span><span class="sMK4o"> {
</span></span><span class="line" line="13"><span class="swJcz">    success</span><span class="sMK4o">:</span><span class="sMK4o"> !!</span><span class="sTEyZ">toolId</span><span class="sMK4o">,
</span></span><span class="line" line="14"><span class="sTEyZ">    toolId</span><span class="sMK4o">,
</span></span><span class="line" line="15"><span class="sHwdD">    // Shows what OCR actually read when a scan fails.
</span></span><span class="line" line="16"><span class="swJcz">    rawText</span><span class="sMK4o">:</span><span class="sTEyZ"> text</span><span class="sMK4o">.</span><span class="s2Zo4">replace</span><span class="sTEyZ">(</span><span class="sMK4o">/</span><span class="sfazB">\s</span><span class="sMK4o">+/</span><span class="sbssI">g</span><span class="sMK4o">,</span><span class="sMK4o"> '</span><span class="sMK4o"> '</span><span class="sTEyZ">)</span><span class="sMK4o">.</span><span class="s2Zo4">trim</span><span class="sTEyZ">()
</span></span><span class="line" line="17"><span class="sMK4o">};
</span></span><span class="line" line="18"><span class="s7zQu">return</span><span class="sTEyZ"> msg</span><span class="sMK4o">;
</span></span></code></pre><p>Wire a <code>debug</code> node to this as well and leave it enabled. When a scan fails, <code>rawText</code> shows what the camera actually read, which is the difference between fixing the label and guessing at it.</p><blockquote><p><strong>Note:</strong> The pattern above expects <code>TL</code> followed by four digits, because that's what the seeded data uses. Your labels almost certainly look different: a different prefix, more digits, a plant code, or no letters at all. Change the regex and the length check to match your own sticker format before you test this on real tools, or every scan will come back as <strong>Label not readable</strong>.</p></blockquote><ol start="6"><li>Add a <code>switch</code> node named "Scan Valid?" on <code>payload.success</code>, with <strong>is true</strong> on the first output and <strong>otherwise</strong> on the second. A failed read skips the database entirely.</li><li>Add a <code>change</code> node named "Set Tool ID" on the true branch, with two rules:<ul><li>Set <code>queryParameters</code> to the JSONata <code>{ "toolId": $trim(payload.toolId) }</code></li><li>Set <code>scannedId</code> to the JSONata <code>$trim(payload.toolId)</code>, so the ID survives to the verdict even when no row comes back</li></ul></li><li>Add a <code>tables-query</code> node named "Look Up Tool":</li></ol><pre class="language-sql shiki shiki-themes material-theme-lighter material-theme material-theme-palenight" code="SELECT
    tool_id,
    equipment_name,

    -- The safety answer comes from the date, not the stored status flag,
    -- which can go stale if whatever recalculates it falls behind.
    (next_due_ts &gt;= NOW()) AS ok_to_use

FROM calibration_assets

-- Deliberately NOT filtered by department or time window: a scan is a
-- lookup of one tool, not a view. Case, padding and hyphens are all
-- normalised away, at the cost of the index, which is fine at register size.
WHERE replace(upper(btrim(tool_id)), '-', '')
    = replace(upper(btrim($toolId)), '-', '');
" language="sql" meta="" style=""><code __ignore-map=""><span class="line" line="1"><span>SELECT
</span></span><span class="line" line="2"><span>    tool_id,
</span></span><span class="line" line="3"><span>    equipment_name,
</span></span><span class="line" line="4"><span empty-line-placeholder>
</span></span><span class="line" line="5"><span>    -- The safety answer comes from the date, not the stored status flag,
</span></span><span class="line" line="6"><span>    -- which can go stale if whatever recalculates it falls behind.
</span></span><span class="line" line="7"><span>    (next_due_ts &gt;= NOW()) AS ok_to_use
</span></span><span class="line" line="8"><span empty-line-placeholder>
</span></span><span class="line" line="9"><span>FROM calibration_assets
</span></span><span class="line" line="10"><span empty-line-placeholder>
</span></span><span class="line" line="11"><span>-- Deliberately NOT filtered by department or time window: a scan is a
</span></span><span class="line" line="12"><span>-- lookup of one tool, not a view. Case, padding and hyphens are all
</span></span><span class="line" line="13"><span>-- normalised away, at the cost of the index, which is fine at register size.
</span></span><span class="line" line="14"><span>WHERE replace(upper(btrim(tool_id)), '-', '')
</span></span><span class="line" line="15"><span>    = replace(upper(btrim($toolId)), '-', '');
</span></span></code></pre><ol start="9"><li>Add a <code>function</code> node named "Build Verdict". Wire <strong>both</strong> the query output and the switch's second output into it:</li></ol><pre class="language-javascript shiki shiki-themes material-theme-lighter material-theme material-theme-palenight" code="// Two paths feed this node: a completed lookup, and a failed scan routed
// straight past the query. Tell them apart by payload shape.
const p = msg.payload;

if (p?.success === false) {
    msg.payload = { state: 'scan_failed' };
    return msg;
}

const row = Array.isArray(p) ? p[0] : p;

if (!row?.tool_id) {
    msg.payload = { state: 'not_found', scannedId: msg.scannedId };
    return msg;
}

msg.payload = {
    state: row.ok_to_use ? 'ok' : 'blocked',
    tool: row
};
return msg;
" language="javascript" meta="" style=""><code __ignore-map=""><span class="line" line="1"><span class="sHwdD">// Two paths feed this node: a completed lookup, and a failed scan routed
</span></span><span class="line" line="2"><span class="sHwdD">// straight past the query. Tell them apart by payload shape.
</span></span><span class="line" line="3"><span class="spNyl">const</span><span class="sTEyZ"> p </span><span class="sMK4o">=</span><span class="sTEyZ"> msg</span><span class="sMK4o">.</span><span class="sTEyZ">payload</span><span class="sMK4o">;
</span></span><span class="line" line="4"><span empty-line-placeholder>
</span></span><span class="line" line="5"><span class="s7zQu">if</span><span class="sTEyZ"> (p</span><span class="sMK4o">?.</span><span class="sTEyZ">success </span><span class="sMK4o">===</span><span class="sfNiH"> false</span><span class="sTEyZ">) </span><span class="sMK4o">{
</span></span><span class="line" line="6"><span class="sTEyZ">    msg</span><span class="sMK4o">.</span><span class="sTEyZ">payload</span><span class="sMK4o"> =</span><span class="sMK4o"> {</span><span class="swJcz"> state</span><span class="sMK4o">:</span><span class="sMK4o"> '</span><span class="sfazB">scan_failed</span><span class="sMK4o">'</span><span class="sMK4o"> };
</span></span><span class="line" line="7"><span class="s7zQu">    return</span><span class="sTEyZ"> msg</span><span class="sMK4o">;
</span></span><span class="line" line="8"><span class="sMK4o">}
</span></span><span class="line" line="9"><span empty-line-placeholder>
</span></span><span class="line" line="10"><span class="spNyl">const</span><span class="sTEyZ"> row </span><span class="sMK4o">=</span><span class="sTEyZ"> Array</span><span class="sMK4o">.</span><span class="s2Zo4">isArray</span><span class="sTEyZ">(p) </span><span class="sMK4o">?</span><span class="sTEyZ"> p[</span><span class="sbssI">0</span><span class="sTEyZ">] </span><span class="sMK4o">:</span><span class="sTEyZ"> p</span><span class="sMK4o">;
</span></span><span class="line" line="11"><span empty-line-placeholder>
</span></span><span class="line" line="12"><span class="s7zQu">if</span><span class="sTEyZ"> (</span><span class="sMK4o">!</span><span class="sTEyZ">row</span><span class="sMK4o">?.</span><span class="sTEyZ">tool_id) </span><span class="sMK4o">{
</span></span><span class="line" line="13"><span class="sTEyZ">    msg</span><span class="sMK4o">.</span><span class="sTEyZ">payload</span><span class="sMK4o"> =</span><span class="sMK4o"> {</span><span class="swJcz"> state</span><span class="sMK4o">:</span><span class="sMK4o"> '</span><span class="sfazB">not_found</span><span class="sMK4o">'</span><span class="sMK4o">,</span><span class="swJcz"> scannedId</span><span class="sMK4o">:</span><span class="sTEyZ"> msg</span><span class="sMK4o">.</span><span class="sTEyZ">scannedId</span><span class="sMK4o"> };
</span></span><span class="line" line="14"><span class="s7zQu">    return</span><span class="sTEyZ"> msg</span><span class="sMK4o">;
</span></span><span class="line" line="15"><span class="sMK4o">}
</span></span><span class="line" line="16"><span empty-line-placeholder>
</span></span><span class="line" line="17"><span class="sTEyZ">msg</span><span class="sMK4o">.</span><span class="sTEyZ">payload </span><span class="sMK4o">=</span><span class="sMK4o"> {
</span></span><span class="line" line="18"><span class="swJcz">    state</span><span class="sMK4o">:</span><span class="sTEyZ"> row</span><span class="sMK4o">.</span><span class="sTEyZ">ok_to_use </span><span class="sMK4o">?</span><span class="sMK4o"> '</span><span class="sfazB">ok</span><span class="sMK4o">'</span><span class="sMK4o"> :</span><span class="sMK4o"> '</span><span class="sfazB">blocked</span><span class="sMK4o">'</span><span class="sMK4o">,
</span></span><span class="line" line="19"><span class="swJcz">    tool</span><span class="sMK4o">:</span><span class="sTEyZ"> row
</span></span><span class="line" line="20"><span class="sMK4o">};
</span></span><span class="line" line="21"><span class="s7zQu">return</span><span class="sTEyZ"> msg</span><span class="sMK4o">;
</span></span></code></pre><p>Four states come out of it, and they're the only four an operator ever sees:</p><table><thead><tr><th>State</th><th>When</th><th>Verdict</th></tr></thead><tbody><tr><td><code>ok</code></td><td>Due date in the future</td><td><strong>OK to use</strong>, green</td></tr><tr><td><code>blocked</code></td><td>Due date has passed</td><td><strong>Do not use</strong>, red</td></tr><tr><td><code>not_found</code></td><td>ID read, no matching row</td><td><strong>Not in register</strong>, amber</td></tr><tr><td><code>scan_failed</code></td><td>No <code>TL-####</code> pattern found</td><td><strong>Label not readable</strong>, amber</td></tr></tbody></table><ol start="10"><li>Add a <code>function</code> node named "Format Notification". It shows what was scanned, the verdict, and what to do about it:</li></ol><pre class="language-javascript shiki shiki-themes material-theme-lighter material-theme material-theme-palenight" code="const v = msg.payload || {};
const t = v.tool;

// timeout 0 on 'blocked' is deliberate: an expired-tool verdict must be
// dismissed by a person, not fade out while nobody is watching.
const VERDICTS = {
    ok:          { text: 'OK to use',          do: 'Carry on.',                        color: '#15803d', timeout: 8 },
    blocked:     { text: 'Do not use',         do: 'Tag it and tell your supervisor.',  color: '#b3261e', timeout: 0 },
    not_found:   { text: 'Not in register',    do: 'Tell your supervisor.',             color: '#b45309', timeout: 12 },
    scan_failed: { text: 'Label not readable', do: 'Wipe the label and scan again.',    color: '#b45309', timeout: 8 }
};

const cfg = VERDICTS[v.state] || VERDICTS.scan_failed;

// ui-notification renders raw HTML, so escape what came from the register.
const esc = s =&gt; String(s ?? '').replace(/[&lt;&gt;&amp;"]/g,
    c =&gt; ({ '&lt;': '&amp;lt;', '&gt;': '&amp;gt;', '&amp;': '&amp;amp;', '"': '&amp;quot;' }[c]));

const scanned = t
    ? esc(t.tool_id) + ' - ' + esc(t.equipment_name)
    : esc(v.scannedId || 'No ID read');

msg.payload = `&lt;div style="font-size:1rem;opacity:.85"&gt;${scanned}&lt;/div&gt;`
    + `&lt;div style="font-size:2rem;font-weight:700;margin:4px 0"&gt;${cfg.text}&lt;/div&gt;`
    + `&lt;div style="font-size:1rem"&gt;${cfg.do}&lt;/div&gt;`;

msg.color = cfg.color;
msg.timeout = cfg.timeout;
return msg;
" language="javascript" meta="" style=""><code __ignore-map=""><span class="line" line="1"><span class="spNyl">const</span><span class="sTEyZ"> v </span><span class="sMK4o">=</span><span class="sTEyZ"> msg</span><span class="sMK4o">.</span><span class="sTEyZ">payload </span><span class="sMK4o">||</span><span class="sMK4o"> {};
</span></span><span class="line" line="2"><span class="spNyl">const</span><span class="sTEyZ"> t </span><span class="sMK4o">=</span><span class="sTEyZ"> v</span><span class="sMK4o">.</span><span class="sTEyZ">tool</span><span class="sMK4o">;
</span></span><span class="line" line="3"><span empty-line-placeholder>
</span></span><span class="line" line="4"><span class="sHwdD">// timeout 0 on 'blocked' is deliberate: an expired-tool verdict must be
</span></span><span class="line" line="5"><span class="sHwdD">// dismissed by a person, not fade out while nobody is watching.
</span></span><span class="line" line="6"><span class="spNyl">const</span><span class="sTEyZ"> VERDICTS </span><span class="sMK4o">=</span><span class="sMK4o"> {
</span></span><span class="line" line="7"><span class="swJcz">    ok</span><span class="sMK4o">:</span><span class="sMK4o">          {</span><span class="swJcz"> text</span><span class="sMK4o">:</span><span class="sMK4o"> '</span><span class="sfazB">OK to use</span><span class="sMK4o">'</span><span class="sMK4o">,</span><span class="swJcz">          do</span><span class="sMK4o">:</span><span class="sMK4o"> '</span><span class="sfazB">Carry on.</span><span class="sMK4o">'</span><span class="sMK4o">,</span><span class="swJcz">                        color</span><span class="sMK4o">:</span><span class="sMK4o"> '</span><span class="sfazB">#15803d</span><span class="sMK4o">'</span><span class="sMK4o">,</span><span class="swJcz"> timeout</span><span class="sMK4o">:</span><span class="sbssI"> 8</span><span class="sMK4o"> },
</span></span><span class="line" line="8"><span class="swJcz">    blocked</span><span class="sMK4o">:</span><span class="sMK4o">     {</span><span class="swJcz"> text</span><span class="sMK4o">:</span><span class="sMK4o"> '</span><span class="sfazB">Do not use</span><span class="sMK4o">'</span><span class="sMK4o">,</span><span class="swJcz">         do</span><span class="sMK4o">:</span><span class="sMK4o"> '</span><span class="sfazB">Tag it and tell your supervisor.</span><span class="sMK4o">'</span><span class="sMK4o">,</span><span class="swJcz">  color</span><span class="sMK4o">:</span><span class="sMK4o"> '</span><span class="sfazB">#b3261e</span><span class="sMK4o">'</span><span class="sMK4o">,</span><span class="swJcz"> timeout</span><span class="sMK4o">:</span><span class="sbssI"> 0</span><span class="sMK4o"> },
</span></span><span class="line" line="9"><span class="swJcz">    not_found</span><span class="sMK4o">:</span><span class="sMK4o">   {</span><span class="swJcz"> text</span><span class="sMK4o">:</span><span class="sMK4o"> '</span><span class="sfazB">Not in register</span><span class="sMK4o">'</span><span class="sMK4o">,</span><span class="swJcz">    do</span><span class="sMK4o">:</span><span class="sMK4o"> '</span><span class="sfazB">Tell your supervisor.</span><span class="sMK4o">'</span><span class="sMK4o">,</span><span class="swJcz">             color</span><span class="sMK4o">:</span><span class="sMK4o"> '</span><span class="sfazB">#b45309</span><span class="sMK4o">'</span><span class="sMK4o">,</span><span class="swJcz"> timeout</span><span class="sMK4o">:</span><span class="sbssI"> 12</span><span class="sMK4o"> },
</span></span><span class="line" line="10"><span class="swJcz">    scan_failed</span><span class="sMK4o">:</span><span class="sMK4o"> {</span><span class="swJcz"> text</span><span class="sMK4o">:</span><span class="sMK4o"> '</span><span class="sfazB">Label not readable</span><span class="sMK4o">'</span><span class="sMK4o">,</span><span class="swJcz"> do</span><span class="sMK4o">:</span><span class="sMK4o"> '</span><span class="sfazB">Wipe the label and scan again.</span><span class="sMK4o">'</span><span class="sMK4o">,</span><span class="swJcz">    color</span><span class="sMK4o">:</span><span class="sMK4o"> '</span><span class="sfazB">#b45309</span><span class="sMK4o">'</span><span class="sMK4o">,</span><span class="swJcz"> timeout</span><span class="sMK4o">:</span><span class="sbssI"> 8</span><span class="sMK4o"> }
</span></span><span class="line" line="11"><span class="sMK4o">};
</span></span><span class="line" line="12"><span empty-line-placeholder>
</span></span><span class="line" line="13"><span class="spNyl">const</span><span class="sTEyZ"> cfg </span><span class="sMK4o">=</span><span class="sTEyZ"> VERDICTS[v</span><span class="sMK4o">.</span><span class="sTEyZ">state] </span><span class="sMK4o">||</span><span class="sTEyZ"> VERDICTS</span><span class="sMK4o">.</span><span class="sTEyZ">scan_failed</span><span class="sMK4o">;
</span></span><span class="line" line="14"><span empty-line-placeholder>
</span></span><span class="line" line="15"><span class="sHwdD">// ui-notification renders raw HTML, so escape what came from the register.
</span></span><span class="line" line="16"><span class="spNyl">const</span><span class="sTEyZ"> esc </span><span class="sMK4o">=</span><span class="sHdIc"> s</span><span class="spNyl"> =&gt;</span><span class="s2Zo4"> String</span><span class="sTEyZ">(s </span><span class="sMK4o">??</span><span class="sMK4o"> ''</span><span class="sTEyZ">)</span><span class="sMK4o">.</span><span class="s2Zo4">replace</span><span class="sTEyZ">(</span><span class="sMK4o">/[</span><span class="sfazB">&lt;&gt;&amp;"</span><span class="sMK4o">]/</span><span class="sbssI">g</span><span class="sMK4o">,
</span></span><span class="line" line="17"><span class="sHdIc">    c</span><span class="spNyl"> =&gt;</span><span class="sTEyZ"> (</span><span class="sMK4o">{</span><span class="sMK4o"> '</span><span class="swJcz">&lt;</span><span class="sMK4o">'</span><span class="sMK4o">:</span><span class="sMK4o"> '</span><span class="sfazB">&amp;lt;</span><span class="sMK4o">'</span><span class="sMK4o">,</span><span class="sMK4o"> '</span><span class="swJcz">&gt;</span><span class="sMK4o">'</span><span class="sMK4o">:</span><span class="sMK4o"> '</span><span class="sfazB">&amp;gt;</span><span class="sMK4o">'</span><span class="sMK4o">,</span><span class="sMK4o"> '</span><span class="swJcz">&amp;</span><span class="sMK4o">'</span><span class="sMK4o">:</span><span class="sMK4o"> '</span><span class="sfazB">&amp;amp;</span><span class="sMK4o">'</span><span class="sMK4o">,</span><span class="sMK4o"> '</span><span class="swJcz">"</span><span class="sMK4o">'</span><span class="sMK4o">:</span><span class="sMK4o"> '</span><span class="sfazB">&amp;quot;</span><span class="sMK4o">'</span><span class="sMK4o"> }</span><span class="sTEyZ">[c]))</span><span class="sMK4o">;
</span></span><span class="line" line="18"><span empty-line-placeholder>
</span></span><span class="line" line="19"><span class="spNyl">const</span><span class="sTEyZ"> scanned </span><span class="sMK4o">=</span><span class="sTEyZ"> t
</span></span><span class="line" line="20"><span class="sMK4o">    ?</span><span class="s2Zo4"> esc</span><span class="sTEyZ">(t</span><span class="sMK4o">.</span><span class="sTEyZ">tool_id) </span><span class="sMK4o">+</span><span class="sMK4o"> '</span><span class="sfazB"> - </span><span class="sMK4o">'</span><span class="sMK4o"> +</span><span class="s2Zo4"> esc</span><span class="sTEyZ">(t</span><span class="sMK4o">.</span><span class="sTEyZ">equipment_name)
</span></span><span class="line" line="21"><span class="sMK4o">    :</span><span class="s2Zo4"> esc</span><span class="sTEyZ">(v</span><span class="sMK4o">.</span><span class="sTEyZ">scannedId </span><span class="sMK4o">||</span><span class="sMK4o"> '</span><span class="sfazB">No ID read</span><span class="sMK4o">'</span><span class="sTEyZ">)</span><span class="sMK4o">;
</span></span><span class="line" line="22"><span empty-line-placeholder>
</span></span><span class="line" line="23"><span class="sTEyZ">msg</span><span class="sMK4o">.</span><span class="sTEyZ">payload </span><span class="sMK4o">=</span><span class="sMK4o"> `</span><span class="sfazB">&lt;div style="font-size:1rem;opacity:.85"&gt;</span><span class="sMK4o">${</span><span class="sTEyZ">scanned</span><span class="sMK4o">}</span><span class="sfazB">&lt;/div&gt;</span><span class="sMK4o">`
</span></span><span class="line" line="24"><span class="sMK4o">    +</span><span class="sMK4o"> `</span><span class="sfazB">&lt;div style="font-size:2rem;font-weight:700;margin:4px 0"&gt;</span><span class="sMK4o">${</span><span class="sTEyZ">cfg</span><span class="sMK4o">.</span><span class="sTEyZ">text</span><span class="sMK4o">}</span><span class="sfazB">&lt;/div&gt;</span><span class="sMK4o">`
</span></span><span class="line" line="25"><span class="sMK4o">    +</span><span class="sMK4o"> `</span><span class="sfazB">&lt;div style="font-size:1rem"&gt;</span><span class="sMK4o">${</span><span class="sTEyZ">cfg</span><span class="sMK4o">.</span><span class="sTEyZ">do</span><span class="sMK4o">}</span><span class="sfazB">&lt;/div&gt;</span><span class="sMK4o">`</span><span class="sMK4o">;
</span></span><span class="line" line="26"><span empty-line-placeholder>
</span></span><span class="line" line="27"><span class="sTEyZ">msg</span><span class="sMK4o">.</span><span class="sTEyZ">color </span><span class="sMK4o">=</span><span class="sTEyZ"> cfg</span><span class="sMK4o">.</span><span class="sTEyZ">color</span><span class="sMK4o">;
</span></span><span class="line" line="28"><span class="sTEyZ">msg</span><span class="sMK4o">.</span><span class="sTEyZ">timeout </span><span class="sMK4o">=</span><span class="sTEyZ"> cfg</span><span class="sMK4o">.</span><span class="sTEyZ">timeout</span><span class="sMK4o">;
</span></span><span class="line" line="29"><span class="s7zQu">return</span><span class="sTEyZ"> msg</span><span class="sMK4o">;
</span></span></code></pre><ol start="11"><li>Add a <code>ui-notification</code> node named "Verdict" and select your ui-base. Set <strong>Position</strong> to <strong>center center</strong>, turn off <strong>Use default colour</strong>, turn on <strong>Show countdown</strong>, <strong>Allow dismiss</strong> and <strong>Allow raw HTML</strong>. The display time and colour on the node are only fallbacks; <code>msg.timeout</code> and <code>msg.color</code> override them for each verdict.</li><li>Add a <code>ui-markdown</code> node named "Tool Check Instructions" in the <strong>Verdict</strong> group, order 2:</li></ol><pre class="language-markdown shiki shiki-themes material-theme-lighter material-theme material-theme-palenight" code="&lt;div style="text-align: center"&gt;

### Before you use a tool

&lt;/div&gt;

**1** Hold the calibration label flat in front of the camera.

**2** Press **SCAN**.

**3** Read the message in the middle of the screen.

---

**"OK to use"**: the tool is inside its calibration interval. Carry on.

**"Do not use"**: set the tool aside, tag it, and tell your supervisor. If you have already used it on parts today, say so; those measurements need checking.

**"Not in register"** or **"Label not readable"**: wipe the label and scan again. If it fails twice, tell your supervisor.

---

Anything other than **"OK to use"** means the tool stays out of production.
" language="markdown" meta="" style=""><code __ignore-map=""><span class="line" line="1"><span class="sMK4o">&lt;</span><span class="swJcz">div</span><span class="spNyl"> style</span><span class="sMK4o">=</span><span class="sMK4o">"</span><span class="sfazB">text-align: center</span><span class="sMK4o">"</span><span class="sMK4o">&gt;
</span></span><span class="line" line="2"><span empty-line-placeholder>
</span></span><span class="line" line="3"><span class="sTEyZ">### Before you use a tool
</span></span><span class="line" line="4"><span empty-line-placeholder>
</span></span><span class="line" line="5"><span class="sMK4o">&lt;/</span><span class="swJcz">div</span><span class="sMK4o">&gt;
</span></span><span class="line" line="6"><span empty-line-placeholder>
</span></span><span class="line" line="7"><span class="sTEyZ">**1** Hold the calibration label flat in front of the camera.
</span></span><span class="line" line="8"><span empty-line-placeholder>
</span></span><span class="line" line="9"><span class="sTEyZ">**2** Press **SCAN**.
</span></span><span class="line" line="10"><span empty-line-placeholder>
</span></span><span class="line" line="11"><span class="sTEyZ">**3** Read the message in the middle of the screen.
</span></span><span class="line" line="12"><span empty-line-placeholder>
</span></span><span class="line" line="13"><span class="sTEyZ">---
</span></span><span class="line" line="14"><span empty-line-placeholder>
</span></span><span class="line" line="15"><span class="sTEyZ">**"OK to use"**: the tool is inside its calibration interval. Carry on.
</span></span><span class="line" line="16"><span empty-line-placeholder>
</span></span><span class="line" line="17"><span class="sTEyZ">**"Do not use"**: set the tool aside, tag it, and tell your supervisor. If you have already used it on parts today, say so; those measurements need checking.
</span></span><span class="line" line="18"><span empty-line-placeholder>
</span></span><span class="line" line="19"><span class="sTEyZ">**"Not in register"** or **"Label not readable"**: wipe the label and scan again. If it fails twice, tell your supervisor.
</span></span><span class="line" line="20"><span empty-line-placeholder>
</span></span><span class="line" line="21"><span class="sTEyZ">---
</span></span><span class="line" line="22"><span empty-line-placeholder>
</span></span><span class="line" line="23"><span class="sTEyZ">Anything other than **"OK to use"** means the tool stays out of production.
</span></span></code></pre><ol start="13"><li>Wire the nodes: <strong>Scan Label Button → ui-webcam → change → simple-ocr → Extract Tool ID → Scan Valid?</strong>, then <strong>Scan Valid? (true) → Set Tool ID → Look Up Tool → Build Verdict</strong>, and <strong>Scan Valid? (otherwise) → Build Verdict → Format Notification → Verdict</strong>.</li></ol><p>Deploy and open <code>/tool-check</code> on a device with a camera. Hold a label reading <code>TL-0007</code>, or one in whatever format you configured above, in front of it and press <strong>SCAN</strong>. Whatever the seeded data says about that tool is what comes back. Because the verdict compares the date instead of reading the status column, it will always agree with the Home page.</p><p><img alt="the Tool Check page with the camera preview and SCAN button" src="https://flowfuse.com/blog/2026/07/images/tool-check.png"/> <em>The scanner page: camera preview, one button, and the operator instructions below it.</em></p><h2 id="what-next">What Next</h2><p>You've built a calibration application that answers two different questions from the same data. The office screen tells a quality engineer how the plant stands and what needs collecting this week. The station screen tells an operator whether the tool in their hand is fit to use. Both read the due date, so neither can drift from the other.</p><p>Right now it runs on generated data. To go live, remove the simulator flow and point the queries at your own register. Just alias your column names in the <code>SELECT</code> lists, and everything downstream keeps working. If your records sit in a CMMS or ERP behind an API, swap the query nodes for <code>http request</code> nodes and nothing else changes. From there, the obvious next steps are ones the register already supports: email the overdue list to the calibration lab each Monday, or <a href="https://flowfuse.com/node-red/notification/">notify</a> someone the moment a critical gauge goes overdue instead of waiting for a screen to be looked at. The same approach works for <a href="https://flowfuse.com/blog/2026/07/defect-and-quality-monitoring/">defect tracking</a> and <a href="https://flowfuse.com/blog/2026/07/build-downtime-logger/">downtime</a> too, and for the other <a href="https://flowfuse.com/blog/2026/08/manufacturing-dashboard-examples/">manufacturing dashboards</a> teams build on the same data. It also pairs with floor-level checks such as a <a href="https://flowfuse.com/blog/2026/08/layered-process-audit/">layered process audit</a>, where a tool's calibration status is exactly the kind of item this dashboard can hand the auditor an answer for instead of a lookup. See how manufacturers are using it on our <a href="https://flowfuse.com/industries/automotive/">automotive solutions page</a>.</p><style>html pre.shiki code .sMK4o, html code.shiki .sMK4o{--shiki-light:#39ADB5;--shiki-default:#89DDFF;--shiki-dark:#89DDFF}html pre.shiki code .spNyl, html code.shiki .spNyl{--shiki-light:#9C3EDA;--shiki-default:#C792EA;--shiki-dark:#C792EA}html pre.shiki code .sfazB, html code.shiki .sfazB{--shiki-light:#91B859;--shiki-default:#C3E88D;--shiki-dark:#C3E88D}html pre.shiki code .sBMFI, html code.shiki .sBMFI{--shiki-light:#E2931D;--shiki-default:#FFCB6B;--shiki-dark:#FFCB6B}html pre.shiki code .sbssI, html code.shiki .sbssI{--shiki-light:#F76D47;--shiki-default:#F78C6C;--shiki-dark:#F78C6C}html pre.shiki code .sTEyZ, html code.shiki .sTEyZ{--shiki-light:#90A4AE;--shiki-default:#EEFFFF;--shiki-dark:#BABED8}html .light .shiki span {color: var(--shiki-light);background: var(--shiki-light-bg);font-style: var(--shiki-light-font-style);font-weight: var(--shiki-light-font-weight);text-decoration: var(--shiki-light-text-decoration);}html.light .shiki span {color: var(--shiki-light);background: var(--shiki-light-bg);font-style: var(--shiki-light-font-style);font-weight: var(--shiki-light-font-weight);text-decoration: var(--shiki-light-text-decoration);}html .default .shiki span {color: var(--shiki-default);background: var(--shiki-default-bg);font-style: var(--shiki-default-font-style);font-weight: var(--shiki-default-font-weight);text-decoration: var(--shiki-default-text-decoration);}html .shiki span {color: var(--shiki-default);background: var(--shiki-default-bg);font-style: var(--shiki-default-font-style);font-weight: var(--shiki-default-font-weight);text-decoration: var(--shiki-default-text-decoration);}html .dark .shiki span {color: var(--shiki-dark);background: var(--shiki-dark-bg);font-style: var(--shiki-dark-font-style);font-weight: var(--shiki-dark-font-weight);text-decoration: var(--shiki-dark-text-decoration);}html.dark .shiki span {color: var(--shiki-dark);background: var(--shiki-dark-bg);font-style: var(--shiki-dark-font-style);font-weight: var(--shiki-dark-font-weight);text-decoration: var(--shiki-dark-text-decoration);}html pre.shiki code .sHwdD, html code.shiki .sHwdD{--shiki-light:#90A4AE;--shiki-light-font-style:italic;--shiki-default:#546E7A;--shiki-default-font-style:italic;--shiki-dark:#676E95;--shiki-dark-font-style:italic}html pre.shiki code .s2Zo4, html code.shiki .s2Zo4{--shiki-light:#6182B8;--shiki-default:#82AAFF;--shiki-dark:#82AAFF}html pre.shiki code .swJcz, html code.shiki .swJcz{--shiki-light:#E53935;--shiki-default:#F07178;--shiki-dark:#F07178}html pre.shiki code .sHdIc, html code.shiki .sHdIc{--shiki-light:#90A4AE;--shiki-light-font-style:italic;--shiki-default:#EEFFFF;--shiki-default-font-style:italic;--shiki-dark:#BABED8;--shiki-dark-font-style:italic}html pre.shiki code .s7zQu, html code.shiki .s7zQu{--shiki-light:#39ADB5;--shiki-light-font-style:italic;--shiki-default:#89DDFF;--shiki-default-font-style:italic;--shiki-dark:#89DDFF;--shiki-dark-font-style:italic}html pre.shiki code .sfNiH, html code.shiki .sfNiH{--shiki-light:#FF5370;--shiki-default:#FF9CAC;--shiki-dark:#FF9CAC}</style><p><strong>See What Your Team Can Build</strong></p><p>See it live with our team, and the variety of applications you can build without coding expertise, then scale them across your plant in a single click.</p><p><a href="https://flowfuse.com/contact-us/">Contact Us</a></p>]]></content>
        <updated>2026-07-31T00:00:00.000Z</updated>
        <link href="https://flowfuse.com/blog/2026/07/calibration-management-dashboard/"/>
        
    </entry>
    <entry>
        <id>https://flowfuse.com/blog/2026/07/what-is-instrument-calibration/</id>
        <title>What Is Instrument Calibration (Equipment Calibration)?</title>
        <summary>Instrument calibration is a documented comparison between a measuring instrument and a more accurate reference standard. Strong calibration programs depend as much on traceable records, interval management, and overdue visibility as on the measurement performed at the bench.</summary>
        <content type="html"><![CDATA[<p>Instrument calibration is a documented comparison between a measuring instrument and a reference standard that is known to be more accurate. The comparison tells you how far the instrument deviates from the reference under specified conditions.</p><p>That sounds straightforward, and at the bench it usually is. Accredited calibration laboratories perform this work every day with well-established procedures.</p><p>The problems that create audit findings and production risk tend to appear elsewhere: an overdue gauge that stayed in service, a certificate that cannot be linked to a specific tool, a due date that was never updated, or a failed instrument whose previous measurements were never reviewed.</p><p>A caliper that reads <strong>0.03 mm low</strong> can pass parts that are actually oversize. Nothing on the line may look unusual while that caliper is being used. The risk appears later, when those parts are assembled, shipped, or returned.</p><p>This article explains what calibration is, how it differs from verification and adjustment, what a calibration record should contain, and how manufacturers can manage calibration status more effectively across the plant.</p><h2 id="what-is-instrument-calibration">What Is Instrument Calibration?</h2><p>Calibration is the process of comparing an instrument with a reference standard and recording the difference between the two at defined test points.</p><p>A complete calibration involves five elements: the instrument under test, a reference standard with better accuracy, measurements taken at selected points across the instrument's range, the deviation between the instrument and the reference, and a documented record of the result.</p><p>Notice what is not included in that definition: repairing or adjusting the instrument. Calibration measures performance; it does not automatically correct it.</p><p>You will also see the terms <strong>equipment calibration</strong>, <strong>instrument calibration</strong>, and <strong>gauge calibration</strong>. In manufacturing they are generally used to describe the same activity.</p><h2 id="calibration-vs-verification-vs-adjustment-vs-validation">Calibration vs. Verification vs. Adjustment vs. Validation</h2><p>These terms are often used interchangeably, but they describe different activities.</p><table><thead><tr><th>Term</th><th>Purpose</th></tr></thead><tbody><tr><td><strong><a href="https://en.wikipedia.org/wiki/Calibration" rel="nofollow">Calibration</a></strong></td><td>Measure and record the instrument's deviation from a reference standard</td></tr><tr><td><strong><a href="https://en.wikipedia.org/wiki/Verification_and_validation" rel="nofollow">Verification</a></strong></td><td>Check whether the measured deviation is within an acceptance limit</td></tr><tr><td><strong>Adjustment</strong></td><td>Change the instrument to reduce its error</td></tr><tr><td><strong><a href="https://en.wikipedia.org/wiki/Verification_and_validation" rel="nofollow">Validation</a></strong></td><td>Demonstrate that a process or method consistently produces the intended result</td></tr></tbody></table><p>A calibration certificate may contain both calibration data and a verification statement such as <strong>PASS</strong> or <strong>FAIL</strong>. The pass/fail decision is based on a stated tolerance; it is not the same thing as the calibration itself.</p><p>An adjustment changes the instrument. After an adjustment, the instrument should be calibrated again so the final condition is documented.</p><p>Validation is broader than calibration. It addresses whether a process works reliably, not whether one instrument reads correctly.</p><h2 id="how-traceability-works">How Traceability Works</h2><p>A calibration result is meaningful only when the reference standard is <a href="https://en.wikipedia.org/wiki/Traceability#Metrology" rel="nofollow">traceable</a> to recognized measurement standards.</p><p>The traceability chain runs from the <a href="https://en.wikipedia.org/wiki/International_System_of_Units" rel="nofollow">SI unit</a>, through a national metrology institute such as <strong><a href="https://www.nist.gov/" rel="nofollow">NIST</a></strong>, <strong><a href="https://www.npl.co.uk/" rel="nofollow">NPL</a></strong>, or <strong><a href="https://www.ptb.de/cms/en.html" rel="nofollow">PTB</a></strong>, through an accredited calibration laboratory, through any working standards used in the plant, and finally to the instrument being calibrated.</p><p>Each link in that chain must be documented. The reference standard should have significantly better accuracy than the instrument it is checking.</p><p>When selecting an external laboratory, a practical check is accreditation to <strong><a href="https://www.iso.org/ISO-IEC-17025-testing-and-calibration-laboratories.html" rel="nofollow">ISO/IEC 17025</a></strong> with a scope that covers the measurement discipline you need, such as pressure, torque, temperature, dimensional measurement, or electrical measurement.</p><h2 id="what-a-calibration-record-should-contain">What a Calibration Record Should Contain</h2><p>Many organizations store only the certificate date and the pass/fail result. That is rarely enough for traceability, audits, or impact assessment.</p><p>A useful calibration record identifies the asset and serial number, records where the instrument is used, and stores the last calibration date, next due date, and interval. It should also preserve the as-found readings, any as-left readings after adjustment, the acceptance tolerance, the laboratory that performed the work, and the certificate number.</p><p>Those fields support different operational needs. The due date supports scheduling, the as-found readings support drift analysis, and the certificate number supports audit traceability.</p><h2 id="how-calibration-intervals-are-determined">How Calibration Intervals Are Determined</h2><p>Calibration intervals are not fixed by physics. They are management decisions based on risk and evidence.</p><p>The interval is influenced by manufacturer recommendations, measurement criticality, frequency of use, operating environment, and historical calibration results.</p><p>A torque wrench used continuously on an automotive assembly line may need a shorter interval than the same model used occasionally in a maintenance shop.</p><p>The most valuable evidence is the <strong>as-found history</strong>. If several consecutive calibrations show very small drift, the interval may be extended. If drift trends toward the tolerance limit, the interval should be shortened.</p><p>Without historical as-found data, interval decisions become difficult to justify.</p><h2 id="why-overdue-instruments-matter">Why Overdue Instruments Matter</h2><p>An overdue instrument is not simply an administrative issue. It may represent an active production risk.</p><p>If the instrument remained in service after the due date, parts may have been measured without current calibration evidence. If it was removed from service and no spare was available, production may have been affected.</p><p>Effective programs monitor instruments <strong>before</strong> they become overdue. The warning window should reflect the actual lead time, including laboratory turnaround, shipping, internal approvals, spare availability, and planned shutdown schedules.</p><p>A <strong>30-day warning</strong> is common, but it is not universally appropriate. Some calibrations require much longer planning windows, while others can be completed within a few days.</p><h2 id="what-happens-when-an-instrument-fails-calibration">What Happens When an Instrument Fails Calibration?</h2><p>When an instrument is found out of tolerance, the first step is straightforward: remove it from service and prevent further use.</p><p>The more important question is what happened <strong>before</strong> the failure was discovered.</p><p>An impact assessment considers the last successful calibration date, the size and direction of the error, the characteristics measured with the instrument, the tolerances of those characteristics, and whether product reinspection is required.</p><p>This is one reason calibration records should preserve historical calibration events rather than overwriting the previous record.</p><p>The same principle applies to reference standards. If a working standard is later found out of tolerance, instruments calibrated against it may also require assessment.</p><h2 id="which-standards-require-calibration">Which Standards Require Calibration?</h2><p>Several quality management standards include calibration requirements.</p><ul><li><strong><a href="https://www.iso.org/standard/62085.html" rel="nofollow">ISO 9001:2015</a> clause 7.1.5.2</strong> — calibration or verification where measurement traceability is required.</li><li><strong><a href="https://en.wikipedia.org/wiki/IATF_16949" rel="nofollow">IATF 16949</a></strong> — automotive-specific calibration records and laboratory competence requirements.</li><li><strong><a href="https://www.iso.org/standard/59752.html" rel="nofollow">ISO 13485</a></strong> — calibration control for medical-device manufacturers.</li><li><strong><a href="https://en.wikipedia.org/wiki/AS9100" rel="nofollow">AS9100</a></strong> — aerospace calibration controls and record requirements.</li></ul><p>Audit findings are frequently related to missing records, overdue equipment, unclear status identification, or inadequate impact assessment rather than to the calibration measurement itself. A shop-floor <a href="https://flowfuse.com/blog/2026/08/layered-process-audit/">layered process audit</a> is one of the places these gaps get caught early, since checking whether a tool is within its calibration date is a standard item on that checklist.</p><h2 id="where-calibration-data-should-be-managed">Where Calibration Data Should Be Managed</h2><p>Calibration data is operational data. Production supervisors, maintenance teams, quality engineers, and auditors may all need access to current status information.</p><p>A spreadsheet can work for a small population of instruments, but it becomes difficult to maintain as the number of assets grows. Common problems include stale status fields, missed due dates, duplicate records, and limited visibility across departments.</p><p>A digital calibration register can derive status directly from due dates, generate due-soon alerts, filter by department or asset type, and provide live compliance metrics.</p><p><a href="https://flowfuse.com/">FlowFuse</a> can connect to calibration records stored in a database, CMMS, or ERP system and present overdue and due-soon status in real time. It can also trigger alerts before an instrument becomes overdue.</p><p>We walk through that implementation in <a href="https://flowfuse.com/blog/2026/07/calibration-management-dashboard/">Tracking Instrument Calibration with a Digital Dashboard</a>.</p><p><strong>Need visibility into calibration status across your plant?</strong></p><p>Talk to our team about connecting calibration records, CMMS data, and shop-floor systems to a real-time calibration dashboard with FlowFuse.</p><p><a href="https://flowfuse.com/contact-us/">Contact Us</a></p>]]></content>
        <updated>2026-07-31T00:00:00.000Z</updated>
        <link href="https://flowfuse.com/blog/2026/07/what-is-instrument-calibration/"/>
        
    </entry>
    <entry>
        <id>https://flowfuse.com/blog/2026/07/flowfuse-release-2-33/</id>
        <title>FlowFuse 2.33: From Setting Up Plant Floor Hardware to Visualizing Your Data</title>
        <summary>2.33 runs the Device Agent installer from your command line, enrolling edge machines in a few guided steps, and adds a supported Modbus driver spanning TCP and Serial. Dashboards get their own spot in the team menu, and the Expert can describe or preview what lives in your Tables on request. Rounding it out: team-scoped access tokens, SAML group-to-role mapping, and a log of each MCP call.</summary>
        <content type="html"><![CDATA[<p>Most releases sharpen one corner of the platform. 2.33 follows the whole journey your data takes — from the moment hardware powers on to the moment someone reads a dashboard built on it. Bringing a machine online no longer means starting in the platform and working backwards, a certified Modbus package speaks the factory floor's most common protocol, and dashboards finally have somewhere of their own to live. And as more of that journey gets automated, the release tightens the guardrails around the clients and AI agents touching your systems.</p><h2 id="set-up-your-plant-floor-hardware-straight-from-the-terminal">Set Up Your Plant Floor Hardware Straight From the Terminal</h2><p>Getting your own hardware into FlowFuse meant working backwards. You signed up, found the remote instance section, learned what the Device Agent was, created the instance in the platform, copied its connection details, and only then ran the installer with that code in hand.</p><p>Now you can start where the hardware already is. Run the installer from your terminal and it walks you through registering — including setting up an account if you need one — ending with your machine registered as a remote instance and ready to build on. If something's in the way — like port 1880 already being in use — the installer tells you up front instead of failing partway through.</p><p>You can grab the install command for your platform on the <a href="https://flowfuse.com/platform/device-agent/">Device Agent page</a> and have a machine online in a few minutes. More of the from-scratch onboarding experience lands in upcoming releases.</p><h2 id="modbus-certified-node">Modbus Certified Node</h2><p>FlowFuse Edge customers can now install a FlowFuse-certified Modbus node straight from the palette manager in their editor. It covers Modbus TCP and Serial — including RTU and ASCII — in a single package.</p><p>Modbus is one of the most common protocols on the factory floor, but the community package most teams rely on depends on volunteer maintainers. The FlowFuse-certified node is backed by our own testing, SLA-backed security patching, and a long-term maintenance commitment.</p><p><em>This feature is available exclusively to FlowFuse Edge customers, on both FlowFuse Cloud and Self Hosted, from v2.33.</em></p><h2 id="ask-the-expert-about-your-tables">Ask the Expert About Your Tables</h2><p>Available in: <a href="https://flowfuse.com/product/edge/">Edge</a>, <a href="https://flowfuse.com/product/hub/">Hub</a>, <a href="https://flowfuse.com/product/fleet/">Fleet</a></p><p>Until now, checking on your Tables data meant leaving the chat panel and opening the Tables view yourself. Now you can just ask the Expert: which tables exist, what a table's columns look like, or for a quick peek at the data, and it answers right there. For real analysis, like filtering, sorting, or making changes, the Expert can build that for you too, as a flow using the <code>tables-query</code> node.</p><p>This release also closes a rough edge in Tables itself: databases with tables outside the default schema now behave correctly throughout, and the UI shows you which schema each table belongs to.</p><p><img alt="The Expert answering a question about a FlowFuse Tables database" data-zoomable="" src="https://flowfuse.com/blog/2026/07/images/chat.png" style="border: 2px solid #E5E7EB;"/></p><p><em>Availability: This feature is available to FlowFuse Hub and Edge customers on FlowFuse Cloud and Self Hosted from v2.33.</em></p><p>Changelog: <a href="https://flowfuse.com/changelog/2026/07/expert-tables-automation/">FlowFuse Expert Can Now Work With Your Tables</a></p><p>Docs: <a href="https://flowfuse.com/docs/user/ff-tables/">FlowFuse Tables</a></p><h2 id="your-dashboards-all-in-one-place">Your Dashboards, All in One Place</h2><p>Available in: <a href="https://flowfuse.com/product/edge/">Edge</a>, <a href="https://flowfuse.com/product/hub/">Hub</a>, <a href="https://flowfuse.com/product/fleet/">Fleet</a></p><p>Dashboards now have a home. A new <strong>Dashboards</strong> entry in your team navigation lists every dashboard across your hosted instances, and opens each one right inside FlowFuse instead of a separate browser tab. Each application also has its own <strong>Dashboards</strong> tab, showing just the dashboards from that application's instances. A drawer lets you switch between dashboards in a single click, without going back to a list.</p><p>Until now, dashboards were reachable only through an "Open Dashboard" button on individual instance pages: fine if you knew where to look, a dead end if you didn't. Dashboard-only users had it worst, landing on a bare list of instances with nowhere to go. Now dashboards are a first-class part of the product, with a home scoped to exactly what each user can access.</p><p><img alt="An embedded dashboard with the switcher drawer open to move between dashboards" data-zoomable="" src="https://flowfuse.com/blog/2026/07/images/dashboard-drawer.png" style="border: 2px solid #E5E7EB;"/></p><p><em>Availability: all users of FlowFuse Cloud and all Self Hosted users from v2.33.</em></p><p>Changelog: <a href="https://flowfuse.com/changelog/2026/07/team-and-application-dashboards/">A Dedicated Home for Your Dashboards</a></p><h2 id="tighter-control-over-who-and-what-reaches-your-systems">Tighter Control Over Who and What Reaches Your Systems</h2><p>The more of your platform that automated clients and AI agents can reach, the more the question shifts: not just what they are allowed to do, but what you can prove they did afterwards, and how narrowly you can scope their access up front. 2.33 adds three controls that answer it.</p><h3 id="platform-mcp-tools-api-actions-audit-trail">Platform MCP Tools &amp; API Actions Audit Trail</h3><p>FlowFuse now logs actions performed through the supported platform MCP tools for AI agents such as our own first class AI agent the FlowFuse Expert. Each log entry records the action, when it occurred, and the user that performed it through it's dependency on the user's Personal Access Token. These logs do not capture activity related to MCP server nodes with which you can build your own MCP tooling and is part of our FlowFuse Expert Insights offering.</p><p>If you answer to an OT security team or an auditor, "the AI did it" is not an acceptable line in an incident report. The audit trail turns AI activity into the same kind of accountable, reviewable record you already expect from human operators.</p><p><em>Availability: Hub and Edge from v2.33.</em></p><h3 id="scoped-personal-access-tokens">Scoped Personal Access Tokens</h3><p>Available in: <a href="https://flowfuse.com/product/edge/">Edge</a>, <a href="https://flowfuse.com/product/hub/">Hub</a>, <a href="https://flowfuse.com/product/fleet/">Fleet</a></p><p>Personal Access Tokens can now be scoped to specific teams and include read or write permissions. Create a token that can do exactly what its integration needs and nothing more. This is especially important for AI use cases.</p><p>Previously a PAT carried the full permissions of the user who created it. If you generated a token for a read-only dashboard integration, that token could still modify your instances. Scoped tokens close that gap and follow the least-privilege pattern your security team already applies everywhere else.</p><p>You can easily navigate towards your <a href="https://app.flowfuse.com/account/security/tokens" rel="nofollow">personal settings</a> to setup a new personal access token and configure it with the right scope and permissions.</p><p><img alt="The token creation dialog with individual permission scopes selected" data-zoomable="" src="https://flowfuse.com/blog/2026/07/images/scoped-pats.png" style="border: 2px solid #E5E7EB;"/></p><p><em>Availability: Hub and Edge from v2.33.</em></p><p>Changelog: <a href="https://flowfuse.com/changelog/2026/07/scoped-pats/">Team Scoped Personal Access Tokens</a></p><h3 id="manage-granular-rbac-through-your-identity-provider">Manage Granular RBAC Through Your Identity Provider</h3><p>Available in: <a href="https://flowfuse.com/product/edge/">Edge</a>, <a href="https://flowfuse.com/product/hub/">Hub</a>, <a href="https://flowfuse.com/product/fleet/">Fleet</a></p><p>SSO admins can now map SAML groups to FlowFuse's granular roles. When someone joins the "Plant Floor Operators" group in your identity provider, they get the matching FlowFuse permissions automatically. No manual role assignment, no drift between your IdP and your platform.</p><p><em>Availability: Hub and Edge from v2.33.</em></p><p>Changelog: <a href="https://flowfuse.com/changelog/2026/07/application-sso-groups/">Application Roles from SSO Groups</a></p><p>Docs: <a href="https://flowfuse.com/docs/admin/sso/">Single Sign-On (SSO)</a></p><h2 id="also-in-this-release">Also in This Release</h2><ul><li>The Expert is better at telling when you want it to act versus when you want guidance.</li><li>MCP server enumeration is much faster for teams with many instances.</li><li>Fixed dropdown inputs rejecting values that matched the start of a suggestion.</li><li>Plus dependency updates and smaller fixes.</li></ul><p>For detailed breakdowns of each feature with additional visuals, visit our <a href="https://flowfuse.com/changelog/">changelog</a>. For the complete list of everything included in FlowFuse 2.33, check out the <a href="https://github.com/FlowFuse/flowfuse/releases" rel="nofollow">release notes</a>.</p><p>If something in this release improves your workflow, or if there is still friction we can remove, please <a href="mailto:contact@flowfuse.com?subject=Feedback%20on%202.33">share feedback or report issues regarding this release</a> to us.</p><h2 id="try-flowfuse">Try FlowFuse</h2><h3 id="flowfuse-cloud">FlowFuse Cloud</h3><p>The fastest way to get started is with FlowFuse Cloud.
<a href="https://app.flowfuse.com/account/create" rel="nofollow">Get started for free</a> and have your Node-RED instances running in minutes.</p><h3 id="self-hosted">Self-Hosted</h3><p>Run FlowFuse locally using <a href="https://flowfuse.com/docs/install/docker/">Docker</a> or <a href="https://flowfuse.com/docs/install/kubernetes/">Kubernetes</a>.</p><h2 id="whats-next">What's Next</h2><p>2.33 closes out the 2.x line. Something bigger arrives in August. 📈</p><p><strong>Start building with your own industrial data</strong></p><p>Connect your systems, automate workflows, and see what’s possible in your environment.</p><p><a href="https://app.flowfuse.com/account/create">Try it out</a></p>]]></content>
        <updated>2026-07-30T00:00:00.000Z</updated>
        <link href="https://flowfuse.com/blog/2026/07/flowfuse-release-2-33/"/>
        
    </entry>
    <entry>
        <id>https://flowfuse.com/blog/2026/07/ishikawa-fishbone-diagram/</id>
        <title>Ishikawa Fishbone Diagram: 6M, Manufacturing Example &amp; Template</title>
        <summary>An Ishikawa diagram, better known as a fishbone or cause-and-effect diagram, finds the real cause of a problem instead of chasing symptoms by sorting possible causes into categories branching off a central spine. The 6Ms are a starting point for manufacturing, but you swap them for whatever fits your problem. It works because it forces a team to externalize and argue their theories on paper before spending money on a fix, and it fails when people stop at labeling empty branches and call that analysis. The diagram surfaces suspects; verifying which one is real, with data, is what actually fixes the problem.</summary>
        <content type="html"><![CDATA[<p>The most dangerous words in a root cause investigation are often the ones spoken with the most confidence: "We already know what caused it." That assumption sends teams straight to a fix before they've explored the system behind the failure. When the same issue returns a few weeks later, it becomes clear they fixed the symptom, not the cause.</p><p>Kaoru Ishikawa built a drawing in the 1960s to kill that exact reflex. It looks like a fish skeleton, which is why almost nobody calls it by his name. Sixty years and a dozen fancier root-cause tools later, engineers still reach for it first. Not because it's clever. Because it forces every theory in the room onto one wall, where the weak ones have nowhere to hide.</p><h2 id="what-is-a-fishbone-diagram">What Is a Fishbone Diagram?</h2><p>Strip away the terminology and a fishbone diagram is a structured way to brainstorm causes without letting the loudest person in the room decide the answer.</p><p>You write the problem, the effect you want to eliminate, on the right side. That's the fish's head. A horizontal line runs left into it: the spine. Off that spine you draw diagonal branches, the ribs, and each rib is a category of causes. Under each category you hang the specific things that might be going wrong. When you're done, you're looking at every plausible cause for one problem, sorted into groups, on a single page.</p><p>The naming gets confusing, so here it is plainly. Ishikawa diagram, fishbone diagram, and cause-and-effect diagram all refer to the same tool. The names are used interchangeably in practice, though purists will point out that not every cause-and-effect sketch follows the fishbone shape. It's one of the <a href="https://en.wikipedia.org/wiki/Seven_basic_tools_of_quality" rel="nofollow">seven basic quality tools</a>, the club of simple techniques quality engineers lean on before pulling out anything statistical.</p><p>What it does <em>not</em> do is prove anything. A fishbone diagram generates hypotheses. It tells you where to look, not what the answer is. That distinction is the whole difference between a diagram that helps and one that wastes an afternoon, and we'll come back to it.</p><h2 id="who-invented-the-ishikawa-diagram">Who Invented the Ishikawa Diagram?</h2><p>The diagram is named after <a href="https://en.wikipedia.org/wiki/Kaoru_Ishikawa" rel="nofollow">Kaoru Ishikawa</a> (1915–1989), a Japanese engineer, University of Tokyo professor, and one of the founding fathers of modern quality management. He popularized it in the 1960s while developing quality processes at the Kawasaki shipyards, and formalized it in his 1968 book <em>Guide to Quality Control</em>. His aim was democratic: he wanted quality improvement in the hands of ordinary workers, not locked inside a specialist team, so he built a diagram simple enough that anyone on the line could use it, which is a big part of why the <a href="https://asq.org/quality-resources/fishbone" rel="nofollow">American Society for Quality</a> still lists it among the seven basic tools sixty years on.</p><p>Its reach since has been broad. One famous case is Mazda, whose engineers reportedly used an Ishikawa diagram to map every factor behind the "Jinba Ittai" (horse and rider as one) feel of the original MX-5 Miata.</p><h2 id="what-are-the-6ms-in-a-fishbone-diagram">What Are the 6Ms in a Fishbone Diagram?</h2><p>Ishikawa suggested generic labels for the rib categories so teams would have somewhere to start instead of staring at a blank spine. In manufacturing, those defaults became the 6Ms:</p><ul><li><strong>Manpower</strong> (people): training gaps, unclear responsibilities, communication breakdowns, fatigue.</li><li><strong>Method</strong> (process): missing standards, steps performed inconsistently, procedures that no longer match reality.</li><li><strong>Machine</strong> (equipment): worn parts, skipped maintenance, wrong tooling, calibration drift.</li><li><strong>Material</strong> (inputs): out-of-spec raw material, supplier variation, wrong batch, storage damage.</li><li><strong>Measurement</strong> (data): miscalibrated instruments, wrong gauge, inconsistent inspection, bad data collection.</li><li><strong>Mother Nature</strong> (environment): temperature, humidity, vibration, dust, anything the surroundings do to the process.</li></ul><p>Here is the part most guides bury: Ishikawa himself told people to rename these categories to fit their problem. The 6Ms are training wheels, not scripture. They map cleanly onto a factory floor, but even there you'll often want to tweak them, and outside a production line they can fall apart entirely.</p><p>Some teams add a seventh M, Money, when cost drivers matter. Process industries sometimes swap in categories like Environment, Equipment, and Procedures. For a service or business problem, the 7Ps (Product, Price, Place, Promotion, People, Process, Physical Evidence) fit better than machinery and materials. The right categories are the ones that make your team say "oh, we haven't thought about that bucket yet." If a category sits empty because it doesn't apply, delete it. An empty rib is not a sign you missed something; it's a sign the label was wrong for your problem.</p><h2 id="how-to-make-a-fishbone-diagram">How to Make a Fishbone Diagram</h2><p>The mechanics take five minutes. Doing it well takes discipline. Here's the sequence.</p><p><strong>Write a problem statement, not a topic.</strong> "Machine downtime" is a topic. "Line 3 filler stops an average of 4 times per shift, each stop lasting 6 to 12 minutes" is a problem statement. The second one gives the team something specific to explain. Vague heads produce vague ribs.</p><p><strong>Draw the spine and pick your categories.</strong> Four to six is the sweet spot. Fewer and you're not really sorting; more and the diagram turns into a wall of branches nobody can read. Start from the 6Ms if you're in manufacturing, adapt hard if you're not.</p><p><strong>Brainstorm causes under each category.</strong> This is where the tool earns its keep. Go category by category and ask what, under this heading, could produce the effect. Write everything down, even the theories you doubt. The point of sorting into buckets is that it triggers ideas you'd never reach with an open-ended "what's wrong?"</p><p><strong>Push each cause deeper with "why."</strong> A first-level cause is rarely the root. Pair the fishbone with the <a href="https://flowfuse.com/blog/2025/12/five-whys-root-cause-analysis-definition-examples/">5 Whys</a>: for each rib entry, ask why that happens, and hang the answer as a sub-branch. "Bearing failed" becomes "bearing failed → lubrication skipped → PM schedule not followed → no one owns the schedule." Now you're looking at a root, not a symptom.</p><p><strong>Then stop drawing and start verifying.</strong> This is the step that separates analysis from theater. A finished fishbone is a list of <em>suspects</em>, and every suspect is a hypothesis you can test against data. Circle the two or three most likely causes, then go check them: pull the maintenance log, measure the material, watch the operator. The diagram points the flashlight. It doesn't tell you what's in the dark.</p><h2 id="fishbone-diagram-example">Fishbone Diagram Example</h2><p>Abstract diagrams teach nothing, so here's the kind of case that plays out on a real line. A packaging line is rejecting cartons because the printed date code is smearing. That's the head of the fish. The team runs 6M categories:</p><ul><li><strong>Machine:</strong> print head height drifted, print head overdue for cleaning, conveyor speed increased last month.</li><li><strong>Material:</strong> new ink supplier introduced two weeks ago, carton stock switched to a glossier finish.</li><li><strong>Method:</strong> no standard for print-head-to-carton distance, cleaning interval never written down.</li><li><strong>Manpower:</strong> night shift not trained on the new ink's dry time.</li><li><strong>Measurement:</strong> no check on ink cure before cartons stack.</li><li><strong>Mother Nature:</strong> plant humidity up since the HVAC repair.</li></ul><p>Six categories, roughly a dozen suspects. Now the 5 Whys on the strongest lead: the glossier carton stock. Why does gloss smear? Ink doesn't absorb. Why not? The new stock is non-porous. Why did we switch? Purchasing found a cheaper supplier. Why didn't anyone flag the print impact? No one owns print-compatibility sign-off on material changes.</p><p>Notice what happened. The obvious fix, "clean the print head," would have bought a day of relief and then the smearing returns. The fishbone surfaced two causes that interacted, a material change and a missing sign-off process, that a single-thread investigation would have walked right past. That's the entire value of the tool: it makes interacting causes visible instead of letting you commit to the first plausible one.</p><h2 id="fishbone-vs-5-whys-vs-pareto-which-one-when">Fishbone vs. 5 Whys vs. Pareto: Which One, When</h2><p>The fishbone rarely works alone, and it's easy to reach for the wrong tool. Here's how the three most common root-cause techniques divide the labor.</p><table><thead><tr><th>Tool</th><th>What it does</th><th>Use it when</th><th>Where it falls short</th></tr></thead><tbody><tr><td><strong>Fishbone diagram</strong></td><td>Goes wide. Surfaces every plausible cause across several categories so nothing obvious gets missed.</td><td>You don't yet know where the problem lives and want the team's collective knowledge on one page.</td><td>Treats every branch as equally worth investigating. Says nothing about which cause matters most.</td></tr><tr><td><strong><a href="https://flowfuse.com/blog/2025/12/five-whys-root-cause-analysis-definition-examples/">5 Whys</a></strong></td><td>Goes deep. Drills a single cause chain, asking "why" until you hit something fixable rather than another symptom.</td><td>After the fishbone, on the two or three branches you think are strongest.</td><td>It's a single thread. Drill the wrong cause and you'll reach a confident, well-reasoned, wrong answer.</td></tr><tr><td><strong><a href="https://flowfuse.com/blog/2025/08/pareto-chart-manufacturing-guide/">Pareto chart</a></strong></td><td>Ranks. Sorts candidate causes by frequency or impact so you fix the vital few, not the trivial many.</td><td>You can count occurrences and need to decide where to act first.</td><td>Needs data you may not have early on, and only ranks what you already thought to measure.</td></tr></tbody></table><p>The sequence is: fishbone to find suspects, 5 Whys to reach the root of the best ones, Pareto to decide which roots are worth fixing first. They're not competitors. They're a pipeline.</p><h2 id="fishbone-diagram-template">Fishbone Diagram Template</h2><p>You don't need software. Here's a text skeleton you can drop into any doc and fill in:</p><pre class="language-text" code="                    Method            Machine           Measurement
                       \                 |                  /
             cause ─────\        cause ──|        cause ───/
             cause ──────\       cause ──|        cause ──/
                          \              |               /
   ══════════════════════════════════════════════════════════►  [ PROBLEM ]
                          /              |               \
             cause ──────/       cause ──|        cause ──\
             cause ─────/        cause ──|        cause ───\
                       /                 |                  \
                   Manpower          Material           Mother Nature
" language="text"><code __ignore-map="">                    Method            Machine           Measurement
                       \                 |                  /
             cause ─────\        cause ──|        cause ───/
             cause ──────\       cause ──|        cause ──/
                          \              |               /
   ══════════════════════════════════════════════════════════►  [ PROBLEM ]
                          /              |               \
             cause ──────/       cause ──|        cause ──\
             cause ─────/        cause ──|        cause ───\
                       /                 |                  \
                   Manpower          Material           Mother Nature
</code></pre><p>Rules for using it: replace the six labels with categories that fit <em>your</em> problem, keep the problem statement specific, and treat every "cause" line as something you'll later verify with data. If you prefer digital, any diagramming tool works, but the paper-and-marker version on a wall is often better because it gets the whole team pointing at the same branch.</p><h2 id="common-fishbone-diagram-mistakes">Common Fishbone Diagram Mistakes</h2><p>Most failed fishbone sessions fail the same handful of ways.</p><p><strong>Labeling empty branches and calling it done.</strong> Six categories with two vague words under each is a brainstorming template, not root-cause analysis. If the diagram doesn't contain specific, checkable causes, you've drawn a fish, not found a problem.</p><p><strong>Confusing the diagram with the answer.</strong> The single most common error. The fishbone lists suspects; it does not convict any of them. Teams that skip verification and just "fix" the most-discussed branch are gambling, not analyzing.</p><p><strong>Using the 6Ms where they don't fit.</strong> Forcing every problem into the manufacturing 6Ms produces empty ribs and missed causes. Pick categories that match your failure surface, and drop the ones that don't apply.</p><p><strong>Vague problem statements.</strong> A fuzzy head produces a fuzzy diagram. Spend the extra two minutes writing what actually happened, where, and how often.</p><p><strong>Stopping at the first level.</strong> "Operator error" is where lazy analysis ends and real analysis begins. Ask why five times before you believe you've hit a root.</p><h2 id="where-the-fishbone-fits">Where the Fishbone Fits</h2><p>The Ishikawa diagram survives because it does one job well: it gets a group of people to externalize their theories, sort them, and argue about them on paper before spending money. It's cheap, it's visual, and it needs no training to read. Those are the same reasons the simplest tools tend to outlast the sophisticated ones.</p><p>It has limits. It shows causes but not their relative weight or how they interact over time; for that you'd reach for a <a href="https://flowfuse.com/blog/2025/08/pareto-chart-manufacturing-guide/">Pareto chart</a>, fault tree, or statistical analysis. And it's only as good as the verification that follows it. Draw the fish, then go prove which bone is broken.</p><p>Used that way, as a hypothesis generator that hands off to real investigation, it remains one of the fastest ways to stop treating symptoms and start fixing causes. Sixty years in, that's still a rare thing for a tool to do.</p><p>The catch is that verification needs data the whiteboard can't give you: how often the machine actually stalls, whether the material batch really shifted, what the sensor logged when the defect appeared. That's the step where <a href="https://flowfuse.com/">FlowFuse</a> fits, connecting your PLCs, sensors, and quality systems into dashboards so you can test which suspected cause is real and confirm the fix held. It won't draw the fishbone for you, but it settles which bone was broken.</p><p><strong>Turn suspected causes into verified ones</strong></p><p>Talk to our team about connecting your PLCs, sensors, and quality systems to FlowFuse, so you can verify which root cause is real with live production data and confirm your fixes actually hold.</p><p><a href="https://flowfuse.com/contact-us/">Contact Us</a></p>]]></content>
        <updated>2026-07-27T00:00:00.000Z</updated>
        <link href="https://flowfuse.com/blog/2026/07/ishikawa-fishbone-diagram/"/>
        
    </entry>
    <entry>
        <id>https://flowfuse.com/blog/2026/07/digital-work-instruction/</id>
        <title>Building Digital Work Instructions Dashboard for the Shop Floor</title>
        <summary>Build a FlowFuse digital work instructions application that authenticates each operator, loads only their assigned work orders, guides them step by step with per-operator progress tracking, and lets them report defects, all tied to their logged-in identity.</summary>
        <content type="html"><![CDATA[<p>Operators need to know what to build, how to build it, and what to do when something breaks. Digital work instructions put that on a screen, guided steps, a checklist, buttons to finish or flag a defect, and retire the paper binder.</p><p>But shared stations raise a question paper never had: who's using it? Without a way to tell operators apart, the work order, the current step, and the record of what happened all blur together. Authentication draws the line, the operator's identity becomes the thread the app hangs on.</p><p><img alt="Digital work instructions dashboard showing operator work orders, production status" src="https://flowfuse.com/blog/2026/07/images/digital-work-instruction-dashboard.png"/><em>Digital work instructions dashboard showing operator work orders, production status</em></p><p><img alt="Operator interface displaying guided work instructions with step completion and defect reporting options" src="https://flowfuse.com/blog/2026/07/images/digital-work-instruction-2.png"/><em>Operator interface displaying guided work instructions with step completion and defect reporting options</em></p><p>In this article, we'll build a digital work instructions app in FlowFuse: an operator interface with work orders, step-by-step assembly guidance, defect reporting, and traceability via authentication.</p><blockquote><p><strong>Note:</strong> This demo is deliberately configured with a preset demo user so anyone can try it, even without being on the team where it's deployed. The version you build following this article uses FlowFuse User Authentication, which limits dashboard access to members of the same team.</p></blockquote><p>You can interact with the live demo here: .</p><h2 id="what-youll-need">What You'll Need</h2><p>Before you start building, get these ready:</p><ul><li><strong>A FlowFuse account.</strong> <a href="https://app.flowfuse.com/account/create" rel="nofollow">Sign up</a> for FlowFuse Cloud, or use a self-hosted instance.</li><li><strong>A FlowFuse instance up and running.</strong> If you don't have one yet, create a new instance from your FlowFuse Platform.</li><li><strong>FlowFuse Dashboard installed.</strong> This tutorial uses <code>@flowfuse/node-red-dashboard</code> nodes (<code>ui-template</code>, <code>ui-table</code>, <code>ui-form</code>, <code>ui-button</code>, <code>ui-control</code>, <code>ui-event</code>, <code>ui-text</code>) to build the operator interface. Install it from the Palette Manager if it isn't already in your instance.</li><li><strong>The FlowFuse Dashboard user addon.</strong> This is what attaches the logged-in user to every dashboard message. We'll install it in the first section.</li></ul><blockquote><p>Note: The Multi-User addon is available to Teams and Enterprise Self-Hosted customers. If you're on a different tier, <a href="https://flowfuse.com/contact-us/">contact us</a> for the configuration to get started.</p></blockquote><h2 id="how-the-application-works">How the Application Works</h2><p>Before we build anything, let's walk through what the app does and how the pieces fit together. There are three pages, and one idea holding them together.</p><ol><li><strong>Home.</strong> After logging in, the application uses the operator's username to retrieve only the work orders assigned to them from the ERP or MES. It displays their station, production summary, the highest-priority work order, and the remaining queue. Selecting <strong>Start Work Order</strong> opens the instructions.</li><li><strong>Instructions.</strong> Operators follow step-by-step instructions with images, checklists, and target cycle times. They can progress through each step, complete the operation, or report an issue at any time.</li><li><strong>Report Issue.</strong> Operators can quickly log defects by selecting the issue type, severity, affected part, and description, with the issue automatically linked to the current work order.</li></ol><p>The logged-in username acts as the application's lookup key. It retrieves the operator's assigned work orders and stores their active work order and current step, allowing them to resume exactly where they left off, even on shared production stations.</p><p>There are two different questions the app has to answer, and it's worth keeping them separate from the start:</p><ul><li><strong>"Where is this operator's data stored?"</strong> — under a persistent global key named after their username, e.g. <code>global.get('operator1', 'persistent')</code>. This is a durable, shared store, and it's meant to be: it's what lets progress survive reloads and reconnects.</li><li><strong>"Who is acting right now, in this message?"</strong> — this must be read fresh from the message that triggered the flow (<code>msg._client.user</code>), not from a single shared "current user" variable. A shared variable has only one value at a time; the moment a second operator's browser connects, it overwrites the first operator's identity for the whole running flow. We'll come back to this the moment it becomes relevant, but it's the one rule that makes every "per operator" claim in this tutorial actually true when two people are logged in at once.</li></ul><h2 id="importing-the-simulated-flow">Importing the Simulated Flow</h2><p>Instead of connecting to a real ERP or MES, we'll use a simple simulated backend that serves sample work orders through an HTTP API.</p><ol><li>Import the following flow into FlowFuse and click <strong>Deploy</strong>.</li></ol><p>The flow initializes a set of sample work orders and exposes REST APIs that the Digital Work Instructions application uses throughout this tutorial. The <code>GET /workorders</code> endpoint returns the active work orders, while the other endpoints simulate completing a work order, reporting defects, and retrieving production statistics. This lets you build and test the application without a live ERP or MES. Later, you can replace these endpoints with calls to your production system while keeping the rest of the application unchanged.</p><h2 id="setting-up-the-dashboard-layout">Setting Up the Dashboard Layout</h2><p>The application consists of three pages. Most widgets are placed inside named groups, while a few are scoped differently. See the <a href="https://dashboard.flowfuse.com/getting-started" rel="nofollow">Dashboard layout docs</a> if you're new to how pages, groups, and bases relate. The app bar greeting is <strong>UI-scoped</strong>, and the work instruction widget is <strong>page-scoped</strong>, allowing it to fill the entire <strong>Instructions</strong> page without requiring a group. Before adding any widgets, create the dashboard structure by setting up the pages and groups.</p><ol><li>Create three <strong>ui-page</strong> nodes. The Dashboard automatically creates a base dashboard the first time you add a Dashboard node to the canvas.<ul><li><strong>Home</strong> (path: <code>/home</code>) – The operator's landing page after login. Set the layout to <strong>Notebook</strong> to match the demo application.</li><li><strong>Instructions</strong> (path: <code>/instructions</code>) – Displays the step-by-step work instructions. Set the layout to <strong>Grid</strong>.</li><li><strong>Report Issue</strong> (path: <code>/report-issue</code>) – Contains the defect reporting form. Set the layout to <strong>Grid</strong>.</li></ul></li><li>Configure the theme for each page as desired.</li><li>On the <strong>Home</strong> page, create four <strong>ui-group</strong> nodes:<ul><li><strong>Current Station</strong></li><li><strong>Stats</strong></li><li><strong>Current Work Order</strong></li><li><strong>Up Next</strong></li></ul></li><li>On the <strong>Report Issue</strong> page, create a single <strong>ui-group</strong> named <strong>Report Issue</strong>. This group will contain the issue reporting form and its action buttons.</li></ol><p>The <strong>Instructions</strong> page does not require a <strong>ui-group</strong> because the work instruction widget is page-scoped and automatically occupies the full page.</p><p>With this layout in place, each widget added in the following sections can be assigned to the appropriate group, or directly to the page when required.</p><h2 id="enabling-flowfuse-user-authentication">Enabling FlowFuse User Authentication</h2><p>Everything starts with a login. Without authentication, the dashboard cannot identify who is using it, so every visitor sees the same experience.</p><blockquote><p><strong>Note:</strong> FlowFuse User Authentication grants dashboard access to members of the same team as the instance. Operators you want to sign in must belong to that team, otherwise they won't be able to reach the dashboard. If you need people outside the team to use the application, you'll need to add them to the team.</p></blockquote><ol><li>Open your FlowFuse instance <strong>Settings</strong>.</li><li>Select the <strong>Security</strong> tab.</li><li>Enable <strong>FlowFuse User Authentication</strong>.</li></ol><p><img alt="Screenshot: the Security tab in instance settings with FlowFuse User Authentication enabled" src="https://flowfuse.com/blog/2024/04/images/displaying-logged-in-user-flowfuse-instance-setting.png"/><em>Enable FlowFuse User Authentication in the instance Security settings. You'll also create a Personal Access Token here for authenticating API requests later in the tutorial.</em></p><p>The first time someone opens the dashboard, they will be prompted to sign in using their FlowFuse username and password. Once authenticated, the dashboard can personalize the experience for each operator throughout the rest of this tutorial.</p><p>Because this tutorial also interacts with the FlowFuse API, you'll need to create a Personal Access Token:</p><ol start="4"><li>In the same <strong>Security</strong> tab, click <strong>Add Token</strong>.</li><li>Enter a name for the token and choose an expiration date.</li><li>Click <strong>Create</strong>, then copy the generated token and save it somewhere secure. You will need it later in the tutorial.</li></ol><blockquote><p><strong>Security note:</strong> Every <code>http request</code> node in this tutorial authenticates with this token, and for the sake of a self-contained tutorial we reference it as a plain Bearer token on each node. Don't leave it hardcoded that way in a real deployment. Store it as an environment variable on your FlowFuse instance and reference that variable from each <code>http request</code> node's auth config instead, so the raw token never sits in exported flow JSON or version control.</p></blockquote><h2 id="installing-the-user-addon">Installing the User Addon</h2><p>Authentication identifies the user, but your flows also need access to that information. The FlowFuse User Addon attaches the authenticated user's details to every Dashboard message.</p><ol><li>Open <strong>Manage Palette</strong>.</li><li>Go to the <strong>Install</strong> tab.</li><li>Search for <code>@flowfuse/node-red-dashboard-2-user-addon</code>.</li><li>Click <strong>Install</strong>.</li></ol><p>After installation, every Dashboard message includes a <code>msg._client.user</code> object:</p><pre class="language-json shiki shiki-themes material-theme-lighter material-theme material-theme-palenight" code="{
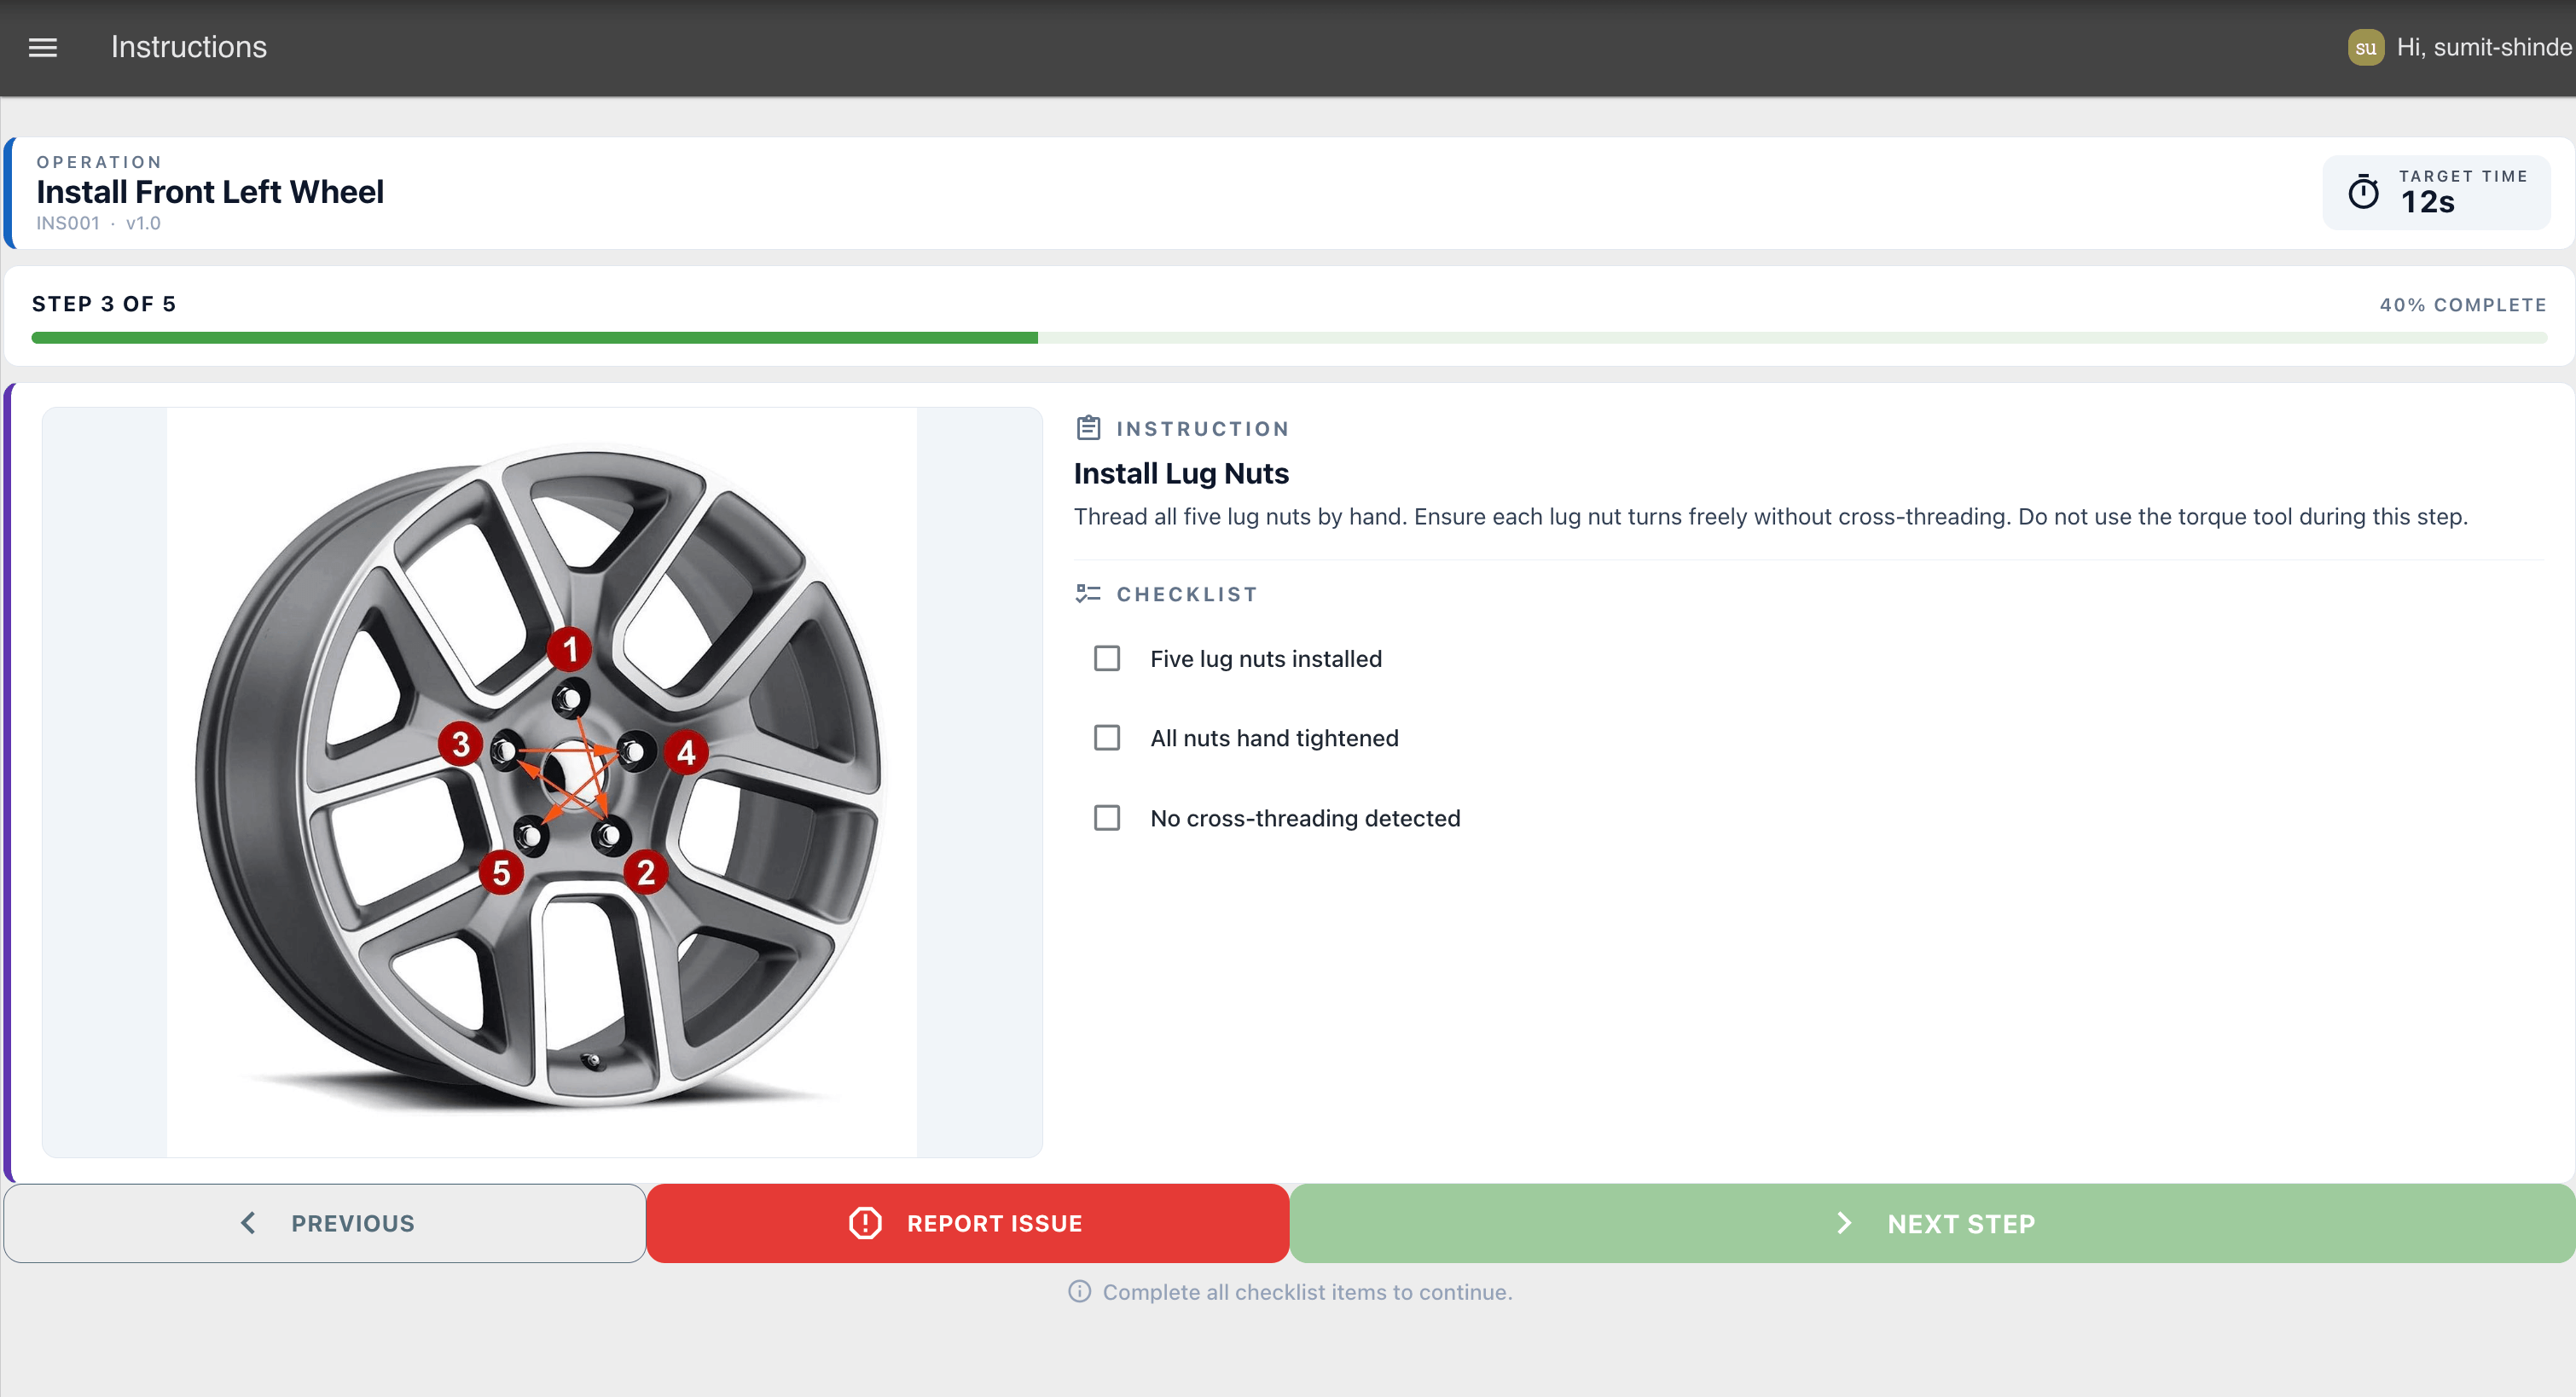
  "userId": "",
  "username": "",
  "email": "",
  "name": "",
  "image": ""
}
" language="json" meta="" style=""><code __ignore-map=""><span class="line" line="1"><span class="sMK4o">{
</span></span><span class="line" line="2"><span class="sMK4o">  "</span><span class="spNyl">userId</span><span class="sMK4o">"</span><span class="sMK4o">:</span><span class="sMK4o"> ""</span><span class="sMK4o">,
</span></span><span class="line" line="3"><span class="sMK4o">  "</span><span class="spNyl">username</span><span class="sMK4o">"</span><span class="sMK4o">:</span><span class="sMK4o"> ""</span><span class="sMK4o">,
</span></span><span class="line" line="4"><span class="sMK4o">  "</span><span class="spNyl">email</span><span class="sMK4o">"</span><span class="sMK4o">:</span><span class="sMK4o"> ""</span><span class="sMK4o">,
</span></span><span class="line" line="5"><span class="sMK4o">  "</span><span class="spNyl">name</span><span class="sMK4o">"</span><span class="sMK4o">:</span><span class="sMK4o"> ""</span><span class="sMK4o">,
</span></span><span class="line" line="6"><span class="sMK4o">  "</span><span class="spNyl">image</span><span class="sMK4o">"</span><span class="sMK4o">:</span><span class="sMK4o"> ""
</span></span><span class="line" line="7"><span class="sMK4o">}
</span></span></code></pre><p>The same information is available in a <strong>ui-template</strong> using <code>setup.socketio.auth.user</code> (or <code>this.setup.socketio.auth.user</code> in the script).</p><ol><li>In the <strong>FF Auth</strong> sidebar tab, ensure <strong>Include Client Data</strong> is enabled.</li><li>Also enable <strong>Accept Client Data</strong> for <strong>ui-template</strong>, <strong>ui-control</strong>, <strong>ui-event</strong>, <strong>ui-form</strong>, and <strong>ui-table</strong> so each browser session is handled independently and operators don't affect each other's dashboard.</li></ol><p><img alt="Screenshot: FF Auth settings showing Include Client Data and Accept Client Data enabled for Dashboard nodes" src="https://flowfuse.com/blog/2026/07/images/client-data-tab-dashboard.png"/><em>Enable <strong>Include Client Data</strong> and <strong>Accept Client Data</strong> to make Dashboard interactions user-specific.</em></p><p>This is the setting that matters most in this tutorial, and it's worth being explicit about why. With <strong>Accept Client Data</strong> enabled, every message a widget sends carries <code>msg._client.user</code> for the session that sent it. That's a per-session identity attached directly to the message, as opposed to a single shared variable that every session would otherwise read and overwrite. We'll use <code>msg._client.user</code> as the source of truth for "who is acting right now" in every function node from here on, rather than a global variable.</p><h2 id="greeting-the-logged-in-operator">Greeting the Logged-In Operator</h2><p>The first, simplest payoff: show the operator their name and avatar in the app bar, so it's obvious who's signed in at this station. This uses Vue's <a href="https://dashboard.flowfuse.com/nodes/widgets/ui-template.html#teleports" rel="nofollow">Teleport</a> to render into the header's action area from a single widget that lives on every page, so you don't have to add it per page.</p><ol><li>Add a <code>ui-template</code> node and name it "App Bar User Info".</li><li>Set its type to <strong>Widget (UI-Scoped)</strong> and select your "My Dashboard" ui-base. UI-scoped widgets render on every page automatically, so one widget covers the whole app, no group needed.</li><li>Paste in the snippet below:</li></ol><pre class="language-html shiki shiki-themes material-theme-lighter material-theme material-theme-palenight" code="&lt;template&gt;
    &lt;!-- Teleport into #app-bar-actions, the action bar's right-hand corner --&gt;
    &lt;Teleport v-if="loaded" to="#app-bar-actions"&gt;
        &lt;div class="user-info"&gt;
            &lt;img :src="setup.socketio.auth.user.image" /&gt;
            &lt;span&gt;Hi, {{ setup.socketio.auth.user.name }}&lt;/span&gt;
        &lt;/div&gt;
    &lt;/Teleport&gt;
&lt;/template&gt;

&lt;script&gt;
export default {
    data() {
        return { loaded: false };
    },
    mounted() {
        // Wait for mount so #app-bar-actions exists before teleporting into it.
        this.loaded = true;
    }
}
&lt;/script&gt;

&lt;style&gt;
.user-info { display: flex; align-items: center; gap: 8px; }
.user-info img { width: 24px; height: 24px; }
&lt;/style&gt;
" language="html" meta="" style=""><code __ignore-map=""><span class="line" line="1"><span class="sMK4o">&lt;</span><span class="swJcz">template</span><span class="sMK4o">&gt;
</span></span><span class="line" line="2"><span class="sHwdD">    &lt;!-- Teleport into #app-bar-actions, the action bar's right-hand corner --&gt;
</span></span><span class="line" line="3"><span class="sMK4o">    &lt;</span><span class="swJcz">Teleport</span><span class="spNyl"> v-if</span><span class="sMK4o">=</span><span class="sMK4o">"</span><span class="sfazB">loaded</span><span class="sMK4o">"</span><span class="spNyl"> to</span><span class="sMK4o">=</span><span class="sMK4o">"</span><span class="sfazB">#app-bar-actions</span><span class="sMK4o">"</span><span class="sMK4o">&gt;
</span></span><span class="line" line="4"><span class="sMK4o">        &lt;</span><span class="swJcz">div</span><span class="spNyl"> class</span><span class="sMK4o">=</span><span class="sMK4o">"</span><span class="sfazB">user-info</span><span class="sMK4o">"</span><span class="sMK4o">&gt;
</span></span><span class="line" line="5"><span class="sMK4o">            &lt;</span><span class="swJcz">img</span><span class="spNyl"> :src</span><span class="sMK4o">=</span><span class="sMK4o">"</span><span class="sfazB">setup.socketio.auth.user.image</span><span class="sMK4o">"</span><span class="sMK4o"> /&gt;
</span></span><span class="line" line="6"><span class="sMK4o">            &lt;</span><span class="swJcz">span</span><span class="sMK4o">&gt;</span><span class="sTEyZ">Hi, {{ setup.socketio.auth.user.name }}</span><span class="sMK4o">&lt;/</span><span class="swJcz">span</span><span class="sMK4o">&gt;
</span></span><span class="line" line="7"><span class="sMK4o">        &lt;/</span><span class="swJcz">div</span><span class="sMK4o">&gt;
</span></span><span class="line" line="8"><span class="sMK4o">    &lt;/</span><span class="swJcz">Teleport</span><span class="sMK4o">&gt;
</span></span><span class="line" line="9"><span class="sMK4o">&lt;/</span><span class="swJcz">template</span><span class="sMK4o">&gt;
</span></span><span class="line" line="10"><span empty-line-placeholder>
</span></span><span class="line" line="11"><span class="sMK4o">&lt;</span><span class="swJcz">script</span><span class="sMK4o">&gt;
</span></span><span class="line" line="12"><span class="s7zQu">export</span><span class="s7zQu"> default</span><span class="sMK4o"> {
</span></span><span class="line" line="13"><span class="swJcz">    data</span><span class="sMK4o">()</span><span class="sMK4o"> {
</span></span><span class="line" line="14"><span class="s7zQu">        return</span><span class="sMK4o"> {</span><span class="swJcz"> loaded</span><span class="sMK4o">:</span><span class="sfNiH"> false</span><span class="sMK4o"> };
</span></span><span class="line" line="15"><span class="sMK4o">    },
</span></span><span class="line" line="16"><span class="swJcz">    mounted</span><span class="sMK4o">()</span><span class="sMK4o"> {
</span></span><span class="line" line="17"><span class="sHwdD">        // Wait for mount so #app-bar-actions exists before teleporting into it.
</span></span><span class="line" line="18"><span class="sMK4o">        this.</span><span class="sTEyZ">loaded</span><span class="sMK4o"> =</span><span class="sfNiH"> true</span><span class="sMK4o">;
</span></span><span class="line" line="19"><span class="sMK4o">    }
</span></span><span class="line" line="20"><span class="sMK4o">}
</span></span><span class="line" line="21"><span class="sMK4o">&lt;/</span><span class="swJcz">script</span><span class="sMK4o">&gt;
</span></span><span class="line" line="22"><span empty-line-placeholder>
</span></span><span class="line" line="23"><span class="sMK4o">&lt;</span><span class="swJcz">style</span><span class="sMK4o">&gt;
</span></span><span class="line" line="24"><span class="sMK4o">.</span><span class="sBMFI">user-info</span><span class="sMK4o"> {</span><span class="sqsOY"> display</span><span class="sMK4o">:</span><span class="sTEyZ"> flex</span><span class="sMK4o">;</span><span class="sqsOY"> align-items</span><span class="sMK4o">:</span><span class="sTEyZ"> center</span><span class="sMK4o">;</span><span class="sqsOY"> gap</span><span class="sMK4o">:</span><span class="sbssI"> 8px</span><span class="sMK4o">;</span><span class="sMK4o"> }
</span></span><span class="line" line="25"><span class="sMK4o">.</span><span class="sBMFI">user-info</span><span class="sBMFI"> img</span><span class="sMK4o"> {</span><span class="sqsOY"> width</span><span class="sMK4o">:</span><span class="sbssI"> 24px</span><span class="sMK4o">;</span><span class="sqsOY"> height</span><span class="sMK4o">:</span><span class="sbssI"> 24px</span><span class="sMK4o">;</span><span class="sMK4o"> }
</span></span><span class="line" line="26"><span class="sMK4o">&lt;/</span><span class="swJcz">style</span><span class="sMK4o">&gt;
</span></span></code></pre><p>Deploy and open the dashboard. The signed-in operator's name and avatar appear in the top-right corner. You don't redeploy when a different operator logs in, the addon fetches each user's data at runtime, so everyone sees their own. This widget reads identity straight off the browser's own socket session (<code>setup.socketio.auth.user</code>), so it's already per-operator by construction, no shared state involved.</p><p><img alt="Screenshot: the dashboard app bar showing the logged-in operator's avatar and greeting" src="https://flowfuse.com/blog/2026/07/images/logged-in-user-app-bar.png"/> <em>The signed-in operator greeted by name and avatar in the app bar, rendered from a single UI-scoped widget.</em></p><h2 id="seeding-the-operator-into-context-on-login">Seeding the Operator into Context on Login</h2><p>Greeting the operator is the visible half. The other half is making their identity available to every function node, not just the widgets.</p><p>You might reach for a single shared global here, <code>global.set('user', msg._client.user, 'persistent')</code> on connect, then read it everywhere. <strong>Don't.</strong> Global context is one store for the whole flow, not one per session, so if two operators are connected at once, whichever connects last overwrites the identity for everyone, and function nodes start attributing the wrong operator's actions to the wrong person.</p><p>Instead, read <code>msg._client.user</code> off each message for "who is acting right now," and use the username only as a durable storage key for saved state. A shared global is still handy as a bootstrap fallback for the very first tick of a page, before any client-tagged message has round-tripped.</p><ol><li>Add a <code>ui-event</code> node named "Client connected" and select the "My Dashboard" ui-base. It fires when a browser session connects.</li><li>Add a <code>change</code> node named "Seed globals" with these <code>set</code> rules, in order:
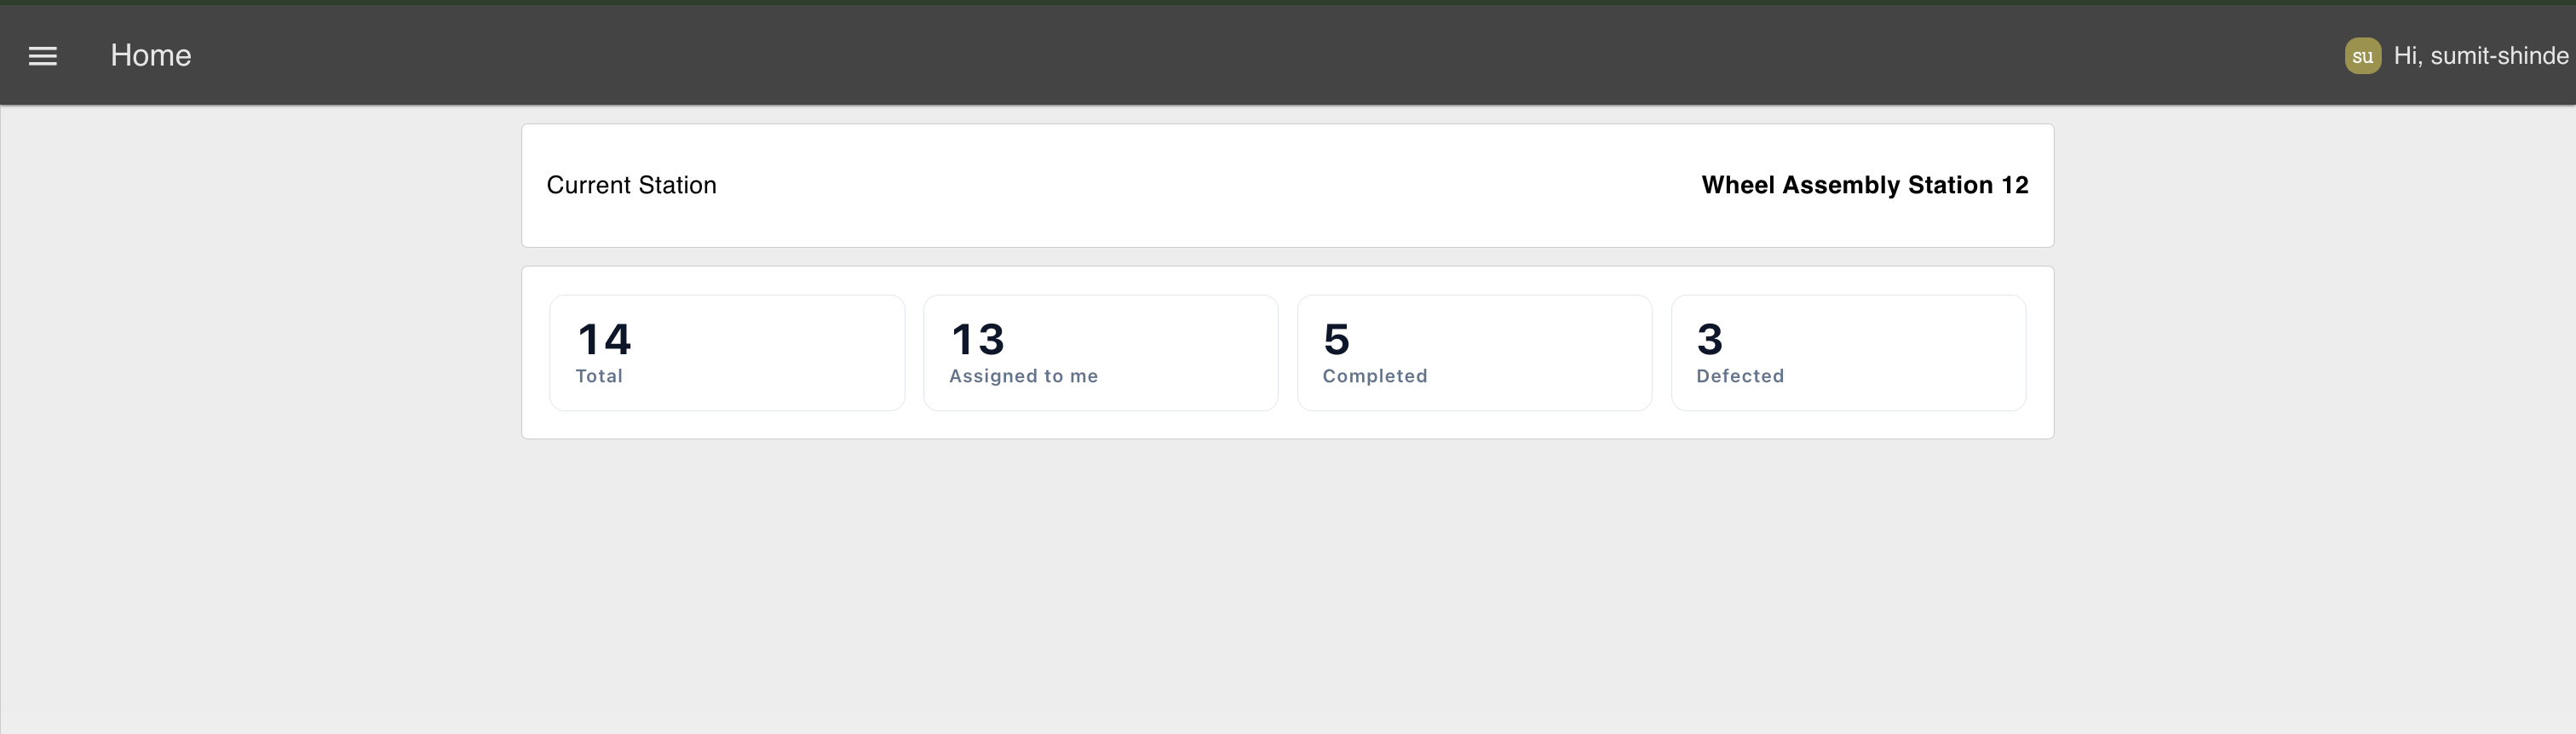
<ul><li><code>user</code> (global, persistent) → <code>msg._client.user</code>. <strong>Bootstrap fallback only</strong>, not the source of truth elsewhere.</li><li><code>StationContext.stationName</code> (global) → your station's name, e.g. <code>Wheel Assembly Station 12</code>.</li><li><code>StationContext.stationId</code> (global, persistent) → this station's ID, e.g. <code>ST12</code>.</li><li><code>Instructions</code> (global, persistent) → the instruction set (steps, images, target times, checklists), cached so the Instructions page loads instantly.</li></ul></li><li>Wire "Client connected" into "Seed globals".</li></ol><p>From here on, every function node that needs the current operator uses this pattern, per-session identity first, bootstrap global only as a fallback:</p><pre class="language-javascript shiki shiki-themes material-theme-lighter material-theme material-theme-palenight" code="const username = msg._client?.user?.username
    || global.get('user', 'persistent')?.username;
" language="javascript" meta="" style=""><code __ignore-map=""><span class="line" line="1"><span class="spNyl">const</span><span class="sTEyZ"> username </span><span class="sMK4o">=</span><span class="sTEyZ"> msg</span><span class="sMK4o">.</span><span class="sTEyZ">_client</span><span class="sMK4o">?.</span><span class="sTEyZ">user</span><span class="sMK4o">?.</span><span class="sTEyZ">username
</span></span><span class="line" line="2"><span class="sMK4o">    ||</span><span class="sTEyZ"> global</span><span class="sMK4o">.</span><span class="s2Zo4">get</span><span class="sTEyZ">(</span><span class="sMK4o">'</span><span class="sfazB">user</span><span class="sMK4o">'</span><span class="sMK4o">,</span><span class="sMK4o"> '</span><span class="sfazB">persistent</span><span class="sMK4o">'</span><span class="sTEyZ">)</span><span class="sMK4o">?.</span><span class="sTEyZ">username</span><span class="sMK4o">;
</span></span></code></pre><h2 id="showing-the-station-and-stats-on-the-home-page">Showing the Station and Stats on the Home Page</h2><p>The Home page shows the current station and a quick summary of work order statistics. Both update whenever the page opens.</p><h3 id="display-the-station-name">Display the Station Name</h3><ol><li>From the <strong>Client connected</strong> event, add a <strong>change</strong> node named <strong>Read station name</strong> and set <code>msg.payload</code> to <code>global.StationContext.stationName</code>.</li><li>Connect it to a <strong>ui-text</strong> node named <strong>Current Station</strong> in the <strong>Current Station</strong> group. Set the value to <code>msg.payload</code>.</li></ol><h3 id="display-the-stats">Display the Stats</h3><ol><li>Add a <strong>ui-control</strong> node named <strong>Page changed</strong>, set its event to <strong>change</strong>, and select your dashboard.</li><li>Add a <strong>function</strong> node named <strong>Build /stats request URL</strong> and paste in the following code. <strong>Replace <code>https://your-instance.flowfuse.cloud</code> with your own FlowFuse instance URL.</strong></li></ol><pre class="language-javascript shiki shiki-themes material-theme-lighter material-theme material-theme-palenight" code="const StationContext = global.get('StationContext', 'persistent');
const username = msg._client?.user?.username
    || global.get('user', 'persistent')?.username;

const params = new URLSearchParams();
params.set('stationId', StationContext.stationId);
if (username) params.set('username', username);

msg.url = `https://your-instance.flowfuse.cloud/workorders/stats?${params}`;
msg.method = "GET";
return msg;
" language="javascript" meta="" style=""><code __ignore-map=""><span class="line" line="1"><span class="spNyl">const</span><span class="sTEyZ"> StationContext </span><span class="sMK4o">=</span><span class="sTEyZ"> global</span><span class="sMK4o">.</span><span class="s2Zo4">get</span><span class="sTEyZ">(</span><span class="sMK4o">'</span><span class="sfazB">StationContext</span><span class="sMK4o">'</span><span class="sMK4o">,</span><span class="sMK4o"> '</span><span class="sfazB">persistent</span><span class="sMK4o">'</span><span class="sTEyZ">)</span><span class="sMK4o">;
</span></span><span class="line" line="2"><span class="spNyl">const</span><span class="sTEyZ"> username </span><span class="sMK4o">=</span><span class="sTEyZ"> msg</span><span class="sMK4o">.</span><span class="sTEyZ">_client</span><span class="sMK4o">?.</span><span class="sTEyZ">user</span><span class="sMK4o">?.</span><span class="sTEyZ">username
</span></span><span class="line" line="3"><span class="sMK4o">    ||</span><span class="sTEyZ"> global</span><span class="sMK4o">.</span><span class="s2Zo4">get</span><span class="sTEyZ">(</span><span class="sMK4o">'</span><span class="sfazB">user</span><span class="sMK4o">'</span><span class="sMK4o">,</span><span class="sMK4o"> '</span><span class="sfazB">persistent</span><span class="sMK4o">'</span><span class="sTEyZ">)</span><span class="sMK4o">?.</span><span class="sTEyZ">username</span><span class="sMK4o">;
</span></span><span class="line" line="4"><span empty-line-placeholder>
</span></span><span class="line" line="5"><span class="spNyl">const</span><span class="sTEyZ"> params </span><span class="sMK4o">=</span><span class="sMK4o"> new</span><span class="s2Zo4"> URLSearchParams</span><span class="sTEyZ">()</span><span class="sMK4o">;
</span></span><span class="line" line="6"><span class="sTEyZ">params</span><span class="sMK4o">.</span><span class="s2Zo4">set</span><span class="sTEyZ">(</span><span class="sMK4o">'</span><span class="sfazB">stationId</span><span class="sMK4o">'</span><span class="sMK4o">,</span><span class="sTEyZ"> StationContext</span><span class="sMK4o">.</span><span class="sTEyZ">stationId)</span><span class="sMK4o">;
</span></span><span class="line" line="7"><span class="s7zQu">if</span><span class="sTEyZ"> (username) params</span><span class="sMK4o">.</span><span class="s2Zo4">set</span><span class="sTEyZ">(</span><span class="sMK4o">'</span><span class="sfazB">username</span><span class="sMK4o">'</span><span class="sMK4o">,</span><span class="sTEyZ"> username)</span><span class="sMK4o">;
</span></span><span class="line" line="8"><span empty-line-placeholder>
</span></span><span class="line" line="9"><span class="sTEyZ">msg</span><span class="sMK4o">.</span><span class="sTEyZ">url </span><span class="sMK4o">=</span><span class="sMK4o"> `</span><span class="sfazB">https://your-instance.flowfuse.cloud/workorders/stats?</span><span class="sMK4o">${</span><span class="sTEyZ">params</span><span class="sMK4o">}`</span><span class="sMK4o">;
</span></span><span class="line" line="10"><span class="sTEyZ">msg</span><span class="sMK4o">.</span><span class="sTEyZ">method </span><span class="sMK4o">=</span><span class="sMK4o"> "</span><span class="sfazB">GET</span><span class="sMK4o">"</span><span class="sMK4o">;
</span></span><span class="line" line="11"><span class="s7zQu">return</span><span class="sTEyZ"> msg</span><span class="sMK4o">;
</span></span></code></pre><ol start="3"><li>Add an <strong>http request</strong> node that uses <code>msg.method</code> and <code>msg.url</code>, returns a parsed JSON object, and uses <strong>Bearer</strong> authentication.</li><li>Configure the bearer token using the access token you created earlier. For production, store it as an environment variable instead of hardcoding it in the flow.</li><li>Add a <strong>ui-template</strong> named <strong>Stats Cards</strong> in the <strong>Stats</strong> group and paste in the template below.</li><li>Wire the nodes: <strong>Page changed → Build /stats request URL → HTTP Request → Stats Cards</strong>.</li></ol><p>The request includes the logged-in username, so the <strong>Assigned to me</strong> count is personalized for each operator, and because <code>ui-control</code> is client-data-aware, <code>msg._client.user</code> reflects whichever operator's browser triggered the page change.</p><p><img alt="Placeholder: Stats Cards widget rendered on the Home page" src="https://flowfuse.com/blog/2026/07/images/stats-and-station.png"/><em>The Home page displays station statistics, including total, assigned to me, completed, and defected work orders.</em></p><h2 id="loading-the-operators-work-orders">Loading the Operator's Work Orders</h2><p>Now for the main part of the Home page: fetching and displaying the operator's work orders. Because the request includes the logged-in username, each operator only sees the work orders assigned to them at the current station.</p><ol><li>Add a <strong>ui-control</strong> node named <strong>Page changed</strong>, select your dashboard, and set the event to <strong>change</strong>. It fires whenever the operator navigates to the Home page, triggering the work order request.</li><li>Add a <strong>function</strong> node named <strong>Build /workorders request URL</strong>, paste in the code below, and replace <code>https://your-instance.flowfuse.cloud</code> with your own FlowFuse instance URL.</li></ol><pre class="language-javascript shiki shiki-themes material-theme-lighter material-theme material-theme-palenight" code="const StationContext = global.get('StationContext', 'persistent');
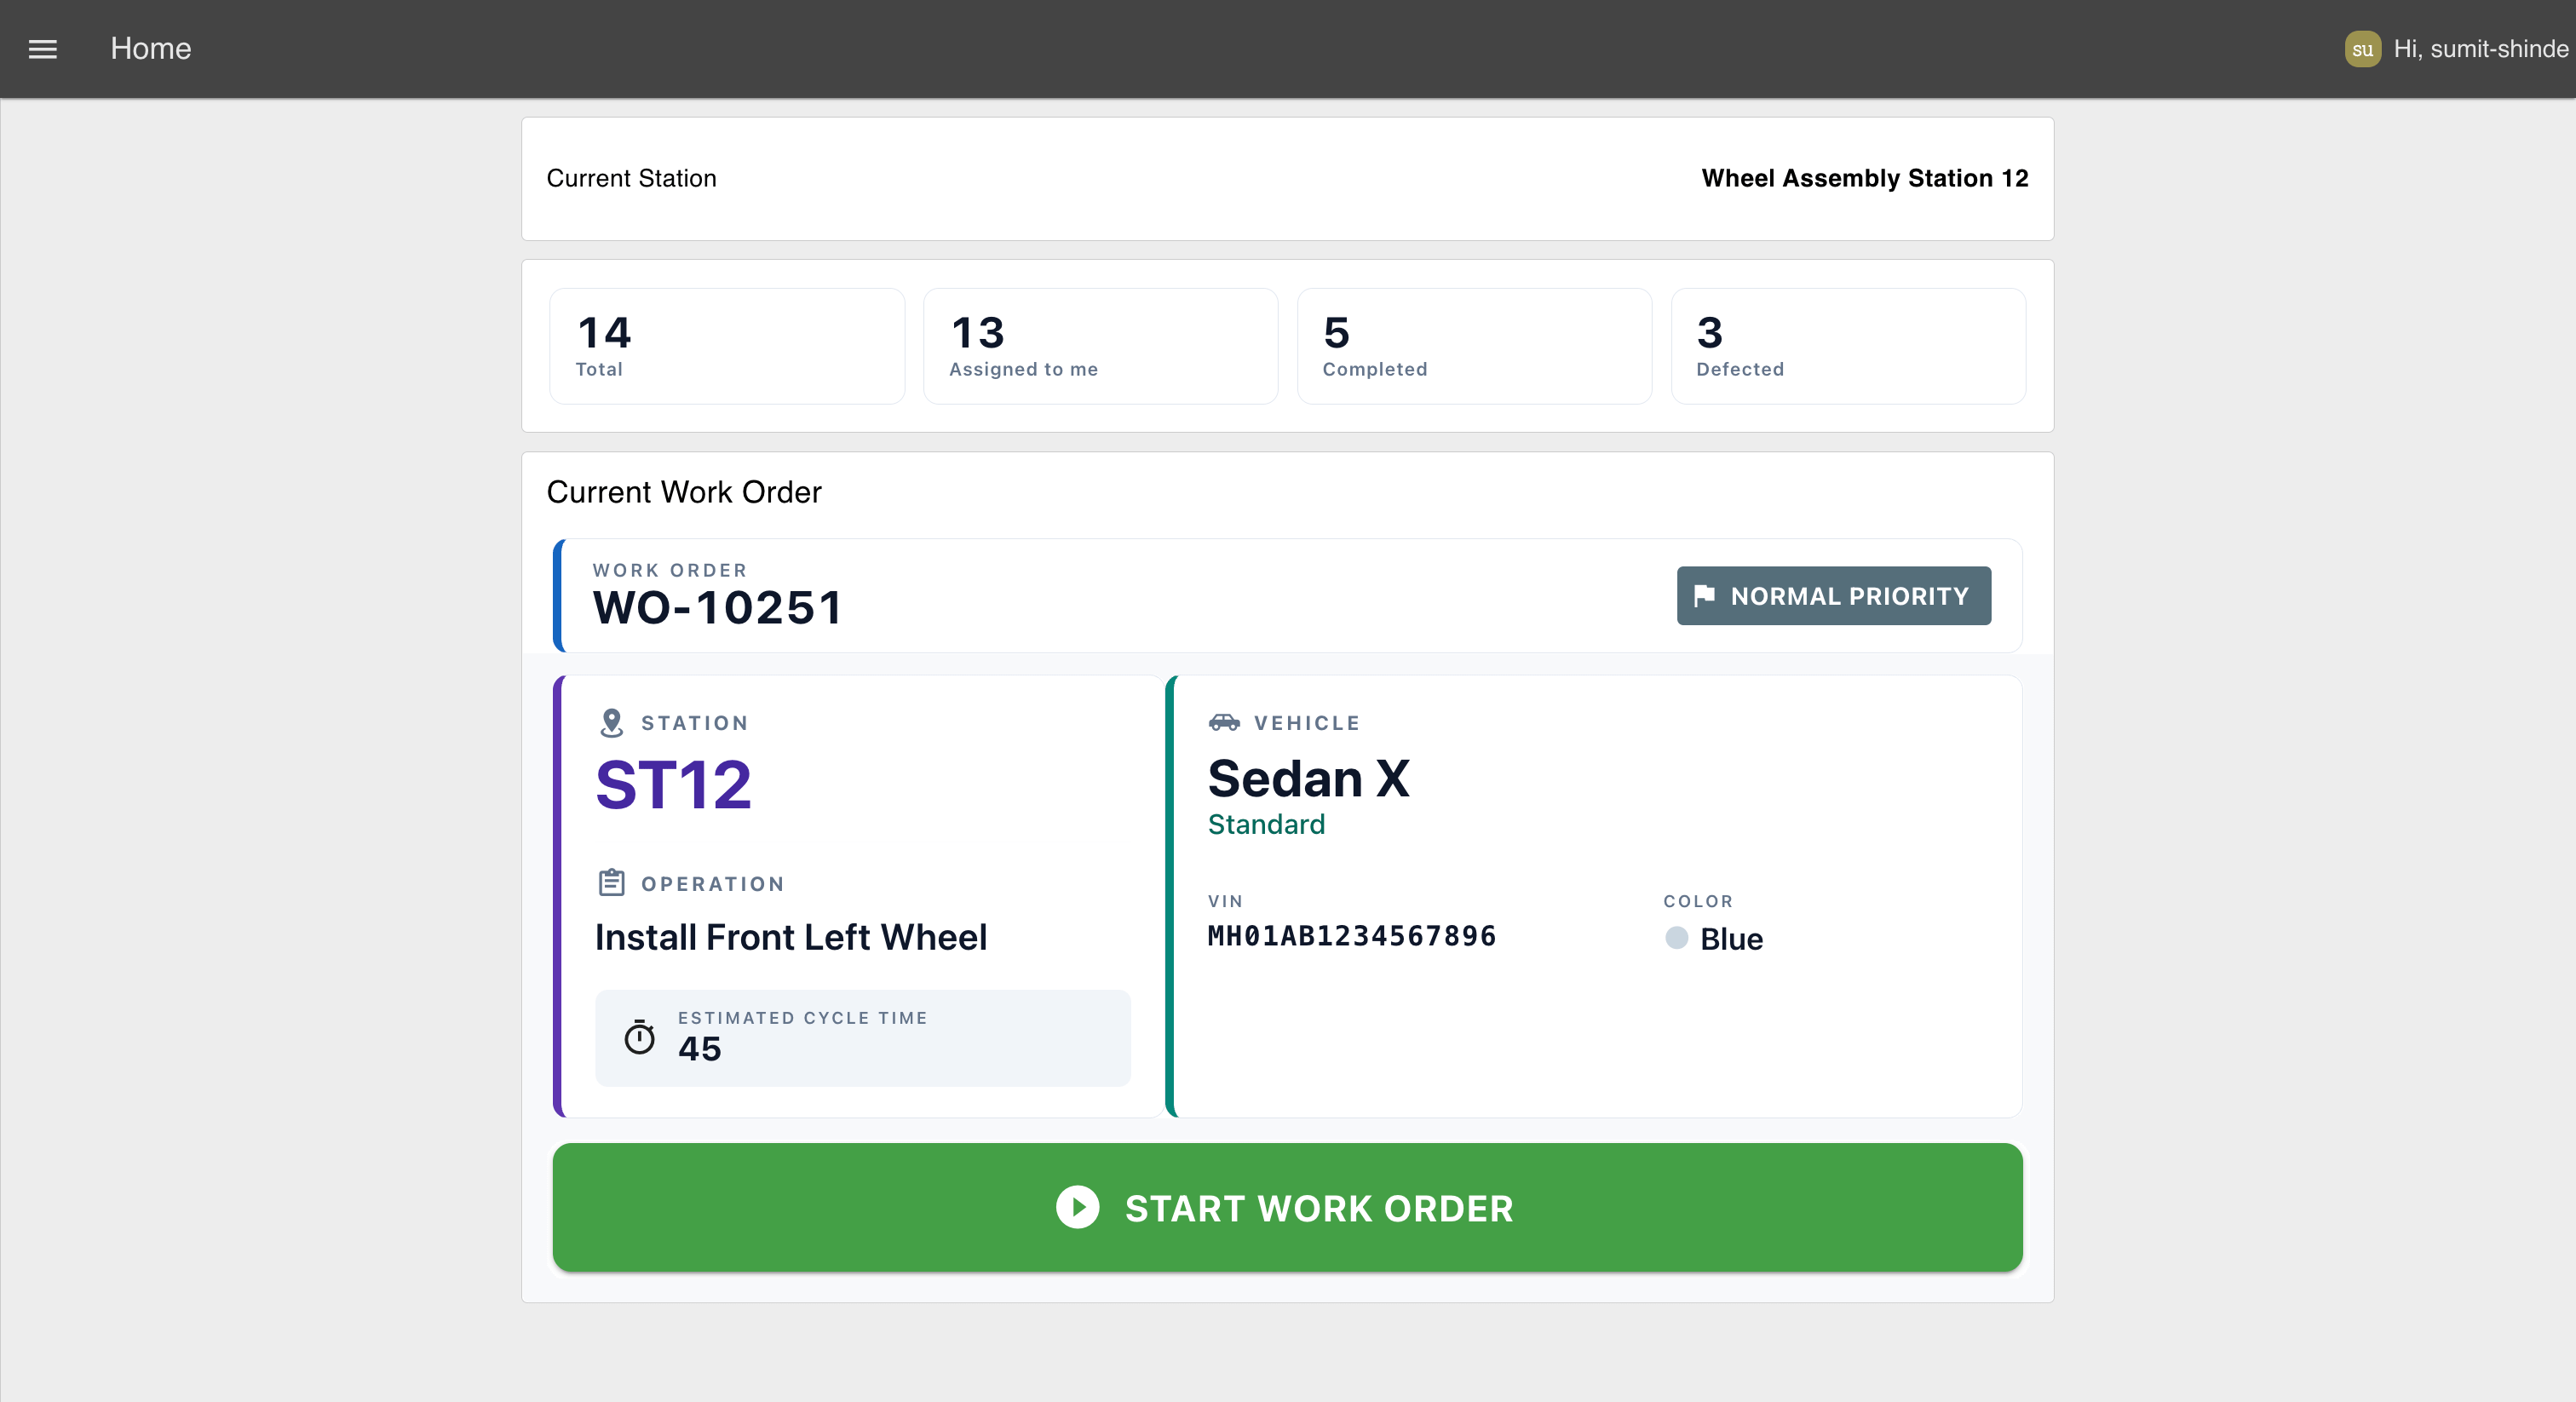
const username = msg._client?.user?.username
    || global.get('user', 'persistent')?.username;

const stationId = StationContext?.stationId;

const params = new URLSearchParams();
params.set('stationId', stationId);
if (username) params.set('username', username);

msg.url = `https://your-instance.flowfuse.cloud/workorders?${params.toString()}`;
msg.method = 'GET';
return msg;
" language="javascript" meta="id="8m19sv"" style=""><code __ignore-map=""><span class="line" line="1"><span class="spNyl">const</span><span class="sTEyZ"> StationContext </span><span class="sMK4o">=</span><span class="sTEyZ"> global</span><span class="sMK4o">.</span><span class="s2Zo4">get</span><span class="sTEyZ">(</span><span class="sMK4o">'</span><span class="sfazB">StationContext</span><span class="sMK4o">'</span><span class="sMK4o">,</span><span class="sMK4o"> '</span><span class="sfazB">persistent</span><span class="sMK4o">'</span><span class="sTEyZ">)</span><span class="sMK4o">;
</span></span><span class="line" line="2"><span class="spNyl">const</span><span class="sTEyZ"> username </span><span class="sMK4o">=</span><span class="sTEyZ"> msg</span><span class="sMK4o">.</span><span class="sTEyZ">_client</span><span class="sMK4o">?.</span><span class="sTEyZ">user</span><span class="sMK4o">?.</span><span class="sTEyZ">username
</span></span><span class="line" line="3"><span class="sMK4o">    ||</span><span class="sTEyZ"> global</span><span class="sMK4o">.</span><span class="s2Zo4">get</span><span class="sTEyZ">(</span><span class="sMK4o">'</span><span class="sfazB">user</span><span class="sMK4o">'</span><span class="sMK4o">,</span><span class="sMK4o"> '</span><span class="sfazB">persistent</span><span class="sMK4o">'</span><span class="sTEyZ">)</span><span class="sMK4o">?.</span><span class="sTEyZ">username</span><span class="sMK4o">;
</span></span><span class="line" line="4"><span empty-line-placeholder>
</span></span><span class="line" line="5"><span class="spNyl">const</span><span class="sTEyZ"> stationId </span><span class="sMK4o">=</span><span class="sTEyZ"> StationContext</span><span class="sMK4o">?.</span><span class="sTEyZ">stationId</span><span class="sMK4o">;
</span></span><span class="line" line="6"><span empty-line-placeholder>
</span></span><span class="line" line="7"><span class="spNyl">const</span><span class="sTEyZ"> params </span><span class="sMK4o">=</span><span class="sMK4o"> new</span><span class="s2Zo4"> URLSearchParams</span><span class="sTEyZ">()</span><span class="sMK4o">;
</span></span><span class="line" line="8"><span class="sTEyZ">params</span><span class="sMK4o">.</span><span class="s2Zo4">set</span><span class="sTEyZ">(</span><span class="sMK4o">'</span><span class="sfazB">stationId</span><span class="sMK4o">'</span><span class="sMK4o">,</span><span class="sTEyZ"> stationId)</span><span class="sMK4o">;
</span></span><span class="line" line="9"><span class="s7zQu">if</span><span class="sTEyZ"> (username) params</span><span class="sMK4o">.</span><span class="s2Zo4">set</span><span class="sTEyZ">(</span><span class="sMK4o">'</span><span class="sfazB">username</span><span class="sMK4o">'</span><span class="sMK4o">,</span><span class="sTEyZ"> username)</span><span class="sMK4o">;
</span></span><span class="line" line="10"><span empty-line-placeholder>
</span></span><span class="line" line="11"><span class="sTEyZ">msg</span><span class="sMK4o">.</span><span class="sTEyZ">url </span><span class="sMK4o">=</span><span class="sMK4o"> `</span><span class="sfazB">https://your-instance.flowfuse.cloud/workorders?</span><span class="sMK4o">${</span><span class="sTEyZ">params</span><span class="sMK4o">.</span><span class="s2Zo4">toString</span><span class="sTEyZ">()</span><span class="sMK4o">}`</span><span class="sMK4o">;
</span></span><span class="line" line="12"><span class="sTEyZ">msg</span><span class="sMK4o">.</span><span class="sTEyZ">method </span><span class="sMK4o">=</span><span class="sMK4o"> '</span><span class="sfazB">GET</span><span class="sMK4o">'</span><span class="sMK4o">;
</span></span><span class="line" line="13"><span class="s7zQu">return</span><span class="sTEyZ"> msg</span><span class="sMK4o">;
</span></span></code></pre><ol start="3"><li>Add an <strong>http request</strong> node, set the <strong>Method</strong> to <strong>Use <code>msg.method</code></strong>, leave the <strong>URL</strong> field blank so it uses <code>msg.url</code>, set the <strong>Return</strong> type to a <strong>parsed JSON object</strong>, and configure <strong>Bearer</strong> authentication. Use the access token you created earlier as the bearer token. For production deployments, store the token as an environment variable and reference it here instead of hardcoding it in the flow.</li><li>Connect the <strong>http request</strong> node to a <strong>link out</strong> node named <strong>Work Orders Out</strong>. The widgets that display the work orders will connect to this node using their own <strong>link in</strong> nodes, allowing the same API response to be reused without stretching wires across the canvas.</li></ol><p>The username in the request is what makes the dashboard personal. Two operators can open the same page at the same station, yet each receives only the work orders assigned to them, because each one's <code>ui-control</code> event carries their own <code>_client.user</code>, not a shared one.</p><h2 id="splitting-the-current-order-from-the-queue">Splitting the Current Order From the Queue</h2><p>The Home page shows one work order front and centre and the rest as a queue. A function splits the list, sorting by priority so the most urgent job is the one the operator sees first. This function also records which work order the operator is about to start, that's the record the Instructions page, the Complete Operation flow, and the Report Issue flow will all read back later, so it has to be attributed to the right operator from the start.</p><ol><li>Add a <code>link in</code> node named "link in 6" and point it at the "work orders out" link.</li><li>Add a <code>function</code> node named "split current vs queue (by priority)" with <strong>2 outputs</strong>:</li></ol><pre class="language-javascript shiki shiki-themes material-theme-lighter material-theme material-theme-palenight" code="const orders = Array.isArray(msg.payload) ? msg.payload : [];

// Sort by priority (Critical/Urgent -&gt; High -&gt; Medium -&gt; Normal -&gt; Low)
const priorityOrder = { critical: 0, urgent: 0, high: 1, medium: 2, normal: 3, low: 4 };
const sorted = [...orders].sort(
    (a, b) =&gt; (priorityOrder[(a.priority || '').toLowerCase()] ?? 5)
            - (priorityOrder[(b.priority || '').toLowerCase()] ?? 5)
);

const currentWorkOrder = sorted[0] || null;

// Record which work order the current operator is about to see/start.
// Identity comes from the triggering message's client data, not a shared global,
// so this is always attributed to the operator whose browser fetched this list.
const username = msg._client?.user?.username
    || global.get('user', 'persistent')?.username;

if (username &amp;&amp; currentWorkOrder) {
    const userState = global.get(username, 'persistent') || {};
    userState.workOrderId = currentWorkOrder.workOrderId;
    global.set(username, userState, 'persistent');
}

return [
    { payload: currentWorkOrder },  // output 1: current order (for card)
    { payload: sorted.slice(1) }    // output 2: remaining orders (queue)
];
" language="javascript" meta="" style=""><code __ignore-map=""><span class="line" line="1"><span class="spNyl">const</span><span class="sTEyZ"> orders </span><span class="sMK4o">=</span><span class="sTEyZ"> Array</span><span class="sMK4o">.</span><span class="s2Zo4">isArray</span><span class="sTEyZ">(msg</span><span class="sMK4o">.</span><span class="sTEyZ">payload) </span><span class="sMK4o">?</span><span class="sTEyZ"> msg</span><span class="sMK4o">.</span><span class="sTEyZ">payload </span><span class="sMK4o">:</span><span class="sTEyZ"> []</span><span class="sMK4o">;
</span></span><span class="line" line="2"><span empty-line-placeholder>
</span></span><span class="line" line="3"><span class="sHwdD">// Sort by priority (Critical/Urgent -&gt; High -&gt; Medium -&gt; Normal -&gt; Low)
</span></span><span class="line" line="4"><span class="spNyl">const</span><span class="sTEyZ"> priorityOrder </span><span class="sMK4o">=</span><span class="sMK4o"> {</span><span class="swJcz"> critical</span><span class="sMK4o">:</span><span class="sbssI"> 0</span><span class="sMK4o">,</span><span class="swJcz"> urgent</span><span class="sMK4o">:</span><span class="sbssI"> 0</span><span class="sMK4o">,</span><span class="swJcz"> high</span><span class="sMK4o">:</span><span class="sbssI"> 1</span><span class="sMK4o">,</span><span class="swJcz"> medium</span><span class="sMK4o">:</span><span class="sbssI"> 2</span><span class="sMK4o">,</span><span class="swJcz"> normal</span><span class="sMK4o">:</span><span class="sbssI"> 3</span><span class="sMK4o">,</span><span class="swJcz"> low</span><span class="sMK4o">:</span><span class="sbssI"> 4</span><span class="sMK4o"> };
</span></span><span class="line" line="5"><span class="spNyl">const</span><span class="sTEyZ"> sorted </span><span class="sMK4o">=</span><span class="sTEyZ"> [</span><span class="sMK4o">...</span><span class="sTEyZ">orders]</span><span class="sMK4o">.</span><span class="s2Zo4">sort</span><span class="sTEyZ">(
</span></span><span class="line" line="6"><span class="sMK4o">    (</span><span class="sHdIc">a</span><span class="sMK4o">,</span><span class="sHdIc"> b</span><span class="sMK4o">)</span><span class="spNyl"> =&gt;</span><span class="sTEyZ"> (priorityOrder[(a</span><span class="sMK4o">.</span><span class="sTEyZ">priority </span><span class="sMK4o">||</span><span class="sMK4o"> ''</span><span class="sTEyZ">)</span><span class="sMK4o">.</span><span class="s2Zo4">toLowerCase</span><span class="sTEyZ">()] </span><span class="sMK4o">??</span><span class="sbssI"> 5</span><span class="sTEyZ">)
</span></span><span class="line" line="7"><span class="sMK4o">            -</span><span class="sTEyZ"> (priorityOrder[(b</span><span class="sMK4o">.</span><span class="sTEyZ">priority </span><span class="sMK4o">||</span><span class="sMK4o"> ''</span><span class="sTEyZ">)</span><span class="sMK4o">.</span><span class="s2Zo4">toLowerCase</span><span class="sTEyZ">()] </span><span class="sMK4o">??</span><span class="sbssI"> 5</span><span class="sTEyZ">)
</span></span><span class="line" line="8"><span class="sTEyZ">)</span><span class="sMK4o">;
</span></span><span class="line" line="9"><span empty-line-placeholder>
</span></span><span class="line" line="10"><span class="spNyl">const</span><span class="sTEyZ"> currentWorkOrder </span><span class="sMK4o">=</span><span class="sTEyZ"> sorted[</span><span class="sbssI">0</span><span class="sTEyZ">] </span><span class="sMK4o">||</span><span class="sMK4o"> null;
</span></span><span class="line" line="11"><span empty-line-placeholder>
</span></span><span class="line" line="12"><span class="sHwdD">// Record which work order the current operator is about to see/start.
</span></span><span class="line" line="13"><span class="sHwdD">// Identity comes from the triggering message's client data, not a shared global,
</span></span><span class="line" line="14"><span class="sHwdD">// so this is always attributed to the operator whose browser fetched this list.
</span></span><span class="line" line="15"><span class="spNyl">const</span><span class="sTEyZ"> username </span><span class="sMK4o">=</span><span class="sTEyZ"> msg</span><span class="sMK4o">.</span><span class="sTEyZ">_client</span><span class="sMK4o">?.</span><span class="sTEyZ">user</span><span class="sMK4o">?.</span><span class="sTEyZ">username
</span></span><span class="line" line="16"><span class="sMK4o">    ||</span><span class="sTEyZ"> global</span><span class="sMK4o">.</span><span class="s2Zo4">get</span><span class="sTEyZ">(</span><span class="sMK4o">'</span><span class="sfazB">user</span><span class="sMK4o">'</span><span class="sMK4o">,</span><span class="sMK4o"> '</span><span class="sfazB">persistent</span><span class="sMK4o">'</span><span class="sTEyZ">)</span><span class="sMK4o">?.</span><span class="sTEyZ">username</span><span class="sMK4o">;
</span></span><span class="line" line="17"><span empty-line-placeholder>
</span></span><span class="line" line="18"><span class="s7zQu">if</span><span class="sTEyZ"> (username </span><span class="sMK4o">&amp;&amp;</span><span class="sTEyZ"> currentWorkOrder) </span><span class="sMK4o">{
</span></span><span class="line" line="19"><span class="spNyl">    const</span><span class="sTEyZ"> userState</span><span class="sMK4o"> =</span><span class="sTEyZ"> global</span><span class="sMK4o">.</span><span class="s2Zo4">get</span><span class="swJcz">(</span><span class="sTEyZ">username</span><span class="sMK4o">,</span><span class="sMK4o"> '</span><span class="sfazB">persistent</span><span class="sMK4o">'</span><span class="swJcz">) </span><span class="sMK4o">||</span><span class="sMK4o"> {};
</span></span><span class="line" line="20"><span class="sTEyZ">    userState</span><span class="sMK4o">.</span><span class="sTEyZ">workOrderId</span><span class="sMK4o"> =</span><span class="sTEyZ"> currentWorkOrder</span><span class="sMK4o">.</span><span class="sTEyZ">workOrderId</span><span class="sMK4o">;
</span></span><span class="line" line="21"><span class="sTEyZ">    global</span><span class="sMK4o">.</span><span class="s2Zo4">set</span><span class="swJcz">(</span><span class="sTEyZ">username</span><span class="sMK4o">,</span><span class="sTEyZ"> userState</span><span class="sMK4o">,</span><span class="sMK4o"> '</span><span class="sfazB">persistent</span><span class="sMK4o">'</span><span class="swJcz">)</span><span class="sMK4o">;
</span></span><span class="line" line="22"><span class="sMK4o">}
</span></span><span class="line" line="23"><span empty-line-placeholder>
</span></span><span class="line" line="24"><span class="s7zQu">return</span><span class="sTEyZ"> [
</span></span><span class="line" line="25"><span class="sMK4o">    {</span><span class="swJcz"> payload</span><span class="sMK4o">:</span><span class="sTEyZ"> currentWorkOrder </span><span class="sMK4o">},</span><span class="sHwdD">  // output 1: current order (for card)
</span></span><span class="line" line="26"><span class="sMK4o">    {</span><span class="swJcz"> payload</span><span class="sMK4o">:</span><span class="sTEyZ"> sorted</span><span class="sMK4o">.</span><span class="s2Zo4">slice</span><span class="sTEyZ">(</span><span class="sbssI">1</span><span class="sTEyZ">) </span><span class="sMK4o">}</span><span class="sHwdD">    // output 2: remaining orders (queue)
</span></span><span class="line" line="27"><span class="sTEyZ">]</span><span class="sMK4o">;
</span></span></code></pre><ol start="3"><li>Import the Current Work Order Card ui-template below and assign it to the Current Work Order group. The complete component is provided below, so there's no need to recreate it.</li></ol><blockquote><p><strong>Tip:</strong> Whenever you need a custom Dashboard widget, you don't have to write the Vue code yourself. Use <a href="https://flowfuse.com/docs/user/expert/node-red-embedded-ai/#css-and-html-generation-for-flowfuse-dashboard">FlowFuse Expert</a> and describe the widget in plain English and it will generate the <code>ui-template</code> for you.</p></blockquote><ol start="4"><li>Wire <strong>output 1</strong> to the "Current Work Order Card" <code>ui-template</code> in the <strong>Current Work Order</strong> group. It shows the work order ID, station, operation and estimated cycle time, the vehicle (model, variant, VIN, colour), a priority chip, and a <strong>Start Work Order</strong> button. On click, the button sends <code>{ action: 'start', workOrderId, stationId }</code>.</li></ol><p><img alt="Placeholder: Current Work Order Card rendered on the Home page" src="https://flowfuse.com/blog/2026/07/images/current-work-order.png"/> <em>The Current Work Order card: work order ID, priority chip, station, operation, vehicle details, and the Start button.</em></p><ol start="5"><li>Add a <code>ui-table</code> node and assign it to the <strong>Up Next</strong> group. Turn off auto-columns and add two text columns as shown below: Work Order (workOrderId) and Priority (priority). Wire output 2 of the split function into it.</li></ol><p><img alt="Placeholder: Up Next table listing queued work orders" src="https://flowfuse.com/blog/2026/07/images/up-next.png"/> <em>The Up Next table showing the remaining queued work orders with their priority.</em></p><ol start="6"><li>From the card, wire a <code>change</code> node named "go to Instructions" that sets <code>payload</code> (msg) to <code>Instructions</code>, then into a <code>ui-control</code> node with its event set to <strong>change</strong> to switch the page.</li></ol><p>When the operator taps <strong>Start Work Order</strong>, the card sends them to the Instructions page. Because the split function already saved this operator's <code>workOrderId</code> under their own username, the Instructions page, Complete Operation, and Report Issue flows can all look it back up correctly, even if another operator is doing the exact same thing on another screen at the same moment.</p><h2 id="loading-the-cached-instruction-set">Loading the Cached Instruction Set</h2><p>The Instructions page needs the steps to show. Because the instruction set was cached in context on login, the page can paint it instantly without another round trip.</p><ol><li>Add a <code>ui-event</code> node named "Page opened" for the Instructions page.</li><li>Add a <code>change</code> node named "Load cached instruction set". Set <code>payload</code> (msg) to the persistent global <code>Instructions</code>.</li><li>Wire "Page opened" into it, and its output into the "Work Instruction Widget" you build next.</li></ol><h2 id="remembering-each-operators-step">Remembering Each Operator's Step</h2><p>This is something paper can't do and shared screens get wrong. If an operator completes the first two steps of a five-step wheel installation and returns later, they should resume at <strong>step 3</strong>, not start again at <strong>step 1</strong>. We achieve this by saving their progress against their username, the one they were identified as when the step was saved, not whichever username happens to be sitting in a shared global at read time.</p><p>The instruction widget emits two housekeeping actions: <code>save_step</code> whenever the operator moves between steps, and <code>load_step</code> when the page opens and needs to know where to resume. One function node handles both.</p><ol><li>Import the <strong>Work Instruction Widget</strong> <code>ui-template</code> below, assign it to the <strong>Instructions</strong> page, and set its scope to <strong>Page</strong>. The widget displays one instruction at a time with its image, target cycle time, and checklist. Operators can't move to the next step until every checklist item is completed, and the final step changes the button to <strong>Complete Operation</strong>.</li></ol><blockquote><p><strong>Tip:</strong> Whenever you need a custom Dashboard widget, you don't have to write the Vue code yourself. Use <a href="https://flowfuse.com/docs/user/expert/node-red-embedded-ai/?utm_source=chatgpt.com#css-and-html-generation-for-flowfuse-dashboard">FlowFuse Expert</a> and describe the widget in plain English and it will generate the <code>ui-template</code> for you.</p></blockquote><p><img alt="Placeholder: Work Instruction Widget showing a step with image, checklist, and navigation controls" src="https://flowfuse.com/blog/2026/07/images/instructions.png"/> <em>The Instructions page: step image, checklist, target time, and Previous / Report Issue / Next controls.</em></p><ol start="2"><li>Add a <code>function</code> node named "Track step (save/load per user)":</li></ol><pre class="language-javascript shiki shiki-themes material-theme-lighter material-theme material-theme-palenight" code="// Remembers the current step per user for the active work order.
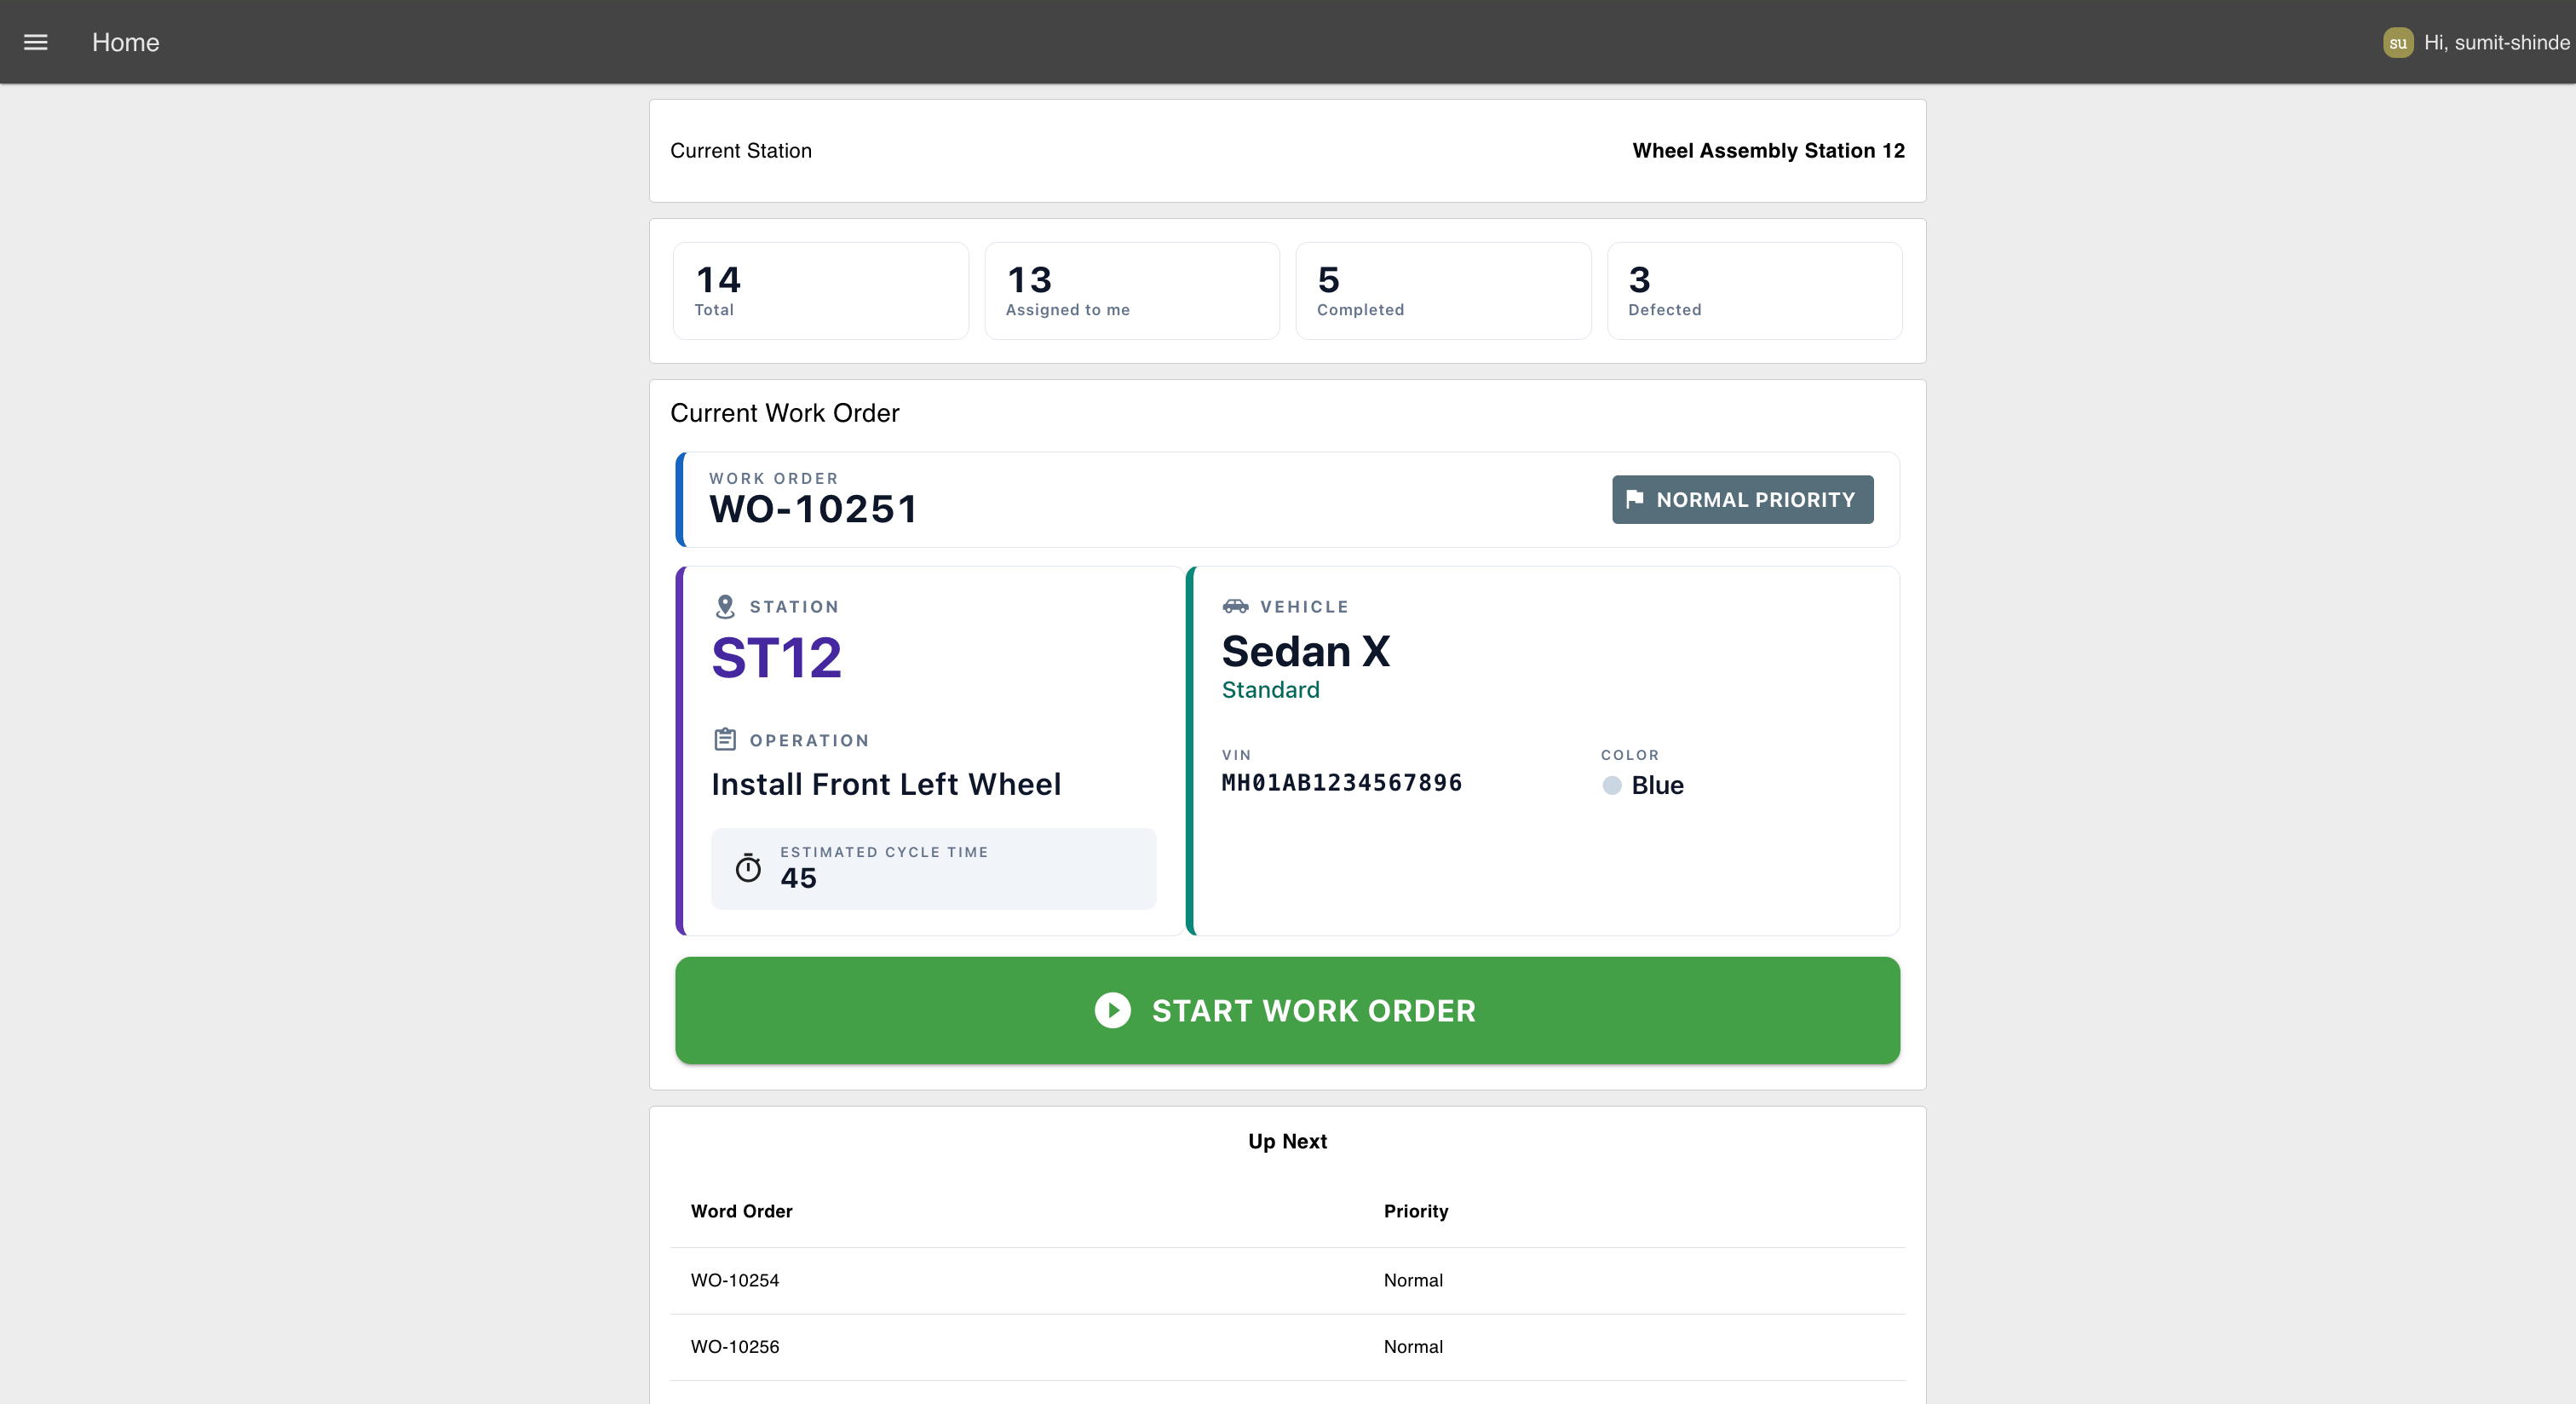
// Handles two actions from the widget:
//   save_step - persist the step the operator is on
//   load_step - reply with the saved step so the widget can resume
const p = msg.payload || {};

// Identity comes from this message's own client data first. This is what
// keeps two operators using the widget at the same time from reading or
// writing each other's progress.
const username = msg._client?.user?.username
    || global.get('user', 'persistent')?.username;
if (!username) return null;

// Read the user's saved state
const userState = global.get(username, "persistent") || {
    workOrderId: null,
    stepIndex: 0
};

switch (p.action) {
    case "save_step":
        userState.stepIndex = p.stepIndex ?? 0;
        global.set(username, userState, "persistent");
        return null;

    case "load_step":
        msg.payload = {
            workOrderId: userState.workOrderId,
            stepIndex: userState.stepIndex ?? 0
        };
        return msg;

    default:
        return null;
}
" language="javascript" meta="" style=""><code __ignore-map=""><span class="line" line="1"><span class="sHwdD">// Remembers the current step per user for the active work order.
</span></span><span class="line" line="2"><span class="sHwdD">// Handles two actions from the widget:
</span></span><span class="line" line="3"><span class="sHwdD">//   save_step - persist the step the operator is on
</span></span><span class="line" line="4"><span class="sHwdD">//   load_step - reply with the saved step so the widget can resume
</span></span><span class="line" line="5"><span class="spNyl">const</span><span class="sTEyZ"> p </span><span class="sMK4o">=</span><span class="sTEyZ"> msg</span><span class="sMK4o">.</span><span class="sTEyZ">payload </span><span class="sMK4o">||</span><span class="sMK4o"> {};
</span></span><span class="line" line="6"><span empty-line-placeholder>
</span></span><span class="line" line="7"><span class="sHwdD">// Identity comes from this message's own client data first. This is what
</span></span><span class="line" line="8"><span class="sHwdD">// keeps two operators using the widget at the same time from reading or
</span></span><span class="line" line="9"><span class="sHwdD">// writing each other's progress.
</span></span><span class="line" line="10"><span class="spNyl">const</span><span class="sTEyZ"> username </span><span class="sMK4o">=</span><span class="sTEyZ"> msg</span><span class="sMK4o">.</span><span class="sTEyZ">_client</span><span class="sMK4o">?.</span><span class="sTEyZ">user</span><span class="sMK4o">?.</span><span class="sTEyZ">username
</span></span><span class="line" line="11"><span class="sMK4o">    ||</span><span class="sTEyZ"> global</span><span class="sMK4o">.</span><span class="s2Zo4">get</span><span class="sTEyZ">(</span><span class="sMK4o">'</span><span class="sfazB">user</span><span class="sMK4o">'</span><span class="sMK4o">,</span><span class="sMK4o"> '</span><span class="sfazB">persistent</span><span class="sMK4o">'</span><span class="sTEyZ">)</span><span class="sMK4o">?.</span><span class="sTEyZ">username</span><span class="sMK4o">;
</span></span><span class="line" line="12"><span class="s7zQu">if</span><span class="sTEyZ"> (</span><span class="sMK4o">!</span><span class="sTEyZ">username) </span><span class="s7zQu">return</span><span class="sMK4o"> null;
</span></span><span class="line" line="13"><span empty-line-placeholder>
</span></span><span class="line" line="14"><span class="sHwdD">// Read the user's saved state
</span></span><span class="line" line="15"><span class="spNyl">const</span><span class="sTEyZ"> userState </span><span class="sMK4o">=</span><span class="sTEyZ"> global</span><span class="sMK4o">.</span><span class="s2Zo4">get</span><span class="sTEyZ">(username</span><span class="sMK4o">,</span><span class="sMK4o"> "</span><span class="sfazB">persistent</span><span class="sMK4o">"</span><span class="sTEyZ">) </span><span class="sMK4o">||</span><span class="sMK4o"> {
</span></span><span class="line" line="16"><span class="swJcz">    workOrderId</span><span class="sMK4o">:</span><span class="sMK4o"> null,
</span></span><span class="line" line="17"><span class="swJcz">    stepIndex</span><span class="sMK4o">:</span><span class="sbssI"> 0
</span></span><span class="line" line="18"><span class="sMK4o">};
</span></span><span class="line" line="19"><span empty-line-placeholder>
</span></span><span class="line" line="20"><span class="s7zQu">switch</span><span class="sTEyZ"> (p</span><span class="sMK4o">.</span><span class="sTEyZ">action) </span><span class="sMK4o">{
</span></span><span class="line" line="21"><span class="s7zQu">    case</span><span class="sMK4o"> "</span><span class="sfazB">save_step</span><span class="sMK4o">"</span><span class="sMK4o">:
</span></span><span class="line" line="22"><span class="sTEyZ">        userState</span><span class="sMK4o">.</span><span class="sTEyZ">stepIndex </span><span class="sMK4o">=</span><span class="sTEyZ"> p</span><span class="sMK4o">.</span><span class="sTEyZ">stepIndex </span><span class="sMK4o">??</span><span class="sbssI"> 0</span><span class="sMK4o">;
</span></span><span class="line" line="23"><span class="sTEyZ">        global</span><span class="sMK4o">.</span><span class="s2Zo4">set</span><span class="sTEyZ">(username</span><span class="sMK4o">,</span><span class="sTEyZ"> userState</span><span class="sMK4o">,</span><span class="sMK4o"> "</span><span class="sfazB">persistent</span><span class="sMK4o">"</span><span class="sTEyZ">)</span><span class="sMK4o">;
</span></span><span class="line" line="24"><span class="s7zQu">        return</span><span class="sMK4o"> null;
</span></span><span class="line" line="25"><span empty-line-placeholder>
</span></span><span class="line" line="26"><span class="s7zQu">    case</span><span class="sMK4o"> "</span><span class="sfazB">load_step</span><span class="sMK4o">"</span><span class="sMK4o">:
</span></span><span class="line" line="27"><span class="sTEyZ">        msg</span><span class="sMK4o">.</span><span class="sTEyZ">payload </span><span class="sMK4o">=</span><span class="sMK4o"> {
</span></span><span class="line" line="28"><span class="swJcz">            workOrderId</span><span class="sMK4o">:</span><span class="sTEyZ"> userState</span><span class="sMK4o">.</span><span class="sTEyZ">workOrderId</span><span class="sMK4o">,
</span></span><span class="line" line="29"><span class="swJcz">            stepIndex</span><span class="sMK4o">:</span><span class="sTEyZ"> userState</span><span class="sMK4o">.</span><span class="sTEyZ">stepIndex </span><span class="sMK4o">??</span><span class="sbssI"> 0
</span></span><span class="line" line="30"><span class="sMK4o">        };
</span></span><span class="line" line="31"><span class="s7zQu">        return</span><span class="sTEyZ"> msg</span><span class="sMK4o">;
</span></span><span class="line" line="32"><span empty-line-placeholder>
</span></span><span class="line" line="33"><span class="s7zQu">    default</span><span class="sMK4o">:
</span></span><span class="line" line="34"><span class="s7zQu">        return</span><span class="sMK4o"> null;
</span></span><span class="line" line="35"><span class="sMK4o">}
</span></span></code></pre><ol start="3"><li>Wire the "Work Instruction Widget" output into this node, and wire the node's output back into the widget so the <code>load_step</code> reply can jump it to the saved step.</li></ol><p>Look at the store key: <code>global.get(username, ...)</code> and <code>global.set(username, ...)</code>. The operator's own username is the storage key, so two operators at the same station never overwrite each other, their progress lives under different keys, and because that key is now sourced from <code>msg._client.user</code> rather than a shared global, it's always the username of whoever's browser actually sent this particular <code>save_step</code> or <code>load_step</code> message.</p><p>Deploy, walk halfway through an operation, then reload the page. It reopens where you left off, because the step is filed under your name.</p><h2 id="completing-the-operation-as-the-logged-in-user">Completing the Operation as the Logged-In User</h2><p>When the operator completes the final instruction, the widget sends <code>{ action: "complete_operation" }</code>. The flow looks up the operator's stored work order and builds the payload that will be sent to the API.</p><ol><li>Add a <strong>link in</strong> node and connect it to the <strong>Work Instruction Widget</strong> actions link.</li><li>Add a <strong>switch</strong> node named <strong>Route by Action</strong> and route messages where <code>msg.payload.action</code> equals <code>complete_operation</code>.</li><li>Add a <strong>function</strong> node named <strong>Build Complete Payload</strong> and paste in the following code.</li></ol><pre class="language-javascript shiki shiki-themes material-theme-lighter material-theme material-theme-palenight" code="const username = msg._client?.user?.username
    || global.get('user', 'persistent')?.username;

if (!username) {
    node.warn('No logged-in user found — cannot complete operation');
    return null;
}

const stored = global.get(username, 'persistent') || {};
const workOrderId = stored.workOrderId || null;

msg.payload = { workOrderId };
return msg;
" language="javascript" meta="" style=""><code __ignore-map=""><span class="line" line="1"><span class="spNyl">const</span><span class="sTEyZ"> username </span><span class="sMK4o">=</span><span class="sTEyZ"> msg</span><span class="sMK4o">.</span><span class="sTEyZ">_client</span><span class="sMK4o">?.</span><span class="sTEyZ">user</span><span class="sMK4o">?.</span><span class="sTEyZ">username
</span></span><span class="line" line="2"><span class="sMK4o">    ||</span><span class="sTEyZ"> global</span><span class="sMK4o">.</span><span class="s2Zo4">get</span><span class="sTEyZ">(</span><span class="sMK4o">'</span><span class="sfazB">user</span><span class="sMK4o">'</span><span class="sMK4o">,</span><span class="sMK4o"> '</span><span class="sfazB">persistent</span><span class="sMK4o">'</span><span class="sTEyZ">)</span><span class="sMK4o">?.</span><span class="sTEyZ">username</span><span class="sMK4o">;
</span></span><span class="line" line="3"><span empty-line-placeholder>
</span></span><span class="line" line="4"><span class="s7zQu">if</span><span class="sTEyZ"> (</span><span class="sMK4o">!</span><span class="sTEyZ">username) </span><span class="sMK4o">{
</span></span><span class="line" line="5"><span class="sTEyZ">    node</span><span class="sMK4o">.</span><span class="s2Zo4">warn</span><span class="swJcz">(</span><span class="sMK4o">'</span><span class="sfazB">No logged-in user found — cannot complete operation</span><span class="sMK4o">'</span><span class="swJcz">)</span><span class="sMK4o">;
</span></span><span class="line" line="6"><span class="s7zQu">    return</span><span class="sMK4o"> null;
</span></span><span class="line" line="7"><span class="sMK4o">}
</span></span><span class="line" line="8"><span empty-line-placeholder>
</span></span><span class="line" line="9"><span class="spNyl">const</span><span class="sTEyZ"> stored </span><span class="sMK4o">=</span><span class="sTEyZ"> global</span><span class="sMK4o">.</span><span class="s2Zo4">get</span><span class="sTEyZ">(username</span><span class="sMK4o">,</span><span class="sMK4o"> '</span><span class="sfazB">persistent</span><span class="sMK4o">'</span><span class="sTEyZ">) </span><span class="sMK4o">||</span><span class="sMK4o"> {};
</span></span><span class="line" line="10"><span class="spNyl">const</span><span class="sTEyZ"> workOrderId </span><span class="sMK4o">=</span><span class="sTEyZ"> stored</span><span class="sMK4o">.</span><span class="sTEyZ">workOrderId </span><span class="sMK4o">||</span><span class="sMK4o"> null;
</span></span><span class="line" line="11"><span empty-line-placeholder>
</span></span><span class="line" line="12"><span class="sTEyZ">msg</span><span class="sMK4o">.</span><span class="sTEyZ">payload </span><span class="sMK4o">=</span><span class="sMK4o"> {</span><span class="sTEyZ"> workOrderId </span><span class="sMK4o">};
</span></span><span class="line" line="13"><span class="s7zQu">return</span><span class="sTEyZ"> msg</span><span class="sMK4o">;
</span></span></code></pre><ol start="4"><li>Add an <strong>http request</strong> node, set the <strong>Method</strong> to <strong>POST</strong>, configure <strong>Bearer</strong> authentication using your access token, and set the URL to <code>https://your-instance.flowfuse.cloud/workorders/complete</code>. Replace <code>https://your-instance.flowfuse.cloud</code> with your own FlowFuse instance URL.</li><li>Add a <strong>change</strong> node that sets <code>msg.payload</code> to <code>Home</code>, then connect it to a <strong>link out</strong> node. This will be used in the next step to reset the operator's state and navigate the operator back to the Home page.</li></ol><p>Because the payload is built from the logged-in operator's stored state, keyed off that same operator's per-message identity, the API always completes the correct work order, even when multiple operators are using the dashboard at the same time.</p><h2 id="reporting-a-defect-as-the-logged-in-operator">Reporting a Defect as the Logged-In Operator</h2><p>If an operator encounters a defect, they can report it from the <strong>Work Instruction Widget</strong>. The report is automatically linked to the work order they're currently performing, so there's no need to enter a work order ID manually.</p><p>The <strong>Report Issue</strong> button sends <code>{ action: "Report Issue" }</code>. Use that action to open the report form.</p><ol><li>Add a <strong>link in</strong> node named <strong>Widget Action In</strong> and connect it to the <strong>Work Instruction Widget</strong> actions link.</li><li>Add a <strong>switch</strong> node named <strong>Route by Action</strong> and route messages where <code>msg.payload.action</code> equals <code>Report Issue</code>.</li><li>Add a <strong>change</strong> node that sets <code>msg.payload</code> to <code>Report Issue</code>, then connect it to a <strong>ui-control</strong> node to navigate to the <strong>Report Issue</strong> page.</li><li>Add a <strong>ui-form</strong> node named <strong>Report Issue Form</strong> to the <strong>Report Issue</strong> group with four required fields:<ul><li><strong>Issue Type</strong> (dropdown)</li><li><strong>Severity</strong> (dropdown)</li><li><strong>Affected Part</strong> (text)</li><li><strong>Description</strong> (multiline)</li></ul><br/>Populate the dropdown fields with the issue types and severity levels used in your application.</li></ol><p><img alt="Screenshot: Report Issue form fields showing the Issue Type, Severity, Affected Part, and Description inputs" src="https://flowfuse.com/blog/2026/07/images/form-elements.png"/><em>The Report Issue form collects the defect details before submitting them against the current work order.</em></p><p><img alt="Screenshot: Configuring the dropdown options for the Issue Type and Severity fields in the ui-form node" src="https://flowfuse.com/blog/2026/07/images/form-dropdown.png"/><em>Configure the Issue Type and Severity dropdowns with the options used in your application.</em></p><ol start="5"><li>Add a <strong>function</strong> node named <strong>Prepare Defect Payload</strong> and paste in the following code.</li></ol><pre class="language-javascript shiki shiki-themes material-theme-lighter material-theme material-theme-palenight" code="const p = msg.payload || {};
const username = msg._client?.user?.username
    || global.get('user', 'persistent')?.username;

if (!username) {
    node.warn('No logged-in user found — cannot report defect');
    return null;
}

const stored = global.get(username, 'persistent') || {};
const workOrderId = stored.workOrderId || null;

const issueType = p.type;
const severity = p.severity;
const affectedPart = p['affected-part'];
const description = p.description || null;

if (!workOrderId || !issueType || !severity || !affectedPart) {
    node.warn('Missing required defect fields — defect not sent');
    return null;
}

msg.payload = {
    workOrderId,
    issueType,
    severity,
    affectedPart,
    description
};

return msg;
" language="javascript" meta="id="vbv4m6"" style=""><code __ignore-map=""><span class="line" line="1"><span class="spNyl">const</span><span class="sTEyZ"> p </span><span class="sMK4o">=</span><span class="sTEyZ"> msg</span><span class="sMK4o">.</span><span class="sTEyZ">payload </span><span class="sMK4o">||</span><span class="sMK4o"> {};
</span></span><span class="line" line="2"><span empty-line-placeholder>
</span></span><span class="line" line="3"><span class="spNyl">const</span><span class="sTEyZ"> username </span><span class="sMK4o">=</span><span class="sTEyZ"> msg</span><span class="sMK4o">.</span><span class="sTEyZ">_client</span><span class="sMK4o">?.</span><span class="sTEyZ">user</span><span class="sMK4o">?.</span><span class="sTEyZ">username
</span></span><span class="line" line="4"><span class="sMK4o">    ||</span><span class="sTEyZ"> global</span><span class="sMK4o">.</span><span class="s2Zo4">get</span><span class="sTEyZ">(</span><span class="sMK4o">'</span><span class="sfazB">user</span><span class="sMK4o">'</span><span class="sMK4o">,</span><span class="sMK4o"> '</span><span class="sfazB">persistent</span><span class="sMK4o">'</span><span class="sTEyZ">)</span><span class="sMK4o">?.</span><span class="sTEyZ">username</span><span class="sMK4o">;
</span></span><span class="line" line="5"><span empty-line-placeholder>
</span></span><span class="line" line="6"><span class="s7zQu">if</span><span class="sTEyZ"> (</span><span class="sMK4o">!</span><span class="sTEyZ">username) </span><span class="sMK4o">{
</span></span><span class="line" line="7"><span class="sTEyZ">    node</span><span class="sMK4o">.</span><span class="s2Zo4">warn</span><span class="swJcz">(</span><span class="sMK4o">'</span><span class="sfazB">No logged-in user found — cannot report defect</span><span class="sMK4o">'</span><span class="swJcz">)</span><span class="sMK4o">;
</span></span><span class="line" line="8"><span class="s7zQu">    return</span><span class="sMK4o"> null;
</span></span><span class="line" line="9"><span class="sMK4o">}
</span></span><span class="line" line="10"><span empty-line-placeholder>
</span></span><span class="line" line="11"><span class="spNyl">const</span><span class="sTEyZ"> stored </span><span class="sMK4o">=</span><span class="sTEyZ"> global</span><span class="sMK4o">.</span><span class="s2Zo4">get</span><span class="sTEyZ">(username</span><span class="sMK4o">,</span><span class="sMK4o"> '</span><span class="sfazB">persistent</span><span class="sMK4o">'</span><span class="sTEyZ">) </span><span class="sMK4o">||</span><span class="sMK4o"> {};
</span></span><span class="line" line="12"><span class="spNyl">const</span><span class="sTEyZ"> workOrderId </span><span class="sMK4o">=</span><span class="sTEyZ"> stored</span><span class="sMK4o">.</span><span class="sTEyZ">workOrderId </span><span class="sMK4o">||</span><span class="sMK4o"> null;
</span></span><span class="line" line="13"><span empty-line-placeholder>
</span></span><span class="line" line="14"><span class="spNyl">const</span><span class="sTEyZ"> issueType </span><span class="sMK4o">=</span><span class="sTEyZ"> p</span><span class="sMK4o">.</span><span class="sTEyZ">type</span><span class="sMK4o">;
</span></span><span class="line" line="15"><span class="spNyl">const</span><span class="sTEyZ"> severity </span><span class="sMK4o">=</span><span class="sTEyZ"> p</span><span class="sMK4o">.</span><span class="sTEyZ">severity</span><span class="sMK4o">;
</span></span><span class="line" line="16"><span class="spNyl">const</span><span class="sTEyZ"> affectedPart </span><span class="sMK4o">=</span><span class="sTEyZ"> p[</span><span class="sMK4o">'</span><span class="sfazB">affected-part</span><span class="sMK4o">'</span><span class="sTEyZ">]</span><span class="sMK4o">;
</span></span><span class="line" line="17"><span class="spNyl">const</span><span class="sTEyZ"> description </span><span class="sMK4o">=</span><span class="sTEyZ"> p</span><span class="sMK4o">.</span><span class="sTEyZ">description </span><span class="sMK4o">||</span><span class="sMK4o"> null;
</span></span><span class="line" line="18"><span empty-line-placeholder>
</span></span><span class="line" line="19"><span class="s7zQu">if</span><span class="sTEyZ"> (</span><span class="sMK4o">!</span><span class="sTEyZ">workOrderId </span><span class="sMK4o">||</span><span class="sMK4o"> !</span><span class="sTEyZ">issueType </span><span class="sMK4o">||</span><span class="sMK4o"> !</span><span class="sTEyZ">severity </span><span class="sMK4o">||</span><span class="sMK4o"> !</span><span class="sTEyZ">affectedPart) </span><span class="sMK4o">{
</span></span><span class="line" line="20"><span class="sTEyZ">    node</span><span class="sMK4o">.</span><span class="s2Zo4">warn</span><span class="swJcz">(</span><span class="sMK4o">'</span><span class="sfazB">Missing required defect fields — defect not sent</span><span class="sMK4o">'</span><span class="swJcz">)</span><span class="sMK4o">;
</span></span><span class="line" line="21"><span class="s7zQu">    return</span><span class="sMK4o"> null;
</span></span><span class="line" line="22"><span class="sMK4o">}
</span></span><span class="line" line="23"><span empty-line-placeholder>
</span></span><span class="line" line="24"><span class="sTEyZ">msg</span><span class="sMK4o">.</span><span class="sTEyZ">payload </span><span class="sMK4o">=</span><span class="sMK4o"> {
</span></span><span class="line" line="25"><span class="sTEyZ">    workOrderId</span><span class="sMK4o">,
</span></span><span class="line" line="26"><span class="sTEyZ">    issueType</span><span class="sMK4o">,
</span></span><span class="line" line="27"><span class="sTEyZ">    severity</span><span class="sMK4o">,
</span></span><span class="line" line="28"><span class="sTEyZ">    affectedPart</span><span class="sMK4o">,
</span></span><span class="line" line="29"><span class="sTEyZ">    description
</span></span><span class="line" line="30"><span class="sMK4o">};
</span></span><span class="line" line="31"><span empty-line-placeholder>
</span></span><span class="line" line="32"><span class="s7zQu">return</span><span class="sTEyZ"> msg</span><span class="sMK4o">;
</span></span></code></pre><ol start="6"><li>Add an <strong>http request</strong> node, set the <strong>Method</strong> to <strong>POST</strong>, configure <strong>Bearer</strong> authentication using your access token, and set the URL to <code>https://your-instance.flowfuse.cloud/workorders/defect</code>. Replace <code>https://your-instance.flowfuse.cloud</code> with your own FlowFuse instance URL, then connect the request to a <strong>link out</strong> node so the flow continues to the reset step.</li><li>Add a <strong>ui-button</strong> named <strong>Back to Work Instructions</strong> to the same group and connect it to a <strong>ui-control</strong> node that navigates back to the <strong>Instructions</strong> page. Since the operator's progress is stored against their username, they return to the same instruction they left.</li></ol><p><img alt="Screenshot: Completed Report Issue page showing the defect reporting form and Back to Work Instructions button" src="https://flowfuse.com/blog/2026/07/images/report-issue.png"/><em>The completed Report Issue page where operators can submit a defect or return to the work instructions.</em></p><p>The work order ID is retrieved from the logged-in operator's stored state, ensuring every defect report is associated with the correct work order, and the lookup key for that state again comes from this message's own client data, not a value that could have been overwritten by someone else's login in the meantime.</p><h2 id="clearing-state-when-work-ends">Clearing State When Work Ends</h2><p>When an operation is completed or a defect is reported, clear the operator's saved progress so the next work order starts from <strong>step 1</strong> instead of resuming a finished one.</p><ol><li>Add a <strong>link in</strong> node named <strong>Complete / Defect Result In</strong> and connect it to the <strong>link out</strong> nodes from the <strong>Complete Operation</strong> and <strong>Report Defect</strong> flows.</li><li>Add a <strong>switch</strong> node that checks <code>msg.statusCode</code> equals <code>200</code>, so the state is only cleared after a successful API response.</li><li>Add a <strong>function</strong> node named <strong>Clear User Step State</strong> and paste in the following code.</li></ol><pre class="language-javascript shiki shiki-themes material-theme-lighter material-theme material-theme-palenight" code="const username = msg._client?.user?.username
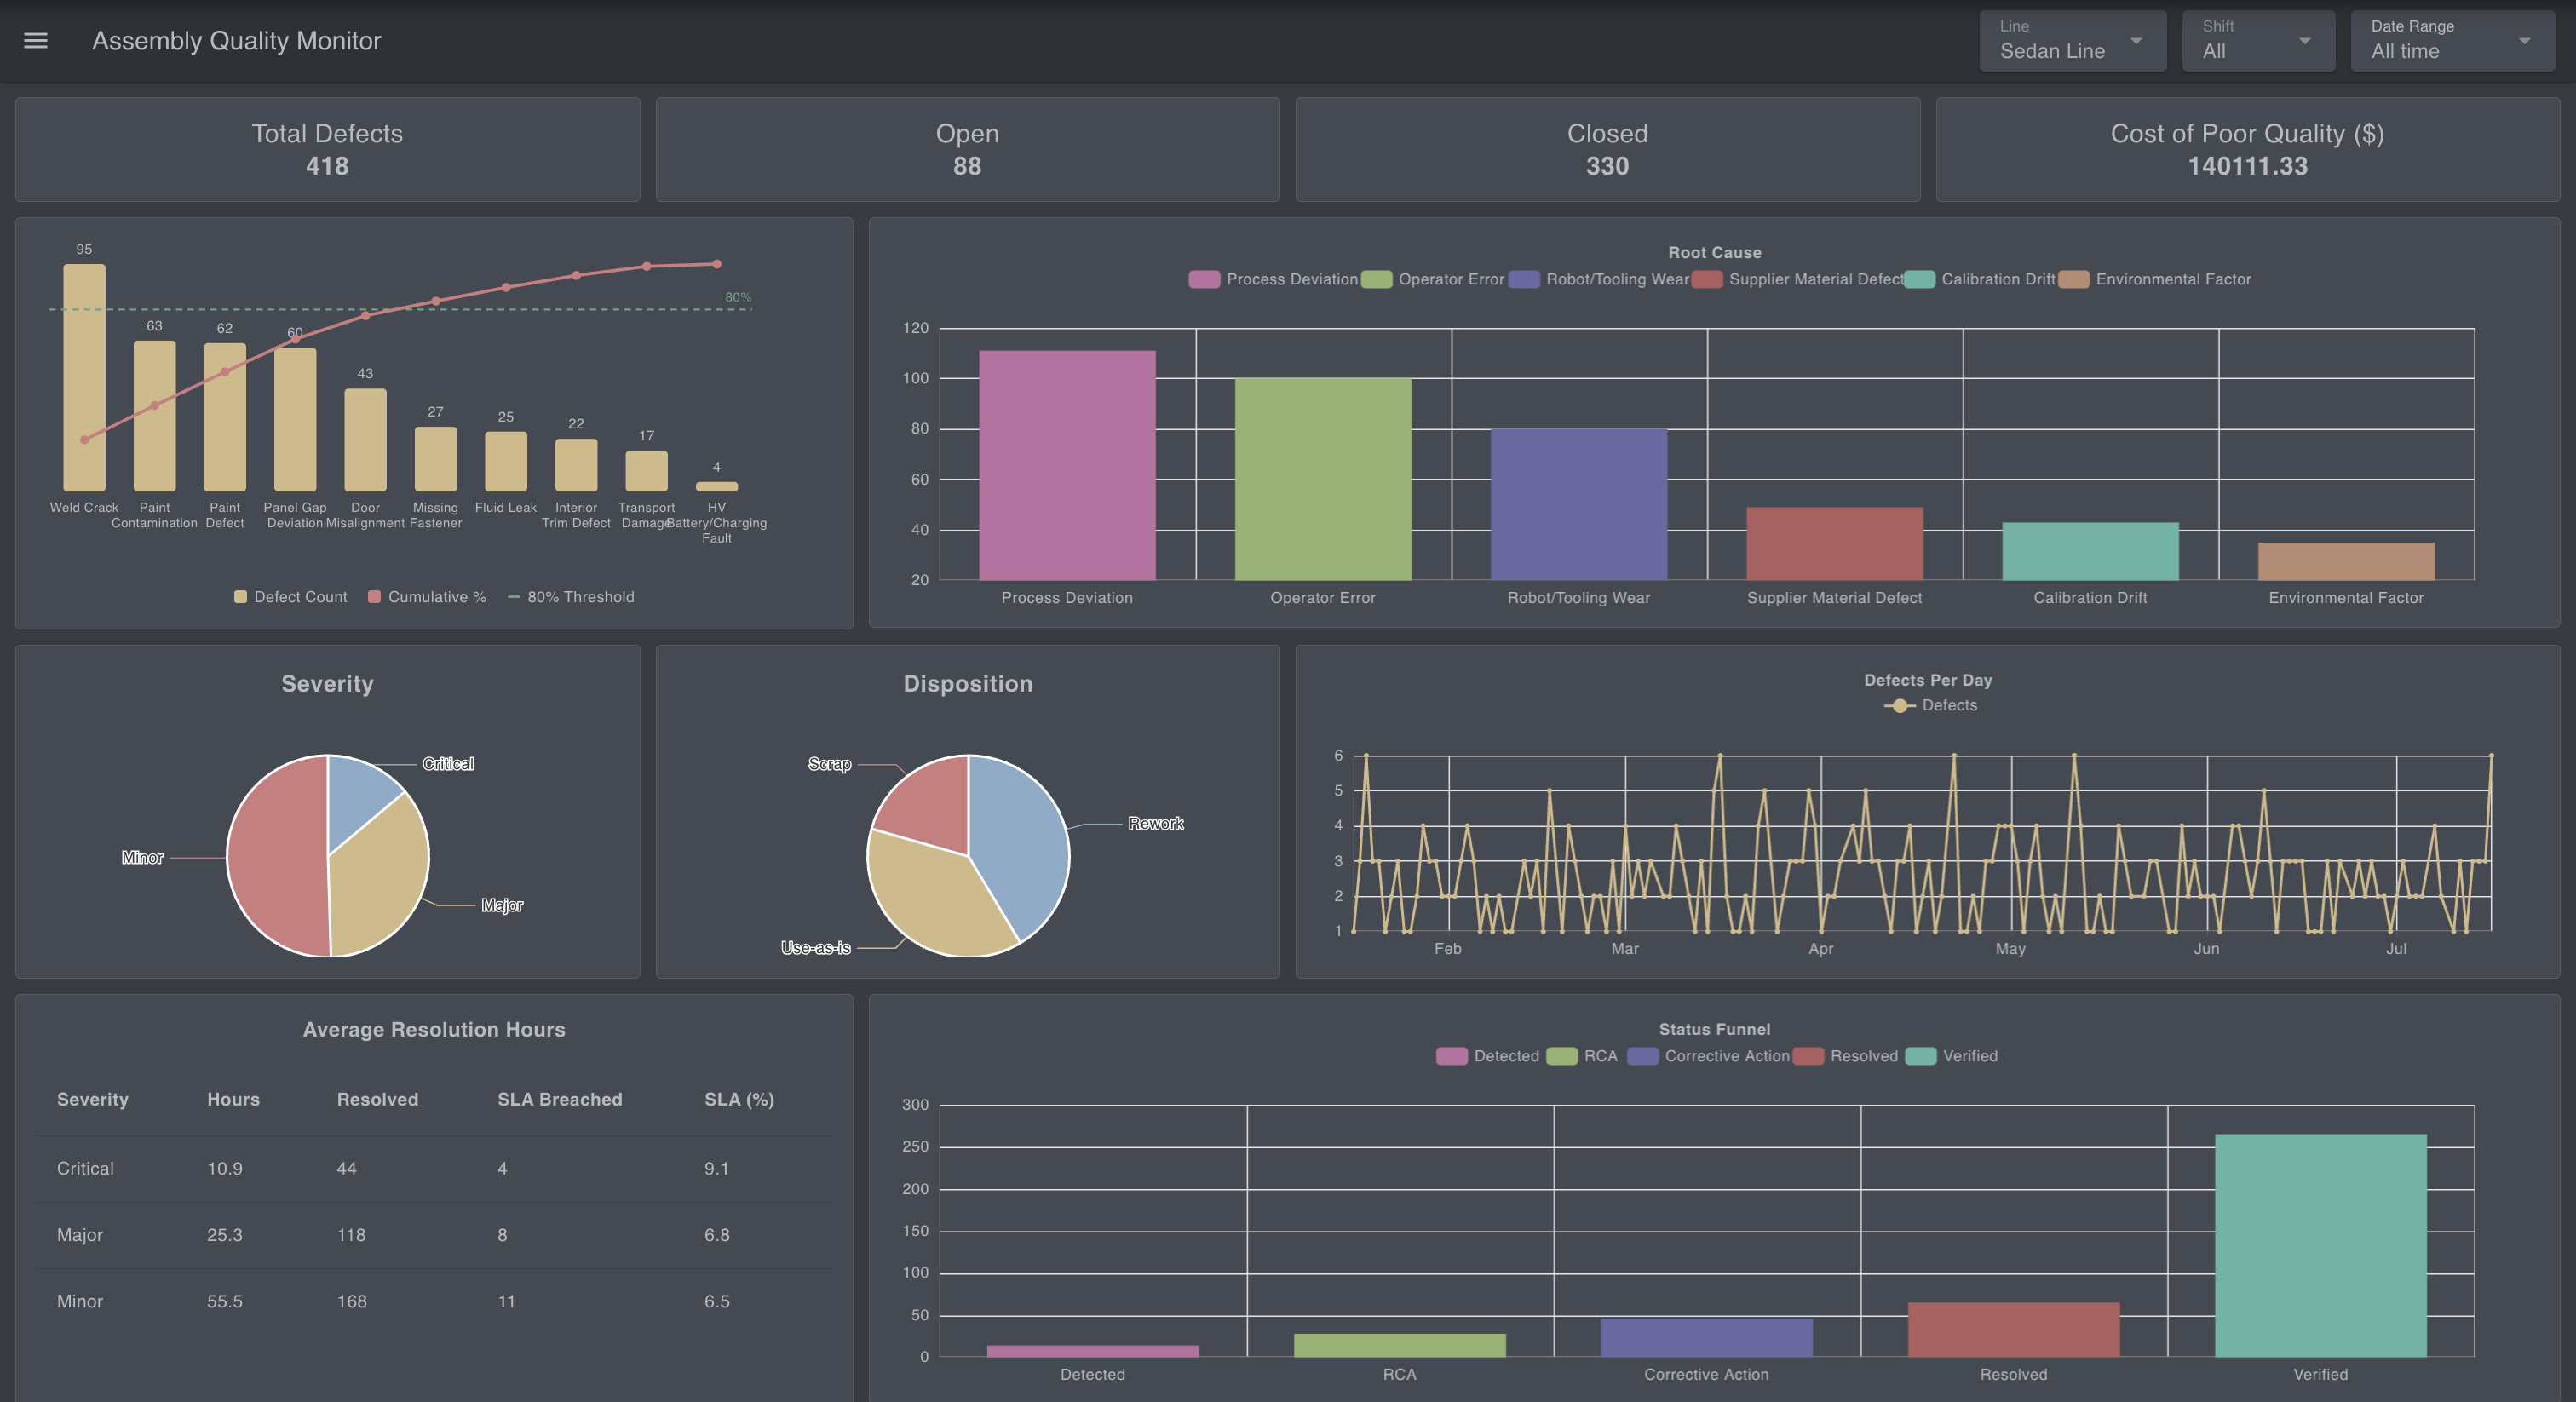
    || global.get('user', 'persistent')?.username;

if (!username) return null;

global.set(username, {}, 'persistent');

msg.payload = "Home";
return msg;
" language="javascript" meta="id="6ej1v5"" style=""><code __ignore-map=""><span class="line" line="1"><span class="spNyl">const</span><span class="sTEyZ"> username </span><span class="sMK4o">=</span><span class="sTEyZ"> msg</span><span class="sMK4o">.</span><span class="sTEyZ">_client</span><span class="sMK4o">?.</span><span class="sTEyZ">user</span><span class="sMK4o">?.</span><span class="sTEyZ">username
</span></span><span class="line" line="2"><span class="sMK4o">    ||</span><span class="sTEyZ"> global</span><span class="sMK4o">.</span><span class="s2Zo4">get</span><span class="sTEyZ">(</span><span class="sMK4o">'</span><span class="sfazB">user</span><span class="sMK4o">'</span><span class="sMK4o">,</span><span class="sMK4o"> '</span><span class="sfazB">persistent</span><span class="sMK4o">'</span><span class="sTEyZ">)</span><span class="sMK4o">?.</span><span class="sTEyZ">username</span><span class="sMK4o">;
</span></span><span class="line" line="3"><span empty-line-placeholder>
</span></span><span class="line" line="4"><span class="s7zQu">if</span><span class="sTEyZ"> (</span><span class="sMK4o">!</span><span class="sTEyZ">username) </span><span class="s7zQu">return</span><span class="sMK4o"> null;
</span></span><span class="line" line="5"><span empty-line-placeholder>
</span></span><span class="line" line="6"><span class="sTEyZ">global</span><span class="sMK4o">.</span><span class="s2Zo4">set</span><span class="sTEyZ">(username</span><span class="sMK4o">,</span><span class="sMK4o"> {},</span><span class="sMK4o"> '</span><span class="sfazB">persistent</span><span class="sMK4o">'</span><span class="sTEyZ">)</span><span class="sMK4o">;
</span></span><span class="line" line="7"><span empty-line-placeholder>
</span></span><span class="line" line="8"><span class="sTEyZ">msg</span><span class="sMK4o">.</span><span class="sTEyZ">payload </span><span class="sMK4o">=</span><span class="sMK4o"> "</span><span class="sfazB">Home</span><span class="sMK4o">"</span><span class="sMK4o">;
</span></span><span class="line" line="9"><span class="s7zQu">return</span><span class="sTEyZ"> msg</span><span class="sMK4o">;
</span></span></code></pre><ol start="4"><li>Connect the function node to a <strong>ui-control</strong> node to navigate the operator back to the <strong>Home</strong> page.</li></ol><p>Because the state is stored and cleared by username, and that username is read from the message that carried the successful API response rather than a shared global, resetting one operator's progress never affects anyone else, even if a second operator has logged in on another screen in between.</p><p>Deploy the flow and open the dashboard. After signing in, operators see only the work orders assigned to them. If they leave and return, they resume from the same instruction. Once they complete the operation or report a defect, their progress is cleared and they're returned to the Home page, ready for the next work order.</p><h2 id="where-to-go-next">Where to Go Next</h2><p>You've built a personalized digital work instructions application that knows who the operator is, what work they're assigned, and where they left off, correctly, even when several operators are on the dashboard at once. Replacing the simulator with a real ERP or MES is simply a matter of pointing the HTTP Request nodes to your production <code>/workorders</code>, <code>/workorders/complete</code>, and <code>/workorders/defect</code> endpoints.</p><p>From there, you can extend the application with production history, quality tracking, role-based experiences, and the <a href="https://flowfuse.com/blog/2026/08/manufacturing-dashboard-examples/">OEE, downtime, and quality dashboards</a> that run alongside it, all powered by the same operator identity. To see how FlowFuse fits into modern automotive manufacturing, explore the <a href="https://flowfuse.com/industries/automotive/">Automotive solutions page</a>.</p><style>html pre.shiki code .sMK4o, html code.shiki .sMK4o{--shiki-light:#39ADB5;--shiki-default:#89DDFF;--shiki-dark:#89DDFF}html pre.shiki code .spNyl, html code.shiki .spNyl{--shiki-light:#9C3EDA;--shiki-default:#C792EA;--shiki-dark:#C792EA}html pre.shiki code .sfazB, html code.shiki .sfazB{--shiki-light:#91B859;--shiki-default:#C3E88D;--shiki-dark:#C3E88D}html pre.shiki code .sBMFI, html code.shiki .sBMFI{--shiki-light:#E2931D;--shiki-default:#FFCB6B;--shiki-dark:#FFCB6B}html pre.shiki code .sbssI, html code.shiki .sbssI{--shiki-light:#F76D47;--shiki-default:#F78C6C;--shiki-dark:#F78C6C}html pre.shiki code .sTEyZ, html code.shiki .sTEyZ{--shiki-light:#90A4AE;--shiki-default:#EEFFFF;--shiki-dark:#BABED8}html .light .shiki span {color: var(--shiki-light);background: var(--shiki-light-bg);font-style: var(--shiki-light-font-style);font-weight: var(--shiki-light-font-weight);text-decoration: var(--shiki-light-text-decoration);}html.light .shiki span {color: var(--shiki-light);background: var(--shiki-light-bg);font-style: var(--shiki-light-font-style);font-weight: var(--shiki-light-font-weight);text-decoration: var(--shiki-light-text-decoration);}html .default .shiki span {color: var(--shiki-default);background: var(--shiki-default-bg);font-style: var(--shiki-default-font-style);font-weight: var(--shiki-default-font-weight);text-decoration: var(--shiki-default-text-decoration);}html .shiki span {color: var(--shiki-default);background: var(--shiki-default-bg);font-style: var(--shiki-default-font-style);font-weight: var(--shiki-default-font-weight);text-decoration: var(--shiki-default-text-decoration);}html .dark .shiki span {color: var(--shiki-dark);background: var(--shiki-dark-bg);font-style: var(--shiki-dark-font-style);font-weight: var(--shiki-dark-font-weight);text-decoration: var(--shiki-dark-text-decoration);}html.dark .shiki span {color: var(--shiki-dark);background: var(--shiki-dark-bg);font-style: var(--shiki-dark-font-style);font-weight: var(--shiki-dark-font-weight);text-decoration: var(--shiki-dark-text-decoration);}html pre.shiki code .swJcz, html code.shiki .swJcz{--shiki-light:#E53935;--shiki-default:#F07178;--shiki-dark:#F07178}html pre.shiki code .sHwdD, html code.shiki .sHwdD{--shiki-light:#90A4AE;--shiki-light-font-style:italic;--shiki-default:#546E7A;--shiki-default-font-style:italic;--shiki-dark:#676E95;--shiki-dark-font-style:italic}html pre.shiki code .s7zQu, html code.shiki .s7zQu{--shiki-light:#39ADB5;--shiki-light-font-style:italic;--shiki-default:#89DDFF;--shiki-default-font-style:italic;--shiki-dark:#89DDFF;--shiki-dark-font-style:italic}html pre.shiki code .sfNiH, html code.shiki .sfNiH{--shiki-light:#FF5370;--shiki-default:#FF9CAC;--shiki-dark:#FF9CAC}html pre.shiki code .sqsOY, html code.shiki .sqsOY{--shiki-light:#8796B0;--shiki-default:#B2CCD6;--shiki-dark:#B2CCD6}html pre.shiki code .s2Zo4, html code.shiki .s2Zo4{--shiki-light:#6182B8;--shiki-default:#82AAFF;--shiki-dark:#82AAFF}html pre.shiki code .sHdIc, html code.shiki .sHdIc{--shiki-light:#90A4AE;--shiki-light-font-style:italic;--shiki-default:#EEFFFF;--shiki-default-font-style:italic;--shiki-dark:#BABED8;--shiki-dark-font-style:italic}</style><p><strong>Want to connect this to your real ERP or MES?</strong></p><p>Talk to our team about integrating digital work instructions with your production systems, adding full traceability, and rolling this out across your shop floor.</p><p><a href="https://flowfuse.com/contact-us/">Contact Us</a></p>]]></content>
        <updated>2026-07-24T00:00:00.000Z</updated>
        <link href="https://flowfuse.com/blog/2026/07/digital-work-instruction/"/>
        
    </entry>
    <entry>
        <id>https://flowfuse.com/blog/2026/07/time-synchronization-edge-devices/</id>
        <title>Handling Clock Drift in Distributed Edge Devices</title>
        <summary>Clock drift is a common problem in distributed edge deployments and can lead to unreliable timestamps, out-of-order events, and inaccurate production data. This guide explains why clocks drift, how to keep devices synchronized using NTP or local time servers, when to use RTCs, and how to monitor clock drift in FlowFuse before it impacts your operations.</summary>
        <content type="html"><![CDATA[<p>Industrial systems rely on accurate timestamps to understand what happened, when it happened, and how events across different systems relate to each other.</p><p>Edge devices, gateways, servers, and data collection systems maintain their own clocks, and those clocks drift over time. When these systems collect and process industrial data, inaccurate timestamps can lead to out-of-order events, unreliable historical records, and incorrect analysis.</p><p>In this article, we'll look at why clock drift happens, how to keep distributed industrial systems synchronized, and how to monitor clock health using FlowFuse.</p><h2 id="why-edge-clocks-drift">Why edge clocks drift</h2><p>Every computer keeps time using a crystal oscillator. These crystals are accurate but not perfect: some run slightly fast, others slightly slow, and their accuracy changes with temperature and age. Two systems that start with the same time gradually drift apart.</p><p>That's the slow cause. In production, there are usually bigger reasons clocks become inaccurate.</p><h3 id="no-real-time-clock">No real-time clock</h3><p>Most servers and desktops include a battery-backed Real-Time Clock (RTC) that keeps time while the machine is powered off. Many low-cost edge devices don't.</p><p>The Raspberry Pi is the best-known example. After being powered off, it has no reliable way to remember the current time, so it must wait until it can reach a time server. Without network access, it may boot thinking it's days, months, or even years in the past.</p><p>The operating system doesn't know the time is wrong. Applications running on that system, such as data collectors, gateways, and logging services, will continue creating timestamps based on whatever time the operating system reports.</p><h3 id="no-access-to-a-time-server">No access to a time server</h3><p>Most systems periodically synchronize with a time server to correct clock drift, but that isn't always possible in industrial environments. Many OT networks intentionally block internet access, and some are completely air-gapped.</p><p>If an edge device, gateway, or data collection system can't reach a trusted time source, it keeps relying on its own clock, drifting a little further each day. A few milliseconds won't matter. A few weeks or months usually will.</p><h3 id="backup-power-doesnt-last-forever">Backup power doesn't last forever</h3><p>Some industrial gateways include an RTC but use a supercapacitor instead of a battery to keep it running during power outages. That works well for short outages, but leave the device unpowered for several days or weeks and the capacitor eventually discharges, resetting the clock.</p><p>Some industrial Linux systems then fall back to the operating system build date or another fixed timestamp. That's why you'll occasionally find multiple systems reporting exactly the same incorrect date from years ago.</p><p>If several systems suddenly report the same incorrect date, it's usually a sign that the backup clock source has been lost.</p><p>Leave a fleet running long enough and the clocks won't agree anymore. Most systems will only be slightly off, while a few can end up completely wrong.</p><h2 id="what-drift-does-to-your-data">What drift does to your data</h2><p>Clock drift rarely causes obvious failures. Systems stay online, messages keep arriving, and dashboards still update. The timestamps just quietly become unreliable, and by the time anyone notices, the root cause can be difficult to trace.</p><p>The problem appears when data from multiple systems needs to be compared. SCADA platforms, HMIs, historians, and data collection systems rely on timestamps to understand event order, calculate production metrics, and investigate failures.</p><p>Events start appearing in the wrong order. If one system reports a motor stop, another an emergency stop, and a third a conveyor jam, but their clocks disagree, the sequence you see may not match what actually happened.</p><p>Data can also land in the wrong time bucket. A reading stamped a few seconds late can fall into the wrong aggregation window and quietly skew averages, production counts, and OEE calculations. The timestamp is not invalid, just inaccurate.</p><p>Cross-machine correlation suffers too. Comparing robot cycles with conveyor speed, or analyzing a production line failure across multiple systems, only works when those systems share a consistent timeline.</p><p>The impact is not usually that machines stop working. The problem is that the historical data used for analysis, troubleshooting, and reporting becomes harder to trust.</p><h2 id="step-one-keep-system-clocks-synchronized">Step one: keep system clocks synchronized</h2><p>The best place to solve clock drift is at the systems that generate and store timestamps. For edge gateways, servers, and data collection systems, this usually means keeping the operating system clock synchronized. When these systems have an inaccurate clock, applications such as data collectors, SCADA connectors, historians, and logging services can create unreliable timestamps.</p><p>Before changing anything, check what's actually running on your systems. Industrial deployments are rarely uniform, since different hardware vendors, OS images, and software versions often ship with different defaults, so it's worth confirming rather than assuming:</p><pre class="language-bash shiki shiki-themes material-theme-lighter material-theme material-theme-palenight" code="which chronyc    # chrony present?
which ntpq       # classic ntpd present?
timedatectl show-timesync --all   # systemd-timesyncd, on many minimal images
" language="bash" meta="" style=""><code __ignore-map=""><span class="line" line="1"><span class="s2Zo4">which</span><span class="sfazB"> chronyc</span><span class="sHwdD">    # chrony present?
</span></span><span class="line" line="2"><span class="s2Zo4">which</span><span class="sfazB"> ntpq</span><span class="sHwdD">       # classic ntpd present?
</span></span><span class="line" line="3"><span class="sBMFI">timedatectl</span><span class="sfazB"> show-timesync</span><span class="sfazB"> --all</span><span class="sHwdD">   # systemd-timesyncd, on many minimal images
</span></span></code></pre><p>Whichever client is present, the underlying goal is the same: keep it pointed at a reliable source and give it a way to maintain accurate time across reboots and network outages.</p><h3 id="choose-an-ntp-client-deliberately">Choose an NTP client deliberately</h3><p>On many modern Linux distributions, <strong>chrony</strong> is the default and has largely replaced the older <strong>ntpd</strong> service. It tends to suit edge environments well: it synchronizes quickly after boot, keeps tracking clock drift while offline, and recovers cleanly when the network becomes available again.</p><p>But it isn't universal, since some minimal or vendor-specific images ship with <code>ntpd</code>, <code>systemd-timesyncd</code>, or nothing at all. Check first, and install or switch only if it makes sense for your deployment.</p><p>If you do use chrony, a basic configuration is enough for most deployments:</p><pre class="language-bash shiki shiki-themes material-theme-lighter material-theme material-theme-palenight" code="# /etc/chrony/chrony.conf

pool pool.ntp.org iburst
driftfile /var/lib/chrony/drift
makestep 1.0 3
rtcsync
" language="bash" meta="" style=""><code __ignore-map=""><span class="line" line="1"><span class="sHwdD"># /etc/chrony/chrony.conf
</span></span><span class="line" line="2"><span empty-line-placeholder>
</span></span><span class="line" line="3"><span class="sBMFI">pool</span><span class="sfazB"> pool.ntp.org</span><span class="sfazB"> iburst
</span></span><span class="line" line="4"><span class="sBMFI">driftfile</span><span class="sfazB"> /var/lib/chrony/drift
</span></span><span class="line" line="5"><span class="sBMFI">makestep</span><span class="sbssI"> 1.0</span><span class="sbssI"> 3
</span></span><span class="line" line="6"><span class="sBMFI">rtcsync
</span></span></code></pre><h3 id="use-multiple-time-sources">Use multiple time sources</h3><p>Avoid relying on a single time server. If that server has the wrong time or becomes unavailable, every system depending on it inherits the problem.</p><p>Using several independent time sources lets the NTP client compare responses, ignore outliers, and maintain a more reliable clock.</p><h3 id="air-gapped-networks-still-need-time-synchronization">Air-gapped networks still need time synchronization</h3><p>No internet does not mean industrial systems have to operate with independent clocks.</p><p>A common approach is to run a local time server inside the OT network and point edge gateways, servers, and data collection systems to it. The protocol does not change. Only the time source does.</p><p>For example:</p><pre class="language-bash shiki shiki-themes material-theme-lighter material-theme material-theme-palenight" code="server 10.0.5.10 iburst
" language="bash" meta="" style=""><code __ignore-map=""><span class="line" line="1"><span class="sBMFI">server</span><span class="sbssI"> 10.0.5.10</span><span class="sfazB"> iburst
</span></span></code></pre><p>Even if that local server is not synchronized with the internet, every system in the plant can maintain a consistent timeline. For many industrial applications, consistency between systems is more important than perfect UTC accuracy.</p><p>If accurate wall-clock time is required, the local server can be synchronized using GPS or another external reference.</p><h3 id="add-a-real-time-clock-where-possible">Add a real-time clock where possible</h3><p>If your hardware does not include an RTC, consider adding one. For devices like the Raspberry Pi, an inexpensive battery-backed RTC module lets the system boot with the correct time even before the network is available.</p><p>This is especially useful for systems that power on, perform a task, and shut down again before NTP has a chance to synchronize.</p><p>Keeping the operating system synchronized solves most clock drift issues. The next step is making sure your applications preserve the correct timestamps and alert you when a system starts drifting.</p><h2 id="monitoring-drift-from-flowfuse">Monitoring drift from FlowFuse</h2><p>If FlowFuse is already running on your edge devices, it is a convenient place to monitor whether the system clock used by data collection flow remains accurate.</p><p>This check applies to the edge computer running FlowFuse or the data collection node, not the PLC itself. The goal is to detect when timestamps generated by the industrial data collection layer may no longer be reliable.</p><p>The flow below works with chrony; if a device runs ntpd instead, swap the command in step 2 for <code>ntpq -p</code> and adjust the parsing in step 3 to match its output format.</p><ol><li>Add an inject node to the canvas, name it "Check clock every 5 min", and set it to repeat on an interval of 5 minutes. Clock drift is a trend, not a single reading, so a one-off check will not show whether the offset is increasing.</li><li>Add an exec node after it, name it "Get chrony offset", and set the command to:</li></ol><pre class="language-bash shiki shiki-themes material-theme-lighter material-theme material-theme-palenight" code="chronyc tracking
" language="bash" meta="" style=""><code __ignore-map=""><span class="line" line="1"><span class="sBMFI">chronyc</span><span class="sfazB"> tracking
</span></span></code></pre><p>This pulls the actual offset from the operating system clock synchronization service rather than estimating it from application timestamps.</p><ol start="3"><li>Add a function node after the exec node, name it "Parse offset", and set it to:</li></ol><pre class="language-javascript shiki shiki-themes material-theme-lighter material-theme material-theme-palenight" code="const lines = msg.payload.split('\n');
const data = {};

lines.forEach(line =&gt; {
    const [key, ...rest] = line.split(':');
    if (key &amp;&amp; rest.length) {
        data[key.trim()] = rest.join(':').trim();
    }
});

const parseOffset = (v) =&gt; v ? parseFloat(v) * 1000 : null; // to ms

msg.payload = {
    stratum: parseInt(data['Stratum']),
    lastOffsetMs: parseOffset(data['Last offset']),
    rmsOffsetMs: parseOffset(data['RMS offset']),
    leapStatus: data['Leap status'],
    timestamp: new Date().toISOString()
};

return msg;
" language="javascript" meta="" style=""><code __ignore-map=""><span class="line" line="1"><span class="spNyl">const</span><span class="sTEyZ"> lines </span><span class="sMK4o">=</span><span class="sTEyZ"> msg</span><span class="sMK4o">.</span><span class="sTEyZ">payload</span><span class="sMK4o">.</span><span class="s2Zo4">split</span><span class="sTEyZ">(</span><span class="sMK4o">'</span><span class="sTEyZ">\n</span><span class="sMK4o">'</span><span class="sTEyZ">)</span><span class="sMK4o">;
</span></span><span class="line" line="2"><span class="spNyl">const</span><span class="sTEyZ"> data </span><span class="sMK4o">=</span><span class="sMK4o"> {};
</span></span><span class="line" line="3"><span empty-line-placeholder>
</span></span><span class="line" line="4"><span class="sTEyZ">lines</span><span class="sMK4o">.</span><span class="s2Zo4">forEach</span><span class="sTEyZ">(</span><span class="sHdIc">line</span><span class="spNyl"> =&gt;</span><span class="sMK4o"> {
</span></span><span class="line" line="5"><span class="spNyl">    const</span><span class="sMK4o"> [</span><span class="sTEyZ">key</span><span class="sMK4o">,</span><span class="sMK4o"> ...</span><span class="sTEyZ">rest</span><span class="sMK4o">]</span><span class="sMK4o"> =</span><span class="sTEyZ"> line</span><span class="sMK4o">.</span><span class="s2Zo4">split</span><span class="swJcz">(</span><span class="sMK4o">'</span><span class="sfazB">:</span><span class="sMK4o">'</span><span class="swJcz">)</span><span class="sMK4o">;
</span></span><span class="line" line="6"><span class="s7zQu">    if</span><span class="swJcz"> (</span><span class="sTEyZ">key</span><span class="sMK4o"> &amp;&amp;</span><span class="sTEyZ"> rest</span><span class="sMK4o">.</span><span class="sTEyZ">length</span><span class="swJcz">) </span><span class="sMK4o">{
</span></span><span class="line" line="7"><span class="sTEyZ">        data</span><span class="swJcz">[</span><span class="sTEyZ">key</span><span class="sMK4o">.</span><span class="s2Zo4">trim</span><span class="swJcz">()] </span><span class="sMK4o">=</span><span class="sTEyZ"> rest</span><span class="sMK4o">.</span><span class="s2Zo4">join</span><span class="swJcz">(</span><span class="sMK4o">'</span><span class="sfazB">:</span><span class="sMK4o">'</span><span class="swJcz">)</span><span class="sMK4o">.</span><span class="s2Zo4">trim</span><span class="swJcz">()</span><span class="sMK4o">;
</span></span><span class="line" line="8"><span class="sMK4o">    }
</span></span><span class="line" line="9"><span class="sMK4o">}</span><span class="sTEyZ">)</span><span class="sMK4o">;
</span></span><span class="line" line="10"><span empty-line-placeholder>
</span></span><span class="line" line="11"><span class="spNyl">const</span><span class="sTEyZ"> parseOffset </span><span class="sMK4o">=</span><span class="sMK4o"> (</span><span class="sHdIc">v</span><span class="sMK4o">)</span><span class="spNyl"> =&gt;</span><span class="sTEyZ"> v </span><span class="sMK4o">?</span><span class="s2Zo4"> parseFloat</span><span class="sTEyZ">(v) </span><span class="sMK4o">*</span><span class="sbssI"> 1000</span><span class="sMK4o"> :</span><span class="sMK4o"> null;</span><span class="sHwdD"> // to ms
</span></span><span class="line" line="12"><span empty-line-placeholder>
</span></span><span class="line" line="13"><span class="sTEyZ">msg</span><span class="sMK4o">.</span><span class="sTEyZ">payload </span><span class="sMK4o">=</span><span class="sMK4o"> {
</span></span><span class="line" line="14"><span class="swJcz">    stratum</span><span class="sMK4o">:</span><span class="s2Zo4"> parseInt</span><span class="sTEyZ">(data[</span><span class="sMK4o">'</span><span class="sfazB">Stratum</span><span class="sMK4o">'</span><span class="sTEyZ">])</span><span class="sMK4o">,
</span></span><span class="line" line="15"><span class="swJcz">    lastOffsetMs</span><span class="sMK4o">:</span><span class="s2Zo4"> parseOffset</span><span class="sTEyZ">(data[</span><span class="sMK4o">'</span><span class="sfazB">Last offset</span><span class="sMK4o">'</span><span class="sTEyZ">])</span><span class="sMK4o">,
</span></span><span class="line" line="16"><span class="swJcz">    rmsOffsetMs</span><span class="sMK4o">:</span><span class="s2Zo4"> parseOffset</span><span class="sTEyZ">(data[</span><span class="sMK4o">'</span><span class="sfazB">RMS offset</span><span class="sMK4o">'</span><span class="sTEyZ">])</span><span class="sMK4o">,
</span></span><span class="line" line="17"><span class="swJcz">    leapStatus</span><span class="sMK4o">:</span><span class="sTEyZ"> data[</span><span class="sMK4o">'</span><span class="sfazB">Leap status</span><span class="sMK4o">'</span><span class="sTEyZ">]</span><span class="sMK4o">,
</span></span><span class="line" line="18"><span class="swJcz">    timestamp</span><span class="sMK4o">:</span><span class="sMK4o"> new</span><span class="s2Zo4"> Date</span><span class="sTEyZ">()</span><span class="sMK4o">.</span><span class="s2Zo4">toISOString</span><span class="sTEyZ">()
</span></span><span class="line" line="19"><span class="sMK4o">};
</span></span><span class="line" line="20"><span empty-line-placeholder>
</span></span><span class="line" line="21"><span class="s7zQu">return</span><span class="sTEyZ"> msg</span><span class="sMK4o">;
</span></span></code></pre><p><code>stratum</code> tells you how many hops this system is from a reference clock. A rising value can indicate that it has fallen back to a less reliable time source.</p><p><code>leapStatus</code> should normally read <code>Normal</code>. Any other value should be treated as a synchronization problem rather than simply a small clock offset.</p><ol start="4"><li>Add a switch node after the function node, name it "Over threshold?", checking <code>payload.lastOffsetMs</code>. Set the threshold based on how the timestamps are used:</li></ol><table><thead><tr><th>Use case</th><th>Alert threshold</th></tr></thead><tbody><tr><td>Historian logging, dashboards, OEE, production reporting</td><td>500ms–1s</td></tr><tr><td>Cross-system event correlation and alarm ordering</td><td>~50–100ms</td></tr><tr><td>Applications requiring sub-millisecond precision</td><td>Use PTP instead of NTP</td></tr></tbody></table><ol start="5"><li>Wire the failing branch to a function node, name it "Build alert", and create a message containing the affected system, clock offset, and stratum information.</li><li>Send the alert to your existing notification system, such as MQTT, email, or another monitoring platform.</li></ol><p>After deployment, trigger the inject node manually once. You should see the parsed clock status in the debug sidebar.</p><h2 id="how-accurate-does-your-clock-need-to-be">How accurate does your clock need to be?</h2><p>Not every industrial application needs microsecond precision. For most use cases, such as historian logging, dashboards, OEE calculations, condition monitoring, and production reporting, NTP provides more than enough accuracy.</p><p>With a stable network, a well-configured NTP client can typically keep systems synchronized within a few milliseconds. That is already more accurate than many industrial applications that aggregate data into one-second or one-minute intervals require.</p><p>PTP (Precision Time Protocol) is a different story. It is designed for applications where events must be synchronized with sub-millisecond or even microsecond precision.</p><p>Examples include:</p><ul><li>motion control</li><li>synchronized robotics</li><li>high-speed sequence-of-events recording</li><li>applications where timing is part of the control or measurement requirement</li></ul><p>PTP requires compatible hardware and network infrastructure, making it more complex to deploy than NTP.</p><p>If your application does not have strict timing requirements, NTP is usually the simpler and more practical choice.</p><h2 id="wrapping-up">Wrapping up</h2><p>Clock drift is one of those problems that is easy to ignore until it starts affecting production data.</p><p>Machines continue running, dashboards continue updating, and messages still arrive, but inaccurate timestamps make troubleshooting, event correlation, and reporting increasingly difficult.</p><p>The challenge is not usually PLC control logic itself. PLCs typically operate using scan cycles, timers, and internal execution timing. The one exception is when the data changing on the PLC is faster than the protocol used to read it. In that case, the PLC has to buffer those fast-changing values in an array so nothing is lost between polls. That's a program design and memory concern, not a clock synchronization one; the PLC still isn't timestamping anything itself. The impact of clock drift appears when data from multiple systems needs to be collected, compared, and analyzed.</p><p>SCADA systems, historians, HMIs, edge gateways, and industrial data platforms depend on accurate timestamps to understand production events and maintain reliable historical records.</p><p>Preventing clock drift does not require complex infrastructure. A reliable NTP client, multiple or local time sources, and hardware with a real-time clock where appropriate can eliminate most clock synchronization issues.</p><p>Just as importantly, monitor system clock health so problems are detected before they affect operational data.</p><p>Clock drift monitoring is really just one small thing you can do with FlowFuse. At its core, it's a platform for collecting data from your PLCs and sensors, building applications and dashboards on top of that data, and deploying and managing all of it across your fleet from one place.</p><style>html pre.shiki code .s2Zo4, html code.shiki .s2Zo4{--shiki-light:#6182B8;--shiki-default:#82AAFF;--shiki-dark:#82AAFF}html pre.shiki code .sfazB, html code.shiki .sfazB{--shiki-light:#91B859;--shiki-default:#C3E88D;--shiki-dark:#C3E88D}html pre.shiki code .sHwdD, html code.shiki .sHwdD{--shiki-light:#90A4AE;--shiki-light-font-style:italic;--shiki-default:#546E7A;--shiki-default-font-style:italic;--shiki-dark:#676E95;--shiki-dark-font-style:italic}html pre.shiki code .sBMFI, html code.shiki .sBMFI{--shiki-light:#E2931D;--shiki-default:#FFCB6B;--shiki-dark:#FFCB6B}html .light .shiki span {color: var(--shiki-light);background: var(--shiki-light-bg);font-style: var(--shiki-light-font-style);font-weight: var(--shiki-light-font-weight);text-decoration: var(--shiki-light-text-decoration);}html.light .shiki span {color: var(--shiki-light);background: var(--shiki-light-bg);font-style: var(--shiki-light-font-style);font-weight: var(--shiki-light-font-weight);text-decoration: var(--shiki-light-text-decoration);}html .default .shiki span {color: var(--shiki-default);background: var(--shiki-default-bg);font-style: var(--shiki-default-font-style);font-weight: var(--shiki-default-font-weight);text-decoration: var(--shiki-default-text-decoration);}html .shiki span {color: var(--shiki-default);background: var(--shiki-default-bg);font-style: var(--shiki-default-font-style);font-weight: var(--shiki-default-font-weight);text-decoration: var(--shiki-default-text-decoration);}html .dark .shiki span {color: var(--shiki-dark);background: var(--shiki-dark-bg);font-style: var(--shiki-dark-font-style);font-weight: var(--shiki-dark-font-weight);text-decoration: var(--shiki-dark-text-decoration);}html.dark .shiki span {color: var(--shiki-dark);background: var(--shiki-dark-bg);font-style: var(--shiki-dark-font-style);font-weight: var(--shiki-dark-font-weight);text-decoration: var(--shiki-dark-text-decoration);}html pre.shiki code .sbssI, html code.shiki .sbssI{--shiki-light:#F76D47;--shiki-default:#F78C6C;--shiki-dark:#F78C6C}html pre.shiki code .spNyl, html code.shiki .spNyl{--shiki-light:#9C3EDA;--shiki-default:#C792EA;--shiki-dark:#C792EA}html pre.shiki code .sTEyZ, html code.shiki .sTEyZ{--shiki-light:#90A4AE;--shiki-default:#EEFFFF;--shiki-dark:#BABED8}html pre.shiki code .sMK4o, html code.shiki .sMK4o{--shiki-light:#39ADB5;--shiki-default:#89DDFF;--shiki-dark:#89DDFF}html pre.shiki code .sHdIc, html code.shiki .sHdIc{--shiki-light:#90A4AE;--shiki-light-font-style:italic;--shiki-default:#EEFFFF;--shiki-default-font-style:italic;--shiki-dark:#BABED8;--shiki-dark-font-style:italic}html pre.shiki code .swJcz, html code.shiki .swJcz{--shiki-light:#E53935;--shiki-default:#F07178;--shiki-dark:#F07178}html pre.shiki code .s7zQu, html code.shiki .s7zQu{--shiki-light:#39ADB5;--shiki-light-font-style:italic;--shiki-default:#89DDFF;--shiki-default-font-style:italic;--shiki-dark:#89DDFF;--shiki-dark-font-style:italic}</style><p><strong>Monitor and Manage Edge Devices with FlowFuse</strong></p><p>Deploy Industrial applications, monitor edge devices, detect clock drift, and manage industrial deployments from a single platform. See how FlowFuse simplifies managing distributed edge infrastructure.</p><p><a href="https://flowfuse.com/contact-us/">Contact Us</a></p>]]></content>
        <updated>2026-07-17T00:00:00.000Z</updated>
        <link href="https://flowfuse.com/blog/2026/07/time-synchronization-edge-devices/"/>
        
    </entry>
    <entry>
        <id>https://flowfuse.com/blog/2026/07/defect-and-quality-monitoring/</id>
        <title>Build a Defect Tracking and Quality Monitoring Dashboard</title>
        <summary>This tutorial builds a defect tracking and quality monitoring dashboard in FlowFuse. Defects live in one table, a single query computes every KPI in one pass, and the dashboard renders stat cards, a Pareto chart, trend and breakdown charts, an SLA table, and a status funnel, all filtering live by line, shift, and date range.</summary>
        <content type="html"><![CDATA[<p>Every production line produces defects. On their own they're easy to wave off, a bit of scrap here, an hour of rework there. But add them up and the cost is real, and that's the part most teams never see. The defects are sitting in a spreadsheet nobody sorts, or locked inside a quality system you can't get a live view out of. So the recurring problems stay invisible until someone runs a report, and by then the bad batch has already shipped.</p><p><img alt="The finished defect tracking dashboard showing stat cards, Pareto chart, and trend line" src="https://flowfuse.com/blog/2026/07/images/flowfuse-defect-monitoring-dashboard.png"/><em>The finished defect tracking dashboard showing stat cards, Pareto chart, and trend line</em></p><p>In this tutorial, you'll build a defect tracking and quality monitoring dashboard using FlowFuse in about 30 minutes. It reads defects from a database, calculates the KPIs a quality engineer actually looks at, and renders them live, filtered by line, shift, and date range.</p><p>You can interact with the live demo here: .</p><p>By the end, you'll have a foundation you can extend into broader production monitoring or OEE tracking, or a plant-wide quality report.</p><h2 id="what-youll-need">What You'll Need</h2><p>Before you start building, make sure you have the following ready:</p><ul><li><strong>A FlowFuse account.</strong> <a href="https://app.flowfuse.com/account/create" rel="nofollow">Sign up</a> for FlowFuse Cloud, or use a self-hosted instance.</li><li><strong>A FlowFuse instance up and running.</strong> If you don't have one yet, create a new instance from your FlowFuse Platform.</li><li><strong>FlowFuse Dashboard installed.</strong> This tutorial uses <code>@flowfuse/node-red-dashboard</code> nodes (<code>ui-text</code>, <code>ui-chart</code>, <code>ui-table</code>, and <code>ui-template</code>) to build the interface. If it is not already installed, add it from the Node-RED Palette Manager. If you are new to FlowFuse Dashboard, follow the <a href="https://dashboard.flowfuse.com/getting-started.html" rel="nofollow">Getting Started guide</a> to become familiar with the basics before continuing.</li></ul><blockquote><p>Note: <a href="https://flowfuse.com/docs/user/ff-tables/">FlowFuse Tables</a> is currently in beta and available to Enterprise tier teams on FlowFuse Cloud, as well as Enterprise licensed self hosted teams running on Kubernetes. If you're on a different tier, you can follow along using any external database instead, Postgres, MySQL, or whatever you already have, with the standard database nodes from the palette. The SQL and flow logic in this tutorial will work the same either way.</p></blockquote><h2 id="how-the-application-works">How the Application Works</h2><p>This dashboard is a read layer. It doesn't capture defects itself; it sits on top of a table of them and turns that table into something a supervisor can read at a glance:</p><ul><li><strong>Defects live in one table.</strong> Each defect is a row: where it happened, what it was, how severe, its root cause, how it was handled, and what it cost. Something else fills this table: an operator logging defects from a form, or automatic events arriving over MQTT. For the tutorial, a simulator stands in for that source.</li><li><strong>One query calculates everything.</strong> A single query filters the table once and computes every KPI on the dashboard in one pass, then splits the result across every card, chart, and table, so the whole dashboard updates from a single source of truth.</li><li><strong>The header drives it all.</strong> Line, shift, and date-range dropdowns live in the dashboard header. Change any one and every widget recalculates together.</li></ul><h2 id="importing-the-simulator">Importing the Simulator</h2><p>You need a table and data in it before the dashboard can show anything. Rather than build that by hand, import the simulator flow; it creates the <code>defects</code> table and fills it for you.</p><p>It gives you two generators. A <strong>historical seed</strong> fills about six months of defects, so the charts have something to show right away. A <strong>live feed</strong> then inserts a fresh defect every few seconds, so the dashboard keeps updating on its own while you build.</p><p>Both run automatically on deploy: no buttons to click. The table is created first, the historical seed lands a few seconds later, and the live feed takes over from there. Within moments your table holds over a thousand records and keeps growing.</p><h3 id="the-schema-it-creates">The schema it creates</h3><p>You don't run this yourself; the import handles it. But it's the contract the whole dashboard depends on, so it's worth knowing what the <code>defects</code> table looks like, especially if you later point the dashboard at your own database:</p><pre class="language-sql shiki shiki-themes material-theme-lighter material-theme material-theme-palenight" code="CREATE TABLE IF NOT EXISTS defects (
    defect_id         VARCHAR(20) PRIMARY KEY,
    date              DATE NOT NULL,
    line              VARCHAR(20),
    station           VARCHAR(30),
    shift             VARCHAR(20),
    sku               VARCHAR(20),
    defect_type       VARCHAR(50),
    defect_category   VARCHAR(30),
    severity          VARCHAR(10),
    detected_stage    VARCHAR(20),
    root_cause        VARCHAR(50),
    disposition       VARCHAR(20),
    status            VARCHAR(20),
    cost_impact       NUMERIC(10,2),
    resolution_hours  NUMERIC(6,1)
);

CREATE INDEX IF NOT EXISTS idx_defects_date ON defects(date);
CREATE INDEX IF NOT EXISTS idx_defects_line ON defects(line);
CREATE INDEX IF NOT EXISTS idx_defects_shift ON defects(shift);
" language="sql" meta="" style=""><code __ignore-map=""><span class="line" line="1"><span>CREATE TABLE IF NOT EXISTS defects (
</span></span><span class="line" line="2"><span>    defect_id         VARCHAR(20) PRIMARY KEY,
</span></span><span class="line" line="3"><span>    date              DATE NOT NULL,
</span></span><span class="line" line="4"><span>    line              VARCHAR(20),
</span></span><span class="line" line="5"><span>    station           VARCHAR(30),
</span></span><span class="line" line="6"><span>    shift             VARCHAR(20),
</span></span><span class="line" line="7"><span>    sku               VARCHAR(20),
</span></span><span class="line" line="8"><span>    defect_type       VARCHAR(50),
</span></span><span class="line" line="9"><span>    defect_category   VARCHAR(30),
</span></span><span class="line" line="10"><span>    severity          VARCHAR(10),
</span></span><span class="line" line="11"><span>    detected_stage    VARCHAR(20),
</span></span><span class="line" line="12"><span>    root_cause        VARCHAR(50),
</span></span><span class="line" line="13"><span>    disposition       VARCHAR(20),
</span></span><span class="line" line="14"><span>    status            VARCHAR(20),
</span></span><span class="line" line="15"><span>    cost_impact       NUMERIC(10,2),
</span></span><span class="line" line="16"><span>    resolution_hours  NUMERIC(6,1)
</span></span><span class="line" line="17"><span>);
</span></span><span class="line" line="18"><span empty-line-placeholder>
</span></span><span class="line" line="19"><span>CREATE INDEX IF NOT EXISTS idx_defects_date ON defects(date);
</span></span><span class="line" line="20"><span>CREATE INDEX IF NOT EXISTS idx_defects_line ON defects(line);
</span></span><span class="line" line="21"><span>CREATE INDEX IF NOT EXISTS idx_defects_shift ON defects(shift);
</span></span></code></pre><p>Each row is one defect. The columns group into where it happened (<code>line</code>, <code>station</code>, <code>shift</code>, <code>sku</code>), what it was (<code>defect_type</code>, <code>severity</code>, <code>detected_stage</code>), how it was handled (<code>root_cause</code>, <code>disposition</code>, <code>status</code>), and what it cost (<code>cost_impact</code>, <code>resolution_hours</code>). The three indexes cover the columns the dashboard filters by, so queries stay fast as the table grows.</p><h2 id="building-the-query">Building the Query</h2><p>Running one query per widget means a dozen database trips on every refresh. This dashboard runs a single query instead. It returns one row where each field holds one widget's data, and every widget reads just its own field.</p><p>Two CTEs at the top do the filtering. <code>filtered_all</code> applies all three filters: line, shift, and date range. <code>filtered_line_and_shift</code> skips the date filter, so the live ticker always shows the latest defects. After that, one <code>json_agg</code> block builds the data for each widget:</p><blockquote><p>Tip: You don't have to write SQL yourself. Use <a href="https://flowfuse.com/blog/2025/09/ai-assistant-flowfuse-tables/">FlowFuse Expert</a> and describe the interface in plain English. It will generate the ui-template code for you.</p></blockquote><pre class="language-sql shiki shiki-themes material-theme-lighter material-theme material-theme-palenight" code="WITH
  filtered_all AS ( -- full 3-filter set, used by almost every widget
    SELECT * FROM defects
    WHERE ($line = 'All' OR line = $line)
      AND ($shift = 'All' OR shift = $shift)
      AND date &gt;= CURRENT_DATE - ($daysback || ' days')::interval
  ),
  filtered_line_and_shift AS ( -- ticker: "right now" view, ignores the date filter
    SELECT * FROM defects
    WHERE ($line = 'All' OR line = $line) AND ($shift = 'All' OR shift = $shift)
  )
SELECT
  -- stat cards + cost of poor quality (one pass over the filtered rows)
  (SELECT json_agg(t) FROM (
    SELECT
      COUNT(*) FILTER (WHERE status IN ('Resolved','Verified'))     AS closed_count,
      COUNT(*) FILTER (WHERE status NOT IN ('Resolved','Verified')) AS open_count,
      COUNT(*)                    AS total_count,
      ROUND(SUM(cost_impact), 2)  AS total_copq
    FROM filtered_all
  ) t) AS stat_cards_and_copq,

  -- average resolution time + SLA breach per severity
  -- (SLA targets: Critical 24h, Major 72h, Minor 168h)
  (SELECT json_agg(t) FROM (
    SELECT severity,
      ROUND(AVG(resolution_hours), 1) AS avg_resolution_hours,
      COUNT(*)                        AS resolved_count,
      COUNT(*) FILTER (WHERE resolution_hours &gt;
        CASE severity WHEN 'Critical' THEN 24 WHEN 'Major' THEN 72 ELSE 168 END) AS sla_breached_count,
      ROUND(100.0 * COUNT(*) FILTER (WHERE resolution_hours &gt;
        CASE severity WHEN 'Critical' THEN 24 WHEN 'Major' THEN 72 ELSE 168 END)
        / NULLIF(COUNT(*), 0), 1) AS sla_breach_pct
    FROM filtered_all WHERE status IN ('Resolved', 'Verified')
    GROUP BY severity
    ORDER BY CASE severity WHEN 'Critical' THEN 1 WHEN 'Major' THEN 2 ELSE 3 END
  ) t) AS avg_resolution_and_sla,

  -- Pareto: defect-type counts with a cumulative % (window functions)
  (SELECT json_agg(t) FROM (
    SELECT defect_type, COUNT(*) AS defect_count,
      ROUND(100.0 * COUNT(*) / SUM(COUNT(*)) OVER (), 1) AS pct_of_total,
      ROUND(SUM(COUNT(*)) OVER (ORDER BY COUNT(*) DESC) * 100.0
            / SUM(COUNT(*)) OVER (), 1) AS cumulative_pct
    FROM filtered_all GROUP BY defect_type ORDER BY defect_count DESC
  ) t) AS pareto,

  -- daily trend
  (SELECT json_agg(t) FROM (
    SELECT date, COUNT(*) AS defect_count
    FROM filtered_all GROUP BY date ORDER BY date
  ) t) AS trend,

  -- disposition breakdown
  (SELECT json_agg(t) FROM (
    SELECT disposition, COUNT(*) AS defect_count, ROUND(SUM(cost_impact), 2) AS total_cost
    FROM filtered_all GROUP BY disposition ORDER BY defect_count DESC
  ) t) AS disposition,

  -- severity breakdown
  (SELECT json_agg(t) FROM (
    SELECT severity, COUNT(*) AS defect_count
    FROM filtered_all GROUP BY severity
    ORDER BY CASE severity WHEN 'Critical' THEN 1 WHEN 'Major' THEN 2 ELSE 3 END
  ) t) AS severity,

  -- root-cause breakdown
  (SELECT json_agg(t) FROM (
    SELECT root_cause, COUNT(*) AS defect_count
    FROM filtered_all GROUP BY root_cause ORDER BY defect_count DESC
  ) t) AS root_cause,

  -- status funnel, ordered by workflow stage
  (SELECT json_agg(t) FROM (
    SELECT status, COUNT(*) AS defect_count
    FROM filtered_all GROUP BY status
    ORDER BY CASE status WHEN 'Detected' THEN 1 WHEN 'RCA' THEN 2 WHEN 'Corrective Action' THEN 3
      WHEN 'Resolved' THEN 4 WHEN 'Verified' THEN 5 END
  ) t) AS status_funnel,

  -- most recent 20 defects, for the live ticker
  (SELECT json_agg(t) FROM (
    SELECT defect_id, date, line, station, defect_type, severity, status, cost_impact
    FROM filtered_line_and_shift ORDER BY defect_id DESC LIMIT 20
  ) t) AS ticker;
" language="sql" meta="" style=""><code __ignore-map=""><span class="line" line="1"><span>WITH
</span></span><span class="line" line="2"><span>  filtered_all AS ( -- full 3-filter set, used by almost every widget
</span></span><span class="line" line="3"><span>    SELECT * FROM defects
</span></span><span class="line" line="4"><span>    WHERE ($line = 'All' OR line = $line)
</span></span><span class="line" line="5"><span>      AND ($shift = 'All' OR shift = $shift)
</span></span><span class="line" line="6"><span>      AND date &gt;= CURRENT_DATE - ($daysback || ' days')::interval
</span></span><span class="line" line="7"><span>  ),
</span></span><span class="line" line="8"><span>  filtered_line_and_shift AS ( -- ticker: "right now" view, ignores the date filter
</span></span><span class="line" line="9"><span>    SELECT * FROM defects
</span></span><span class="line" line="10"><span>    WHERE ($line = 'All' OR line = $line) AND ($shift = 'All' OR shift = $shift)
</span></span><span class="line" line="11"><span>  )
</span></span><span class="line" line="12"><span>SELECT
</span></span><span class="line" line="13"><span>  -- stat cards + cost of poor quality (one pass over the filtered rows)
</span></span><span class="line" line="14"><span>  (SELECT json_agg(t) FROM (
</span></span><span class="line" line="15"><span>    SELECT
</span></span><span class="line" line="16"><span>      COUNT(*) FILTER (WHERE status IN ('Resolved','Verified'))     AS closed_count,
</span></span><span class="line" line="17"><span>      COUNT(*) FILTER (WHERE status NOT IN ('Resolved','Verified')) AS open_count,
</span></span><span class="line" line="18"><span>      COUNT(*)                    AS total_count,
</span></span><span class="line" line="19"><span>      ROUND(SUM(cost_impact), 2)  AS total_copq
</span></span><span class="line" line="20"><span>    FROM filtered_all
</span></span><span class="line" line="21"><span>  ) t) AS stat_cards_and_copq,
</span></span><span class="line" line="22"><span empty-line-placeholder>
</span></span><span class="line" line="23"><span>  -- average resolution time + SLA breach per severity
</span></span><span class="line" line="24"><span>  -- (SLA targets: Critical 24h, Major 72h, Minor 168h)
</span></span><span class="line" line="25"><span>  (SELECT json_agg(t) FROM (
</span></span><span class="line" line="26"><span>    SELECT severity,
</span></span><span class="line" line="27"><span>      ROUND(AVG(resolution_hours), 1) AS avg_resolution_hours,
</span></span><span class="line" line="28"><span>      COUNT(*)                        AS resolved_count,
</span></span><span class="line" line="29"><span>      COUNT(*) FILTER (WHERE resolution_hours &gt;
</span></span><span class="line" line="30"><span>        CASE severity WHEN 'Critical' THEN 24 WHEN 'Major' THEN 72 ELSE 168 END) AS sla_breached_count,
</span></span><span class="line" line="31"><span>      ROUND(100.0 * COUNT(*) FILTER (WHERE resolution_hours &gt;
</span></span><span class="line" line="32"><span>        CASE severity WHEN 'Critical' THEN 24 WHEN 'Major' THEN 72 ELSE 168 END)
</span></span><span class="line" line="33"><span>        / NULLIF(COUNT(*), 0), 1) AS sla_breach_pct
</span></span><span class="line" line="34"><span>    FROM filtered_all WHERE status IN ('Resolved', 'Verified')
</span></span><span class="line" line="35"><span>    GROUP BY severity
</span></span><span class="line" line="36"><span>    ORDER BY CASE severity WHEN 'Critical' THEN 1 WHEN 'Major' THEN 2 ELSE 3 END
</span></span><span class="line" line="37"><span>  ) t) AS avg_resolution_and_sla,
</span></span><span class="line" line="38"><span empty-line-placeholder>
</span></span><span class="line" line="39"><span>  -- Pareto: defect-type counts with a cumulative % (window functions)
</span></span><span class="line" line="40"><span>  (SELECT json_agg(t) FROM (
</span></span><span class="line" line="41"><span>    SELECT defect_type, COUNT(*) AS defect_count,
</span></span><span class="line" line="42"><span>      ROUND(100.0 * COUNT(*) / SUM(COUNT(*)) OVER (), 1) AS pct_of_total,
</span></span><span class="line" line="43"><span>      ROUND(SUM(COUNT(*)) OVER (ORDER BY COUNT(*) DESC) * 100.0
</span></span><span class="line" line="44"><span>            / SUM(COUNT(*)) OVER (), 1) AS cumulative_pct
</span></span><span class="line" line="45"><span>    FROM filtered_all GROUP BY defect_type ORDER BY defect_count DESC
</span></span><span class="line" line="46"><span>  ) t) AS pareto,
</span></span><span class="line" line="47"><span empty-line-placeholder>
</span></span><span class="line" line="48"><span>  -- daily trend
</span></span><span class="line" line="49"><span>  (SELECT json_agg(t) FROM (
</span></span><span class="line" line="50"><span>    SELECT date, COUNT(*) AS defect_count
</span></span><span class="line" line="51"><span>    FROM filtered_all GROUP BY date ORDER BY date
</span></span><span class="line" line="52"><span>  ) t) AS trend,
</span></span><span class="line" line="53"><span empty-line-placeholder>
</span></span><span class="line" line="54"><span>  -- disposition breakdown
</span></span><span class="line" line="55"><span>  (SELECT json_agg(t) FROM (
</span></span><span class="line" line="56"><span>    SELECT disposition, COUNT(*) AS defect_count, ROUND(SUM(cost_impact), 2) AS total_cost
</span></span><span class="line" line="57"><span>    FROM filtered_all GROUP BY disposition ORDER BY defect_count DESC
</span></span><span class="line" line="58"><span>  ) t) AS disposition,
</span></span><span class="line" line="59"><span empty-line-placeholder>
</span></span><span class="line" line="60"><span>  -- severity breakdown
</span></span><span class="line" line="61"><span>  (SELECT json_agg(t) FROM (
</span></span><span class="line" line="62"><span>    SELECT severity, COUNT(*) AS defect_count
</span></span><span class="line" line="63"><span>    FROM filtered_all GROUP BY severity
</span></span><span class="line" line="64"><span>    ORDER BY CASE severity WHEN 'Critical' THEN 1 WHEN 'Major' THEN 2 ELSE 3 END
</span></span><span class="line" line="65"><span>  ) t) AS severity,
</span></span><span class="line" line="66"><span empty-line-placeholder>
</span></span><span class="line" line="67"><span>  -- root-cause breakdown
</span></span><span class="line" line="68"><span>  (SELECT json_agg(t) FROM (
</span></span><span class="line" line="69"><span>    SELECT root_cause, COUNT(*) AS defect_count
</span></span><span class="line" line="70"><span>    FROM filtered_all GROUP BY root_cause ORDER BY defect_count DESC
</span></span><span class="line" line="71"><span>  ) t) AS root_cause,
</span></span><span class="line" line="72"><span empty-line-placeholder>
</span></span><span class="line" line="73"><span>  -- status funnel, ordered by workflow stage
</span></span><span class="line" line="74"><span>  (SELECT json_agg(t) FROM (
</span></span><span class="line" line="75"><span>    SELECT status, COUNT(*) AS defect_count
</span></span><span class="line" line="76"><span>    FROM filtered_all GROUP BY status
</span></span><span class="line" line="77"><span>    ORDER BY CASE status WHEN 'Detected' THEN 1 WHEN 'RCA' THEN 2 WHEN 'Corrective Action' THEN 3
</span></span><span class="line" line="78"><span>      WHEN 'Resolved' THEN 4 WHEN 'Verified' THEN 5 END
</span></span><span class="line" line="79"><span>  ) t) AS status_funnel,
</span></span><span class="line" line="80"><span empty-line-placeholder>
</span></span><span class="line" line="81"><span>  -- most recent 20 defects, for the live ticker
</span></span><span class="line" line="82"><span>  (SELECT json_agg(t) FROM (
</span></span><span class="line" line="83"><span>    SELECT defect_id, date, line, station, defect_type, severity, status, cost_impact
</span></span><span class="line" line="84"><span>    FROM filtered_line_and_shift ORDER BY defect_id DESC LIMIT 20
</span></span><span class="line" line="85"><span>  ) t) AS ticker;
</span></span></code></pre><p>With the query written, wire it up so it runs on a timer and its result reaches every widget.</p><ol><li>Add a change node before the Query node and name it "Set Params". This maps the saved filters onto the <code>$line</code>, <code>$shift</code>, and <code>$daysback</code> parameters the SQL reads. Set four rules, in order:<ul><li>Set <code>queryParameters</code> to <code>{}</code> (JSON): starts clean so stale values don't linger.</li><li>Set <code>queryParameters.line</code> to <code>filters.line</code> (global persistent).</li><li>Set <code>queryParameters.shift</code> to <code>filters.shift</code> (global persistent).</li><li>Set <code>queryParameters.daysback</code> to <code>filters.dateRange</code> (global persistent).</li></ul></li></ol><p><img alt="Screenshot: Set Params change node with its four rules" src="https://flowfuse.com/blog/2026/07/images/set-params-change-node.png"/><em>The "Set Params" change node open in the edit panel, all four rules visible.</em></p><ol><li>Add an inject node named "Poll Data" and set it to repeat every 10 to 30 seconds. Wire it into "Set Params"; this re-runs the query on a timer so the dashboard keeps up as new defects arrive. Also add a link in node here, named "Refresh Trigger," and connect it to the "Set Params" change node; this will let the filter flow you build next trigger a refresh as well.</li><li>After the Query node, add a single link out node and name it "KPI Result". Each widget you build next will connect a link in node to it, so the one result broadcasts to every widget at once.</li></ol><h2 id="adding-the-filters">Adding the Filters</h2><p>The filters go in the dashboard header rather than a widget group, since they control the whole page, not one chart. Each selection saves to the global <code>filters</code> object that "Set Params" reads before every query run.</p><ol><li>Add a ui-event node. It fires on page load, so a fresh browser session starts with the dropdowns populated.</li><li>Add a change node named "Set Filters". Set <code>payload</code> to one JSON object containing your filter options. For this tutorial it looks like the following, but update it to match your table:</li></ol><pre class="language-json shiki shiki-themes material-theme-lighter material-theme material-theme-palenight" code="{
    "line": "SUV Line",
    "shift": "Night",
    "dateRange": 30,
    "lineOptions": [
        "All",
        "Sedan Line",
        "SUV Line",
        "EV Line"
    ],
    "shiftOptions": [
        "All",
        "Morning",
        "Evening",
        "Night"
    ],
    "dateRangeOptions": [
        {
            "label": "Last 7 days",
            "value": 7
        },
        {
            "label": "Last 30 days",
            "value": 30
        },
        {
            "label": "Last 90 days",
            "value": 90
        },
        {
            "label": "All time",
            "value": 100000
        }
    ]
}
" language="json" meta="" style=""><code __ignore-map=""><span class="line" line="1"><span class="sMK4o">{
</span></span><span class="line" line="2"><span class="sMK4o">    "</span><span class="spNyl">line</span><span class="sMK4o">"</span><span class="sMK4o">:</span><span class="sMK4o"> "</span><span class="sfazB">SUV Line</span><span class="sMK4o">"</span><span class="sMK4o">,
</span></span><span class="line" line="3"><span class="sMK4o">    "</span><span class="spNyl">shift</span><span class="sMK4o">"</span><span class="sMK4o">:</span><span class="sMK4o"> "</span><span class="sfazB">Night</span><span class="sMK4o">"</span><span class="sMK4o">,
</span></span><span class="line" line="4"><span class="sMK4o">    "</span><span class="spNyl">dateRange</span><span class="sMK4o">"</span><span class="sMK4o">:</span><span class="sbssI"> 30</span><span class="sMK4o">,
</span></span><span class="line" line="5"><span class="sMK4o">    "</span><span class="spNyl">lineOptions</span><span class="sMK4o">"</span><span class="sMK4o">:</span><span class="sMK4o"> [
</span></span><span class="line" line="6"><span class="sMK4o">        "</span><span class="sfazB">All</span><span class="sMK4o">"</span><span class="sMK4o">,
</span></span><span class="line" line="7"><span class="sMK4o">        "</span><span class="sfazB">Sedan Line</span><span class="sMK4o">"</span><span class="sMK4o">,
</span></span><span class="line" line="8"><span class="sMK4o">        "</span><span class="sfazB">SUV Line</span><span class="sMK4o">"</span><span class="sMK4o">,
</span></span><span class="line" line="9"><span class="sMK4o">        "</span><span class="sfazB">EV Line</span><span class="sMK4o">"
</span></span><span class="line" line="10"><span class="sMK4o">    ],
</span></span><span class="line" line="11"><span class="sMK4o">    "</span><span class="spNyl">shiftOptions</span><span class="sMK4o">"</span><span class="sMK4o">:</span><span class="sMK4o"> [
</span></span><span class="line" line="12"><span class="sMK4o">        "</span><span class="sfazB">All</span><span class="sMK4o">"</span><span class="sMK4o">,
</span></span><span class="line" line="13"><span class="sMK4o">        "</span><span class="sfazB">Morning</span><span class="sMK4o">"</span><span class="sMK4o">,
</span></span><span class="line" line="14"><span class="sMK4o">        "</span><span class="sfazB">Evening</span><span class="sMK4o">"</span><span class="sMK4o">,
</span></span><span class="line" line="15"><span class="sMK4o">        "</span><span class="sfazB">Night</span><span class="sMK4o">"
</span></span><span class="line" line="16"><span class="sMK4o">    ],
</span></span><span class="line" line="17"><span class="sMK4o">    "</span><span class="spNyl">dateRangeOptions</span><span class="sMK4o">"</span><span class="sMK4o">:</span><span class="sMK4o"> [
</span></span><span class="line" line="18"><span class="sMK4o">        {
</span></span><span class="line" line="19"><span class="sMK4o">            "</span><span class="sBMFI">label</span><span class="sMK4o">"</span><span class="sMK4o">:</span><span class="sMK4o"> "</span><span class="sfazB">Last 7 days</span><span class="sMK4o">"</span><span class="sMK4o">,
</span></span><span class="line" line="20"><span class="sMK4o">            "</span><span class="sBMFI">value</span><span class="sMK4o">"</span><span class="sMK4o">:</span><span class="sbssI"> 7
</span></span><span class="line" line="21"><span class="sMK4o">        },
</span></span><span class="line" line="22"><span class="sMK4o">        {
</span></span><span class="line" line="23"><span class="sMK4o">            "</span><span class="sBMFI">label</span><span class="sMK4o">"</span><span class="sMK4o">:</span><span class="sMK4o"> "</span><span class="sfazB">Last 30 days</span><span class="sMK4o">"</span><span class="sMK4o">,
</span></span><span class="line" line="24"><span class="sMK4o">            "</span><span class="sBMFI">value</span><span class="sMK4o">"</span><span class="sMK4o">:</span><span class="sbssI"> 30
</span></span><span class="line" line="25"><span class="sMK4o">        },
</span></span><span class="line" line="26"><span class="sMK4o">        {
</span></span><span class="line" line="27"><span class="sMK4o">            "</span><span class="sBMFI">label</span><span class="sMK4o">"</span><span class="sMK4o">:</span><span class="sMK4o"> "</span><span class="sfazB">Last 90 days</span><span class="sMK4o">"</span><span class="sMK4o">,
</span></span><span class="line" line="28"><span class="sMK4o">            "</span><span class="sBMFI">value</span><span class="sMK4o">"</span><span class="sMK4o">:</span><span class="sbssI"> 90
</span></span><span class="line" line="29"><span class="sMK4o">        },
</span></span><span class="line" line="30"><span class="sMK4o">        {
</span></span><span class="line" line="31"><span class="sMK4o">            "</span><span class="sBMFI">label</span><span class="sMK4o">"</span><span class="sMK4o">:</span><span class="sMK4o"> "</span><span class="sfazB">All time</span><span class="sMK4o">"</span><span class="sMK4o">,
</span></span><span class="line" line="32"><span class="sMK4o">            "</span><span class="sBMFI">value</span><span class="sMK4o">"</span><span class="sMK4o">:</span><span class="sbssI"> 100000
</span></span><span class="line" line="33"><span class="sMK4o">        }
</span></span><span class="line" line="34"><span class="sMK4o">    ]
</span></span><span class="line" line="35"><span class="sMK4o">}
</span></span></code></pre><ol start="3"><li>Add a ui-template node named "Header Filters". Set its type to "Widget" (UI scoped) and select your UI. Ask <a href="https://flowfuse.com/docs/user/expert/node-red-embedded-ai/#css-and-html-generation-for-flowfuse-dashboard">FlowFuse Expert</a> to build it:</li></ol><blockquote><p>Create a ui-template with three header dropdowns, Line, Shift, and Date Range, wrapped in <code>&lt;Teleport defer to="#app-bar-actions"&gt;</code> so they render in the header bar and survive a reload. msg.payload has the selections (line, shift, dateRange) and options (lineOptions, shiftOptions, dateRangeOptions). Line/Shift options are strings; dateRangeOptions items are {label, value} objects, so bind label as text and value as the value, not the whole object. On any change, and on load, send {line, shift, dateRange} downstream.</p></blockquote><p>Below is the template it produced for us, import it directly if you prefer:</p><p><img alt="Screenshot: the three header dropdowns (Line, Shift, and Date Range) rendered in the dashboard header" src="https://flowfuse.com/blog/2026/07/images/dashboard-header-filter.png"/><em>The finished header filters. Capture the Line, Shift, and Date Range dropdowns in the live dashboard header.</em></p><ol start="4"><li>Add a change node named "Save Filters" that sets the persistent global <code>filters</code> to <code>msg.payload</code>, and connect its input to the "Header Filters" ui-template node.</li></ol><p><img alt="The Save Filters change node configured to set the global filters object to msg.payload" src="https://flowfuse.com/blog/2026/07/images/store-filters.png"/><em>The "Save Filters" change node, setting the persistent global <code>filters</code> to <code>msg.payload</code>.</em></p><ol start="5"><li>Next, add a link out node, connect its input to the "Save Filters" change node, and connect its output to the "Refresh Trigger" link in node you added earlier.</li></ol><p>Deploy, and the dropdowns appear in the header. Change one and the next query pass redraws every widget against it.</p><h2 id="building-the-widgets">Building the Widgets</h2><p>Everything the dashboard shows comes from the "KPI Result" broadcast, so every widget follows the same wiring: a <strong>link in</strong> node connected to "KPI Result", a change node that extracts that widget's field, and the display node.</p><p>Before adding widgets, create a page for the dashboard (ours is "Assembly Quality Monitor") and a ui-group for each widget. The group is what positions and sizes a widget on the grid.</p><h3 id="stat-cards">Stat cards</h3><p>Start with the four numbers a supervisor checks first: total defects, open, closed, and cost of poor quality.</p><ol><li>Add a link in node and connect it to "KPI Result".</li><li>Add a change node named "Extract KPI Summary" with one rule: set <code>msg.payload</code> to <code>msg.payload[0].stat_cards_and_copq</code> (msg). Wire the link in to it.</li><li>Add four ui-text nodes, one in each of the four top groups (Total Defects, Open, Closed, Cost of Poor Quality). Wire the change node to all four.</li><li>In each ui-text node, set the value to the matching field: <code>msg.payload[0].total_count</code>, <code>msg.payload[0].open_count</code>, <code>msg.payload[0].closed_count</code>, <code>msg.payload[0].total_copq</code>.</li></ol><p>Open counts everything not yet Resolved or Verified; the cost figure sums <code>cost_impact</code> across the current filter, so it moves the moment you switch line or shift.</p><p><img alt="Screenshot: the four stat cards: Total Defects, Open, Closed, and Cost of Poor Quality" src="https://flowfuse.com/blog/2026/07/images/stat-cards.png"/><em>The four stat cards populated with seeded data.</em></p><h3 id="pareto-chart">Pareto chart</h3><p>The <a href="https://flowfuse.com/blog/2025/08/pareto-chart-manufacturing-guide/">Pareto chart</a> ranks defect types by count and overlays a cumulative-percentage line with an 80% marker. It is the fastest way to see which few defect types cause most of the pain. The built-in ui-chart can't combine bars and a line, so this one is a ui-template that draws the SVG itself.</p><ol><li>Add a link in node connected to "KPI Result".</li><li>Add a change node named "Extract Pareto Data": set <code>msg.payload</code> to <code>msg.payload[0].pareto</code> (msg).</li><li>Add a ui-template node in the Pareto group. Ask <a href="https://flowfuse.com/docs/user/expert/node-red-embedded-ai/#css-and-html-generation-for-flowfuse-dashboard">FlowFuse Expert</a> to generate it:</li></ol><blockquote><p>Create a Vue ui-template that renders a Pareto chart as responsive inline SVG. <code>msg.payload</code> is an array of <code>{defect_type, defect_count, cumulative_pct}</code>, sorted by count descending. Draw a bar per defect type with its count above and a word-wrapped label below, a cumulative-percentage line with dots over the bars, a dashed threshold line at 80%, and a small legend. Derive the rows from <code>msg.payload</code> reactively so the chart redraws on every new message.</p></blockquote><p>Below is the template it produced for us, import it directly if you prefer:</p><p><img alt="Screenshot: the Pareto chart with bars per defect type and the cumulative-percentage line crossing the 80% marker" src="https://flowfuse.com/blog/2026/07/images/pareto-chart-added.png"/><em>The rendered Pareto chart. Make sure the cumulative line and the dashed 80% threshold are both visible.</em></p><h3 id="root-cause">Root cause</h3><ol><li>Add a link in node connected to "KPI Result".</li><li>Add a change node named "Extract Root Cause Data": set <code>msg.payload</code> to <code>msg.payload[0].root_cause</code> (msg).</li><li>Add a ui-chart node in the Root Cause group, chart type Bar, <code>root_cause</code> on the x-axis, <code>defect_count</code> on the y.</li></ol><p>The query sorts it most-common-first, so the chart reads left to right as a priority list.</p><p><img alt="Screenshot: the Root Cause bar chart, sorted most-common-first" src="https://flowfuse.com/blog/2026/07/images/root-cause-added.png"/><em>The root cause bar chart, bars descending left to right.</em></p><h3 id="severity-and-disposition">Severity and disposition</h3><ol><li>Add two link in nodes connected to "KPI Result", one per chart.</li><li>Add two change nodes: "Extract Severity Data" sets <code>msg.payload</code> to <code>msg.payload[0].severity</code>; "Extract Disposition Data" sets <code>payload</code> to <code>payload[0].disposition</code>.</li><li>Add two ui-chart nodes in their groups, chart type Pie. For each, set the label to the category column (<code>severity</code> / <code>disposition</code>) and the value to <code>defect_count</code>.</li></ol><p>Severity shows how serious the mix is; disposition shows what it's costing you: Scrap, Rework, or Use-as-is.</p><p><img alt="Screenshot: the Severity and Disposition pie charts side by side" src="https://flowfuse.com/blog/2026/07/images/severity-and-disposition-added.png"/><em>The two pie charts. Capture Severity and Disposition together.</em></p><h3 id="defects-per-day">Defects per day</h3><ol><li>Add a link in node connected to "KPI Result".</li><li>Add a change node named "Extract Trend Data": set <code>msg.payload</code> to <code>msg.payload[0].trend</code> (msg).</li><li>Add a ui-chart node in the Defects Per Day group. Set the chart type to Line, the x-axis property to <code>date</code> (type: time), and the y-axis property to <code>defect_count</code>.</li></ol><p>This is where a bad week, or a bad batch, shows up as a bump you can point at.</p><p><img alt="Screenshot: the Defects Per Day line chart showing daily counts over the selected date range" src="https://flowfuse.com/blog/2026/07/images/defect-day-added.png"/><em>The daily trend line chart. A date range showing a visible bump makes the point best.</em></p><h3 id="resolution-time-and-sla">Resolution time and SLA</h3><ol><li>Add a link in node connected to "KPI Result".</li><li>Add a change node named "Extract Resolution &amp; SLA Data": set <code>msg.payload</code> to <code>msg.payload[0].avg_resolution_and_sla</code> (msg).</li><li>Add a ui-table node in the Average Resolution group. Turn off auto-columns and configure five: Severity (<code>severity</code>), Hours (<code>avg_resolution_hours</code>), Resolved (<code>resolved_count</code>), SLA Breached (<code>sla_breached_count</code>), SLA % (<code>sla_breach_pct</code>).</li></ol><p>This is the widget that answers whether defects are being closed fast enough, not just how many exist.</p><p><img alt="Screenshot: the Average Resolution &amp; SLA table with its five columns per severity" src="https://flowfuse.com/blog/2026/07/images/avg-resolution-added.png"/><em>The resolution/SLA table, all five columns per severity row.</em></p><h3 id="status-funnel">Status funnel</h3><ol><li>Add a link in node connected to "KPI Result".</li><li>Add a change node named "Extract Status Funnel Data": set <code>payload</code> to <code>payload[0].status_funnel</code> (msg).</li><li>Add a ui-chart node in the Status Funnel group, chart type Bar, <code>status</code> on the x-axis, <code>defect_count</code> on the y.</li></ol><p>The query orders it by workflow stage (Detected, RCA, Corrective Action, Resolved, Verified), so a pile-up at any stage is visible at a glance.</p><p><img alt="Screenshot: the Status Funnel bar chart, ordered by workflow stage" src="https://flowfuse.com/blog/2026/07/images/status-funnel.png"/><em>The status funnel bar chart, bars in workflow order.</em></p><p>Deploy and open the dashboard. Every widget populates from the seeded data at once. Change a filter in the header and the whole page recalculates together; leave the live feed running and the numbers keep ticking.</p><h2 id="what-next">What Next</h2><p>You've built a working quality dashboard: a <code>defects</code> table, a single query that computes every KPI in one pass, and a page of stat cards, a Pareto chart, trend and breakdown charts, an SLA table, and a status funnel, all filtering live by line, shift, and date.</p><p>Right now it runs on the simulator, but that was only ever a stand-in for your real data. To go live, remove the simulator flow and point the query at your own <code>defects</code> table. Everything downstream keeps working, because the dashboard only ever reads from that one query. Your defects don't live in PostgreSQL? That's fine too. FlowFuse connects to MySQL, MongoDB, InfluxDB, and more, as our <a href="https://flowfuse.com/node-red/database/">database integration guides</a> show.</p><p>That's the real point. FlowFuse lets you build the exact application your floor needs quickly, without deep engineering knowledge or writing code, wired to the systems you already run instead of forcing your process to fit a fixed tool. This tutorial happened to build defect tracking, but the same approach covers the full range of <a href="https://flowfuse.com/blog/2026/08/manufacturing-dashboard-examples/">manufacturing dashboards</a>, production monitoring, OEE, and the wider quality picture. See how manufacturers are already putting it to work on our <a href="https://flowfuse.com/industries/automotive/">automotive solutions page</a>.</p><style>html pre.shiki code .sMK4o, html code.shiki .sMK4o{--shiki-light:#39ADB5;--shiki-default:#89DDFF;--shiki-dark:#89DDFF}html pre.shiki code .spNyl, html code.shiki .spNyl{--shiki-light:#9C3EDA;--shiki-default:#C792EA;--shiki-dark:#C792EA}html pre.shiki code .sfazB, html code.shiki .sfazB{--shiki-light:#91B859;--shiki-default:#C3E88D;--shiki-dark:#C3E88D}html pre.shiki code .sBMFI, html code.shiki .sBMFI{--shiki-light:#E2931D;--shiki-default:#FFCB6B;--shiki-dark:#FFCB6B}html pre.shiki code .sbssI, html code.shiki .sbssI{--shiki-light:#F76D47;--shiki-default:#F78C6C;--shiki-dark:#F78C6C}html pre.shiki code .sTEyZ, html code.shiki .sTEyZ{--shiki-light:#90A4AE;--shiki-default:#EEFFFF;--shiki-dark:#BABED8}html .light .shiki span {color: var(--shiki-light);background: var(--shiki-light-bg);font-style: var(--shiki-light-font-style);font-weight: var(--shiki-light-font-weight);text-decoration: var(--shiki-light-text-decoration);}html.light .shiki span {color: var(--shiki-light);background: var(--shiki-light-bg);font-style: var(--shiki-light-font-style);font-weight: var(--shiki-light-font-weight);text-decoration: var(--shiki-light-text-decoration);}html .default .shiki span {color: var(--shiki-default);background: var(--shiki-default-bg);font-style: var(--shiki-default-font-style);font-weight: var(--shiki-default-font-weight);text-decoration: var(--shiki-default-text-decoration);}html .shiki span {color: var(--shiki-default);background: var(--shiki-default-bg);font-style: var(--shiki-default-font-style);font-weight: var(--shiki-default-font-weight);text-decoration: var(--shiki-default-text-decoration);}html .dark .shiki span {color: var(--shiki-dark);background: var(--shiki-dark-bg);font-style: var(--shiki-dark-font-style);font-weight: var(--shiki-dark-font-weight);text-decoration: var(--shiki-dark-text-decoration);}html.dark .shiki span {color: var(--shiki-dark);background: var(--shiki-dark-bg);font-style: var(--shiki-dark-font-style);font-weight: var(--shiki-dark-font-weight);text-decoration: var(--shiki-dark-text-decoration);}</style><p><strong>See What Your Team Can Build</strong></p><p>See it live with our team, and the variety of applications you can build without coding expertise, then scale them across your plant in a single click.</p><p><a href="https://flowfuse.com/contact-us/">Contact Us</a></p>]]></content>
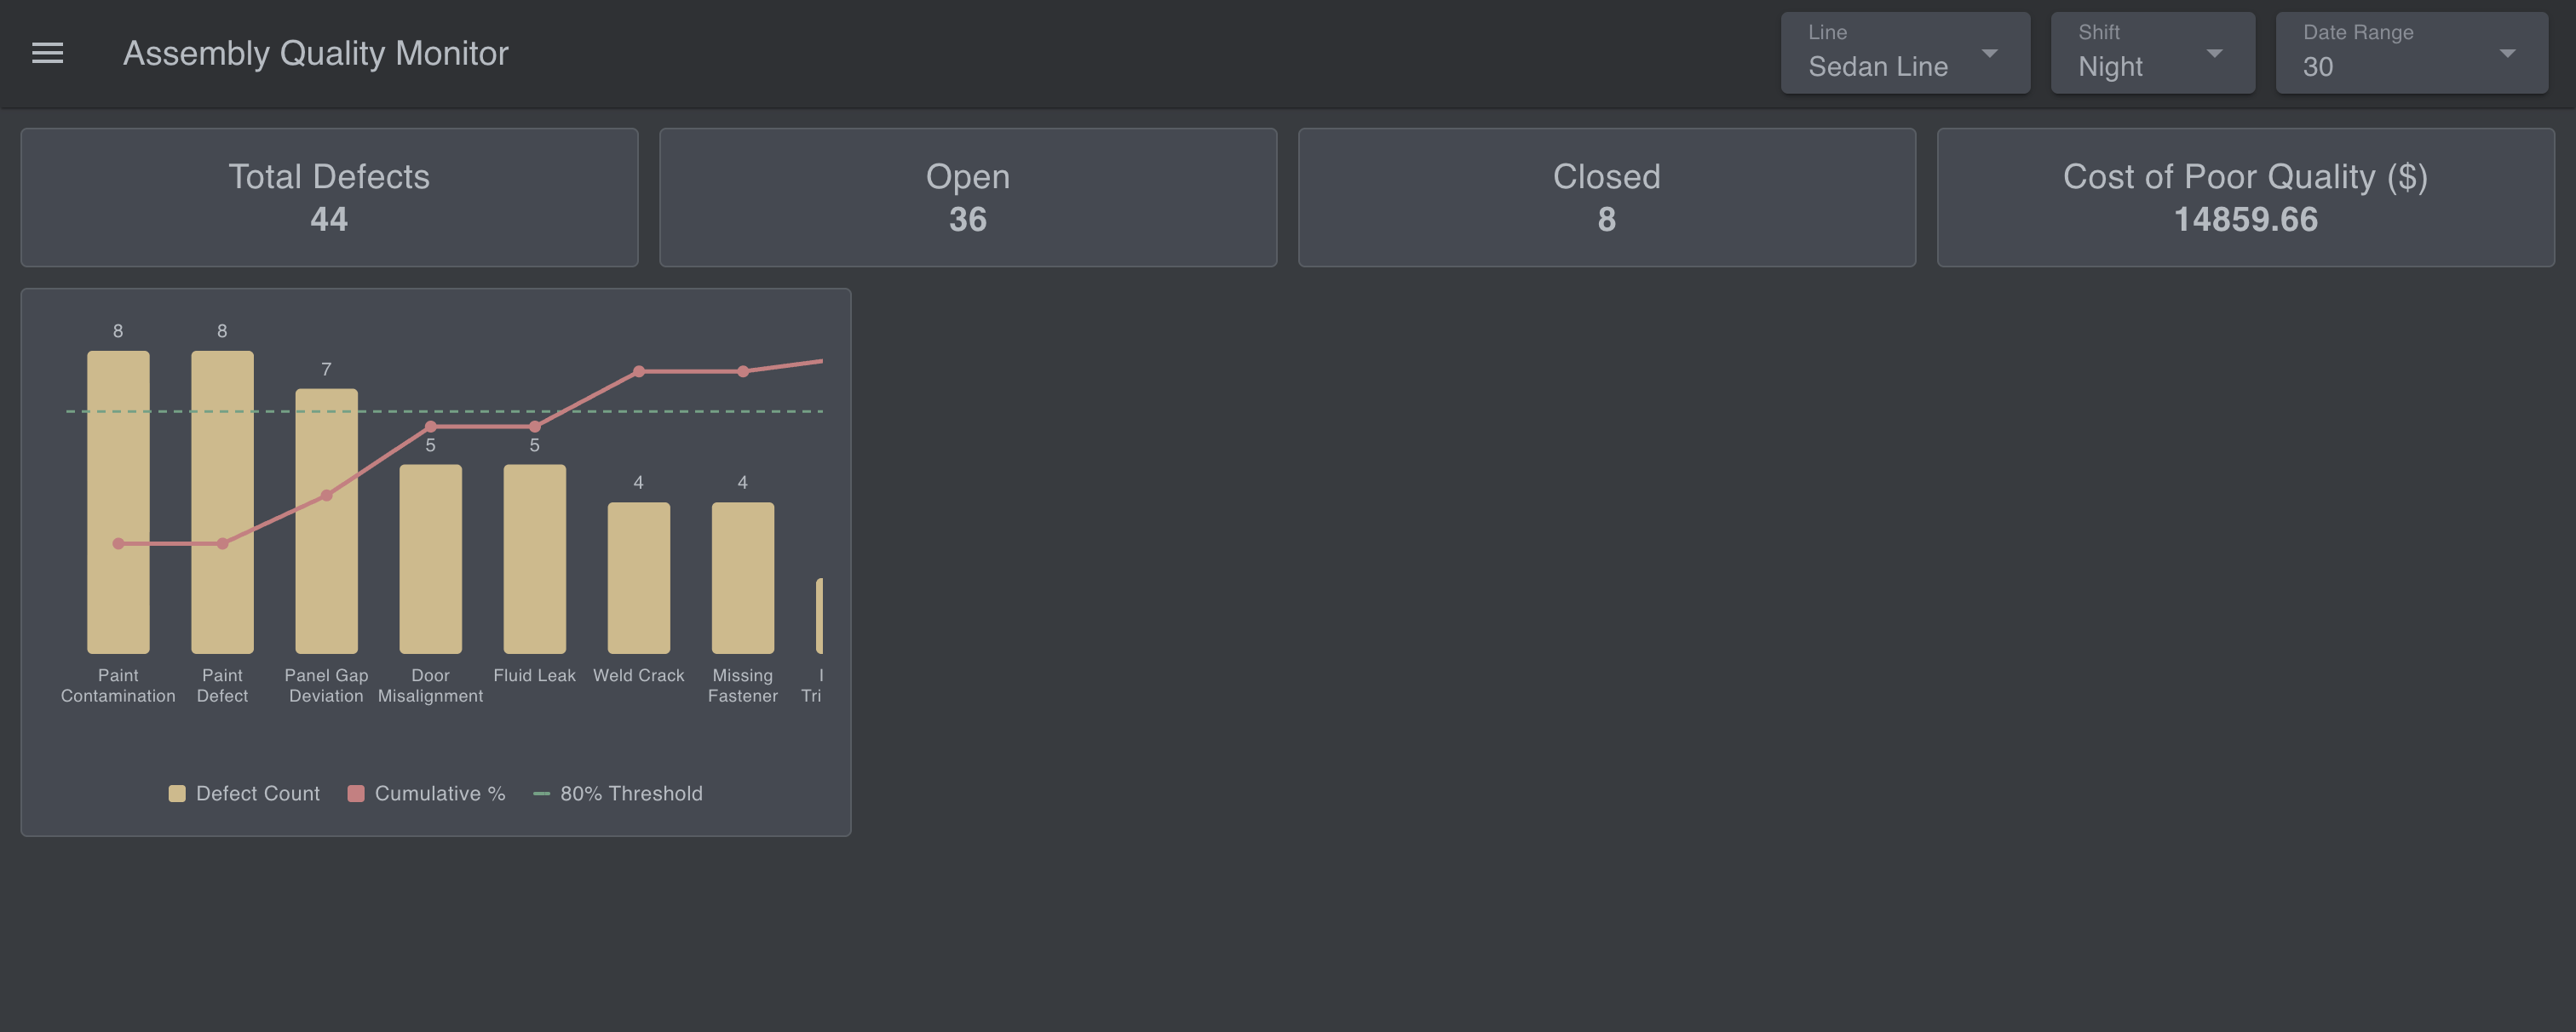
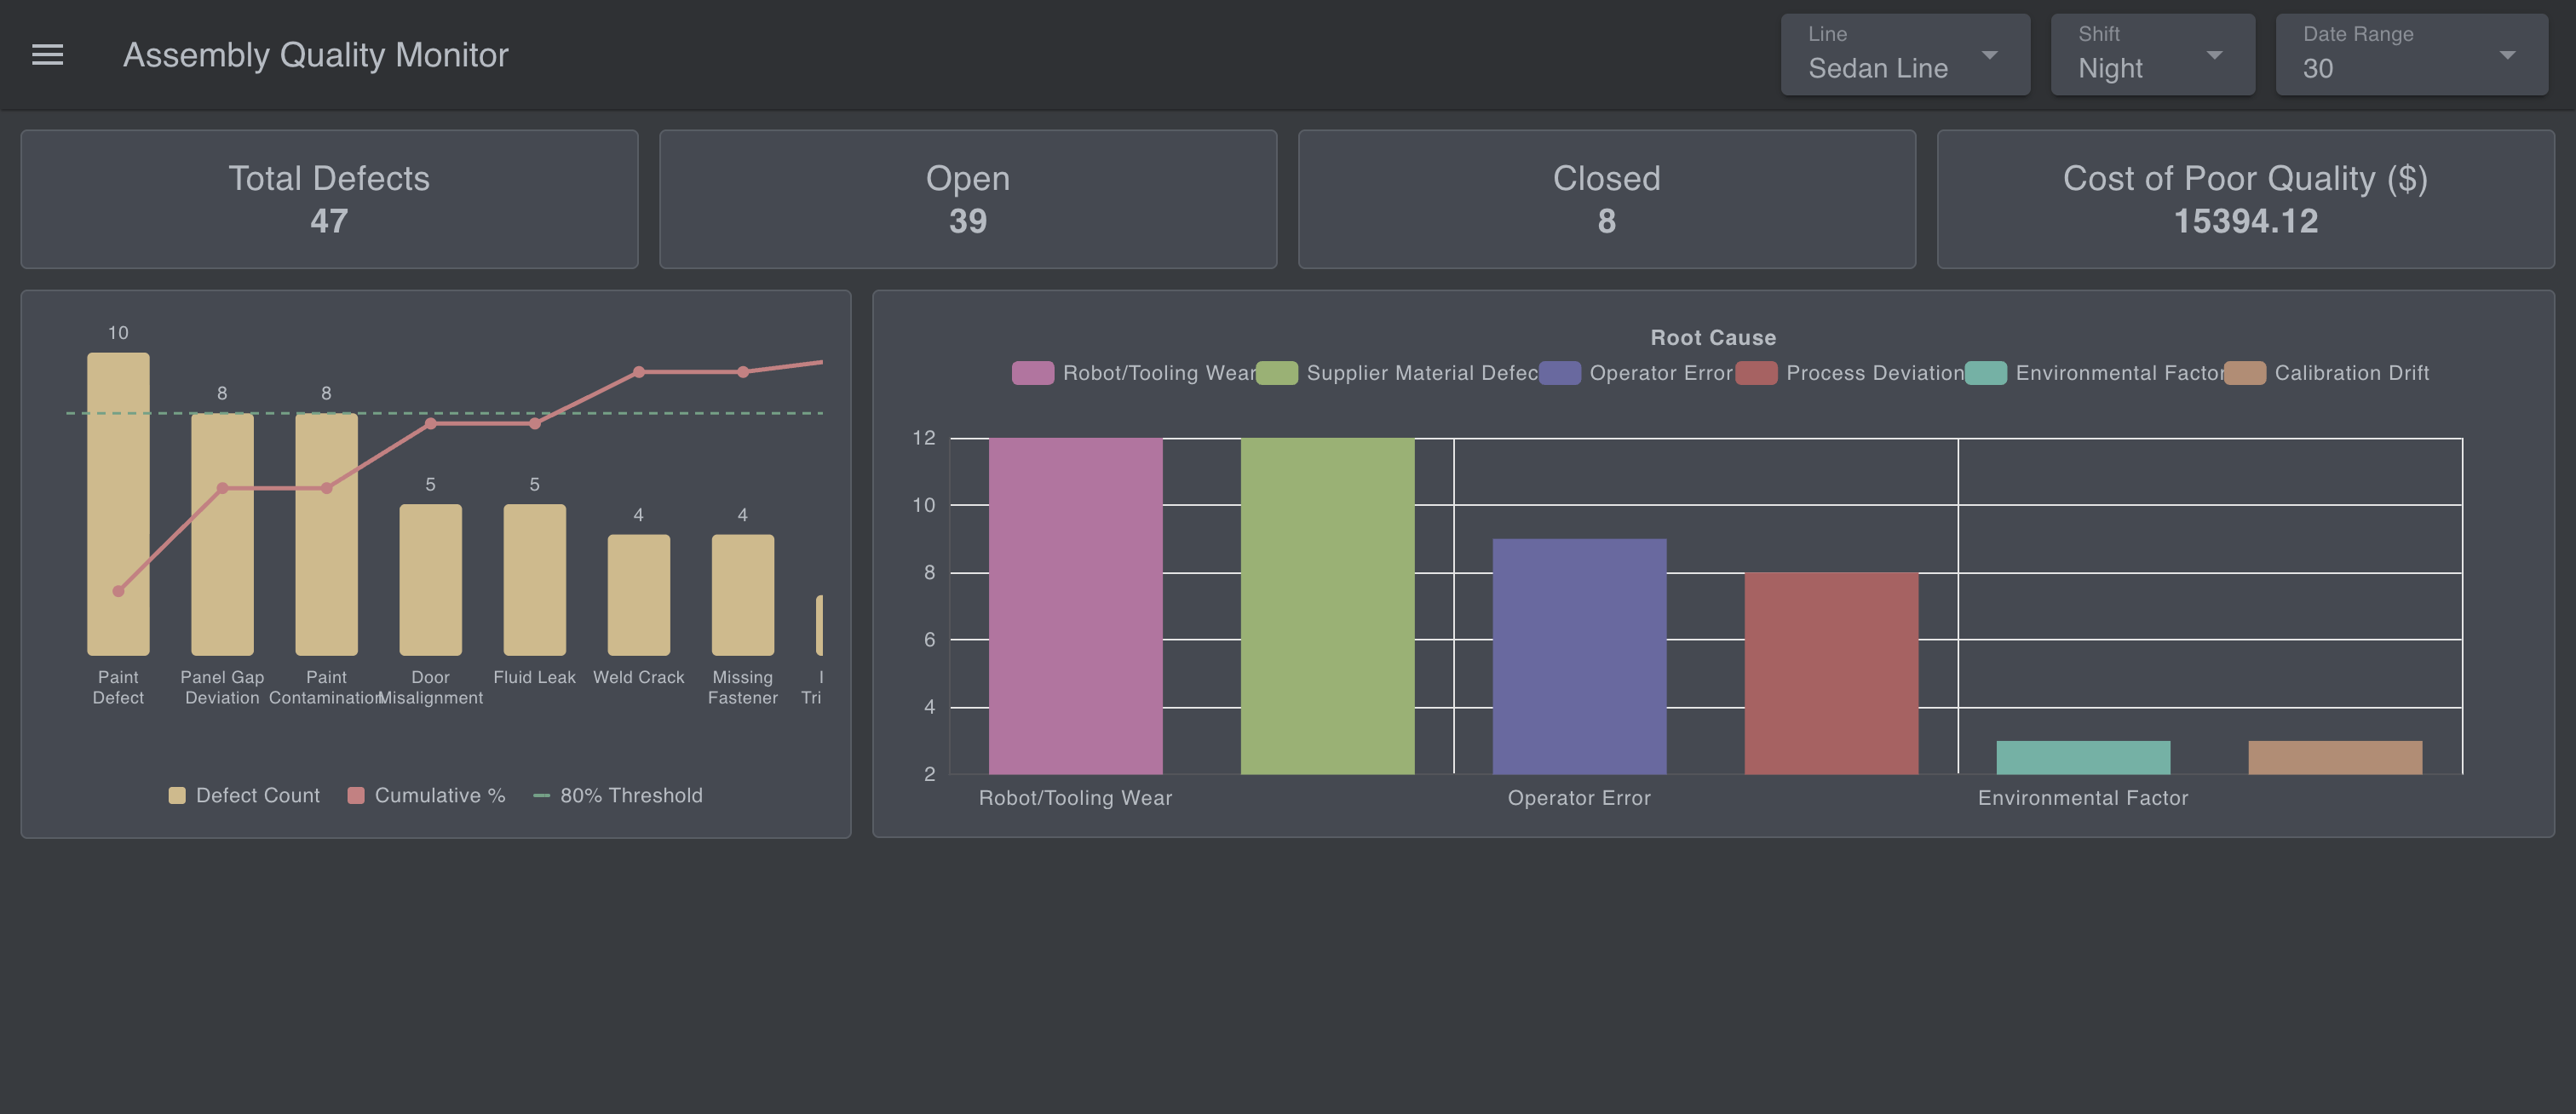
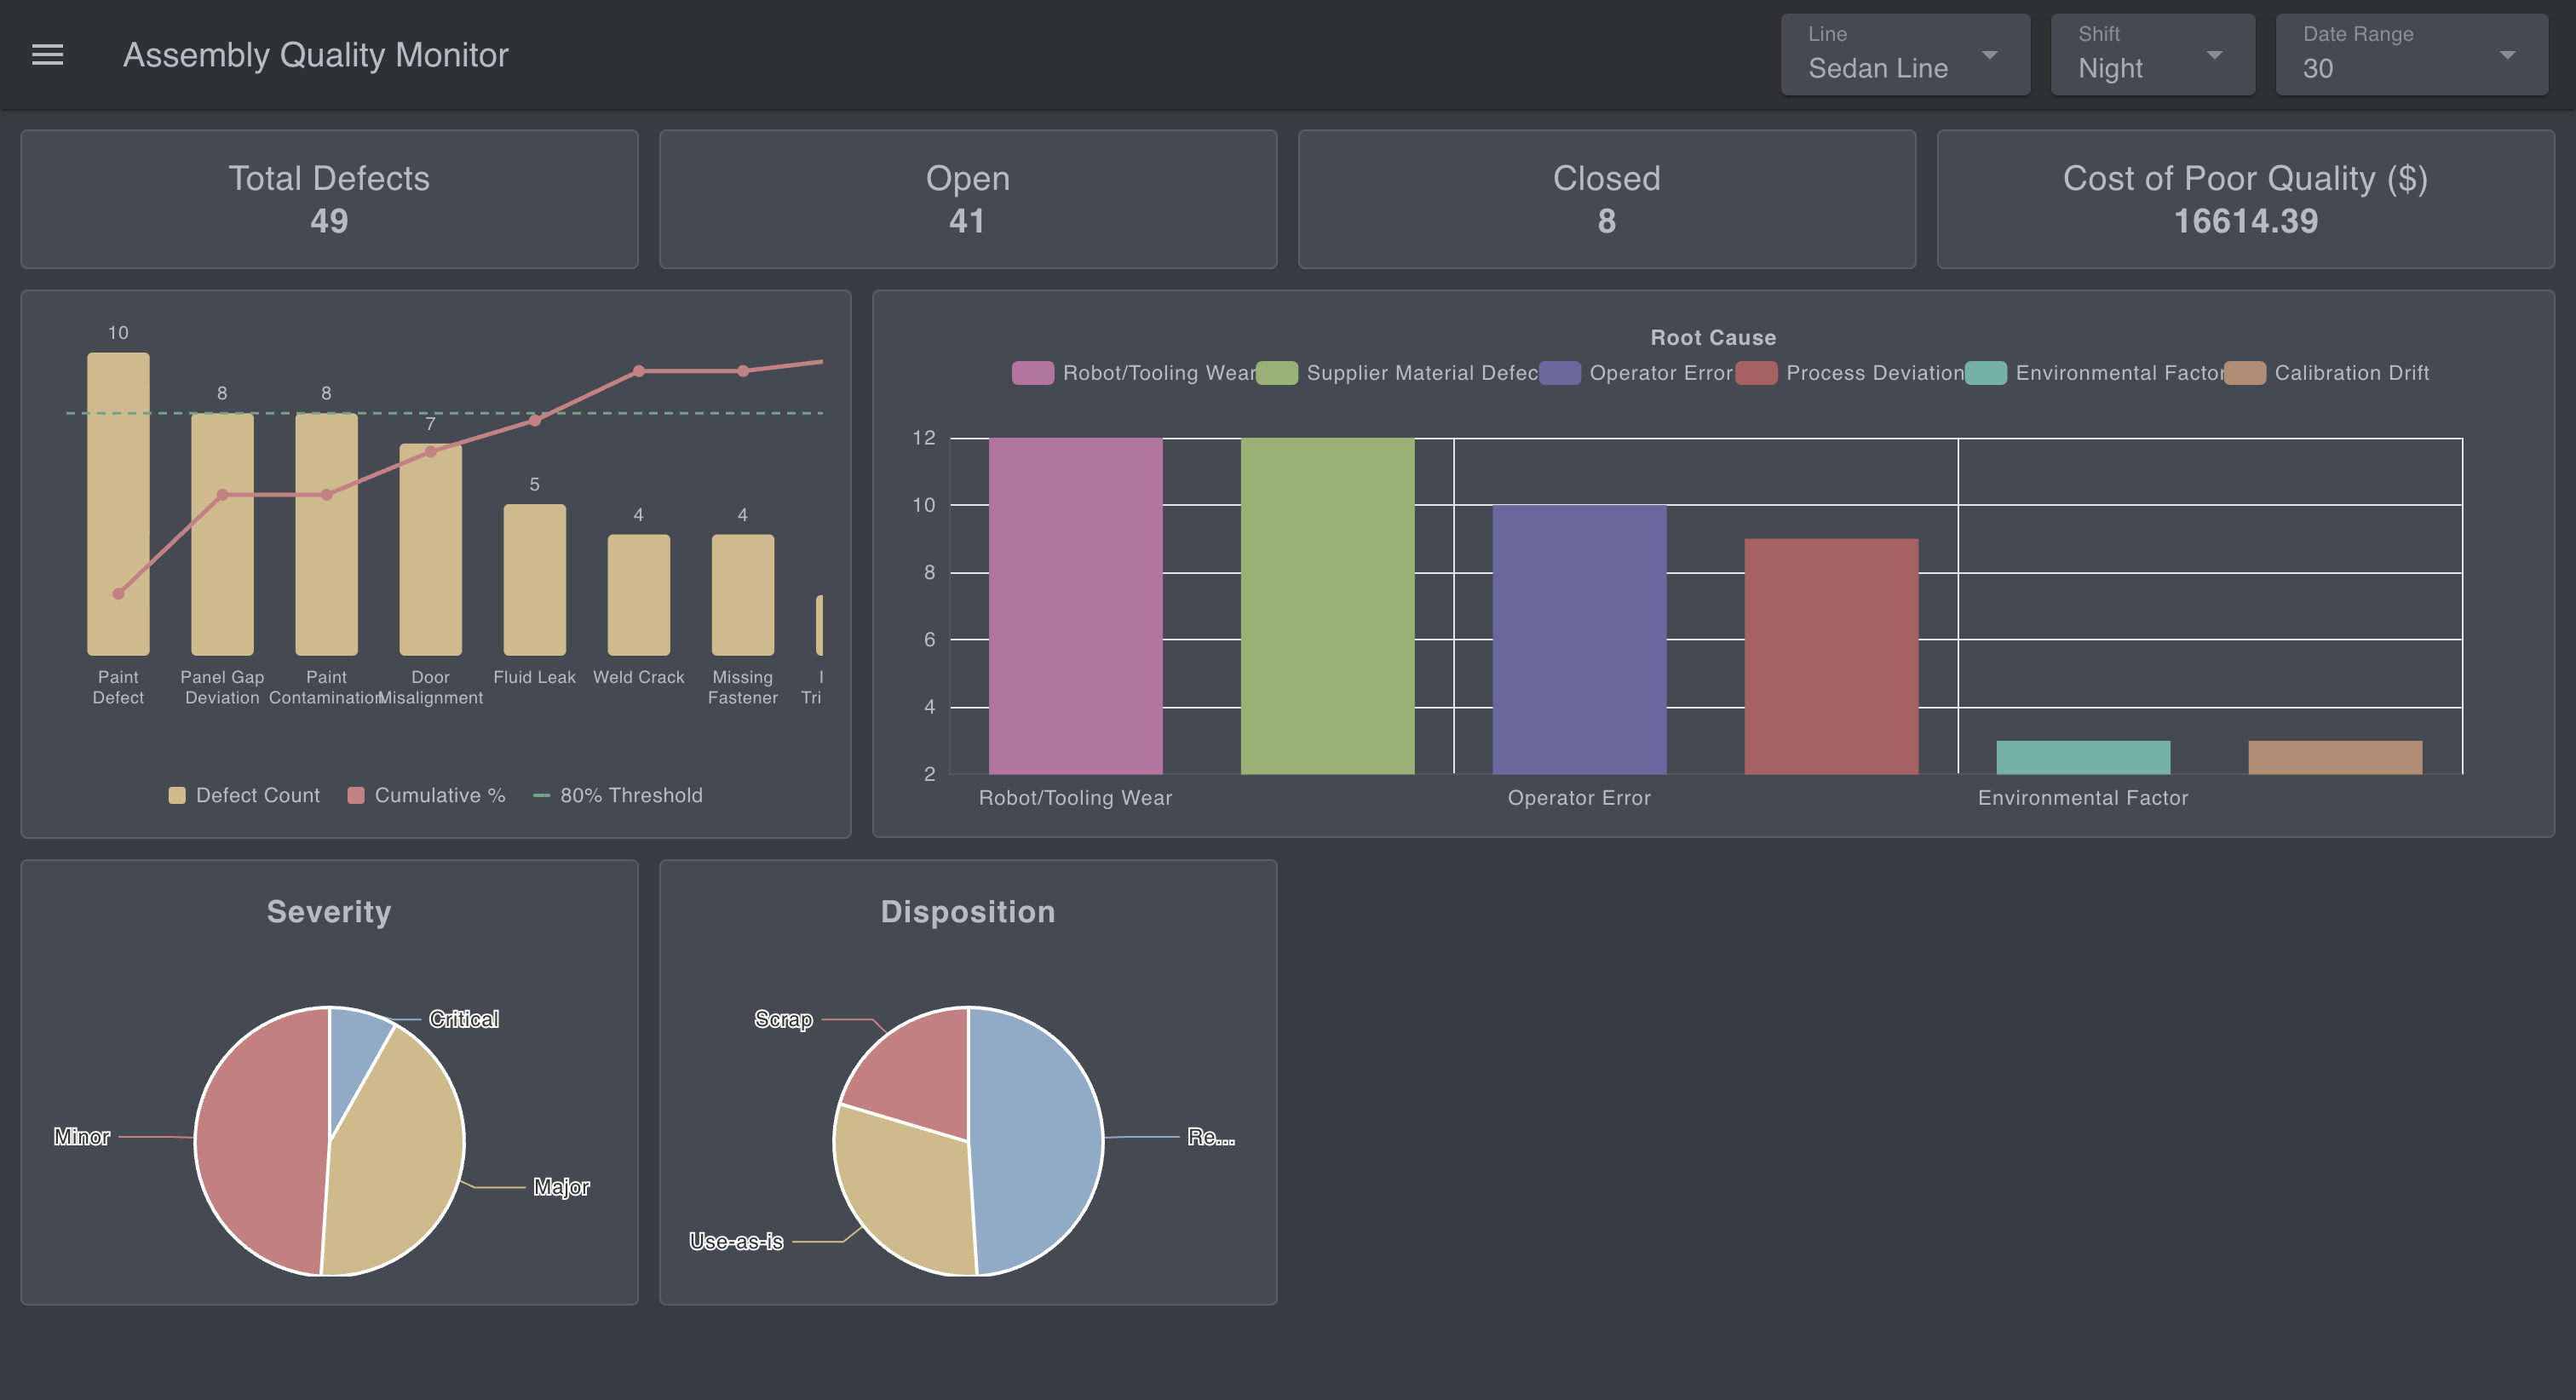
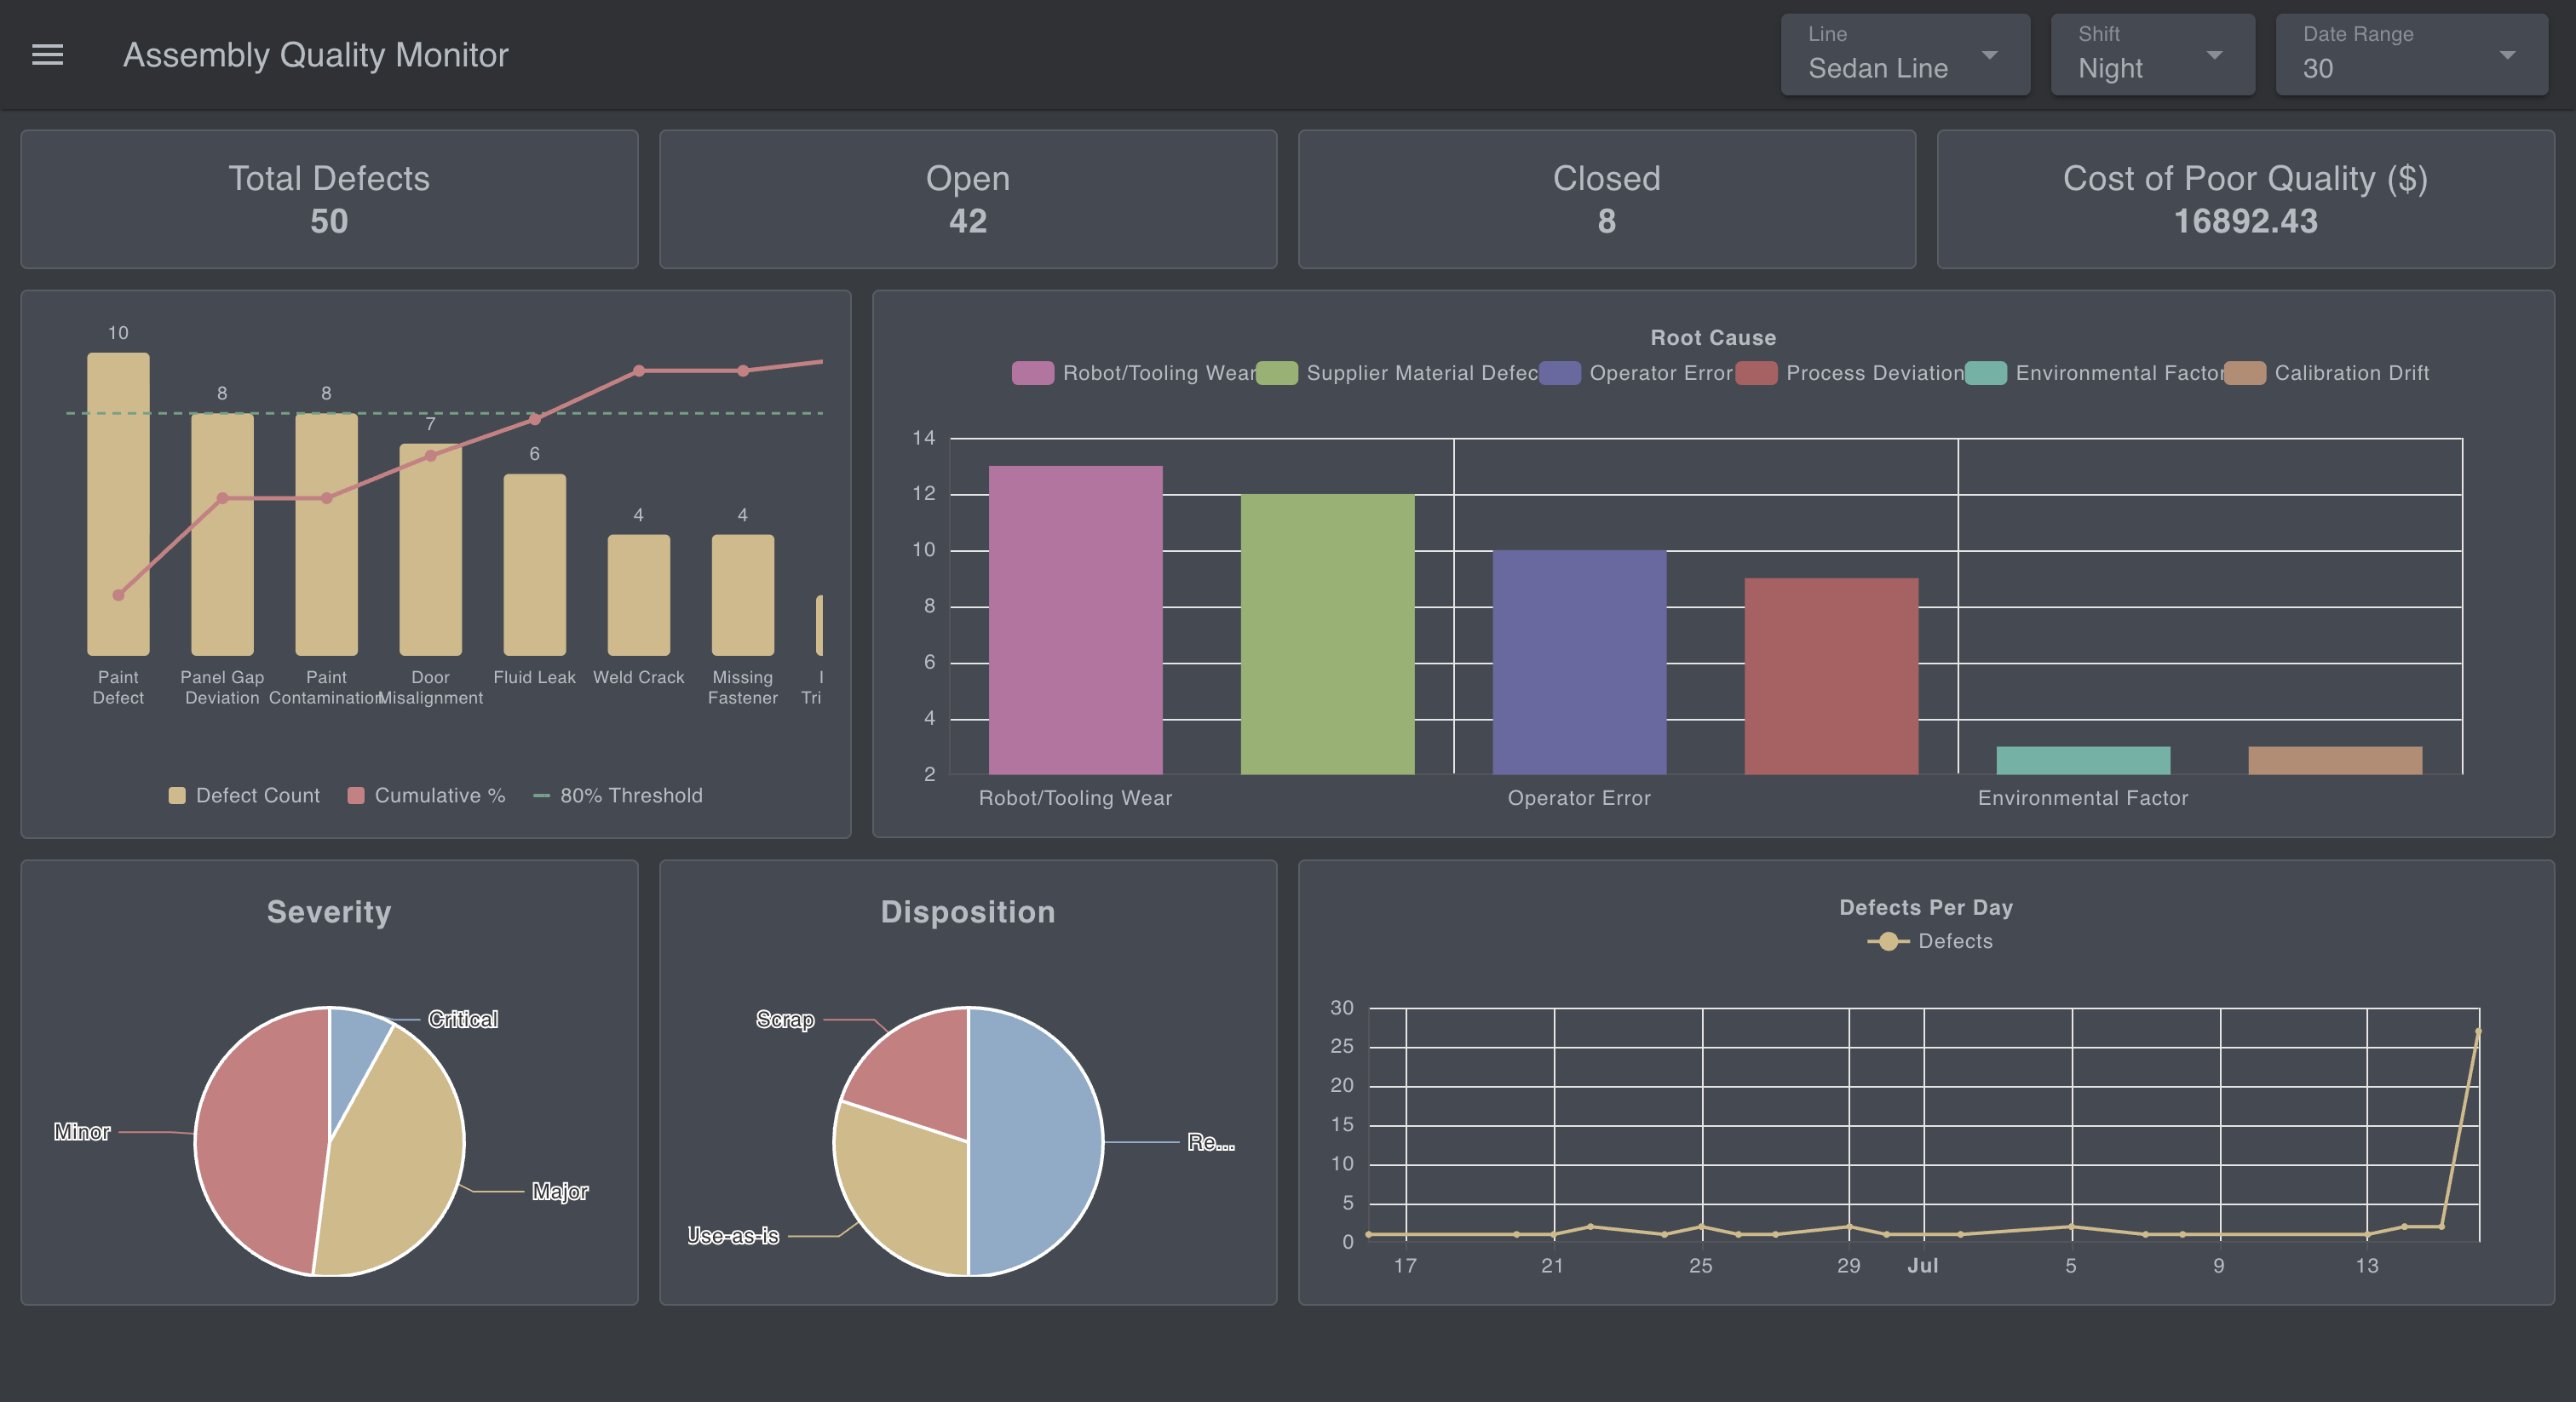
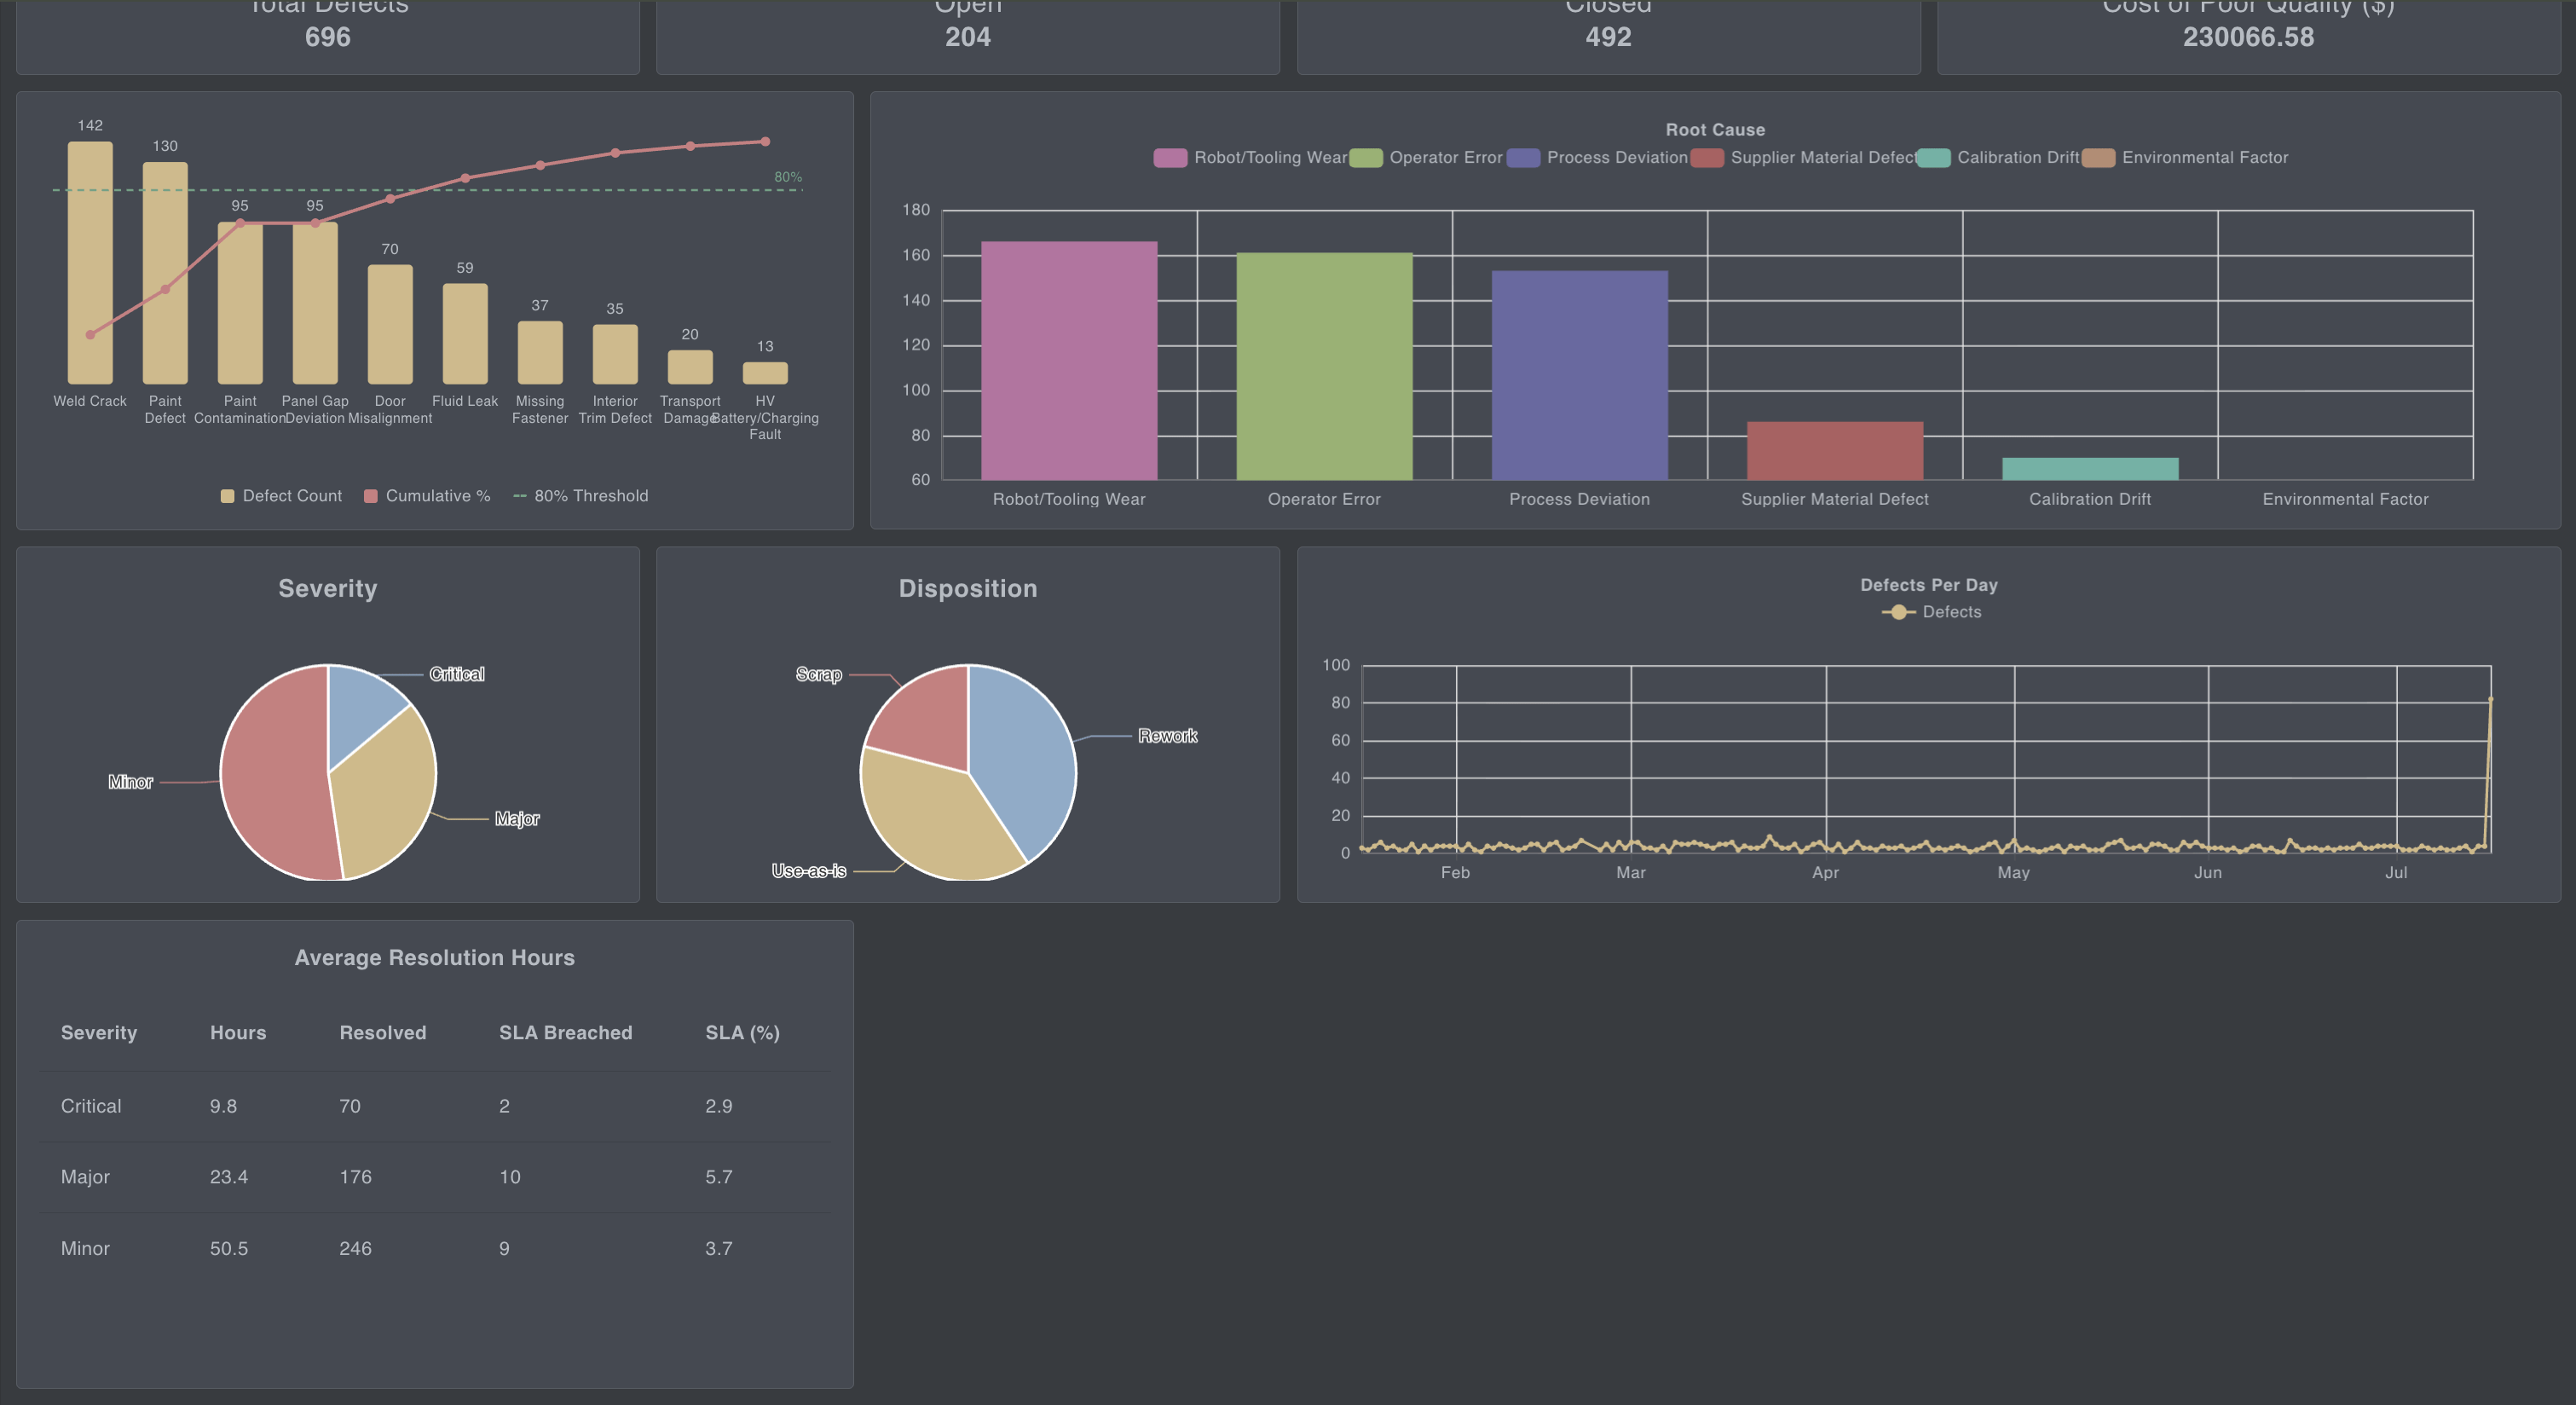
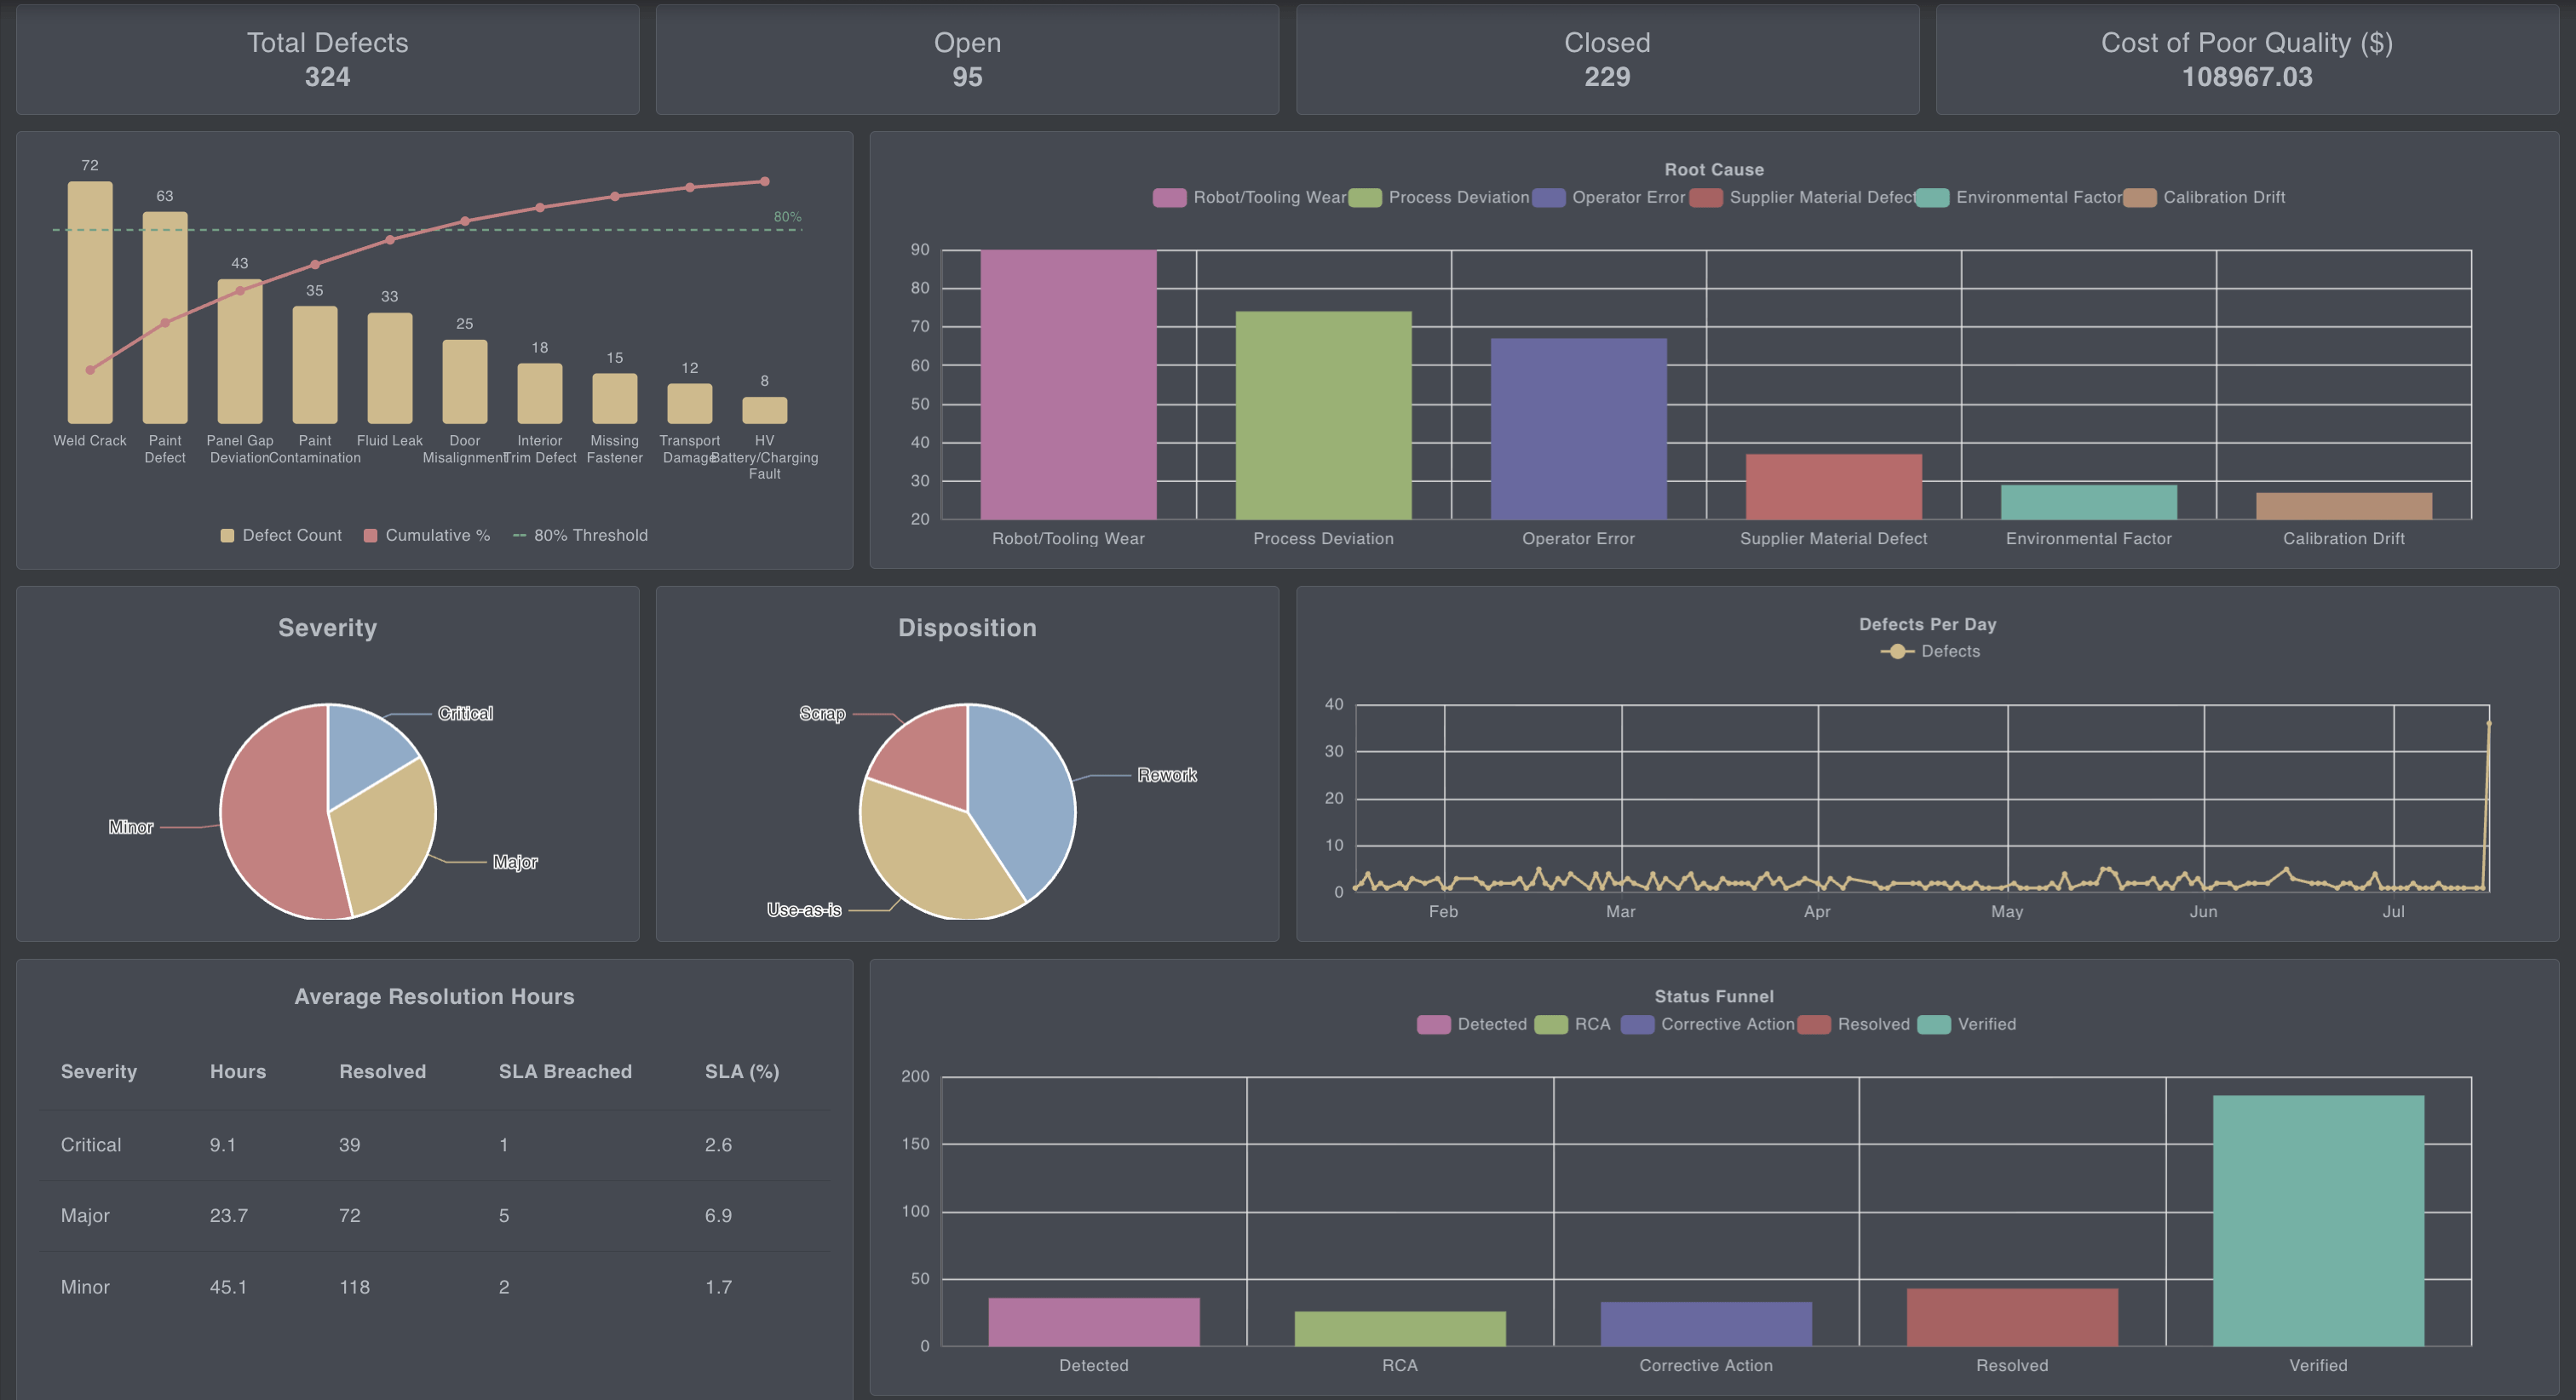
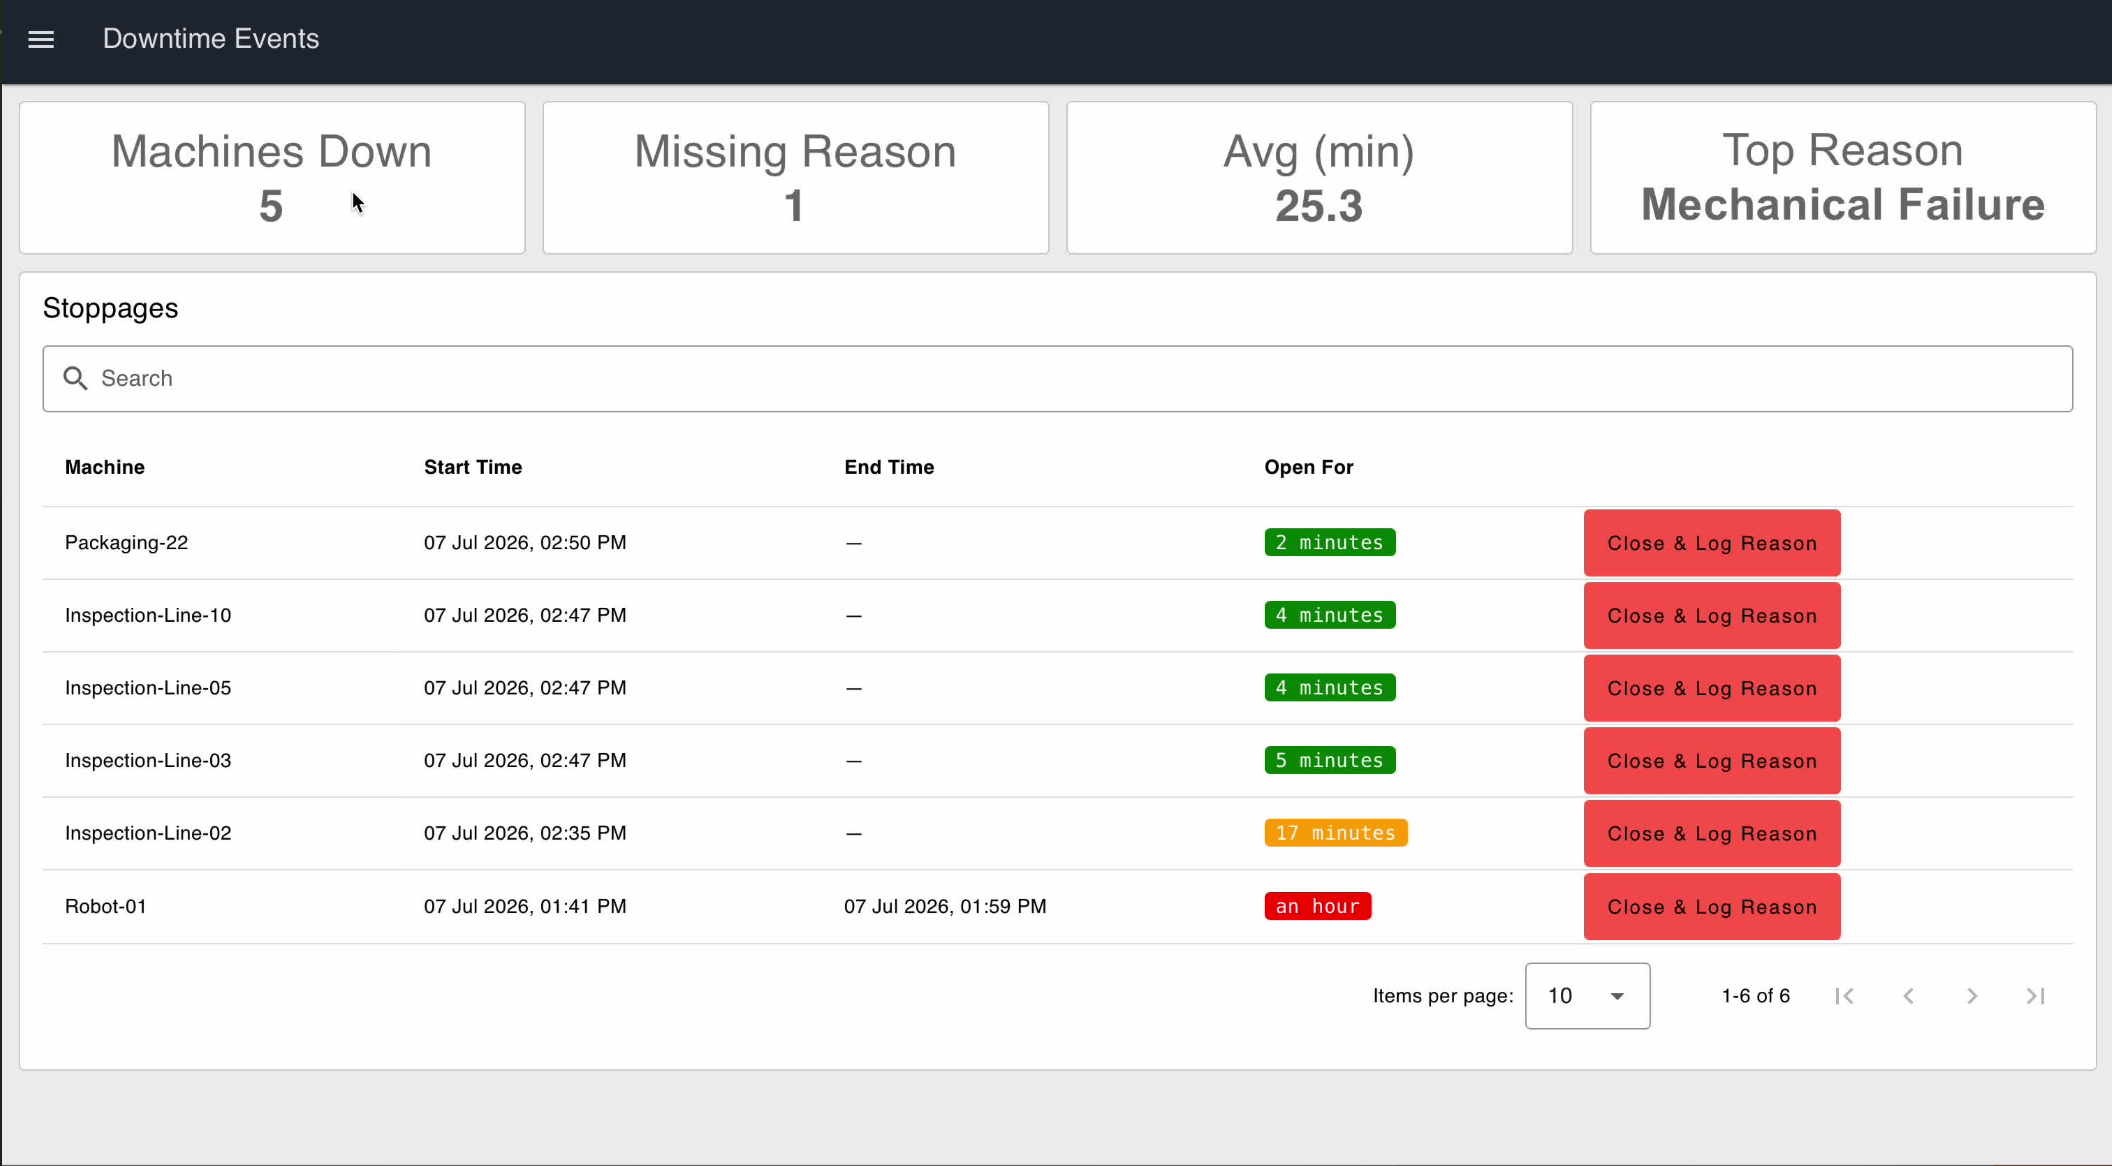
        <updated>2026-07-16T00:00:00.000Z</updated>
        <link href="https://flowfuse.com/blog/2026/07/defect-and-quality-monitoring/"/>
        
    </entry>
    <entry>
        <id>https://flowfuse.com/blog/2026/07/software-defined-manufacturing/</id>
        <title>Software-Defined Manufacturing: Improve Without Hardware Changes</title>
        <summary>Software-defined manufacturing (SDM) shifts how factories improve: instead of changing hardware, manufacturers build and evolve software that connects, orchestrates, and adapts existing equipment. FlowFuse provides the platform to build, deploy, and manage these industrial applications with version control and GitOps-based deployments, letting manufacturers start small and expand without large-scale modernization projects.</summary>
        <content type="html"><![CDATA[<p>For a long time, improving a manufacturing process meant touching the equipment itself. Need another inspection step? An engineer reprograms the PLC on-site. Need more production data? Install another system. Want a new workflow? That often meant modifying equipment, bringing in a vendor, or scheduling downtime.</p><p>That was simply how factories evolved.</p><p>Today, the machines are still there. PLCs still control equipment, robots still move products, sensors still collect data. But many improvements now happen in software instead. Manufacturers are connecting machines, production systems, enterprise software, and cloud services in ways that weren't common a few years ago, building dashboards, maintenance workflows, quality applications, and production reports without constantly changing the machines themselves.</p><p>That's the idea behind <strong>software-defined manufacturing (SDM)</strong>: separating control logic, process orchestration, and operational intelligence from any single piece of hardware, and running them instead in a software layer that sits above the equipment. The machines don't change. What changes is how quickly and easily they can be connected, coordinated, and improved, through software updates instead of rewiring cabinets or reprogramming individual PLCs.</p><p>Some in the industry, including analysts at <a href="https://www.arcweb.com/glossary/what-software-defined-manufacturing-sdm" rel="nofollow">ARC Advisory Group</a> and <a href="https://www.deloitte.com/us/en/services/consulting/articles/software-defined-manufacturing.html" rel="nofollow">Deloitte</a>, describe the fuller vision of SDM as extending all the way to AI-driven optimization and autonomous, agent-based production, where software doesn't just orchestrate equipment but continuously improves how it runs. That broader picture is real, but it starts with the same foundational shift: getting control logic and orchestration out of rigid, single-purpose implementations and into a software layer that can evolve. This article focuses on that foundational layer, the practical, incremental part of SDM that most manufacturers are building toward today.</p><h2 id="manufacturing-is-becoming-more-software-centric">Manufacturing Is Becoming More Software-Centric</h2><p>Manufacturing isn't the first industry to move this way. Networking became software-defined networking. Storage became software-defined storage. Instead of adding dedicated hardware every time a new capability was needed, software took on more responsibility for configuring, managing, and coordinating those systems.</p><p>Manufacturing follows a similar pattern, with one important difference: factories still depend on deterministic control, safety systems, and equipment that may stay in production for twenty years or longer. Those systems aren't going away, but what runs around them increasingly is software rather than hardware.</p><p>Software sits above those systems, connecting them, exchanging data between them, and coordinating what happens around the production process. That's increasingly important because factory data no longer stays inside the plant. Maintenance teams, quality systems, MES platforms, ERP software, historians, cloud services, and sometimes AI applications all need it. Adding a dashboard, connecting a new machine, or automating a maintenance process has become more of a software project than a hardware one. The equipment stays where it is; the software around it keeps evolving.</p><h2 id="why-traditional-manufacturing-software-starts-to-struggle">Why Traditional Manufacturing Software Starts to Struggle</h2><p>The problem is that much of today's manufacturing software wasn't designed to change this often. Many industrial systems were built around a single large implementation: install it, customize it, train everyone, then leave it running for years. That worked when production changed slowly. It becomes much harder when operations are constantly looking for new reports, additional integrations, better visibility, or another workflow. Even small requests, like adding a dashboard, connecting another PLC, or integrating a maintenance system, can turn into large projects.</p><p>Vendor lock-in makes this worse. Many industrial platforms depend on proprietary tools or tightly coupled software, so even straightforward improvements take longer than expected because every change runs through the same platform.</p><p>Most factories also aren't starting with a clean slate. A single production line might include PLCs installed fifteen years ago alongside modern robots, vision systems, industrial PCs, barcode scanners, cloud services, and enterprise software. The challenge usually isn't replacing those systems. It's getting them to work together reliably.</p><p>Software governance adds another layer. Manufacturing teams already have strict processes for changing production equipment; software needs the same discipline. Teams need to know what version is running, who changed it, when it was deployed, and how to roll back if something goes wrong. Without that, software becomes difficult to maintain as more applications get added across the factory. Large modernization projects don't really fix this either, since they often take months or years to deliver value, by which point the business has usually moved on to the next requirement.</p><h2 id="building-applications-that-can-grow">Building Applications That Can Grow</h2><p>Software-defined manufacturing takes a different approach. Instead of one large application trying to handle everything, manufacturers build smaller applications that each solve a specific problem. Those applications work together, but they don't all have to change at the same time.</p><p>Imagine a packaging machine stops unexpectedly. One application records the downtime for OEE. Another updates the production dashboard. Another notifies the maintenance team. Later, the quality team adds an inspection step. Only the quality application needs to change. The downtime application keeps running. The dashboard doesn't need to be touched. Maintenance continues working the same way.</p><p>Each application evolves independently, which makes the whole system easier to understand, test, and improve over time. The PLC still controls the machine; the software extends what happens around it, connecting systems, sharing information, automating workflows, and giving different teams the information they need. It's the same decoupling principle behind software-defined networking and storage, applied to the factory floor: the hardware stays fixed, and the software layer above it is what keeps changing.</p><h2 id="from-software-projects-to-a-software-platform">From Software Projects to a Software Platform</h2><p>Building an industrial application is no longer the difficult part.</p><p>The difficult part is what happens after that application proves its value.</p><p>It gets deployed to another production line. Another factory wants the same solution with a few changes. A new machine needs to be connected. Another dashboard is requested. Before long, what started as one successful application becomes dozens running across multiple lines, plants, and teams.</p><p>That's when software-defined manufacturing stops being a development challenge and becomes an operational one.</p><p>Manufacturers need more than a way to build applications. They need a consistent way to deploy them, manage them, update them, secure them, and scale them across the organization without every site becoming its own isolated software project.</p><p>This is the role FlowFuse plays.</p><p>Rather than being another manufacturing application, FlowFuse provides the platform that manufacturers use to build, deploy, and operate industrial applications throughout their lifecycle. It creates a common operating model for software running across the factory, whether that software connects equipment, collects production data, orchestrates workflows, or integrates with enterprise systems.</p><p>As more applications are introduced, that consistency becomes increasingly valuable. Teams can standardize how applications are developed, deploy them reliably to edge devices, manage changes through version control and GitOps, track every deployment with audit logs, control access through role-based permissions, and operate applications across multiple sites from a single platform.</p><p>The result is that software scales with the business instead of becoming another maintenance burden. Once an application proves its value, it can be reused, adapted, and continuously improved without rebuilding the entire solution for every production line or facility.</p><p><a href="https://flowfuse.com/customer-stories/scaling-manufacturing-automation-with-flowfuse/">Arch Systems</a> experienced this challenge as its manufacturing platform expanded across customer sites. Connecting more than 100 production databases and MES systems manually was slowing every deployment. By building reusable integration components and deploying them through FlowFuse, Arch standardized its rollout process and propagated changes across production environments from a single platform.</p><p>That same approach extends to existing development practices. FlowFuse DevOps Pipelines support GitHub, GitLab, Bitbucket, Gitea, and other Git servers, allowing manufacturers to adopt GitOps workflows without changing the infrastructure they already use.</p><p>Software-defined manufacturing isn't simply about writing software for factories. It's about creating a repeatable way to operate software as it becomes part of everyday manufacturing. FlowFuse provides the platform that turns individual software projects into a scalable software-defined manufacturing environment.</p><h2 id="where-manufacturing-is-heading">Where Manufacturing Is Heading</h2><p>The factories that adapt fastest over the next decade won't necessarily be the ones with the newest equipment. They'll be the ones that can turn one operational problem into one working application, then reuse and extend it the next time the same problem shows up on another line or at another site. That's the real shift behind software-defined manufacturing: not a single large modernization project, but a growing library of applications that connect existing equipment, adapt as requirements change, and compound in value over time. FlowFuse is the platform manufacturers use to build that library, one application, one production line, one factory at a time.</p><p><strong>Ready to start building software-defined applications for your factory?</strong></p><p>Talk to the FlowFuse team about connecting your PLCs, devices, and enterprise systems into industrial applications you can build, deploy, and manage with version control.</p><p><a href="https://flowfuse.com/contact-us/">Contact Us</a></p>]]></content>
        <updated>2026-07-13T00:00:00.000Z</updated>
        <link href="https://flowfuse.com/blog/2026/07/software-defined-manufacturing/"/>
        
    </entry>
    <entry>
        <id>https://flowfuse.com/blog/2026/07/build-downtime-logger/</id>
        <title>Build a Machine Downtime Tracking Application</title>
        <summary>Build a FlowFuse application that captures machine stop and start events over MQTT, logs them to a database, lets operators assign a downtime reason from a dashboard, and displays live KPI cards summarizing downtime across the floor.</summary>
        <content type="html"><![CDATA[<p>Production lines in manufacturing and automotive facilities experience planned and unplanned downtime every day. Tracking when a machine stops, how long it stays down, and why it happened helps production and maintenance teams identify recurring issues and improve operations.</p><p>Many factories still record downtime on paper or in spreadsheets. Others rely on PLC alarms without keeping a centralized history that teams can review and analyze later.</p><p>In this tutorial, you'll build a machine downtime tracking application using FlowFuse. The application records machine stop and start events, calculates downtime duration, lets operators assign downtime reasons, and displays a live dashboard with unresolved events and key metrics. Following the steps below, you can have this application built and deployed in about 10-15 minutes.</p><p><img alt="Screenshot: completed dashboard with KPI cards and stoppages table" src="https://flowfuse.com/blog/2026/07/images/downtime-logger.png"/><em>The finished dashboard: KPI cards on top, unresolved stoppages below.</em></p><p>You can interact with the live demo here: .</p><p>By the end, you'll have a foundation you can extend into OEE, production reporting, maintenance dashboards, or MES integrations.</p><h2 id="what-youll-need">What You'll Need</h2><p>Before you start building, get these ready:</p><ul><li><strong>A FlowFuse account.</strong> Sign up for FlowFuse Cloud, or use a self-hosted instance.</li><li><strong>A FlowFuse instance up and running.</strong> If you don't have one yet, create a new instance from your FlowFuse Platform.</li><li><strong>FlowFuse Dashboard installed.</strong> This tutorial uses <code>@flowfuse/node-red-dashboard</code> nodes (<code>ui-button</code>, <code>ui-table</code>, <code>ui-chart</code>) to build the operator interface. Install it from the Palette Manager if it isn't already in your instance.</li><li><strong>The Humanizer node installed.</strong> This is what turns raw downtime into readable text like "12 minutes." It comes from the <code>node-red-contrib-moment</code> package, install it from the Palette Manager.</li></ul><p>You won't need a PLC or any real hardware for this tutorial. We'll simulate machine stop and start events with inject nodes, and the same flow logic applies later when you connect real signals.</p><h2 id="how-the-application-works">How the Application Works</h2><p>Before we build anything, let's first walk through what it should do and how the flow will look:</p><ol><li><strong>Machine stops.</strong> A signal comes in and a new downtime record opens for that machine.</li><li><strong>Machine starts again.</strong> The record closes on its own, and the duration gets calculated.</li><li><strong>Operator logs a reason.</strong> From the dashboard, closing it manually too if it wasn't already.</li><li><strong>The table shows what's unresolved.</strong> Anything open, or anything closed without a reason, stays visible with the clock still running next to it.</li><li><strong>The KPI cards keep score.</strong> Machines down now, missing reasons, average downtime, and the most common reason.</li></ol><p>Once you see these five pieces working together, the rest of the tutorial is just wiring them up.</p><h2 id="setting-up-the-database-table">Setting Up the Database Table</h2><p>Everything in this application reads from and writes to a single table, so that's where we start.</p><blockquote><p>Note: <a href="https://flowfuse.com/docs/user/ff-tables/">FlowFuse Tables</a> is currently in beta and available to Enterprise tier teams on FlowFuse Cloud, as well as Enterprise licensed self hosted teams running on Kubernetes. If you're on a different tier, you can follow along using any external database instead, Postgres, MySQL, or whatever you already have, with the standard database nodes from the palette. The SQL and flow logic in this tutorial will work the same either way.</p></blockquote><ol><li>Add a Query node to your canvas. This lets you run SQL queries directly against your FlowFuse managed database.</li><li>Set its query to create the table:</li></ol><pre class="language-sql shiki shiki-themes material-theme-lighter material-theme material-theme-palenight" code="CREATE TABLE IF NOT EXISTS downtime_events (
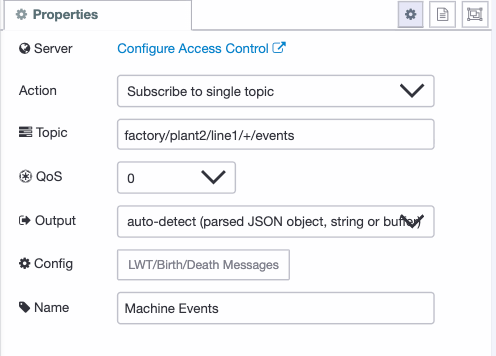
    id SERIAL PRIMARY KEY,
    machine_id TEXT NOT NULL,
    status TEXT NOT NULL DEFAULT 'Open',
    reason TEXT,
    comments TEXT,
    start_time TIMESTAMPTZ NOT NULL,
    end_time TIMESTAMPTZ,
    duration_seconds INTEGER,
    created_at TIMESTAMP DEFAULT CURRENT_TIMESTAMP
);
" language="sql" meta="" style=""><code __ignore-map=""><span class="line" line="1"><span>CREATE TABLE IF NOT EXISTS downtime_events (
</span></span><span class="line" line="2"><span>    id SERIAL PRIMARY KEY,
</span></span><span class="line" line="3"><span>    machine_id TEXT NOT NULL,
</span></span><span class="line" line="4"><span>    status TEXT NOT NULL DEFAULT 'Open',
</span></span><span class="line" line="5"><span>    reason TEXT,
</span></span><span class="line" line="6"><span>    comments TEXT,
</span></span><span class="line" line="7"><span>    start_time TIMESTAMPTZ NOT NULL,
</span></span><span class="line" line="8"><span>    end_time TIMESTAMPTZ,
</span></span><span class="line" line="9"><span>    duration_seconds INTEGER,
</span></span><span class="line" line="10"><span>    created_at TIMESTAMP DEFAULT CURRENT_TIMESTAMP
</span></span><span class="line" line="11"><span>);
</span></span></code></pre><ol start="3"><li>Wire an inject node into the Query node. This is what triggers the query to run.</li><li>Add a debug node after the Query node. This lets you confirm the table was created successfully.</li><li>Click the inject node once, then check the debug sidebar. You should see a confirmation that the query ran.</li></ol><p>Each row in this table represents one stoppage. Status tracks whether it's open or closed, reason and comments stay empty until an operator fills them in, and duration_seconds gets calculated the moment a stoppage closes.</p><p>With the table in place, the application has somewhere to write to. Next, we'll set up the event that opens a record the moment a machine stops.</p><h2 id="capturing-stop-and-start-events">Capturing Stop and Start Events</h2><p>With the table ready, the next step is getting machine events into it, using MQTT.</p><p>Note: this tutorial uses the FlowFuse <a href="https://flowfuse.com/docs/user/teambroker/">built in broker</a>, available to Pro and Enterprise tier teams on FlowFuse Cloud. If you're on a different tier, contact us to get access, or use your own broker with the standard MQTT nodes instead, they work the same way here.</p><p>The event names used here, <code>downtime_started</code> and <code>downtime_ended</code>, are just an example. Your source may use different tags or a boolean instead of a string. What matters is the pattern, one signal opens a record and one closes it, so adjust to match your actual data.</p><ol><li>Add an ff-mqtt-in node to the canvas, name it "Machine Events In", and set the topic to <code>factory/plant2/line1/+/events</code>, with QoS 0. Once you deploy this node, it will automatically pick up the connection and credentials for your team's broker, no config node needed.</li></ol><p><img alt="Screenshot: ff-mqtt-in node configuration panel with topic and QoS set" src="https://flowfuse.com/blog/2026/07/images/machine-events.png"/><em>The Machine Events In node subscribed to the wildcard topic.</em></p><ol start="2"><li>Add a switch node checking payload.event, with two rules, downtime_started and downtime_ended.</li></ol><p><img alt="Screenshot: switch node with two rules routing on payload.event" src="https://flowfuse.com/blog/2026/07/images/switch-to-route-events.png"/><em>Routing incoming events by type before they reach the database.</em></p><ol start="3"><li>For downtime_started, add a change node before the Query node with two rules: set <code>queryParameters.machine_id</code> to <code>payload.machine_id</code> (msg), and set <code>queryParameters.timestamp</code> to <code>payload.timestamp</code> (msg).</li></ol><p><img alt="Screenshot: change node rules mapping payload fields to queryParameters" src="https://flowfuse.com/blog/2026/07/images/prep-params.png"/><em>Both sides of each rule set to msg, this is the step most likely to get mistyped.</em></p><ol start="4"><li>Add the Query node itself:</li></ol><pre class="language-sql shiki shiki-themes material-theme-lighter material-theme material-theme-palenight" code="INSERT INTO downtime_events (machine_id, start_time)
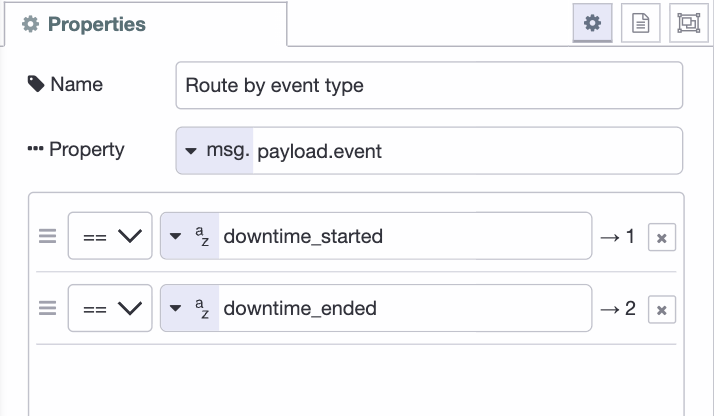
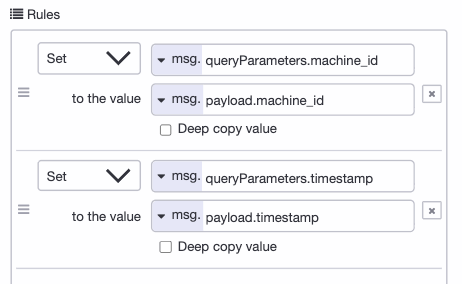
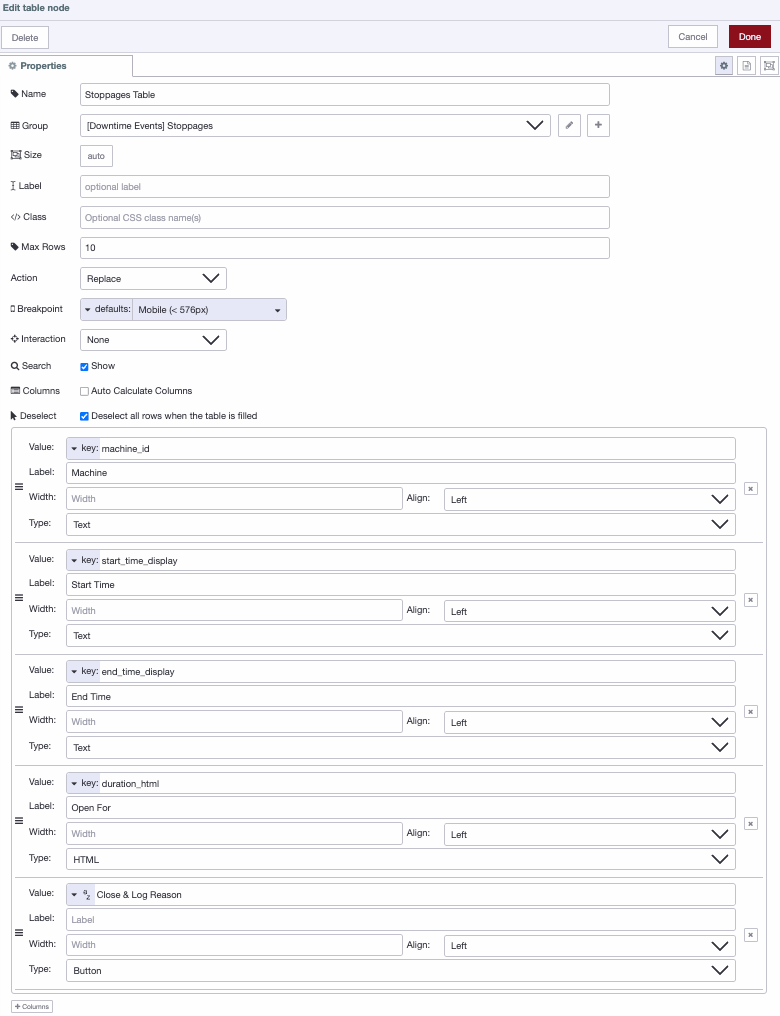
SELECT $machine_id, $timestamp
WHERE NOT EXISTS (
    SELECT 1 FROM downtime_events
    WHERE machine_id = $machine_id AND status = 'Open'
);
" language="sql" meta="" style=""><code __ignore-map=""><span class="line" line="1"><span>INSERT INTO downtime_events (machine_id, start_time)
</span></span><span class="line" line="2"><span>SELECT $machine_id, $timestamp
</span></span><span class="line" line="3"><span>WHERE NOT EXISTS (
</span></span><span class="line" line="4"><span>    SELECT 1 FROM downtime_events
</span></span><span class="line" line="5"><span>    WHERE machine_id = $machine_id AND status = 'Open'
</span></span><span class="line" line="6"><span>);
</span></span></code></pre><ol start="5"><li>For downtime_ended, add the same kind of change node, <code>queryParameters.machine_id</code> and <code>queryParameters.timestamp</code> mapped the same way, then a separate Query node:</li></ol><pre class="language-sql shiki shiki-themes material-theme-lighter material-theme material-theme-palenight" code="UPDATE downtime_events
SET status = 'Closed',
    end_time = $timestamp,
    duration_seconds = EXTRACT(EPOCH FROM ($timestamp::timestamptz - start_time))
WHERE machine_id = $machine_id AND status = 'Open';
" language="sql" meta="" style=""><code __ignore-map=""><span class="line" line="1"><span>UPDATE downtime_events
</span></span><span class="line" line="2"><span>SET status = 'Closed',
</span></span><span class="line" line="3"><span>    end_time = $timestamp,
</span></span><span class="line" line="4"><span>    duration_seconds = EXTRACT(EPOCH FROM ($timestamp::timestamptz - start_time))
</span></span><span class="line" line="5"><span>WHERE machine_id = $machine_id AND status = 'Open';
</span></span></code></pre><p>To test without hardware, import the following flow:</p><p>This gives you two buttons, one that simulates a machine stopping, one that simulates it starting again, wired through a function node that builds the topic and payload, then out over MQTT just like a real device would.</p><p>Deploy, click Simulate: Downtime Started, then check your table, a new open record should appear. Click Simulate: Downtime Ended and it should close with a duration.</p><p>Next, the dashboard table and the reason form operators use to close and explain a stoppage.</p><h2 id="building-the-dashboard-table-and-reason-form">Building the Dashboard Table and Reason Form</h2><p>With events flowing into the database, the next step is showing them to the operator, and giving them a way to log why a machine stopped. Before starting, add a ui-page named "Downtime Events" and a ui-group named "Stoppages" on that page, this is where the table will live.</p><ol><li>Go back to your event flow from the last section, after both Query nodes, downtime_started and downtime_ended, add a link out node. Give it a name like "event processed" so it's easy to find later.</li><li>In this new part of the flow, add a link in node and connect it to that same link out node. This is what lets the dashboard react any time a record opens or closes, without wiring long lines across the canvas.</li><li>There's one gap to close before moving on. The table only refreshes when an event comes in, so if a machine stays down for an hour with no new signal, "Open For" will sit frozen instead of counting up. Add an inject node set to repeat every 30 seconds, with its own link out wired to the same link in from step 2. This keeps the table and KPI cards refreshing on their own, even when nothing else is happening.</li><li>After the link in node, add a Query node that pulls every stoppage that's either still running or missing a reason. This is a triage table, so it only ever shows what still needs attention, once a stoppage is closed and explained, it drops off:</li></ol><pre class="language-sql shiki shiki-themes material-theme-lighter material-theme material-theme-palenight" code="SELECT *,
       EXTRACT(EPOCH FROM start_time) AS start_epoch,
       TO_CHAR(start_time, 'DD Mon YYYY, HH12:MI AM') AS start_time_display,
       COALESCE(TO_CHAR(end_time, 'DD Mon YYYY, HH12:MI AM'), '-') AS end_time_display,
       COALESCE(reason, 'Not logged') AS reason_display,
       CASE WHEN reason IS NULL THEN true ELSE false END AS needs_review
FROM downtime_events
WHERE status = 'Open' OR reason IS NULL
ORDER BY CASE WHEN status = 'Open' THEN 0 ELSE 1 END, start_time DESC;
" language="sql" meta="" style=""><code __ignore-map=""><span class="line" line="1"><span>SELECT *,
</span></span><span class="line" line="2"><span>       EXTRACT(EPOCH FROM start_time) AS start_epoch,
</span></span><span class="line" line="3"><span>       TO_CHAR(start_time, 'DD Mon YYYY, HH12:MI AM') AS start_time_display,
</span></span><span class="line" line="4"><span>       COALESCE(TO_CHAR(end_time, 'DD Mon YYYY, HH12:MI AM'), '-') AS end_time_display,
</span></span><span class="line" line="5"><span>       COALESCE(reason, 'Not logged') AS reason_display,
</span></span><span class="line" line="6"><span>       CASE WHEN reason IS NULL THEN true ELSE false END AS needs_review
</span></span><span class="line" line="7"><span>FROM downtime_events
</span></span><span class="line" line="8"><span>WHERE status = 'Open' OR reason IS NULL
</span></span><span class="line" line="9"><span>ORDER BY CASE WHEN status = 'Open' THEN 0 ELSE 1 END, start_time DESC;
</span></span></code></pre><p>This formats the timestamps into something readable, like <code>07 Jul 2026, 02:45 PM</code>, sorts open stoppages to the top, and falls back to a dash or "Not logged" instead of a blank cell wherever a value is missing.</p><ol start="5"><li>Add a split node after it, to break the result set into individual rows so each one can be processed on its own.</li><li>Add a change node that computes how long each stoppage has been open, using JSONata. Set the rule to <code>payload.elapsed_seconds</code>, type JSONata:</li></ol><pre class="language-text" code="$floor($millis() / 1000 - $number(payload.start_epoch))
" language="text"><code __ignore-map="">$floor($millis() / 1000 - $number(payload.start_epoch))
</code></pre><ol start="7"><li>Add a humanizer node after that, set to read from elapsed_seconds. This turns the raw number into something readable, like "12 minutes" instead of "720".</li><li>Add a function node named <strong>Colorize Duration</strong>. This wraps the humanized value in a colored badge, so a stoppage that's dragged on stands out without anyone having to read the number:</li></ol><blockquote><p>Tip: You don't have to write this JavaScript yourself. Use <a href="https://flowfuse.com/docs/user/expert/node-red-embedded-ai/#function-code-generation">FlowFuse Expert</a> and describe the logic in plain English. It will generate the code for you.</p></blockquote><pre class="language-javascript shiki shiki-themes material-theme-lighter material-theme material-theme-palenight" code="const seconds = msg.payload.elapsed_seconds || 0;
let color = "green";

if (seconds &gt;= 1800) {
    color = "red";
} else if (seconds &gt;= 300) {
    color = "orange";
}

msg.payload.duration_html = `&lt;span style="background:${color}; color:white; padding:2px 8px; border-radius:4px;"&gt;${msg.payload.humanized}&lt;/span&gt;`;

return msg;
" language="javascript" meta="" style=""><code __ignore-map=""><span class="line" line="1"><span class="spNyl">const</span><span class="sTEyZ"> seconds </span><span class="sMK4o">=</span><span class="sTEyZ"> msg</span><span class="sMK4o">.</span><span class="sTEyZ">payload</span><span class="sMK4o">.</span><span class="sTEyZ">elapsed_seconds </span><span class="sMK4o">||</span><span class="sbssI"> 0</span><span class="sMK4o">;
</span></span><span class="line" line="2"><span class="spNyl">let</span><span class="sTEyZ"> color </span><span class="sMK4o">=</span><span class="sMK4o"> "</span><span class="sfazB">green</span><span class="sMK4o">"</span><span class="sMK4o">;
</span></span><span class="line" line="3"><span empty-line-placeholder>
</span></span><span class="line" line="4"><span class="s7zQu">if</span><span class="sTEyZ"> (seconds </span><span class="sMK4o">&gt;=</span><span class="sbssI"> 1800</span><span class="sTEyZ">) </span><span class="sMK4o">{
</span></span><span class="line" line="5"><span class="sTEyZ">    color</span><span class="sMK4o"> =</span><span class="sMK4o"> "</span><span class="sfazB">red</span><span class="sMK4o">"</span><span class="sMK4o">;
</span></span><span class="line" line="6"><span class="sMK4o">}</span><span class="s7zQu"> else</span><span class="s7zQu"> if</span><span class="sTEyZ"> (seconds </span><span class="sMK4o">&gt;=</span><span class="sbssI"> 300</span><span class="sTEyZ">) </span><span class="sMK4o">{
</span></span><span class="line" line="7"><span class="sTEyZ">    color</span><span class="sMK4o"> =</span><span class="sMK4o"> "</span><span class="sfazB">orange</span><span class="sMK4o">"</span><span class="sMK4o">;
</span></span><span class="line" line="8"><span class="sMK4o">}
</span></span><span class="line" line="9"><span empty-line-placeholder>
</span></span><span class="line" line="10"><span class="sTEyZ">msg</span><span class="sMK4o">.</span><span class="sTEyZ">payload</span><span class="sMK4o">.</span><span class="sTEyZ">duration_html </span><span class="sMK4o">=</span><span class="sMK4o"> `</span><span class="sfazB">&lt;span style="background:</span><span class="sMK4o">${</span><span class="sTEyZ">color</span><span class="sMK4o">}</span><span class="sfazB">; color:white; padding:2px 8px; border-radius:4px;"&gt;</span><span class="sMK4o">${</span><span class="sTEyZ">msg</span><span class="sMK4o">.</span><span class="sTEyZ">payload</span><span class="sMK4o">.</span><span class="sTEyZ">humanized</span><span class="sMK4o">}</span><span class="sfazB">&lt;/span&gt;</span><span class="sMK4o">`</span><span class="sMK4o">;
</span></span><span class="line" line="11"><span empty-line-placeholder>
</span></span><span class="line" line="12"><span class="s7zQu">return</span><span class="sTEyZ"> msg</span><span class="sMK4o">;
</span></span></code></pre><p>Under five minutes shows green, under thirty shows orange, anything longer shows red. Adjust the thresholds to whatever counts as concerning on your floor.</p><ol start="9"><li>Add a join node set to rebuild the rows back into a single array, so the table gets the full list at once instead of one row at a time.</li><li>Add a ui-table node, assign it to the Stoppages group you created earlier, and wire it to the join node. Set up the following columns:</li></ol><ul><li><strong>Machine</strong>, key <code>machine_id</code>, type Text</li><li><strong>Start Time</strong>, key <code>start_time_display</code>, type Text</li><li><strong>End Time</strong>, key <code>end_time_display</code>, type Text</li><li><strong>Open For</strong>, key <code>duration_html</code>, type HTML</li><li>a button column labeled something like "Close &amp; Log Reason"</li></ul><p>The HTML type on Open For is what renders the colored badge instead of showing raw tags. The query also computes <code>reason_display</code> and <code>needs_review</code>, these aren't shown as columns here, but stay available in the row data if you want to add them to the table later.</p><p><img alt="Screenshot: ui-table node column configuration panel" src="https://flowfuse.com/blog/2026/07/images/ui-table-stoppages.png"/><em>Column setup for the Stoppages table, including the HTML type on Open For.</em></p><ol start="11"><li>Wire the table's button output to a ui-template node. Leave its group field empty and set its page to the same "Downtime Events" page, since this needs to render as a popup dialog over the whole page, not sit inside the table's group. This is where the reason form lives, a small custom dialog with a dropdown for reason and a text field for optional comments, built with a bit of Vue, since there's no default form node for this exact popup-on-row-click pattern:</li></ol><blockquote><p>Tip: You don't have to write the Vue code yourself. Use <a href="https://flowfuse.com/docs/user/expert/node-red-embedded-ai/#css-and-html-generation-for-flowfuse-dashboard">FlowFuse Expert</a> and describe the interface in plain English. It will generate the ui-template code for you.</p></blockquote><pre class="language-html shiki shiki-themes material-theme-lighter material-theme material-theme-palenight" code="&lt;template&gt;
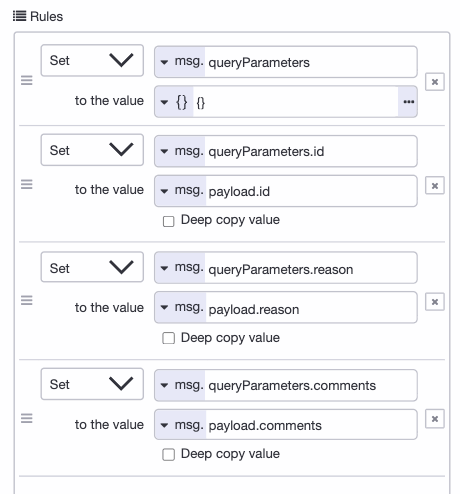
  &lt;v-dialog v-model="show" max-width="420"&gt;
    &lt;v-card prepend-icon="mdi-alert-circle-outline" title="Record Downtime Reason"&gt;
      &lt;v-card-subtitle&gt;{{ machine_id }}, Stoppage #{{ id_value }}&lt;/v-card-subtitle&gt;
      &lt;v-card-text&gt;
        &lt;v-select v-model="reason" :items="reasonOptions" label="Reason*" required&gt;&lt;/v-select&gt;
        &lt;v-textarea v-model="comments" label="Comments (optional)" rows="2"&gt;&lt;/v-textarea&gt;
      &lt;/v-card-text&gt;
      &lt;v-divider&gt;&lt;/v-divider&gt;
      &lt;v-card-actions&gt;
        &lt;v-spacer&gt;&lt;/v-spacer&gt;
        &lt;v-btn text="Close" variant="plain" @click="handleClose"&gt;&lt;/v-btn&gt;
        &lt;v-btn color="primary" text="Save" variant="tonal" :loading="submitting" :disabled="!reason || !id_value || submitting" @click="confirmSubmit"&gt;&lt;/v-btn&gt;
      &lt;/v-card-actions&gt;
    &lt;/v-card&gt;
  &lt;/v-dialog&gt;
&lt;/template&gt;

&lt;script&gt;
export default {
  data() {
    return {
      show: false,
      id_value: null,
      machine_id: '',
      reason: null,
      comments: '',
      submitting: false,
      reasonOptions: [
        'Mechanical Failure',
        'Electrical Fault',
        'Material Shortage',
        'Changeover',
        'Operator Break',
        'Quality Issue',
        'Other'
      ]
    }
  },
  mounted() {
    this.socketHandler = (msg) =&gt; {
      if (msg?.payload?.id) {
        this.id_value = msg.payload.id;
        this.machine_id = msg.payload.machine_id;
        this.reason = null;
        this.comments = '';
        this.submitting = false;
        this.show = true;
      }
    };
    this.$socket.on('msg-input:' + this.id, this.socketHandler);
  },
  beforeUnmount() {
    this.$socket.off('msg-input:' + this.id, this.socketHandler);
  },
  methods: {
    handleClose() {
      if (this.reason || this.comments) {
        if (!confirm('Discard the reason you entered?')) return;
      }
      this.show = false;
    },
    confirmSubmit() {
      if (!confirm(`Close this stoppage on ${this.machine_id} with reason "${this.reason}"?`)) return;
      this.submitReason();
    },
    submitReason() {
      if (!this.id_value || this.submitting) return;
      this.submitting = true;
      this.send({
        payload: {
          id: this.id_value,
          reason: this.reason,
          comments: this.comments
        }
      });
      this.show = false;
    }
  }
}
&lt;/script&gt;
" language="html" meta="" style=""><code __ignore-map=""><span class="line" line="1"><span class="sMK4o">&lt;</span><span class="swJcz">template</span><span class="sMK4o">&gt;
</span></span><span class="line" line="2"><span class="sMK4o">  &lt;</span><span class="swJcz">v-dialog</span><span class="spNyl"> v-model</span><span class="sMK4o">=</span><span class="sMK4o">"</span><span class="sfazB">show</span><span class="sMK4o">"</span><span class="spNyl"> max-width</span><span class="sMK4o">=</span><span class="sMK4o">"</span><span class="sfazB">420</span><span class="sMK4o">"</span><span class="sMK4o">&gt;
</span></span><span class="line" line="3"><span class="sMK4o">    &lt;</span><span class="swJcz">v-card</span><span class="spNyl"> prepend-icon</span><span class="sMK4o">=</span><span class="sMK4o">"</span><span class="sfazB">mdi-alert-circle-outline</span><span class="sMK4o">"</span><span class="spNyl"> title</span><span class="sMK4o">=</span><span class="sMK4o">"</span><span class="sfazB">Record Downtime Reason</span><span class="sMK4o">"</span><span class="sMK4o">&gt;
</span></span><span class="line" line="4"><span class="sMK4o">      &lt;</span><span class="swJcz">v-card-subtitle</span><span class="sMK4o">&gt;</span><span class="sTEyZ">{{ machine_id }}, Stoppage #{{ id_value }}</span><span class="sMK4o">&lt;/</span><span class="swJcz">v-card-subtitle</span><span class="sMK4o">&gt;
</span></span><span class="line" line="5"><span class="sMK4o">      &lt;</span><span class="swJcz">v-card-text</span><span class="sMK4o">&gt;
</span></span><span class="line" line="6"><span class="sMK4o">        &lt;</span><span class="swJcz">v-select</span><span class="spNyl"> v-model</span><span class="sMK4o">=</span><span class="sMK4o">"</span><span class="sfazB">reason</span><span class="sMK4o">"</span><span class="spNyl"> :items</span><span class="sMK4o">=</span><span class="sMK4o">"</span><span class="sfazB">reasonOptions</span><span class="sMK4o">"</span><span class="spNyl"> label</span><span class="sMK4o">=</span><span class="sMK4o">"</span><span class="sfazB">Reason*</span><span class="sMK4o">"</span><span class="spNyl"> required</span><span class="sMK4o">&gt;&lt;/</span><span class="swJcz">v-select</span><span class="sMK4o">&gt;
</span></span><span class="line" line="7"><span class="sMK4o">        &lt;</span><span class="swJcz">v-textarea</span><span class="spNyl"> v-model</span><span class="sMK4o">=</span><span class="sMK4o">"</span><span class="sfazB">comments</span><span class="sMK4o">"</span><span class="spNyl"> label</span><span class="sMK4o">=</span><span class="sMK4o">"</span><span class="sfazB">Comments (optional)</span><span class="sMK4o">"</span><span class="spNyl"> rows</span><span class="sMK4o">=</span><span class="sMK4o">"</span><span class="sfazB">2</span><span class="sMK4o">"</span><span class="sMK4o">&gt;&lt;/</span><span class="swJcz">v-textarea</span><span class="sMK4o">&gt;
</span></span><span class="line" line="8"><span class="sMK4o">      &lt;/</span><span class="swJcz">v-card-text</span><span class="sMK4o">&gt;
</span></span><span class="line" line="9"><span class="sMK4o">      &lt;</span><span class="swJcz">v-divider</span><span class="sMK4o">&gt;&lt;/</span><span class="swJcz">v-divider</span><span class="sMK4o">&gt;
</span></span><span class="line" line="10"><span class="sMK4o">      &lt;</span><span class="swJcz">v-card-actions</span><span class="sMK4o">&gt;
</span></span><span class="line" line="11"><span class="sMK4o">        &lt;</span><span class="swJcz">v-spacer</span><span class="sMK4o">&gt;&lt;/</span><span class="swJcz">v-spacer</span><span class="sMK4o">&gt;
</span></span><span class="line" line="12"><span class="sMK4o">        &lt;</span><span class="swJcz">v-btn</span><span class="spNyl"> text</span><span class="sMK4o">=</span><span class="sMK4o">"</span><span class="sfazB">Close</span><span class="sMK4o">"</span><span class="spNyl"> variant</span><span class="sMK4o">=</span><span class="sMK4o">"</span><span class="sfazB">plain</span><span class="sMK4o">"</span><span class="spNyl"> @click</span><span class="sMK4o">=</span><span class="sMK4o">"</span><span class="sfazB">handleClose</span><span class="sMK4o">"</span><span class="sMK4o">&gt;&lt;/</span><span class="swJcz">v-btn</span><span class="sMK4o">&gt;
</span></span><span class="line" line="13"><span class="sMK4o">        &lt;</span><span class="swJcz">v-btn</span><span class="spNyl"> color</span><span class="sMK4o">=</span><span class="sMK4o">"</span><span class="sfazB">primary</span><span class="sMK4o">"</span><span class="spNyl"> text</span><span class="sMK4o">=</span><span class="sMK4o">"</span><span class="sfazB">Save</span><span class="sMK4o">"</span><span class="spNyl"> variant</span><span class="sMK4o">=</span><span class="sMK4o">"</span><span class="sfazB">tonal</span><span class="sMK4o">"</span><span class="spNyl"> :loading</span><span class="sMK4o">=</span><span class="sMK4o">"</span><span class="sfazB">submitting</span><span class="sMK4o">"</span><span class="spNyl"> :disabled</span><span class="sMK4o">=</span><span class="sMK4o">"</span><span class="sfazB">!reason || !id_value || submitting</span><span class="sMK4o">"</span><span class="spNyl"> @click</span><span class="sMK4o">=</span><span class="sMK4o">"</span><span class="sfazB">confirmSubmit</span><span class="sMK4o">"</span><span class="sMK4o">&gt;&lt;/</span><span class="swJcz">v-btn</span><span class="sMK4o">&gt;
</span></span><span class="line" line="14"><span class="sMK4o">      &lt;/</span><span class="swJcz">v-card-actions</span><span class="sMK4o">&gt;
</span></span><span class="line" line="15"><span class="sMK4o">    &lt;/</span><span class="swJcz">v-card</span><span class="sMK4o">&gt;
</span></span><span class="line" line="16"><span class="sMK4o">  &lt;/</span><span class="swJcz">v-dialog</span><span class="sMK4o">&gt;
</span></span><span class="line" line="17"><span class="sMK4o">&lt;/</span><span class="swJcz">template</span><span class="sMK4o">&gt;
</span></span><span class="line" line="18"><span empty-line-placeholder>
</span></span><span class="line" line="19"><span class="sMK4o">&lt;</span><span class="swJcz">script</span><span class="sMK4o">&gt;
</span></span><span class="line" line="20"><span class="s7zQu">export</span><span class="s7zQu"> default</span><span class="sMK4o"> {
</span></span><span class="line" line="21"><span class="swJcz">  data</span><span class="sMK4o">()</span><span class="sMK4o"> {
</span></span><span class="line" line="22"><span class="s7zQu">    return</span><span class="sMK4o"> {
</span></span><span class="line" line="23"><span class="swJcz">      show</span><span class="sMK4o">:</span><span class="sfNiH"> false</span><span class="sMK4o">,
</span></span><span class="line" line="24"><span class="swJcz">      id_value</span><span class="sMK4o">:</span><span class="sMK4o"> null,
</span></span><span class="line" line="25"><span class="swJcz">      machine_id</span><span class="sMK4o">:</span><span class="sMK4o"> ''</span><span class="sMK4o">,
</span></span><span class="line" line="26"><span class="swJcz">      reason</span><span class="sMK4o">:</span><span class="sMK4o"> null,
</span></span><span class="line" line="27"><span class="swJcz">      comments</span><span class="sMK4o">:</span><span class="sMK4o"> ''</span><span class="sMK4o">,
</span></span><span class="line" line="28"><span class="swJcz">      submitting</span><span class="sMK4o">:</span><span class="sfNiH"> false</span><span class="sMK4o">,
</span></span><span class="line" line="29"><span class="swJcz">      reasonOptions</span><span class="sMK4o">:</span><span class="swJcz"> [
</span></span><span class="line" line="30"><span class="sMK4o">        '</span><span class="sfazB">Mechanical Failure</span><span class="sMK4o">'</span><span class="sMK4o">,
</span></span><span class="line" line="31"><span class="sMK4o">        '</span><span class="sfazB">Electrical Fault</span><span class="sMK4o">'</span><span class="sMK4o">,
</span></span><span class="line" line="32"><span class="sMK4o">        '</span><span class="sfazB">Material Shortage</span><span class="sMK4o">'</span><span class="sMK4o">,
</span></span><span class="line" line="33"><span class="sMK4o">        '</span><span class="sfazB">Changeover</span><span class="sMK4o">'</span><span class="sMK4o">,
</span></span><span class="line" line="34"><span class="sMK4o">        '</span><span class="sfazB">Operator Break</span><span class="sMK4o">'</span><span class="sMK4o">,
</span></span><span class="line" line="35"><span class="sMK4o">        '</span><span class="sfazB">Quality Issue</span><span class="sMK4o">'</span><span class="sMK4o">,
</span></span><span class="line" line="36"><span class="sMK4o">        '</span><span class="sfazB">Other</span><span class="sMK4o">'
</span></span><span class="line" line="37"><span class="swJcz">      ]
</span></span><span class="line" line="38"><span class="sMK4o">    }
</span></span><span class="line" line="39"><span class="sMK4o">  },
</span></span><span class="line" line="40"><span class="swJcz">  mounted</span><span class="sMK4o">()</span><span class="sMK4o"> {
</span></span><span class="line" line="41"><span class="sMK4o">    this.</span><span class="s2Zo4">socketHandler</span><span class="sMK4o"> =</span><span class="sMK4o"> (</span><span class="sHdIc">msg</span><span class="sMK4o">)</span><span class="spNyl"> =&gt;</span><span class="sMK4o"> {
</span></span><span class="line" line="42"><span class="s7zQu">      if</span><span class="swJcz"> (</span><span class="sTEyZ">msg</span><span class="sMK4o">?.</span><span class="sTEyZ">payload</span><span class="sMK4o">?.</span><span class="sTEyZ">id</span><span class="swJcz">) </span><span class="sMK4o">{
</span></span><span class="line" line="43"><span class="sMK4o">        this.</span><span class="sTEyZ">id_value</span><span class="sMK4o"> =</span><span class="sTEyZ"> msg</span><span class="sMK4o">.</span><span class="sTEyZ">payload</span><span class="sMK4o">.</span><span class="sTEyZ">id</span><span class="sMK4o">;
</span></span><span class="line" line="44"><span class="sMK4o">        this.</span><span class="sTEyZ">machine_id</span><span class="sMK4o"> =</span><span class="sTEyZ"> msg</span><span class="sMK4o">.</span><span class="sTEyZ">payload</span><span class="sMK4o">.</span><span class="sTEyZ">machine_id</span><span class="sMK4o">;
</span></span><span class="line" line="45"><span class="sMK4o">        this.</span><span class="sTEyZ">reason</span><span class="sMK4o"> =</span><span class="sMK4o"> null;
</span></span><span class="line" line="46"><span class="sMK4o">        this.</span><span class="sTEyZ">comments</span><span class="sMK4o"> =</span><span class="sMK4o"> ''</span><span class="sMK4o">;
</span></span><span class="line" line="47"><span class="sMK4o">        this.</span><span class="sTEyZ">submitting</span><span class="sMK4o"> =</span><span class="sfNiH"> false</span><span class="sMK4o">;
</span></span><span class="line" line="48"><span class="sMK4o">        this.</span><span class="sTEyZ">show</span><span class="sMK4o"> =</span><span class="sfNiH"> true</span><span class="sMK4o">;
</span></span><span class="line" line="49"><span class="sMK4o">      }
</span></span><span class="line" line="50"><span class="sMK4o">    };
</span></span><span class="line" line="51"><span class="sMK4o">    this.</span><span class="sTEyZ">$socket</span><span class="sMK4o">.</span><span class="s2Zo4">on</span><span class="swJcz">(</span><span class="sMK4o">'</span><span class="sfazB">msg-input:</span><span class="sMK4o">'</span><span class="sMK4o"> +</span><span class="sMK4o"> this.</span><span class="sTEyZ">id</span><span class="sMK4o">,</span><span class="sMK4o"> this.</span><span class="sTEyZ">socketHandler</span><span class="swJcz">)</span><span class="sMK4o">;
</span></span><span class="line" line="52"><span class="sMK4o">  },
</span></span><span class="line" line="53"><span class="swJcz">  beforeUnmount</span><span class="sMK4o">()</span><span class="sMK4o"> {
</span></span><span class="line" line="54"><span class="sMK4o">    this.</span><span class="sTEyZ">$socket</span><span class="sMK4o">.</span><span class="s2Zo4">off</span><span class="swJcz">(</span><span class="sMK4o">'</span><span class="sfazB">msg-input:</span><span class="sMK4o">'</span><span class="sMK4o"> +</span><span class="sMK4o"> this.</span><span class="sTEyZ">id</span><span class="sMK4o">,</span><span class="sMK4o"> this.</span><span class="sTEyZ">socketHandler</span><span class="swJcz">)</span><span class="sMK4o">;
</span></span><span class="line" line="55"><span class="sMK4o">  },
</span></span><span class="line" line="56"><span class="swJcz">  methods</span><span class="sMK4o">:</span><span class="sMK4o"> {
</span></span><span class="line" line="57"><span class="swJcz">    handleClose</span><span class="sMK4o">()</span><span class="sMK4o"> {
</span></span><span class="line" line="58"><span class="s7zQu">      if</span><span class="swJcz"> (</span><span class="sMK4o">this.</span><span class="sTEyZ">reason</span><span class="sMK4o"> ||</span><span class="sMK4o"> this.</span><span class="sTEyZ">comments</span><span class="swJcz">) </span><span class="sMK4o">{
</span></span><span class="line" line="59"><span class="s7zQu">        if</span><span class="swJcz"> (</span><span class="sMK4o">!</span><span class="s2Zo4">confirm</span><span class="swJcz">(</span><span class="sMK4o">'</span><span class="sfazB">Discard the reason you entered?</span><span class="sMK4o">'</span><span class="swJcz">)) </span><span class="s7zQu">return</span><span class="sMK4o">;
</span></span><span class="line" line="60"><span class="sMK4o">      }
</span></span><span class="line" line="61"><span class="sMK4o">      this.</span><span class="sTEyZ">show</span><span class="sMK4o"> =</span><span class="sfNiH"> false</span><span class="sMK4o">;
</span></span><span class="line" line="62"><span class="sMK4o">    },
</span></span><span class="line" line="63"><span class="swJcz">    confirmSubmit</span><span class="sMK4o">()</span><span class="sMK4o"> {
</span></span><span class="line" line="64"><span class="s7zQu">      if</span><span class="swJcz"> (</span><span class="sMK4o">!</span><span class="s2Zo4">confirm</span><span class="swJcz">(</span><span class="sMK4o">`</span><span class="sfazB">Close this stoppage on </span><span class="sMK4o">${</span><span class="sMK4o">this.</span><span class="sTEyZ">machine_id</span><span class="sMK4o">}</span><span class="sfazB"> with reason "</span><span class="sMK4o">${</span><span class="sMK4o">this.</span><span class="sTEyZ">reason</span><span class="sMK4o">}</span><span class="sfazB">"?</span><span class="sMK4o">`</span><span class="swJcz">)) </span><span class="s7zQu">return</span><span class="sMK4o">;
</span></span><span class="line" line="65"><span class="sMK4o">      this.</span><span class="s2Zo4">submitReason</span><span class="swJcz">()</span><span class="sMK4o">;
</span></span><span class="line" line="66"><span class="sMK4o">    },
</span></span><span class="line" line="67"><span class="swJcz">    submitReason</span><span class="sMK4o">()</span><span class="sMK4o"> {
</span></span><span class="line" line="68"><span class="s7zQu">      if</span><span class="swJcz"> (</span><span class="sMK4o">!this.</span><span class="sTEyZ">id_value</span><span class="sMK4o"> ||</span><span class="sMK4o"> this.</span><span class="sTEyZ">submitting</span><span class="swJcz">) </span><span class="s7zQu">return</span><span class="sMK4o">;
</span></span><span class="line" line="69"><span class="sMK4o">      this.</span><span class="sTEyZ">submitting</span><span class="sMK4o"> =</span><span class="sfNiH"> true</span><span class="sMK4o">;
</span></span><span class="line" line="70"><span class="sMK4o">      this.</span><span class="s2Zo4">send</span><span class="swJcz">(</span><span class="sMK4o">{
</span></span><span class="line" line="71"><span class="swJcz">        payload</span><span class="sMK4o">:</span><span class="sMK4o"> {
</span></span><span class="line" line="72"><span class="swJcz">          id</span><span class="sMK4o">:</span><span class="sMK4o"> this.</span><span class="sTEyZ">id_value</span><span class="sMK4o">,
</span></span><span class="line" line="73"><span class="swJcz">          reason</span><span class="sMK4o">:</span><span class="sMK4o"> this.</span><span class="sTEyZ">reason</span><span class="sMK4o">,
</span></span><span class="line" line="74"><span class="swJcz">          comments</span><span class="sMK4o">:</span><span class="sMK4o"> this.</span><span class="sTEyZ">comments
</span></span><span class="line" line="75"><span class="sMK4o">        }
</span></span><span class="line" line="76"><span class="sMK4o">      }</span><span class="swJcz">)</span><span class="sMK4o">;
</span></span><span class="line" line="77"><span class="sMK4o">      this.</span><span class="sTEyZ">show</span><span class="sMK4o"> =</span><span class="sfNiH"> false</span><span class="sMK4o">;
</span></span><span class="line" line="78"><span class="sMK4o">    }
</span></span><span class="line" line="79"><span class="sMK4o">  }
</span></span><span class="line" line="80"><span class="sMK4o">}
</span></span><span class="line" line="81"><span class="sMK4o">&lt;/</span><span class="swJcz">script</span><span class="sMK4o">&gt;
</span></span></code></pre><p>This includes a confirmation step before closing or discarding, and disables Save while a submission is in progress, so an operator can't lose data or submit the same close twice.</p><ol start="12"><li>Wire the template's output to a change node that maps the submitted fields into query parameters. Set four rules: first set <code>queryParameters</code> to <code>{}</code> (JSON), then set <code>queryParameters.id</code> to <code>payload.id</code> (msg), <code>queryParameters.reason</code> to <code>payload.reason</code> (msg), and <code>queryParameters.comments</code> to <code>payload.comments</code> (msg).</li></ol><p><img alt="Screenshot: change node rules mapping the submitted id, reason, and comments into queryParameters" src="https://flowfuse.com/blog/2026/07/images/prep-params-2.png"/><em>Resetting queryParameters first, then mapping each submitted field from the reason form.</em></p><ol start="13"><li>Add a final Query node to close the record and save the reason:</li></ol><pre class="language-sql shiki shiki-themes material-theme-lighter material-theme material-theme-palenight" code="UPDATE downtime_events
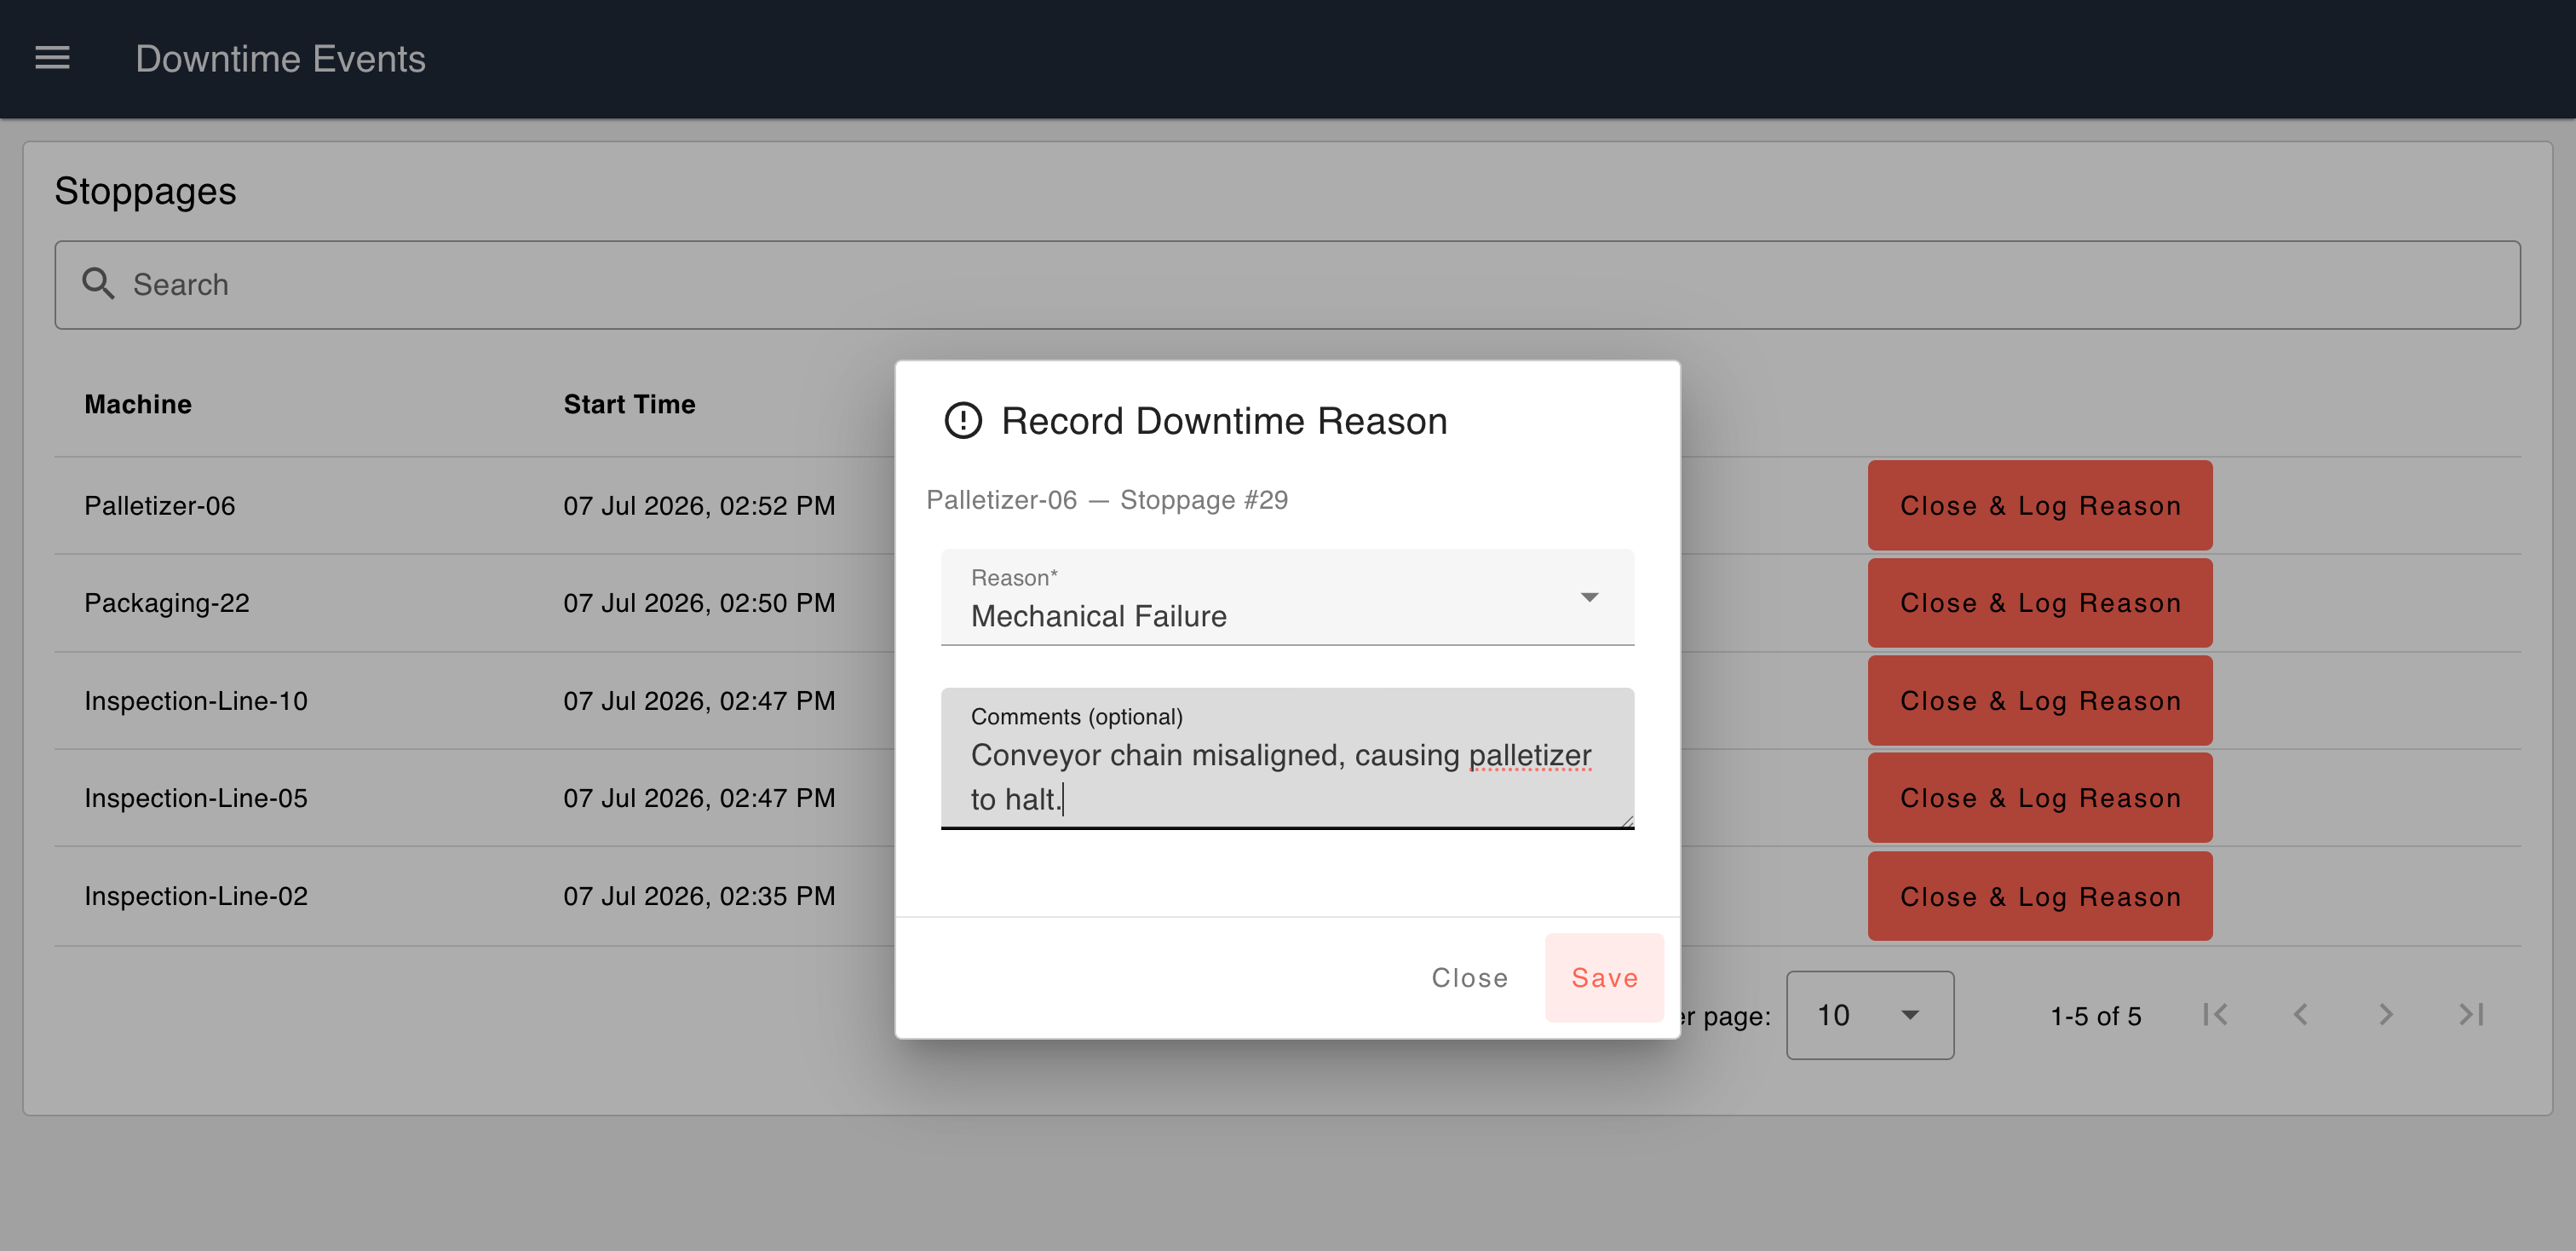
SET reason = $reason,
    comments = $comments,
    status = 'Closed',
    end_time = NOW(),
    duration_seconds = EXTRACT(EPOCH FROM (NOW() - start_time))
WHERE id = $id;
" language="sql" meta="" style=""><code __ignore-map=""><span class="line" line="1"><span>UPDATE downtime_events
</span></span><span class="line" line="2"><span>SET reason = $reason,
</span></span><span class="line" line="3"><span>    comments = $comments,
</span></span><span class="line" line="4"><span>    status = 'Closed',
</span></span><span class="line" line="5"><span>    end_time = NOW(),
</span></span><span class="line" line="6"><span>    duration_seconds = EXTRACT(EPOCH FROM (NOW() - start_time))
</span></span><span class="line" line="7"><span>WHERE id = $id;
</span></span></code></pre><ol start="14"><li>Add a link out node after this last query too, wired to the same link in you used in step 2. This way closing a record manually refreshes the table just like an automatic close would.</li></ol><p>Deploy, and open your dashboard. You should see the table populate with any open stoppages from the last section. Click "Close &amp; Log Reason" on one, pick a reason, confirm, and it should disappear from the unresolved list right away.</p><p><img alt="Screenshot: dashboard table with the reason form dialog open" src="https://flowfuse.com/blog/2026/07/images/ui-table-with-popup.png"/><em>The reason form popping up after clicking Close &amp; Log Reason on a stoppage.</em></p><p>Next, the KPI cards that summarize all of this into a few numbers at a glance.</p><h2 id="adding-the-kpi-cards">Adding the KPI Cards</h2><p>With the table and reason form working, the last piece is a quick summary an operator or supervisor can glance at without reading every row. Add three more ui-groups on the same "Downtime Events" page, one for each card, so they can sit side by side across the top of the dashboard.</p><ol><li>In the same part of the flow as your table's link in, add a Query node that calculates four numbers at once:</li></ol><pre class="language-sql shiki shiki-themes material-theme-lighter material-theme material-theme-palenight" code="SELECT
  (SELECT COUNT(*) FROM downtime_events WHERE status = 'Open')::int AS open_count,
  (SELECT COUNT(*) FROM downtime_events WHERE status = 'Closed' AND reason IS NULL)::int AS missing_reason_count,
  (SELECT COALESCE(ROUND(AVG(duration_seconds) / 60.0, 1), 0)::float8
     FROM downtime_events
     WHERE status = 'Closed' AND start_time::date = CURRENT_DATE) AS avg_downtime,
  (SELECT COALESCE(
     (SELECT reason
      FROM downtime_events
      WHERE status = 'Closed' AND start_time::date = CURRENT_DATE AND reason IS NOT NULL
      GROUP BY reason
      ORDER BY COUNT(*) DESC
      LIMIT 1),
     'None yet'
  )) AS top_reason;
" language="sql" meta="" style=""><code __ignore-map=""><span class="line" line="1"><span>SELECT
</span></span><span class="line" line="2"><span>  (SELECT COUNT(*) FROM downtime_events WHERE status = 'Open')::int AS open_count,
</span></span><span class="line" line="3"><span>  (SELECT COUNT(*) FROM downtime_events WHERE status = 'Closed' AND reason IS NULL)::int AS missing_reason_count,
</span></span><span class="line" line="4"><span>  (SELECT COALESCE(ROUND(AVG(duration_seconds) / 60.0, 1), 0)::float8
</span></span><span class="line" line="5"><span>     FROM downtime_events
</span></span><span class="line" line="6"><span>     WHERE status = 'Closed' AND start_time::date = CURRENT_DATE) AS avg_downtime,
</span></span><span class="line" line="7"><span>  (SELECT COALESCE(
</span></span><span class="line" line="8"><span>     (SELECT reason
</span></span><span class="line" line="9"><span>      FROM downtime_events
</span></span><span class="line" line="10"><span>      WHERE status = 'Closed' AND start_time::date = CURRENT_DATE AND reason IS NOT NULL
</span></span><span class="line" line="11"><span>      GROUP BY reason
</span></span><span class="line" line="12"><span>      ORDER BY COUNT(*) DESC
</span></span><span class="line" line="13"><span>      LIMIT 1),
</span></span><span class="line" line="14"><span>     'None yet'
</span></span><span class="line" line="15"><span>  )) AS top_reason;
</span></span></code></pre><p>These four numbers cover different things on purpose, machines down right now, stoppages already closed but still missing a reason, average downtime in minutes today, and today's most common reason.</p><ol start="2"><li>Wire this Query node to the same link in you already have from the event flow, so the cards refresh the moment a record opens or closes, same as the table.</li><li>Add four ui-text nodes, each assigned to its own group from the groups you just created:</li></ol><ul><li><strong>Machines Down</strong> → <code>payload[0].open_count</code></li><li><strong>Missing Reason</strong> → <code>payload[0].missing_reason_count</code></li><li><strong>Avg (min)</strong> → <code>payload[0].avg_downtime</code></li><li><strong>Top Reason</strong> → <code>payload[0].top_reason</code></li></ul><ol start="4"><li>Set each group's width so the four sit side by side across the dashboard page.</li></ol><p>Deploy and check your dashboard. As you open, close, and log reasons on stoppages, all four numbers should update right along with the table.</p><p><img alt="Screenshot: completed dashboard with KPI cards and stoppages table" src="https://flowfuse.com/blog/2026/07/images/complete-dashbaord-downtime-logger.png"/><em>The finished dashboard: KPI cards on top, unresolved stoppages below.</em></p><p>That completes the application. You now have a working pipeline: a stoppage gets recorded the moment it happens, stays visible until someone accounts for it, and rolls up into numbers that mean something to a supervisor walking the floor. From here, this same table is the foundation for OEE calculations, shift reports, or feeding a maintenance dashboard, the hard part, capturing clean downtime data, is already done. For where a downtime view sits alongside production, OEE, and quality screens, see our <a href="https://flowfuse.com/blog/2026/08/manufacturing-dashboard-examples/">manufacturing dashboard examples</a>.</p><style>html .light .shiki span {color: var(--shiki-light);background: var(--shiki-light-bg);font-style: var(--shiki-light-font-style);font-weight: var(--shiki-light-font-weight);text-decoration: var(--shiki-light-text-decoration);}html.light .shiki span {color: var(--shiki-light);background: var(--shiki-light-bg);font-style: var(--shiki-light-font-style);font-weight: var(--shiki-light-font-weight);text-decoration: var(--shiki-light-text-decoration);}html .default .shiki span {color: var(--shiki-default);background: var(--shiki-default-bg);font-style: var(--shiki-default-font-style);font-weight: var(--shiki-default-font-weight);text-decoration: var(--shiki-default-text-decoration);}html .shiki span {color: var(--shiki-default);background: var(--shiki-default-bg);font-style: var(--shiki-default-font-style);font-weight: var(--shiki-default-font-weight);text-decoration: var(--shiki-default-text-decoration);}html .dark .shiki span {color: var(--shiki-dark);background: var(--shiki-dark-bg);font-style: var(--shiki-dark-font-style);font-weight: var(--shiki-dark-font-weight);text-decoration: var(--shiki-dark-text-decoration);}html.dark .shiki span {color: var(--shiki-dark);background: var(--shiki-dark-bg);font-style: var(--shiki-dark-font-style);font-weight: var(--shiki-dark-font-weight);text-decoration: var(--shiki-dark-text-decoration);}html pre.shiki code .sMK4o, html code.shiki .sMK4o{--shiki-light:#39ADB5;--shiki-default:#89DDFF;--shiki-dark:#89DDFF}html pre.shiki code .spNyl, html code.shiki .spNyl{--shiki-light:#9C3EDA;--shiki-default:#C792EA;--shiki-dark:#C792EA}html pre.shiki code .sfazB, html code.shiki .sfazB{--shiki-light:#91B859;--shiki-default:#C3E88D;--shiki-dark:#C3E88D}html pre.shiki code .sBMFI, html code.shiki .sBMFI{--shiki-light:#E2931D;--shiki-default:#FFCB6B;--shiki-dark:#FFCB6B}html pre.shiki code .sbssI, html code.shiki .sbssI{--shiki-light:#F76D47;--shiki-default:#F78C6C;--shiki-dark:#F78C6C}html pre.shiki code .sTEyZ, html code.shiki .sTEyZ{--shiki-light:#90A4AE;--shiki-default:#EEFFFF;--shiki-dark:#BABED8}html pre.shiki code .s7zQu, html code.shiki .s7zQu{--shiki-light:#39ADB5;--shiki-light-font-style:italic;--shiki-default:#89DDFF;--shiki-default-font-style:italic;--shiki-dark:#89DDFF;--shiki-dark-font-style:italic}html pre.shiki code .swJcz, html code.shiki .swJcz{--shiki-light:#E53935;--shiki-default:#F07178;--shiki-dark:#F07178}html pre.shiki code .sfNiH, html code.shiki .sfNiH{--shiki-light:#FF5370;--shiki-default:#FF9CAC;--shiki-dark:#FF9CAC}html pre.shiki code .s2Zo4, html code.shiki .s2Zo4{--shiki-light:#6182B8;--shiki-default:#82AAFF;--shiki-dark:#82AAFF}html pre.shiki code .sHdIc, html code.shiki .sHdIc{--shiki-light:#90A4AE;--shiki-light-font-style:italic;--shiki-default:#EEFFFF;--shiki-default-font-style:italic;--shiki-dark:#BABED8;--shiki-dark-font-style:italic}</style><p><strong>Want to turn this into full OEE and MES reporting?</strong></p><p>Talk to our team about extending this downtime table into production reporting, maintenance dashboards, and MES integrations for your factory floor.</p><p><a href="https://flowfuse.com/contact-us/">Contact Us</a></p>]]></content>
        <updated>2026-07-08T00:00:00.000Z</updated>
        <link href="https://flowfuse.com/blog/2026/07/build-downtime-logger/"/>
        
    </entry>
    <entry>
        <id>https://flowfuse.com/blog/2026/07/gitops-for-manufacturing/</id>
        <title>Why Manufacturing Needs GitOps</title>
        <summary>As software becomes core to manufacturing operations, it needs the same change management discipline manufacturers already apply to machines and processes. GitOps brings that discipline to industrial software, and FlowFuse DevOps Pipelines now support any Git server, including self-hosted ones, so manufacturers can adopt GitOps without changing their existing Git infrastructure.</summary>
        <content type="html"><![CDATA[<p>Manufacturing has always been good at managing change.</p><p>If a machine is modified, a production process is updated, or a new recipe is introduced, there's usually a clear process to follow. The change is reviewed, documented, approved, and recorded before it reaches production. That discipline exists because every change can affect quality, uptime, and safety.</p><p>Software is now part of that same production process.</p><p>A modern factory doesn't just rely on PLCs anymore. Industrial gateways connect machines to business systems, edge applications process production data close to the source, dashboards give operators real-time visibility, and integrations move information between OT systems, MES, ERP, and cloud platforms. These applications are updated regularly as production requirements evolve and operations improve.</p><p>The challenge isn't that software changes. It's managing those changes consistently across the factory.</p><p>A maintenance engineer updates an application on one gateway to resolve an issue. A new production line needs an additional machine connection, so another device gets a slightly different configuration. An operator requests a dashboard improvement, and the change is made directly on the running system because production can't wait. On an <a href="https://flowfuse.com/industries/automotive/">automotive</a> line, it might be an updated torque spec pushed to fix one part number, with no clear record afterward of which stations actually received it.</p><p>Each change solves an immediate problem. Over time, though, those small updates create a bigger one: one production line starts behaving differently from another, even though they're supposed to be identical. A gateway runs a different application version than the rest of the fleet. During troubleshooting, nobody is completely certain which version is running where, or whether every site received the latest update.</p><p>Those aren't software development problems anymore. They're operational problems. As industrial software becomes a bigger part of manufacturing, it needs the same level of change management that manufacturers have applied to machines and processes for decades.</p><h2 id="applying-change-management-to-software">Applying Change Management to Software</h2><p>Managing software on a single gateway is straightforward. Managing it across dozens of production lines, multiple factories, or hundreds of edge devices is a very different challenge.</p><p>Without a consistent deployment process, software gradually drifts apart. A configuration is changed during troubleshooting but never documented. An engineer fixes an issue directly on a production device because it's the quickest way to restore operations. Each change makes sense in isolation, but over time identical production lines no longer run identical applications, and proving what was deployed, and when, means piecing together information from multiple systems or relying on people's memory.</p><p>Software engineering teams faced these same challenges years ago. Rather than treating running systems as the source of truth, they moved to a process where every change is made in a development environment, stored in a Git repository, reviewed before deployment, and promoted into production through a controlled workflow.</p><p>This approach is commonly known as GitOps. Despite the name, GitOps isn't really about Git. It's about making software deployments predictable, repeatable, and traceable. The Git repository becomes the record of the application versions that should be running. Every change has a history, every deployment follows the same approval process, and every production environment receives the version that was reviewed, not whatever happened to be changed directly on a device.</p><p>For manufacturers, GitOps extends the same principles they've always applied to physical process changes to the software running alongside them.</p><h2 id="bringing-gitops-to-the-factory-floor">Bringing GitOps to the Factory Floor</h2><p>GitOps provides the process, but manufacturers also need a platform that can apply it to industrial edge infrastructure. That's where FlowFuse fits.</p><p>FlowFuse is an industrial application platform that helps manufacturers build, deploy, monitor, and manage applications running across industrial edge devices, centrally rather than gateway by gateway.</p><p>DevOps Pipelines extend that platform by bringing a GitOps workflow to industrial applications.</p><p><img alt="FlowFuse DevOps Pipeline showing a development stage, staging stage, and Git stage for pushing changes, and a second pipeline with a Git stage pushing deployments through multiple edge device groups across different regions."" src="https://flowfuse.com/blog/2026/07/images/gitops-pipeline.png"/><em>FlowFuse DevOps Pipeline showing a development stage, staging stage, and Git stage for pushing changes, and a second pipeline with a Git stage pushing deployments through multiple edge device groups across different regions."</em></p><p>Rather than making changes directly on production devices, engineers develop new application versions in a development environment and push them to their organization's Git repository, where changes can be reviewed using the team's existing approval process before deployment.</p><p>The Git repository becomes the source of truth for application deployments, while FlowFuse delivers those approved versions to the right devices consistently, whether updating a small pilot line or rolling out a new version across multiple factories.</p><h2 id="supporting-the-git-infrastructure-you-already-use">Supporting the Git Infrastructure You Already Use</h2><p>Until now, adopting a GitOps workflow on the factory floor often meant compromising on Git infrastructure. Many manufacturers already host Git internally using platforms such as GitLab, Bitbucket, or Gitea, often for cybersecurity, compliance, or network-architecture reasons. Moving repositories to a cloud-hosted service just to support a deployment workflow isn't practical for many organizations.</p><p><a href="https://flowfuse.com/blog/2026/07/flowfuse-release-2-32/#pipelines-connect-to-any-git-server">FlowFuse 2.32</a> removes that limitation. DevOps Pipelines now support any Git server accessible over HTTPS, cloud-hosted or self-hosted, and organizations using a private certificate authority can configure their certificates so FlowFuse can communicate securely with internal Git servers.</p><p>Getting started is straightforward: create a pipeline, add a Git Repository stage, connect it using a Personal Access Token, choose your repository and branches, and you're ready to deploy through Git. See the <a href="https://flowfuse.com/docs/user/devops-pipelines/">DevOps Pipelines documentation</a> for step-by-step instructions.</p><p>A typical deployment process looks like this:</p><ol><li>An engineer develops and tests a new application version in a FlowFuse development instance.</li><li>They create a DevOps Pipeline, starting with the development instance as the source snapshot. Additional stages, such as a staging instance, can be added if required.</li><li>A Git Repository stage is added to push the application snapshot to the organization's Git repository.</li><li>The change is reviewed and approved using the team's existing Git workflow (for example, through a pull request).</li><li>For deployment, another DevOps Pipeline starts with the Git Repository stage as the source and deploys the approved version to the target Hosted instance, Edge Device, or Edge Group.</li></ol><p>Every deployment comes from a reviewed version stored in Git, whether that's a handful of gateways on one production line or thousands of edge devices across multiple facilities.</p><h2 id="software-change-management-is-becoming-an-operational-requirement">Software Change Management Is Becoming an Operational Requirement</h2><p>Modern manufacturing depends on more software than ever before. Every new gateway, edge application, dashboard, and system integration adds another application that needs to be deployed, updated, and maintained throughout its lifecycle. Managing that through manual updates may work for a handful of devices, but it becomes increasingly difficult as deployments scale across production lines, factories, and distributed sites.</p><p>GitOps provides a practical way to bring manufacturing's existing discipline around change management to industrial software, by making deployments consistent, changes traceable, and application versions easy to manage.</p><p>FlowFuse builds on those principles by helping manufacturers manage industrial applications across fleets of edge devices while integrating with the Git infrastructure they already use, moving from manually updating individual devices to deploying reviewed application versions through a repeatable workflow.</p><p>As industrial software continues to grow in importance, knowing exactly which version is running across every production line is no longer just a software engineering concern. It's part of running a modern manufacturing operation.</p><p><strong>Bring GitOps to Your Industrial Applications</strong></p><p>See how FlowFuse helps you build, deploy, and manage industrial applications with a GitOps workflow that scales from a single production line to fleets of edge devices.</p><p><a href="https://flowfuse.com/contact-us/">Contact Us</a></p>]]></content>
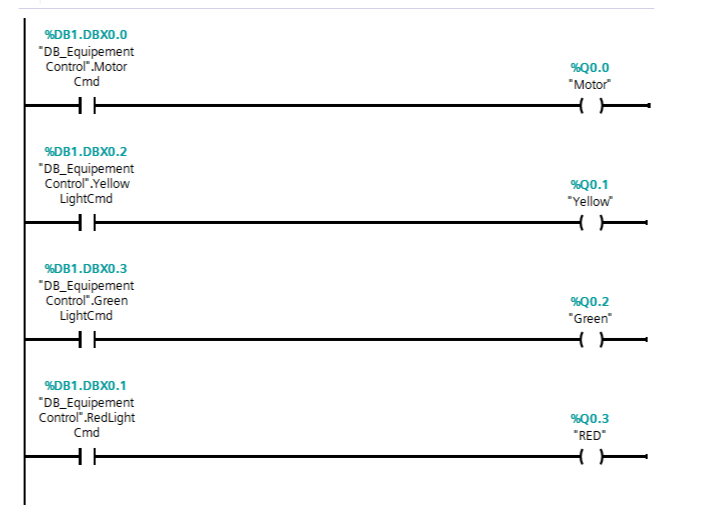
        <updated>2026-07-03T00:00:00.000Z</updated>
        <link href="https://flowfuse.com/blog/2026/07/gitops-for-manufacturing/"/>
        
    </entry>
    <entry>
        <id>https://flowfuse.com/blog/2026/07/control-and-track-factory-floor-machines/</id>
        <title>Control and Track Machines on the Factory Floor</title>
        <summary>Connect FlowFuse to a Siemens S7 PLC with node-red-contrib-s7, build a dashboard to control a motor and stack light, and use the Hourglass node to automatically track and display how long each device has been running.</summary>
        <content type="html"><![CDATA[<p>Operators need more than buttons to control machines - they also need visibility into what's actually happening on the factory floor. Knowing whether a motor is running is useful, but knowing how long it has been running helps with maintenance, production tracking, and troubleshooting.</p><p>In this tutorial, you'll connect FlowFuse to a Siemens S7 PLC, build an operator dashboard to control a motor and stack light, and automatically track the runtime of each device. By the end, you'll have a dashboard that not only sends commands to the PLC but also displays live operating time for every connected device.</p><h2 id="prerequisites">Prerequisites</h2><p>Before you begin, make sure you have the following:</p><ul><li>A Siemens S7 PLC, or <strong>S7-PLCSIM</strong> if you're using a simulated PLC.</li><li>A FlowFuse instance running on your edge device with the Device Agent installed. If you don't already have one, <a href="https://app.flowfuse.com/account/create" rel="nofollow">sign up</a> and follow the <a href="https://flowfuse.com/docs/device-agent/quickstart/">Device Agent Quick Start guide</a> to connect your first device.</li><li>The following packages installed:
<ul><li><code>@flowfuse/node-red-dashboard</code></li><li><code>node-red-contrib-s7</code></li><li><code>node-red-contrib-hourglass</code></li></ul></li><li>A motor and stack light connected to the PLC, or simulated outputs.</li></ul><blockquote><p>Note: This tutorial uses a Siemens S7 PLC and the node-red-contrib-s7 package, but FlowFuse isn't limited to S7 PLCs. It has community nodes for most major PLC brands and protocols, including Allen-Bradley/Rockwell (EtherNet/IP), Modbus, OPC UA, Mitsubishi, and more, so you can follow the same pattern with whichever PLC and connection node matches your hardware.</p></blockquote><h2 id="example-plc-logic">Example PLC Logic</h2><p>The demo above uses a simple example PLC program with four normally open contacts stored inside a data block, each controlling a PLC output:</p><ul><li>Motor</li><li>RedLightCmd</li><li>YellowLightCmd</li><li>GreenLightCmd</li></ul><p>Whenever one of these data block values is set to <code>TRUE</code>, the PLC energizes the corresponding output. Setting the value back to <code>FALSE</code> turns the output off again.</p><p>Throughout this tutorial, FlowFuse writes to these data block variables whenever an operator interacts with the dashboard. At the same time, it continuously reads those same variables so it always knows the current state of each device. We'll later use those live values to calculate runtime automatically.</p><p>If your PLC program is structured differently, that's fine: you just need to know which data block(s) and addresses correspond to the outputs you want to control, and adjust the variable configuration in the following sections accordingly.</p><p>The example ladder logic used in this tutorial is shown below.</p><p><img alt="Example ladder logic with four normally open contacts controlling the motor, red light, yellow light, and green light outputs" src="https://flowfuse.com/blog/2026/07/images/plc-program-runtime.png"/><em>The example ladder logic used in this tutorial: four contacts controlling the motor and the three stack light colors.</em></p><h2 id="connecting-flowfuse-to-the-plc">Connecting FlowFuse to the PLC</h2><p>With an example PLC program in mind, let's establish communication between FlowFuse and the controller.</p><p>We'll use the <code>node-red-contrib-s7</code> package to communicate with the PLC. The first task is creating an S7 endpoint, which stores the connection details that every S7 node in the flow will reuse.</p><h3 id="configure-the-s7-endpoint">Configure the S7 Endpoint</h3><p>Drag either an <strong>S7 In</strong> or <strong>S7 Out</strong> node onto the workspace and create a new <strong>S7 Endpoint</strong>.</p><p>Configure it as follows:</p><ol><li>Select <strong>Ethernet (ISO on TCP)</strong> as the transport.</li><li>Enter the PLC's IP address.</li><li>Leave the port set to <strong>102</strong>.</li><li>Set the connection mode to <strong>Rack</strong>.</li><li>Enter the appropriate <strong>Rack</strong> and <strong>Slot</strong> values for your PLC.</li><li>Set the <strong>Cycle Time</strong> and <strong>Timeout</strong> values according to your application's requirements.</li></ol><p>Your configuration should look similar to the example below.</p><p><img alt="S7 Endpoint configuration showing transport, IP address, rack, slot, and cycle time fields" src="https://flowfuse.com/blog/2026/07/images/plc-config.png"/><em>S7 Endpoint configuration used to connect FlowFuse to the PLC over Ethernet (ISO on TCP).</em></p><p>The endpoint now manages communication with the PLC, allowing every S7 node in the flow to reuse the same connection rather than creating multiple independent PLC connections.</p><h3 id="add-the-plc-variables">Add the PLC Variables</h3><p>Next, tell the endpoint which PLC variables it should read and write.</p><ol><li>Open the <strong>Variables</strong> tab.</li><li>Add the following variables.</li></ol><table><thead><tr><th>Variable</th><th>Address</th></tr></thead><tbody><tr><td>Motor</td><td><code>DB1,X0.0</code></td></tr><tr><td>Red Light</td><td><code>DB1,X0.1</code></td></tr><tr><td>Yellow Light</td><td><code>DB1,X0.2</code></td></tr><tr><td>Green Light</td><td><code>DB1,X0.3</code></td></tr></tbody></table><p>These addresses correspond to the example ladder logic used in this tutorial. Replace them with the data block and address values that match the outputs on your own PLC. If you'd like to learn more about how variable addresses are defined for the S7 nodes, see our guide on <a href="https://flowfuse.com/blog/2025/01/integrating-siemens-s7-plcs-with-node-red-guide/#addressing-scheme-for-variables-in-node-red-with-the-s7-node">Addressing Scheme for Variables in FlowFuse with the S7 Node</a>.</p><p>After adding them, your configuration should resemble the following.</p><p><img alt="S7 Endpoint Variables tab listing Motor, Red Light, Yellow Light, and Green Light with their data block addresses" src="https://flowfuse.com/blog/2026/07/images/s7-config-variables-counter.png"/><em>The four PLC variables mapped to their data block addresses in the S7 Endpoint.</em></p><h3 id="add-the-output-nodes">Add the Output Nodes</h3><p>The dashboard will control each PLC output independently, so we'll create one <strong>S7 Out</strong> node per Output.</p><ol><li>Drag four <strong>S7 Out</strong> nodes onto the workspace.</li><li>Configure each node to use the endpoint created earlier.</li><li>Assign one PLC variable to each node:
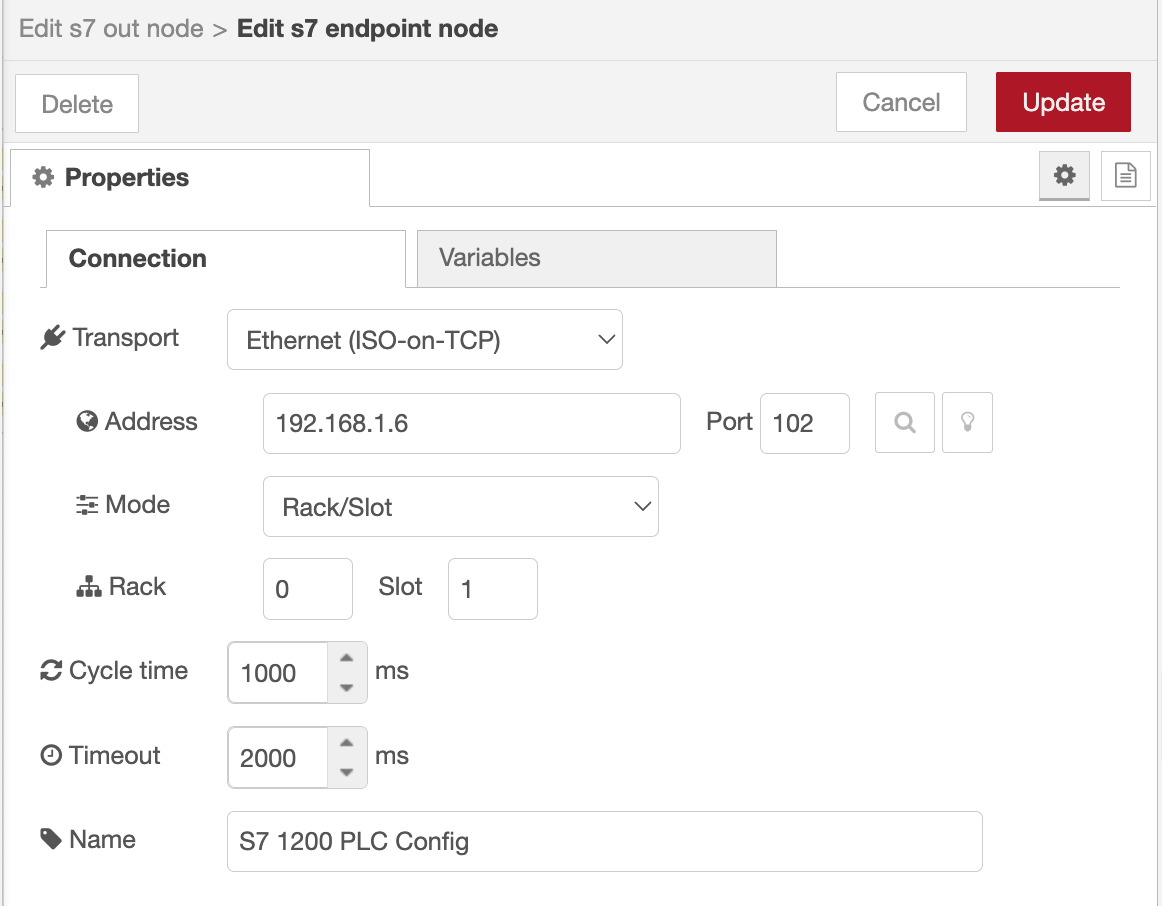
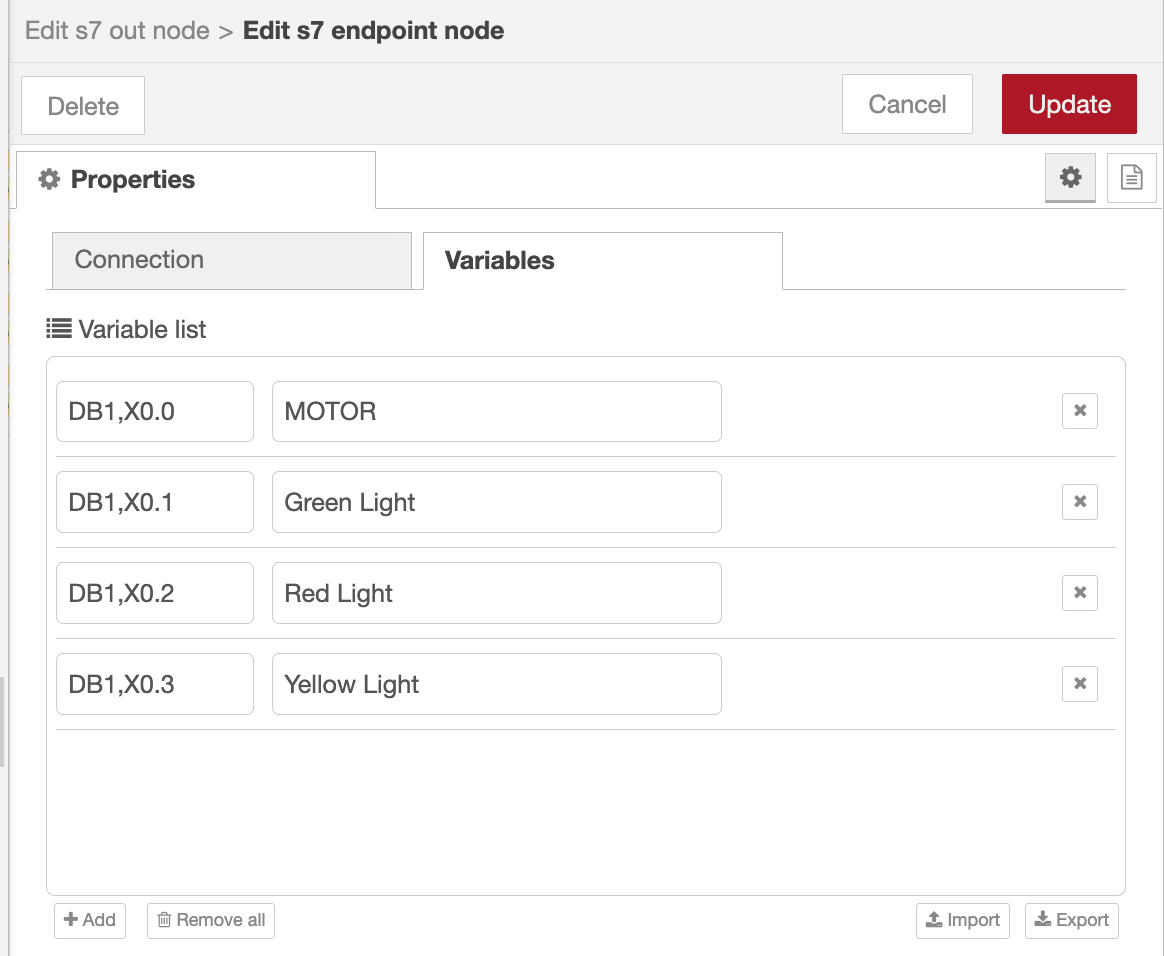
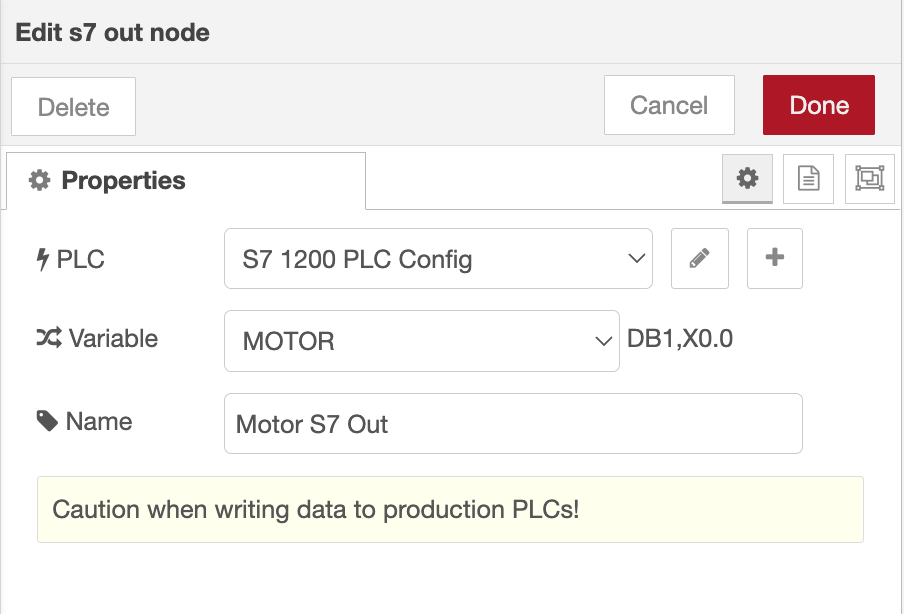
<ul><li>Motor</li><li>Red Light</li><li>Yellow Light</li><li>Green Light</li></ul></li></ol><p>All four nodes are configured the same way: only the assigned variable changes. For reference, here's the configuration for the <strong>Motor</strong> node; configure the other three the same way, assigning <strong>Red Light</strong>, <strong>Yellow Light</strong>, and <strong>Green Light</strong> respectively.</p><p><img alt="S7 Out node configured to write to the Motor variable using the S7 Endpoint" src="https://flowfuse.com/blog/2026/07/images/motor-s7-out.png"/><em>Reference configuration for the Motor S7 Out node. Repeat this setup for Red Light, Yellow Light, and Green Light, changing only the assigned variable.</em></p><p>Each node is now responsible for updating a single PLC variable whenever it receives a new value.</p><h3 id="read-the-plc-status">Read the PLC Status</h3><p>Writing values to the PLC is only half of the solution. We also need to monitor the current output states so the dashboard always reflects what's happening inside the controller.</p><ol><li>Drag an <strong>S7 In</strong> node onto the workspace.</li><li>Select the same S7 Endpoint.</li><li>Set the node to <strong>All Variables</strong> mode.</li><li>Connect a <strong>Debug</strong> node to its output.</li><li>Deploy the flow.</li></ol><p>Whenever one of the configured variables changes, the S7 In node publishes the latest state of every PLC variable as a single object.</p><pre class="language-javascript shiki shiki-themes material-theme-lighter material-theme material-theme-palenight" code="{
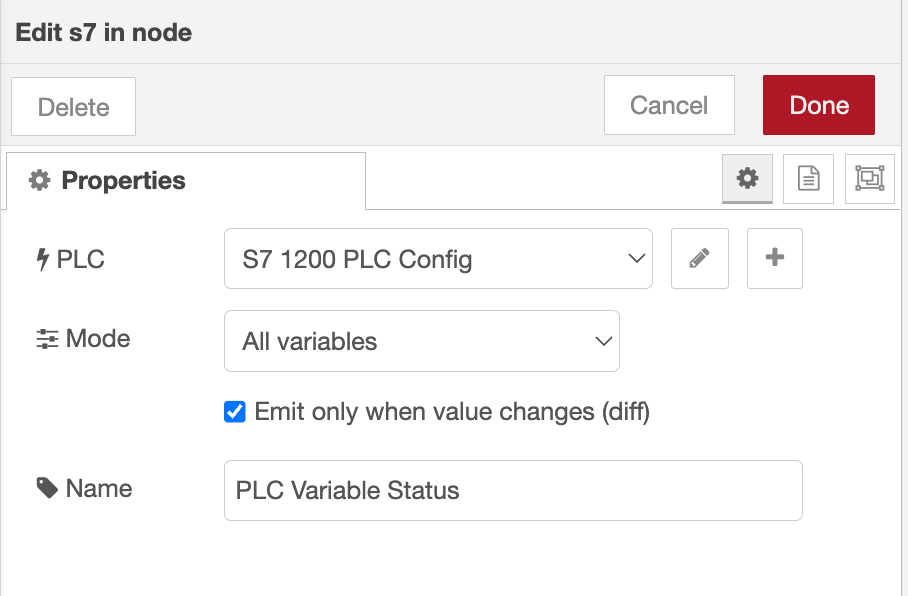
    "Motor": true,
    "Red Light": false,
    "Yellow Light": false,
    "Green Light": true
}
" language="javascript" meta="" style=""><code __ignore-map=""><span class="line" line="1"><span class="sMK4o">{
</span></span><span class="line" line="2"><span class="sMK4o">    "</span><span class="sfazB">Motor</span><span class="sMK4o">"</span><span class="swJcz">: </span><span class="sfNiH">true</span><span class="sMK4o">,
</span></span><span class="line" line="3"><span class="sMK4o">    "</span><span class="sfazB">Red Light</span><span class="sMK4o">"</span><span class="swJcz">: </span><span class="sfNiH">false</span><span class="sMK4o">,
</span></span><span class="line" line="4"><span class="sMK4o">    "</span><span class="sfazB">Yellow Light</span><span class="sMK4o">"</span><span class="swJcz">: </span><span class="sfNiH">false</span><span class="sMK4o">,
</span></span><span class="line" line="5"><span class="sMK4o">    "</span><span class="sfazB">Green Light</span><span class="sMK4o">"</span><span class="swJcz">: </span><span class="sfNiH">true
</span></span><span class="line" line="6"><span class="sMK4o">}
</span></span></code></pre><p>This message represents the live state of the PLC. Later in the tutorial we'll use these values to synchronize the dashboard and determine when each runtime timer should start or stop.</p><p><img alt="S7 In node set to All Variables mode connected to a Debug node, with the Debug panel showing the live PLC state object" src="https://flowfuse.com/blog/2026/07/images/read-all-s7-in.png"/><em>S7 In node reading all PLC variables at once and publishing the combined state to a Debug node.</em></p><h3 id="verify-the-connection">Verify the Connection</h3><p>Once everything has been configured, deploy the flow one final time.</p><p>If the connection is successful, every S7 node should display an <strong>Online</strong> status.</p><p>At this point, FlowFuse can both control the PLC outputs and continuously monitor their current state. In the next section, we'll use these S7 nodes to build an operator dashboard for controlling the motor and stack light.</p><h2 id="building-the-dashboard">Building the Dashboard</h2><p>With communication to the PLC established, we can now build the operator interface.</p><p>For this tutorial, the dashboard provides controls for both the motor and the stack light. The motor uses two buttons: one to start it and another to stop it, while each stack light color is controlled using its own switch.</p><p>The finished dashboard will contain the following widgets.</p><table><thead><tr><th>Widget</th><th>Purpose</th></tr></thead><tbody><tr><td>Button</td><td>Start Motor</td></tr><tr><td>Button</td><td>Stop Motor</td></tr><tr><td>Switch</td><td>Red Light</td></tr><tr><td>Switch</td><td>Yellow Light</td></tr><tr><td>Switch</td><td>Green Light</td></tr></tbody></table><h3 id="control-the-motor">Control the Motor</h3><p>Let's start by creating the controls for the motor.</p><ol><li>Add two <strong>Button</strong> widgets to the dashboard.</li><li>Configure the first button with:
<ul><li><strong>Label:</strong> Start Motor</li><li><strong>Payload:</strong> <code>true</code></li></ul></li><li>Configure the second button with:
<ul><li><strong>Label:</strong> Stop Motor</li><li><strong>Payload:</strong> <code>false</code></li></ul></li><li>Connect both buttons to the <strong>Motor</strong> S7 Out node.</li></ol><p>Whenever an operator presses one of these buttons, the corresponding Boolean value is written to the PLC. Writing <code>true</code> starts the motor, while writing <code>false</code> stops it.</p><p>Configure each button the same way, changing only the label and payload. For example, here's the configuration for the <strong>Start Motor</strong> button:</p><p><img alt="Button widget configuration with label "Start Motor" and payload set to true" src="https://flowfuse.com/blog/2026/07/images/motor-on-button-config.png"/><em>Example Button widget configuration for Start Motor. Use the same setup for Stop Motor, with the payload set to <code>false</code>.</em></p><h3 id="control-the-stack-light">Control the Stack Light</h3><p>Next, create controls for each color of the stack light.</p><p>Rather than using buttons, switches are a better choice because they clearly indicate whether each light is currently enabled or disabled.</p><ol><li>Add three <strong>Switch</strong> widgets to the dashboard.</li><li>Label them:
<ul><li>Red Light</li><li>Yellow Light</li><li>Green Light</li></ul></li><li>Configure each switch with:
<ul><li><strong>ON Payload:</strong> <code>true</code></li><li><strong>OFF Payload:</strong> <code>false</code></li></ul></li><li>Connect each switch to its corresponding <strong>S7 Out</strong> node.</li></ol><p>When a switch changes state, FlowFuse immediately writes the updated value to the PLC, turning the selected light on or off.</p><p>Configure each switch the same way, changing only the label and connected node. For example, here's the configuration for the <strong>Red Light</strong> switch:</p><p><img alt="Switch widget configuration for Red Light with ON payload true and OFF payload false" src="https://flowfuse.com/blog/2026/07/images/red-led-switch.png"/><em>Example Switch widget configuration for Red Light. Use the same setup for Yellow Light and Green Light.</em></p><h3 id="test-the-dashboard">Test the Dashboard</h3><p>At this point the dashboard is fully wired to the PLC.</p><p>Deploy the flow and open the dashboard in your browser. Verify that:</p><ul><li>Pressing <strong>Start Motor</strong> starts the motor.</li><li>Pressing <strong>Stop Motor</strong> stops it.</li><li>Each switch controls the correct stack light output.</li><li>Changes made from the dashboard are immediately reflected in the PLC.</li></ul><p>You now have a functional PLC control dashboard that can operate each connected device independently.</p><h2 id="tracking-device-runtime">Tracking Device Runtime</h2><p>The dashboard can now control the PLC, but it still doesn't provide any information about how long each device has been operating.</p><p>Since the <strong>S7 In</strong> node continuously reports the state of every PLC output, we can use those values to determine when a device starts and stops running. We'll use the <strong>Hourglass</strong> node to maintain an independent runtime counter for each device.</p><p>Before connecting the Hourglass nodes, we first need to convert the PLC states into the commands they expect.</p><h3 id="convert-plc-states-into-timer-commands">Convert PLC States into Timer Commands</h3><p>The S7 In node outputs all configured variables as a single object. The Hourglass node, however, expects individual messages containing either a <code>start</code> or <code>stop</code> command.</p><p>We'll use a <strong>Function</strong> node to bridge this gap.</p><ol><li>Drag a <strong>Function</strong> node onto the workspace after the <strong>S7 In</strong> node.</li><li>Configure the node with <strong>four outputs</strong>.</li><li>Replace the default code with the following:</li></ol><pre class="language-javascript shiki shiki-themes material-theme-lighter material-theme material-theme-palenight" code="return [
    { command: msg.payload.Motor ? "start" : "stop" },
    { command: msg.payload["Red Light"] ? "start" : "stop" },
    { command: msg.payload["Yellow Light"] ? "start" : "stop" },
    { command: msg.payload["Green Light"] ? "start" : "stop" }
];
" language="javascript" meta="" style=""><code __ignore-map=""><span class="line" line="1"><span class="s7zQu">return</span><span class="sTEyZ"> [
</span></span><span class="line" line="2"><span class="sMK4o">    {</span><span class="swJcz"> command</span><span class="sMK4o">:</span><span class="sTEyZ"> msg</span><span class="sMK4o">.</span><span class="sTEyZ">payload</span><span class="sMK4o">.</span><span class="sTEyZ">Motor </span><span class="sMK4o">?</span><span class="sMK4o"> "</span><span class="sfazB">start</span><span class="sMK4o">"</span><span class="sMK4o"> :</span><span class="sMK4o"> "</span><span class="sfazB">stop</span><span class="sMK4o">"</span><span class="sMK4o"> },
</span></span><span class="line" line="3"><span class="sMK4o">    {</span><span class="swJcz"> command</span><span class="sMK4o">:</span><span class="sTEyZ"> msg</span><span class="sMK4o">.</span><span class="sTEyZ">payload[</span><span class="sMK4o">"</span><span class="sfazB">Red Light</span><span class="sMK4o">"</span><span class="sTEyZ">] </span><span class="sMK4o">?</span><span class="sMK4o"> "</span><span class="sfazB">start</span><span class="sMK4o">"</span><span class="sMK4o"> :</span><span class="sMK4o"> "</span><span class="sfazB">stop</span><span class="sMK4o">"</span><span class="sMK4o"> },
</span></span><span class="line" line="4"><span class="sMK4o">    {</span><span class="swJcz"> command</span><span class="sMK4o">:</span><span class="sTEyZ"> msg</span><span class="sMK4o">.</span><span class="sTEyZ">payload[</span><span class="sMK4o">"</span><span class="sfazB">Yellow Light</span><span class="sMK4o">"</span><span class="sTEyZ">] </span><span class="sMK4o">?</span><span class="sMK4o"> "</span><span class="sfazB">start</span><span class="sMK4o">"</span><span class="sMK4o"> :</span><span class="sMK4o"> "</span><span class="sfazB">stop</span><span class="sMK4o">"</span><span class="sMK4o"> },
</span></span><span class="line" line="5"><span class="sMK4o">    {</span><span class="swJcz"> command</span><span class="sMK4o">:</span><span class="sTEyZ"> msg</span><span class="sMK4o">.</span><span class="sTEyZ">payload[</span><span class="sMK4o">"</span><span class="sfazB">Green Light</span><span class="sMK4o">"</span><span class="sTEyZ">] </span><span class="sMK4o">?</span><span class="sMK4o"> "</span><span class="sfazB">start</span><span class="sMK4o">"</span><span class="sMK4o"> :</span><span class="sMK4o"> "</span><span class="sfazB">stop</span><span class="sMK4o">"</span><span class="sMK4o"> }
</span></span><span class="line" line="6"><span class="sTEyZ">]</span><span class="sMK4o">;
</span></span></code></pre><p>The Function node examines the current state of each PLC output and converts it into either a <code>start</code> or <code>stop</code> command. Update the field names (<code>msg.payload.Motor</code>, etc.) to match the variable names you used in your own PLC Variables configuration.</p><p>For example:</p><ul><li>If the motor is running (<code>true</code>), the first output sends <code>{ command: "start" }</code>.</li><li>If the motor stops (<code>false</code>), it sends <code>{ command: "stop" }</code>.</li></ul><p>The same logic is applied independently to each stack light.</p><p><img alt="Function node code editor showing the four-output script that converts PLC states into start and stop commands" src="https://flowfuse.com/blog/2026/07/images/function-config-state-to-commands.png"/><em>Function node converting the PLC's live output states into start/stop commands for the four Hourglass nodes.</em></p><h3 id="add-the-hourglass-nodes">Add the Hourglass Nodes</h3><p>Now that each device has its own stream of timer commands, we can begin tracking runtime.</p><ol><li>Drag four Hourglass nodes onto the workspace.</li><li>Configure each node to use English as the language.</li><li>Use one Hourglass node for each device:
<ul><li>Motor</li><li>Red Light</li><li>Yellow Light</li><li>Green Light</li></ul></li></ol><p>All four nodes use the same configuration: only the device they're wired to changes.</p><p>Each Hourglass node maintains its own accumulated runtime. This means every device is tracked independently, allowing the motor and each stack light to start and stop without affecting the timers for the other devices.</p><h3 id="request-runtime-updates">Request Runtime Updates</h3><p>The Hourglass node stores the elapsed time internally and only reports its current status when requested. To keep the dashboard updated in real time, we'll periodically ask each Hourglass node to publish its current runtime.</p><ol><li>Add an <strong>Inject</strong> node to the workspace.</li><li>Configure it to repeat every <strong>1 second</strong>.</li><li>Set the payload type to <strong>JSON</strong>.</li><li>Use the following payload:</li></ol><pre class="language-json shiki shiki-themes material-theme-lighter material-theme material-theme-palenight" code="{
    "command": "status"
}
" language="json" meta="" style=""><code __ignore-map=""><span class="line" line="1"><span class="sMK4o">{
</span></span><span class="line" line="2"><span class="sMK4o">    "</span><span class="spNyl">command</span><span class="sMK4o">"</span><span class="sMK4o">:</span><span class="sMK4o"> "</span><span class="sfazB">status</span><span class="sMK4o">"
</span></span><span class="line" line="3"><span class="sMK4o">}
</span></span></code></pre><ol start="5"><li>Connect the Inject node to all four Hourglass nodes.</li></ol><p>Every second, the Inject node sends a <code>status</code> command, prompting each Hourglass node to return its latest runtime information.</p><p>At this point, every Hourglass node is continuously tracking the runtime of its assigned device and publishing an updated status once per second. The final step is displaying that information on the dashboard.</p><h2 id="displaying-the-runtime">Displaying the Runtime</h2><p>We'll use <strong>UI Template</strong> widgets to build a simple HMI-style runtime display for each device.</p><h3 id="create-the-runtime-display">Create the Runtime Display</h3><ol><li>Drag four <strong>UI Template</strong> widgets onto the workspace and configure each one to use the appropriate Page and Group based on your dashboard layout and type to "Widget ( Group Scoped )"</li><li>Connect each Hourglass node to its corresponding UI Template.</li><li>Give each widget an appropriate label:
<ul><li>Motor</li><li>Red Light</li><li>Yellow Light</li><li>Green Light</li></ul></li></ol><blockquote><p><strong>Note:</strong> The dashboard layout, groups, and theme are intentionally left to your preference. You can organize the widgets in whatever way best suits your application. For guidance on pages, groups, navigation, layouts, and styling in FlowFuse Dashboard, see <a href="https://flowfuse.com/blog/2024/05/node-red-dashboard-2-layout-navigation-styling/">FlowFuse Dashboard: Layout, Navigation &amp; Styling</a>.</p></blockquote><p>Whenever an Hourglass node publishes its status, the connected UI Template receives a message similar to the following.</p><pre class="language-javascript shiki shiki-themes material-theme-lighter material-theme material-theme-palenight" code="{
    started: true,
    elapsed: {
        time: {
            hours: 0,
            minutes: 12,
            seconds: 34
        }
    }
}
" language="javascript" meta="" style=""><code __ignore-map=""><span class="line" line="1"><span class="sMK4o">{
</span></span><span class="line" line="2"><span class="sBMFI">    started</span><span class="sMK4o">:</span><span class="sfNiH"> true</span><span class="sMK4o">,
</span></span><span class="line" line="3"><span class="sBMFI">    elapsed</span><span class="sMK4o">:</span><span class="sMK4o"> {
</span></span><span class="line" line="4"><span class="sBMFI">        time</span><span class="sMK4o">:</span><span class="sMK4o"> {
</span></span><span class="line" line="5"><span class="sBMFI">            hours</span><span class="sMK4o">:</span><span class="sbssI"> 0</span><span class="sMK4o">,
</span></span><span class="line" line="6"><span class="sBMFI">            minutes</span><span class="sMK4o">:</span><span class="sbssI"> 12</span><span class="sMK4o">,
</span></span><span class="line" line="7"><span class="sBMFI">            seconds</span><span class="sMK4o">:</span><span class="sbssI"> 34
</span></span><span class="line" line="8"><span class="sMK4o">        }
</span></span><span class="line" line="9"><span class="sMK4o">    }
</span></span><span class="line" line="10"><span class="sMK4o">}
</span></span></code></pre><p>The <code>started</code> property indicates whether the device is currently running, while <code>elapsed.time</code> contains the accumulated runtime.</p><h3 id="build-the-runtime-widget">Build the Runtime Widget</h3><p>Paste the following code into each <strong>UI Template</strong> widget, updating only the device label (for example <strong>Motor</strong>, <strong>Red Light</strong>, <strong>Yellow Light</strong>, or <strong>Green Light</strong>) where required.</p><blockquote><p><strong>Note:</strong> If you'd like a different design for the runtime widget, you can use <strong>FlowFuse Expert</strong>. Simply describe the UI you want in plain English, and it will generate the component for your dashboard. Learn more about <a href="https://flowfuse.com/docs/user/expert/node-red-embedded-ai">FlowFuse Expert</a>.</p></blockquote><pre class="language-html shiki shiki-themes material-theme-lighter material-theme material-theme-palenight" code="&lt;template&gt;
  &lt;div class="hmi-timer" :class="{ running: started }" @mouseenter="hover = true" @mouseleave="hover = false"&gt;
    &lt;span class="label"&gt;Motor&lt;/span&gt;
    &lt;span class="clock"&gt;{{ clock }}&lt;/span&gt;
  &lt;/div&gt;
&lt;/template&gt;

&lt;script&gt;
export default {
  name: 'HmiTimer',
  data() {
    return { hover: false }
  },
  computed: {
    started() {
      return this.msg?.started === true
    },
    clock() {
      const t = this.msg?.elapsed?.time
      const pad = (n) =&gt; String(n ?? 0).padStart(2, '0')

      if (!t) return '00h:00m:00s'

      return `${pad(t.hours)}h:${pad(t.minutes)}m:${pad(t.seconds)}s`
    }
  }
}
&lt;/script&gt;

&lt;style scoped&gt;
.hmi-timer {
  --accent: #2ecc71;
  display: flex;
  flex-direction: row;
  align-items: center;
  justify-content: center;
  gap: 16px;
  width: 100%;
  box-sizing: border-box;
  background: #11161d;
  border: 1px solid #2c3744;
  border-radius: 10px;
  font-family: 'Courier New', monospace;
  font-weight: 700;
  letter-spacing: 2px;
  padding: 16px 24px;
  color: #5b6675;
  transition: all .3s ease;
  transform: .95;
}

.label {
  font-size: 2.4rem;
  font-weight: 600;
}

.clock {
  font-size: 2.4rem;
}

.hmi-timer.running {
  padding: 26px 36px;
  color: var(--accent);
  border-color: var(--accent);
  background: #0d1c13;
  box-shadow: 0 0 18px rgba(46, 204, 113, .35),
              inset 0 0 12px rgba(46, 204, 113, .15);
}

.hmi-timer.running .label {
  font-size: 3.6rem;
}

.hmi-timer.running .clock {
  font-size: 5rem;
}
&lt;/style&gt;
" language="html" meta="" style=""><code __ignore-map=""><span class="line" line="1"><span class="sMK4o">&lt;</span><span class="swJcz">template</span><span class="sMK4o">&gt;
</span></span><span class="line" line="2"><span class="sMK4o">  &lt;</span><span class="swJcz">div</span><span class="spNyl"> class</span><span class="sMK4o">=</span><span class="sMK4o">"</span><span class="sfazB">hmi-timer</span><span class="sMK4o">"</span><span class="spNyl"> :class</span><span class="sMK4o">=</span><span class="sMK4o">"</span><span class="sfazB">{ running: started }</span><span class="sMK4o">"</span><span class="spNyl"> @mouseenter</span><span class="sMK4o">=</span><span class="sMK4o">"</span><span class="sfazB">hover = true</span><span class="sMK4o">"</span><span class="spNyl"> @mouseleave</span><span class="sMK4o">=</span><span class="sMK4o">"</span><span class="sfazB">hover = false</span><span class="sMK4o">"</span><span class="sMK4o">&gt;
</span></span><span class="line" line="3"><span class="sMK4o">    &lt;</span><span class="swJcz">span</span><span class="spNyl"> class</span><span class="sMK4o">=</span><span class="sMK4o">"</span><span class="sfazB">label</span><span class="sMK4o">"</span><span class="sMK4o">&gt;</span><span class="sTEyZ">Motor</span><span class="sMK4o">&lt;/</span><span class="swJcz">span</span><span class="sMK4o">&gt;
</span></span><span class="line" line="4"><span class="sMK4o">    &lt;</span><span class="swJcz">span</span><span class="spNyl"> class</span><span class="sMK4o">=</span><span class="sMK4o">"</span><span class="sfazB">clock</span><span class="sMK4o">"</span><span class="sMK4o">&gt;</span><span class="sTEyZ">{{ clock }}</span><span class="sMK4o">&lt;/</span><span class="swJcz">span</span><span class="sMK4o">&gt;
</span></span><span class="line" line="5"><span class="sMK4o">  &lt;/</span><span class="swJcz">div</span><span class="sMK4o">&gt;
</span></span><span class="line" line="6"><span class="sMK4o">&lt;/</span><span class="swJcz">template</span><span class="sMK4o">&gt;
</span></span><span class="line" line="7"><span empty-line-placeholder>
</span></span><span class="line" line="8"><span class="sMK4o">&lt;</span><span class="swJcz">script</span><span class="sMK4o">&gt;
</span></span><span class="line" line="9"><span class="s7zQu">export</span><span class="s7zQu"> default</span><span class="sMK4o"> {
</span></span><span class="line" line="10"><span class="swJcz">  name</span><span class="sMK4o">:</span><span class="sMK4o"> '</span><span class="sfazB">HmiTimer</span><span class="sMK4o">'</span><span class="sMK4o">,
</span></span><span class="line" line="11"><span class="swJcz">  data</span><span class="sMK4o">()</span><span class="sMK4o"> {
</span></span><span class="line" line="12"><span class="s7zQu">    return</span><span class="sMK4o"> {</span><span class="swJcz"> hover</span><span class="sMK4o">:</span><span class="sfNiH"> false</span><span class="sMK4o"> }
</span></span><span class="line" line="13"><span class="sMK4o">  },
</span></span><span class="line" line="14"><span class="swJcz">  computed</span><span class="sMK4o">:</span><span class="sMK4o"> {
</span></span><span class="line" line="15"><span class="swJcz">    started</span><span class="sMK4o">()</span><span class="sMK4o"> {
</span></span><span class="line" line="16"><span class="s7zQu">      return</span><span class="sMK4o"> this.</span><span class="sTEyZ">msg</span><span class="sMK4o">?.</span><span class="sTEyZ">started</span><span class="sMK4o"> ===</span><span class="sfNiH"> true
</span></span><span class="line" line="17"><span class="sMK4o">    },
</span></span><span class="line" line="18"><span class="swJcz">    clock</span><span class="sMK4o">()</span><span class="sMK4o"> {
</span></span><span class="line" line="19"><span class="spNyl">      const</span><span class="sTEyZ"> t</span><span class="sMK4o"> =</span><span class="sMK4o"> this.</span><span class="sTEyZ">msg</span><span class="sMK4o">?.</span><span class="sTEyZ">elapsed</span><span class="sMK4o">?.</span><span class="sTEyZ">time
</span></span><span class="line" line="20"><span class="spNyl">      const</span><span class="sTEyZ"> pad</span><span class="sMK4o"> =</span><span class="sMK4o"> (</span><span class="sHdIc">n</span><span class="sMK4o">)</span><span class="spNyl"> =&gt;</span><span class="s2Zo4"> String</span><span class="swJcz">(</span><span class="sTEyZ">n</span><span class="sMK4o"> ??</span><span class="sbssI"> 0</span><span class="swJcz">)</span><span class="sMK4o">.</span><span class="s2Zo4">padStart</span><span class="swJcz">(</span><span class="sbssI">2</span><span class="sMK4o">,</span><span class="sMK4o"> '</span><span class="sfazB">0</span><span class="sMK4o">'</span><span class="swJcz">)
</span></span><span class="line" line="21"><span empty-line-placeholder>
</span></span><span class="line" line="22"><span class="s7zQu">      if</span><span class="swJcz"> (</span><span class="sMK4o">!</span><span class="sTEyZ">t</span><span class="swJcz">) </span><span class="s7zQu">return</span><span class="sMK4o"> '</span><span class="sfazB">00h:00m:00s</span><span class="sMK4o">'
</span></span><span class="line" line="23"><span empty-line-placeholder>
</span></span><span class="line" line="24"><span class="s7zQu">      return</span><span class="sMK4o"> `${</span><span class="s2Zo4">pad</span><span class="sTEyZ">(t</span><span class="sMK4o">.</span><span class="sTEyZ">hours)</span><span class="sMK4o">}</span><span class="sfazB">h:</span><span class="sMK4o">${</span><span class="s2Zo4">pad</span><span class="sTEyZ">(t</span><span class="sMK4o">.</span><span class="sTEyZ">minutes)</span><span class="sMK4o">}</span><span class="sfazB">m:</span><span class="sMK4o">${</span><span class="s2Zo4">pad</span><span class="sTEyZ">(t</span><span class="sMK4o">.</span><span class="sTEyZ">seconds)</span><span class="sMK4o">}</span><span class="sfazB">s</span><span class="sMK4o">`
</span></span><span class="line" line="25"><span class="sMK4o">    }
</span></span><span class="line" line="26"><span class="sMK4o">  }
</span></span><span class="line" line="27"><span class="sMK4o">}
</span></span><span class="line" line="28"><span class="sMK4o">&lt;/</span><span class="swJcz">script</span><span class="sMK4o">&gt;
</span></span><span class="line" line="29"><span empty-line-placeholder>
</span></span><span class="line" line="30"><span class="sMK4o">&lt;</span><span class="swJcz">style</span><span class="spNyl"> scoped</span><span class="sMK4o">&gt;
</span></span><span class="line" line="31"><span class="sMK4o">.</span><span class="sBMFI">hmi-timer</span><span class="sMK4o"> {
</span></span><span class="line" line="32"><span class="sTEyZ">  --accent</span><span class="sMK4o">:</span><span class="sMK4o"> #</span><span class="sTEyZ">2ecc71</span><span class="sMK4o">;
</span></span><span class="line" line="33"><span class="sqsOY">  display</span><span class="sMK4o">:</span><span class="sTEyZ"> flex</span><span class="sMK4o">;
</span></span><span class="line" line="34"><span class="sqsOY">  flex-direction</span><span class="sMK4o">:</span><span class="sTEyZ"> row</span><span class="sMK4o">;
</span></span><span class="line" line="35"><span class="sqsOY">  align-items</span><span class="sMK4o">:</span><span class="sTEyZ"> center</span><span class="sMK4o">;
</span></span><span class="line" line="36"><span class="sqsOY">  justify-content</span><span class="sMK4o">:</span><span class="sTEyZ"> center</span><span class="sMK4o">;
</span></span><span class="line" line="37"><span class="sqsOY">  gap</span><span class="sMK4o">:</span><span class="sbssI"> 16px</span><span class="sMK4o">;
</span></span><span class="line" line="38"><span class="sqsOY">  width</span><span class="sMK4o">:</span><span class="sbssI"> 100%</span><span class="sMK4o">;
</span></span><span class="line" line="39"><span class="sqsOY">  box-sizing</span><span class="sMK4o">:</span><span class="sTEyZ"> border-box</span><span class="sMK4o">;
</span></span><span class="line" line="40"><span class="sqsOY">  background</span><span class="sMK4o">:</span><span class="sMK4o"> #</span><span class="sTEyZ">11161d</span><span class="sMK4o">;
</span></span><span class="line" line="41"><span class="sqsOY">  border</span><span class="sMK4o">:</span><span class="sbssI"> 1px</span><span class="sTEyZ"> solid </span><span class="sMK4o">#</span><span class="sTEyZ">2c3744</span><span class="sMK4o">;
</span></span><span class="line" line="42"><span class="sqsOY">  border-radius</span><span class="sMK4o">:</span><span class="sbssI"> 10px</span><span class="sMK4o">;
</span></span><span class="line" line="43"><span class="sqsOY">  font-family</span><span class="sMK4o">:</span><span class="sMK4o"> '</span><span class="sfazB">Courier New</span><span class="sMK4o">'</span><span class="sMK4o">,</span><span class="sTEyZ"> monospace</span><span class="sMK4o">;
</span></span><span class="line" line="44"><span class="sqsOY">  font-weight</span><span class="sMK4o">:</span><span class="sbssI"> 700</span><span class="sMK4o">;
</span></span><span class="line" line="45"><span class="sqsOY">  letter-spacing</span><span class="sMK4o">:</span><span class="sbssI"> 2px</span><span class="sMK4o">;
</span></span><span class="line" line="46"><span class="sqsOY">  padding</span><span class="sMK4o">:</span><span class="sbssI"> 16px</span><span class="sbssI"> 24px</span><span class="sMK4o">;
</span></span><span class="line" line="47"><span class="sqsOY">  color</span><span class="sMK4o">:</span><span class="sMK4o"> #</span><span class="sTEyZ">5b6675</span><span class="sMK4o">;
</span></span><span class="line" line="48"><span class="sqsOY">  transition</span><span class="sMK4o">:</span><span class="sTEyZ"> all </span><span class="sbssI">.3s</span><span class="sTEyZ"> ease</span><span class="sMK4o">;
</span></span><span class="line" line="49"><span class="sqsOY">  transform</span><span class="sMK4o">:</span><span class="sbssI"> .95</span><span class="sMK4o">;
</span></span><span class="line" line="50"><span class="sMK4o">}
</span></span><span class="line" line="51"><span empty-line-placeholder>
</span></span><span class="line" line="52"><span class="sMK4o">.</span><span class="sBMFI">label</span><span class="sMK4o"> {
</span></span><span class="line" line="53"><span class="sqsOY">  font-size</span><span class="sMK4o">:</span><span class="sbssI"> 2.4rem</span><span class="sMK4o">;
</span></span><span class="line" line="54"><span class="sqsOY">  font-weight</span><span class="sMK4o">:</span><span class="sbssI"> 600</span><span class="sMK4o">;
</span></span><span class="line" line="55"><span class="sMK4o">}
</span></span><span class="line" line="56"><span empty-line-placeholder>
</span></span><span class="line" line="57"><span class="sMK4o">.</span><span class="sBMFI">clock</span><span class="sMK4o"> {
</span></span><span class="line" line="58"><span class="sqsOY">  font-size</span><span class="sMK4o">:</span><span class="sbssI"> 2.4rem</span><span class="sMK4o">;
</span></span><span class="line" line="59"><span class="sMK4o">}
</span></span><span class="line" line="60"><span empty-line-placeholder>
</span></span><span class="line" line="61"><span class="sMK4o">.</span><span class="sBMFI">hmi-timer</span><span class="sMK4o">.</span><span class="sBMFI">running</span><span class="sMK4o"> {
</span></span><span class="line" line="62"><span class="sqsOY">  padding</span><span class="sMK4o">:</span><span class="sbssI"> 26px</span><span class="sbssI"> 36px</span><span class="sMK4o">;
</span></span><span class="line" line="63"><span class="sqsOY">  color</span><span class="sMK4o">:</span><span class="s2Zo4"> var</span><span class="sMK4o">(</span><span class="sTEyZ">--accent</span><span class="sMK4o">);
</span></span><span class="line" line="64"><span class="sqsOY">  border-color</span><span class="sMK4o">:</span><span class="s2Zo4"> var</span><span class="sMK4o">(</span><span class="sTEyZ">--accent</span><span class="sMK4o">);
</span></span><span class="line" line="65"><span class="sqsOY">  background</span><span class="sMK4o">:</span><span class="sMK4o"> #</span><span class="sTEyZ">0d1c13</span><span class="sMK4o">;
</span></span><span class="line" line="66"><span class="sqsOY">  box-shadow</span><span class="sMK4o">:</span><span class="sbssI"> 0</span><span class="sbssI"> 0</span><span class="sbssI"> 18px</span><span class="s2Zo4"> rgba</span><span class="sMK4o">(</span><span class="sbssI">46</span><span class="sMK4o">,</span><span class="sbssI"> 204</span><span class="sMK4o">,</span><span class="sbssI"> 113</span><span class="sMK4o">,</span><span class="sbssI"> .35</span><span class="sMK4o">),
</span></span><span class="line" line="67"><span class="sTEyZ">              inset </span><span class="sbssI">0</span><span class="sbssI"> 0</span><span class="sbssI"> 12px</span><span class="s2Zo4"> rgba</span><span class="sMK4o">(</span><span class="sbssI">46</span><span class="sMK4o">,</span><span class="sbssI"> 204</span><span class="sMK4o">,</span><span class="sbssI"> 113</span><span class="sMK4o">,</span><span class="sbssI"> .15</span><span class="sMK4o">);
</span></span><span class="line" line="68"><span class="sMK4o">}
</span></span><span class="line" line="69"><span empty-line-placeholder>
</span></span><span class="line" line="70"><span class="sMK4o">.</span><span class="sBMFI">hmi-timer</span><span class="sMK4o">.</span><span class="sBMFI">running</span><span class="sMK4o"> .</span><span class="sBMFI">label</span><span class="sMK4o"> {
</span></span><span class="line" line="71"><span class="sqsOY">  font-size</span><span class="sMK4o">:</span><span class="sbssI"> 3.6rem</span><span class="sMK4o">;
</span></span><span class="line" line="72"><span class="sMK4o">}
</span></span><span class="line" line="73"><span empty-line-placeholder>
</span></span><span class="line" line="74"><span class="sMK4o">.</span><span class="sBMFI">hmi-timer</span><span class="sMK4o">.</span><span class="sBMFI">running</span><span class="sMK4o"> .</span><span class="sBMFI">clock</span><span class="sMK4o"> {
</span></span><span class="line" line="75"><span class="sqsOY">  font-size</span><span class="sMK4o">:</span><span class="sbssI"> 5rem</span><span class="sMK4o">;
</span></span><span class="line" line="76"><span class="sMK4o">}
</span></span><span class="line" line="77"><span class="sMK4o">&lt;/</span><span class="swJcz">style</span><span class="sMK4o">&gt;
</span></span></code></pre><p>All four widgets use the same template code: only the label changes. For reference, this example uses the <strong>Motor</strong> label; configure the other three the same way, swapping in <strong>Red Light</strong>, <strong>Yellow Light</strong>, and <strong>Green Light</strong>.</p><p><img alt="Finished HMI-style runtime widget for the Motor, showing elapsed time and a highlighted green state while running" src="https://flowfuse.com/blog/2026/07/images/runtime-display-motor.png"/><em>Reference result for the Motor runtime widget. Repeat this setup for Red Light, Yellow Light, and Green Light, changing only the label.</em></p><p>The template formats the elapsed time into an easy-to-read <code>HHh:MMm:SSs</code> display and automatically changes its appearance while the device is running. Because each widget is connected to a separate Hourglass node, every device maintains its own independent runtime display.</p><p>Deploy the flow and open the dashboard.</p><p>Start the motor and toggle each stack light while watching the runtime displays update.</p><style>html pre.shiki code .sMK4o, html code.shiki .sMK4o{--shiki-light:#39ADB5;--shiki-default:#89DDFF;--shiki-dark:#89DDFF}html pre.shiki code .sfazB, html code.shiki .sfazB{--shiki-light:#91B859;--shiki-default:#C3E88D;--shiki-dark:#C3E88D}html pre.shiki code .swJcz, html code.shiki .swJcz{--shiki-light:#E53935;--shiki-default:#F07178;--shiki-dark:#F07178}html pre.shiki code .sfNiH, html code.shiki .sfNiH{--shiki-light:#FF5370;--shiki-default:#FF9CAC;--shiki-dark:#FF9CAC}html .light .shiki span {color: var(--shiki-light);background: var(--shiki-light-bg);font-style: var(--shiki-light-font-style);font-weight: var(--shiki-light-font-weight);text-decoration: var(--shiki-light-text-decoration);}html.light .shiki span {color: var(--shiki-light);background: var(--shiki-light-bg);font-style: var(--shiki-light-font-style);font-weight: var(--shiki-light-font-weight);text-decoration: var(--shiki-light-text-decoration);}html .default .shiki span {color: var(--shiki-default);background: var(--shiki-default-bg);font-style: var(--shiki-default-font-style);font-weight: var(--shiki-default-font-weight);text-decoration: var(--shiki-default-text-decoration);}html .shiki span {color: var(--shiki-default);background: var(--shiki-default-bg);font-style: var(--shiki-default-font-style);font-weight: var(--shiki-default-font-weight);text-decoration: var(--shiki-default-text-decoration);}html .dark .shiki span {color: var(--shiki-dark);background: var(--shiki-dark-bg);font-style: var(--shiki-dark-font-style);font-weight: var(--shiki-dark-font-weight);text-decoration: var(--shiki-dark-text-decoration);}html.dark .shiki span {color: var(--shiki-dark);background: var(--shiki-dark-bg);font-style: var(--shiki-dark-font-style);font-weight: var(--shiki-dark-font-weight);text-decoration: var(--shiki-dark-text-decoration);}html pre.shiki code .s7zQu, html code.shiki .s7zQu{--shiki-light:#39ADB5;--shiki-light-font-style:italic;--shiki-default:#89DDFF;--shiki-default-font-style:italic;--shiki-dark:#89DDFF;--shiki-dark-font-style:italic}html pre.shiki code .sTEyZ, html code.shiki .sTEyZ{--shiki-light:#90A4AE;--shiki-default:#EEFFFF;--shiki-dark:#BABED8}html pre.shiki code .spNyl, html code.shiki .spNyl{--shiki-light:#9C3EDA;--shiki-default:#C792EA;--shiki-dark:#C792EA}html pre.shiki code .sBMFI, html code.shiki .sBMFI{--shiki-light:#E2931D;--shiki-default:#FFCB6B;--shiki-dark:#FFCB6B}html pre.shiki code .sbssI, html code.shiki .sbssI{--shiki-light:#F76D47;--shiki-default:#F78C6C;--shiki-dark:#F78C6C}html pre.shiki code .sHdIc, html code.shiki .sHdIc{--shiki-light:#90A4AE;--shiki-light-font-style:italic;--shiki-default:#EEFFFF;--shiki-default-font-style:italic;--shiki-dark:#BABED8;--shiki-dark-font-style:italic}html pre.shiki code .s2Zo4, html code.shiki .s2Zo4{--shiki-light:#6182B8;--shiki-default:#82AAFF;--shiki-dark:#82AAFF}html pre.shiki code .sqsOY, html code.shiki .sqsOY{--shiki-light:#8796B0;--shiki-default:#B2CCD6;--shiki-dark:#B2CCD6}</style><p><strong>Ready to bring this to your shopfloor?</strong></p><p>Talk to our team about connecting FlowFuse to your PLCs and building operator dashboards for your production line.</p><p><a href="https://flowfuse.com/contact-us/">Contact Us</a></p>]]></content>
        <updated>2026-07-02T00:00:00.000Z</updated>
        <link href="https://flowfuse.com/blog/2026/07/control-and-track-factory-floor-machines/"/>
        
    </entry>
    <entry>
        <id>https://flowfuse.com/blog/2026/07/flowfuse-release-2-32/</id>
        <title>FlowFuse 2.32: Certified Redis, Git Pipelines for Any Server, Insights on Remote Instances, and Dark Mode</title>
        <summary>2.32 certifies the Redis node and extends DevOps Git pipelines to any HTTPS server: GitLab, Bitbucket, Gitea, or self-hosted. Insights mode now reaches your remote instances, so the FlowFuse Expert answers plain-language questions about live edge data. Plus dark mode, Device Agent 4, and a Plan Mode for the Expert.</summary>
        <content type="html"><![CDATA[<p>This release meets your stack where it already lives. Redis becomes a certified node. DevOps pipelines connect to any HTTPS Git server, not just GitHub. And the FlowFuse Expert can now read the live data on your remote instances and answer questions about it in plain language. Dark mode lands too, so the platform stops glaring at you through long sessions.</p><h2 id="certified-redis-integration">Certified Redis Integration</h2><p>Community nodes are code you have to vet, secure, and maintain yourself. Certified Nodes take that on with a defined quality, security, and support process.</p><h3 id="redis-joins-the-catalog">Redis Joins the Catalog</h3><p>2.32 adds <strong>Redis</strong> as a certified node, so you can integrate with Redis using a node FlowFuse tests, secures, and supports, backed by the same trust contract as every certified node: vetted quality, a CVE response commitment, and a real path to support.</p><p>Certified Nodes belong to specific FlowFuse packages. Browse the full catalog on the <a href="https://flowfuse.com/integrations/?certified=1">integrations page</a>, and contact us to get them enabled for your team or instance.</p><h2 id="pipelines-connect-to-any-git-server">Pipelines Connect to Any Git Server</h2><p>DevOps Pipeline Git stages only worked with GitHub or Azure DevOps, leaving self-hosted GitLab or on-prem Bitbucket out.</p><p>Git Repository stages now connect to any HTTPS Git server: GitLab, Bitbucket, Gitea, or a self-hosted instance. Point a pipeline at the repository and it pushes and pulls snapshots as before. For a server behind a private CA, paste in its certificate, no infrastructure changes needed. This means your team can integrate seamlessly with your existing Git workflow and its compliance setup.</p><h2 id="do-more-with-the-flowfuse-expert">Do More With the FlowFuse Expert</h2><h3 id="ask-about-your-machine-or-operational-data-in-plain-language">Ask about your machine or operational data in Plain Language</h3><p>Your live machine data sits on your remote instances at the edge. Insights mode now reaches it directly. Point the FlowFuse Expert in "insights" mode, or any AI agent, at a remote instance and ask in plain language: "What was the average cycle time on line 3 today?" You get the answer from live data, with no dashboard to build and no query to write. The Expert can even help you build the MCP servers that feed it, right in Node-RED.</p><p><img alt="The FlowFuse Expert answering a plain-language question about live machine data" data-zoomable="" src="https://flowfuse.com/blog/2026/07/images/insights-mode.png" style="border: 2px solid #E5E7EB;"/></p><h3 id="from-advice-to-action">From Advice to Action</h3><p>We are enabling the FlowFuse Expert to do things inside the platform, starting with setting up an instance and getting information about your fleet of instances for you. It is the first step toward building any application from beginning to end: you start with the Expert in the platform, it understands the context, provisions the instance, and leads you straight into the Node-RED editor to build it for you. Groundwork, with more to follow.</p><h3 id="loose-for-prototypes-strict-in-production">Loose for Prototypes, Strict in Production</h3><p>In support mode, you decide how freely the Expert acts, and you can fine-tune its permissions separately for building flows in Node-RED and for taking actions in the FlowFuse platform. Let it run without interruption while you stand up a first proof of concept, so it builds quickly. Then tighten those same tools for production flows, where you want to see and approve each change before it lands. When a tool is set to ask, an approval card shows exactly what the Expert intends to do and waits for your call.</p><p><img alt="The FlowFuse Expert asking to run a tool, with Allow and Deny controls in the chat" data-zoomable="" src="https://flowfuse.com/blog/2026/07/images/hitl-approvals.png" style="border: 2px solid #E5E7EB;"/></p><h3 id="plan-together-build-what-you-expect">Plan Together, Build What You Expect</h3><p>The Expert now understands your intent and plans with you. It asks clarifying questions before it starts implementing, so you get what you need built faster and closer to what you pictured. This is a solid step, and we'll keep improving the Expert from here.</p><h2 id="dark-mode">Dark Mode</h2><p>FlowFuse has only ever had a light interface, and long sessions in a bright UI are tiring on the eyes. FlowFuse now has a dark mode. Turn it on and the platform switches to a dark theme, easier on the eyes and a better match for a dark desktop. Node-RED auto-switches along with you, which works especially well in combination with the new <a href="https://flowfuse.com/blog/2026/06/node-red-5-on-flowfuse/">Node-RED 5.0</a>!</p><p><img alt="FlowFuse in dark mode" data-zoomable="" src="https://flowfuse.com/blog/2026/07/images/dark-mode.png" style="border: 2px solid #E5E7EB;"/></p><p><em>Note: the Node-RED editor only auto-switches with your FlowFuse theme on the latest Node-RED, 5.0.1 and newer, so you set it once.</em></p><h2 id="better-security-with-device-agent-4">Better Security with Device Agent 4</h2><p>The Device Agent reaches a new major version. Its container now runs as an unprivileged user instead of root and on Node.js 22, a more secure, modern base that unlocks Insights, token auth, and Node-RED 5 on your devices.</p><h3 id="what-this-means-for-you">What This Means for You</h3><p>Device Agent 4 is a breaking upgrade. When you move to it, make your bind-mounted state directories owned by the agent's user, then upgrade. The platform flags any device that needs v4 to use this release's features. Check the upgrade notes before upgrading.</p><h2 id="what-else-is-new">What else is new?</h2><ul><li><strong>Real-time status over MQTT</strong>: instance, device, and team status now stream over MQTT instead of HTTP polling, so changes show faster</li><li><strong>Faster instance lists</strong>: pagination and an N+1 fix on the Hosted and Remote Instances pages, plus sorting by status</li><li><strong>Namespace-scoped RBAC</strong>: role-based access scoped to a namespace for shared-cluster self-hosted deployments</li><li><strong>Platform polish</strong>: descriptive page titles, a login-page cookie-consent notice, and a fix for instances reporting suspended while still running</li></ul><p>For detailed breakdowns of each feature with additional visuals, visit our <a href="https://flowfuse.com/changelog/">changelog</a>. For the complete list of everything included in FlowFuse 2.32, check out the <a href="https://github.com/FlowFuse/flowfuse/releases" rel="nofollow">release notes</a>.</p><p>If something in this release improves your workflow, or if there is still friction we can remove, please <a href="mailto:contact@flowfuse.com?subject=Feedback%20on%202.32">share feedback or report issues regarding this release</a> to us.</p><h2 id="try-flowfuse">Try FlowFuse</h2><h3 id="flowfuse-cloud">FlowFuse Cloud</h3><p>The fastest way to get started is with FlowFuse Cloud.
<a href="https://app.flowfuse.com/account/create" rel="nofollow">Get started for free</a> and have your Node-RED instances running in minutes.</p><h3 id="self-hosted">Self-Hosted</h3><p>Run FlowFuse locally using <a href="https://flowfuse.com/docs/install/docker/">Docker</a> or <a href="https://flowfuse.com/docs/install/kubernetes/">Kubernetes</a>.</p><p><strong>Review FlowFuse for your setup</strong></p><p>Get in touch and we'll walk through how FlowFuse empowers your production environment, including the Certified Nodes packages that cover the systems you connect to.</p><p><a href="https://flowfuse.com/contact-us/">Contact Us</a></p>]]></content>
        <updated>2026-07-02T00:00:00.000Z</updated>
        <link href="https://flowfuse.com/blog/2026/07/flowfuse-release-2-32/"/>
        
    </entry>
    <entry>
        <id>https://flowfuse.com/blog/2026/06/announcing-node-red-con-2026/</id>
        <title>Announcing Node-RED Con 2026: Call for Papers Now Open</title>
        <summary>Node-RED Con 2026 takes place November 3, 2026, proudly sponsored by FlowFuse. The Call for Papers is open until July 31.</summary>
        <content type="html"><![CDATA[<p>Node-RED Con is back. The community conference returns on <strong>Tuesday,
November 3, 2026</strong>, free, online, and open to everyone. FlowFuse is proud
to sponsor this year's event alongside the OpenJS Foundation.</p><p>This year's theme is <strong>Node-RED at the Edge of Intelligence</strong>.</p><h2 id="the-call-for-papers-is-open">The Call for Papers is open</h2><p>The conference agenda is built entirely from community submissions. The
organizing team is looking for talks across three formats:</p><ul><li><strong>Full Talks &amp; Demos (25–30 mins):</strong> Technical talks, case studies, and
practical demonstrations aligned with this year's theme. Submissions are
particularly encouraged in these areas: real-world Node-RED deployments in
production, AI integration (LLMs, agents, MCP), edge computing architectures,
industrial use cases (PLCs, SCADA, OPC-UA, MQTT), and using AI tools to build
and manage flows.</li><li><strong>Lightning Talks (8–10 mins):</strong> Fun, cool, or inspiring projects built with
Node-RED, no matter how unconventional. IoT/IIoT and AI projects are
encouraged, but any project you're proud of is welcome.</li><li><strong>Panelists:</strong> Experts with strong opinions and experience in industrial
automation, AI in industrial environments, IoT security, or the future of
low-code development.</li></ul><p><a href="https://nrcon.nodered.org/" rel="nofollow">Submit your talk</a> <strong>CFP closes Friday, July 31, 2026.</strong></p><h2 id="why-speak">Why speak</h2><p>Node-RED Con 2025 welcomed 1,700+ registered and 1,100+ attendees from 35+
countries. Sessions averaged 350+ live viewers, with the most-watched talks
drawing over 600 concurrent attendees. All sessions are recorded and published:
the <a href="https://www.youtube.com/playlist?list=PLyNBB9VCLmo2yvFdVZOv41NUEzuw-CAZX" rel="nofollow">Node-RED Con 2025 playlist</a>
has accumulated 3,100+ views and is still growing.</p><h2 id="stay-in-the-loop">Stay in the loop</h2><p>Want to be notified when registration opens? Sign up below.</p><script char-set="utf-8" type="text/javascript" src="https://flowfuse.com//js-eu1.hsforms.net/forms/embed/v2.js"></script><script>
  hbspt.forms.create({
    portalId: "26586079",
    formId: "9a447b67-0957-4f40-90e9-69db1ab9c70a",
    region: "eu1"
  });
</script><p><strong>See Node-RED running at scale</strong></p><p>FlowFuse lets you deploy, manage, and govern Node-RED across your entire operation, from a single instance to hundreds of devices.</p><p><a href="https://flowfuse.com/book-demo/">Book a Demo</a></p>]]></content>
        <updated>2026-06-29T00:00:00.000Z</updated>
        <link href="https://flowfuse.com/blog/2026/06/announcing-node-red-con-2026/"/>
        
    </entry>
    <entry>
        <id>https://flowfuse.com/blog/2026/06/application-idea-to-architectur/</id>
        <title>Turning an Application Idea into an Architecture</title>
        <summary>A simple four-step framework helps turn industrial application ideas into clear architectures by focusing on responsibilities, not technologies.</summary>
        <content type="html"><![CDATA[<p>Every industrial application starts with an idea.</p><p><em>"We need OEE dashboards."</em></p><p><em>"We need a Unified Namespace."</em></p><p><em>"We need an asset registry."</em></p><p>The challenge isn't the idea. It's turning it into a clear architecture. Instead of starting with technologies, start with the responsibilities the application must fulfil. Once you can identify those, the architecture naturally follows.</p><p>This article introduces a simple four-step framework for turning application ideas into repeatable industrial architectures.</p><h2 id="how-this-framework-works">How This Framework Works</h2><p><img alt="Four-step framework for turning an application idea into an architecture" src="https://flowfuse.com/blog/2026/06/images/four-moves-framework.png"/><em>Turn any application idea into an architecture in four moves</em></p><p>A FlowFuse application uses a small number of standard building blocks. Don't memorise them. Learn to recognise them. Think of it as learning to see the structure behind an application idea.</p><p>Every example in this guide follows the same four moves:</p><ol><li><strong>Say what it does.</strong> Start with the outcome. Describe the problem you're solving, not the technology you're using.</li><li><strong>Pick the building block.</strong> Identify the FlowFuse building block, or combination of blocks, that delivers that outcome.</li><li><strong>Decide where the data goes.</strong> Determine how data moves through the application and where it should live.</li><li><strong>Read off the sentence.</strong> Combine the pieces into a single architectural statement.</li></ol><p>That final sentence matters more than it might seem. If you can describe the architecture in one clear sentence, you've already made most of the important design decisions.</p><p>We'll apply these four moves three times: first to a hardware application, then to a software application, and finally to one that combines both.</p><h2 id="example-1-a-hardware-idea">Example 1: A Hardware Idea</h2><p>Let's start with a requirement many manufacturers are working towards today.</p><h3 id="the-idea">The Idea</h3><p>A company wants to build a Unified Namespace so that dashboards, analytics tools, and other applications can consume machine data consistently.</p><p>At this stage, forget MQTT, databases, and deployment. Focus on what needs to happen.</p><h3 id="_1-say-what-it-does">1. Say What It Does</h3><p>The application reads data from local equipment and publishes it in a consistent structure for other systems to consume.</p><p>That's the outcome.</p><h3 id="_2-pick-the-building-block">2. Pick the Building Block</h3><p>Look at the hardware building blocks available, and recognise which one matches the requirement.</p><table><thead><tr><th>Hardware Building Block</th><th>What it is</th></tr></thead><tbody><tr><td><strong>Packaged App</strong></td><td>A finished application that runs on a device with little or no configuration.</td></tr><tr><td><strong>Configurable App</strong></td><td>The same application, but with site-specific settings.</td></tr><tr><td><strong>Edge Building Block</strong></td><td>Reusable functionality that you assemble into larger edge solutions.</td></tr></tbody></table><p>This application talks directly to machines, PLCs, and sensors, so we're dealing with a hardware component.</p><p>It also needs adapting to the equipment at each site rather than deploying unchanged everywhere. That rules out a Packaged App and points us towards an <strong>Edge Building Block</strong>.</p><p>We now know the first piece of our architecture.</p><h3 id="_3-decide-where-the-data-goes">3. Decide Where the Data Goes</h3><p>Now ask what happens to the data.</p><p>The application reads information from machines and makes it available to other systems: dashboards, analytics platforms, historians, reporting tools, or other applications.</p><p>Because multiple consumers need the same information in real time, a <strong>Broker (MQTT)</strong> is the natural destination. Rather than send data directly to each application, the Edge Building Block publishes it once and lets other systems subscribe to what they need.</p><p><img alt="Architecture diagram of a Hardware Edge Building Block publishing equipment data to a Broker" src="https://flowfuse.com/blog/2026/06/images/example-1-diagram.png"/><em>The Edge Building Block reads machine data and publishes it once, so any system can subscribe</em></p><p>We've now identified both the application and its primary data destination.</p><h3 id="_4-read-off-the-sentence">4. Read Off the Sentence</h3><p>Combine the pieces.</p><blockquote><p>A Hardware Edge Building Block reads local equipment data and publishes it to a Broker.</p></blockquote><p>That's the architecture.</p><p>Notice what we skipped. We never discussed protocols, flows, dashboards, databases, or deployment details. We started with a requirement, picked the building block, decided where the data goes, and arrived at a clear architectural description, captured in a single sentence.</p><h2 id="example-2-a-software-idea">Example 2: A Software Idea</h2><p>The process doesn't change when hardware disappears from the picture. This time the four moves should already feel familiar, so we'll work through them as one continuous walk rather than four labelled steps.</p><h3 id="the-idea-1">The Idea</h3><p>A company wants a central asset registry where teams can view, search, and maintain information about equipment across multiple sites.</p><p>Operators, maintenance teams, and engineers all need the same information, and everyone should see changes immediately.</p><h3 id="working-through-the-moves">Working Through the Moves</h3><p>Said plainly, the application maintains a shared list of assets that users can view, search, and update. That's the outcome, not the implementation.</p><p>This time nothing touches machines, PLCs, or sensors. The application exists entirely for people. Users open screens, search records, update information, and view results. That points us towards a software building block.</p><table><thead><tr><th>Software Building Block</th><th>What it is</th></tr></thead><tbody><tr><td><strong>Packaged App</strong></td><td>A self-contained application that performs a specific function without a user interface.</td></tr><tr><td><strong>Data-Driven App</strong></td><td>A user-facing application whose content is driven by data.</td></tr><tr><td><strong>Shared Building Block</strong></td><td>Reusable functionality that you incorporate into other applications.</td></tr></tbody></table><p>The requirement revolves around people viewing and managing data through an interface, which makes it a <strong>Data-Driven App</strong>.</p><p>Now the data. Assets are records. An asset belongs to a site. It may have an owner, a status, maintenance history, and other attributes. Users search these records, update them, and relate them to one another. This is structured business data, which makes a <strong>Relational Database</strong> the natural choice. The Data-Driven App reads and updates the information stored there.</p><p><img alt="Architecture diagram of a Software Data-Driven App reading and updating asset records in a Relational Database" src="https://flowfuse.com/blog/2026/06/images/example-2-diagram.png"/><em>Asset records live in the Relational Database; the Data-Driven App is the interface users work through</em></p><h3 id="read-off-the-sentence">Read Off the Sentence</h3><p>Combine the pieces.</p><blockquote><p>A Software Data-Driven App manages asset information stored in a Relational Database.</p></blockquote><p>That's the architecture.</p><p>Same four moves, same single-sentence result. We started with a business requirement, picked the application type, and decided where the data belongs, without touching implementation. Only the pieces changed.</p><h2 id="example-3-combining-hardware-and-software-oee">Example 3: Combining Hardware and Software (OEE)</h2><p>The first two examples were deliberately simple: one hardware application, one software application. Most real-world industrial applications combine both. By now the moves should feel like second nature, so we'll again work through them as one continuous walk.</p><h3 id="the-idea-2">The Idea</h3><p>A manufacturer wants operators and supervisors to see live OEE for every production line. They also want historical data so they can analyse trends, compare performance, and spot opportunities for improvement.</p><p>This requirement spans two worlds. Machines generate the data. People consume the results.</p><p>Make it concrete. Say Line 3 is a packaging line, and the manufacturer wants the supervisor's screen to show that it's running at 78% OEE right now, with a downtime event logged at 14:32. To get there, the line's PLC has to publish its running state and part counts, something in the cloud has to turn those into an OEE figure, and the day's readings have to land somewhere you can chart them tomorrow. Hold that picture while we work through it.</p><h3 id="working-through-the-moves-1">Working Through the Moves</h3><p>Said plainly, the solution needs to collect production data from equipment, calculate OEE metrics, present those metrics to users, and store historical data for analysis. That's already more than one responsibility, which tells us we're combining building blocks, not picking a single one.</p><p>The machine side is the pattern from Example 1: production data needs collecting from equipment and making available to other systems. That's a <strong>Hardware Edge Building Block</strong>.</p><p>The user side is the pattern from Example 2: operators need dashboards showing current performance and historical trends. That's a <strong>Software Data-Driven App</strong>.</p><p>Now the data. The hardware component publishes machine state and production events. On Line 3, that's the running/stopped flag and the part count ticking up. Multiple consumers may need that information, so the first destination is a <strong>Broker</strong>. The software application subscribes to the broker, consumes the machine data, and calculates OEE, turning Line 3's raw counts into that 78% figure on the supervisor's screen.</p><p>The requirement also calls for historical analysis. OEE values, production counts, and downtime events like the 14:32 stop are all time-based measurements, which makes a <strong>Time-Series Database</strong> the natural place to store them.</p><p><img alt="Architecture diagram of an Edge Building Block, Broker, Data-Driven App, and Time-Series Database working together for OEE" src="https://flowfuse.com/blog/2026/06/images/example-3-diagram.png"/><em>Two familiar patterns connected: the edge piece publishes, the cloud app calculates and displays, the database remembers</em></p><h3 id="read-off-the-sentence-1">Read Off the Sentence</h3><p>Combine the pieces.</p><blockquote><p>A Hardware Edge Building Block publishes machine data to a Broker, which a Software Data-Driven App consumes to calculate and display OEE, storing historical metrics in a Time-Series Database.</p></blockquote><p>That's the architecture.</p><p>We didn't design OEE from scratch. We recognised two patterns we'd already seen and connected them. The challenge wasn't inventing a new architecture. It was recognising which building blocks the job needed and how they fit together.</p><h2 id="conclusion">Conclusion</h2><p>At the start of this article, an OEE system, a Unified Namespace, and an asset registry looked like completely different applications. By now they should look familiar, not because the business problems are the same, but because the process for designing them is.</p><p>Each started with a requirement, broke down into a set of responsibilities, mapped onto FlowFuse building blocks, and resolved into a single architectural sentence.</p><p>That's the real purpose of this framework: to help you see the structure behind an application before implementation begins. Once you can do that, you stop asking "What should we build?" and start asking "Which patterns are already here?"</p><p>Next time a requirement lands on your desk, run the four moves before you open a diagram. The answer is usually much simpler than it first appears.</p><p><strong>Design your industrial architecture with FlowFuse</strong></p><p>Talk to our team to map your application idea into a scalable industrial architecture using FlowFuse building blocks.</p><p><a href="https://flowfuse.com/contact-us/">Contact Us</a></p>]]></content>
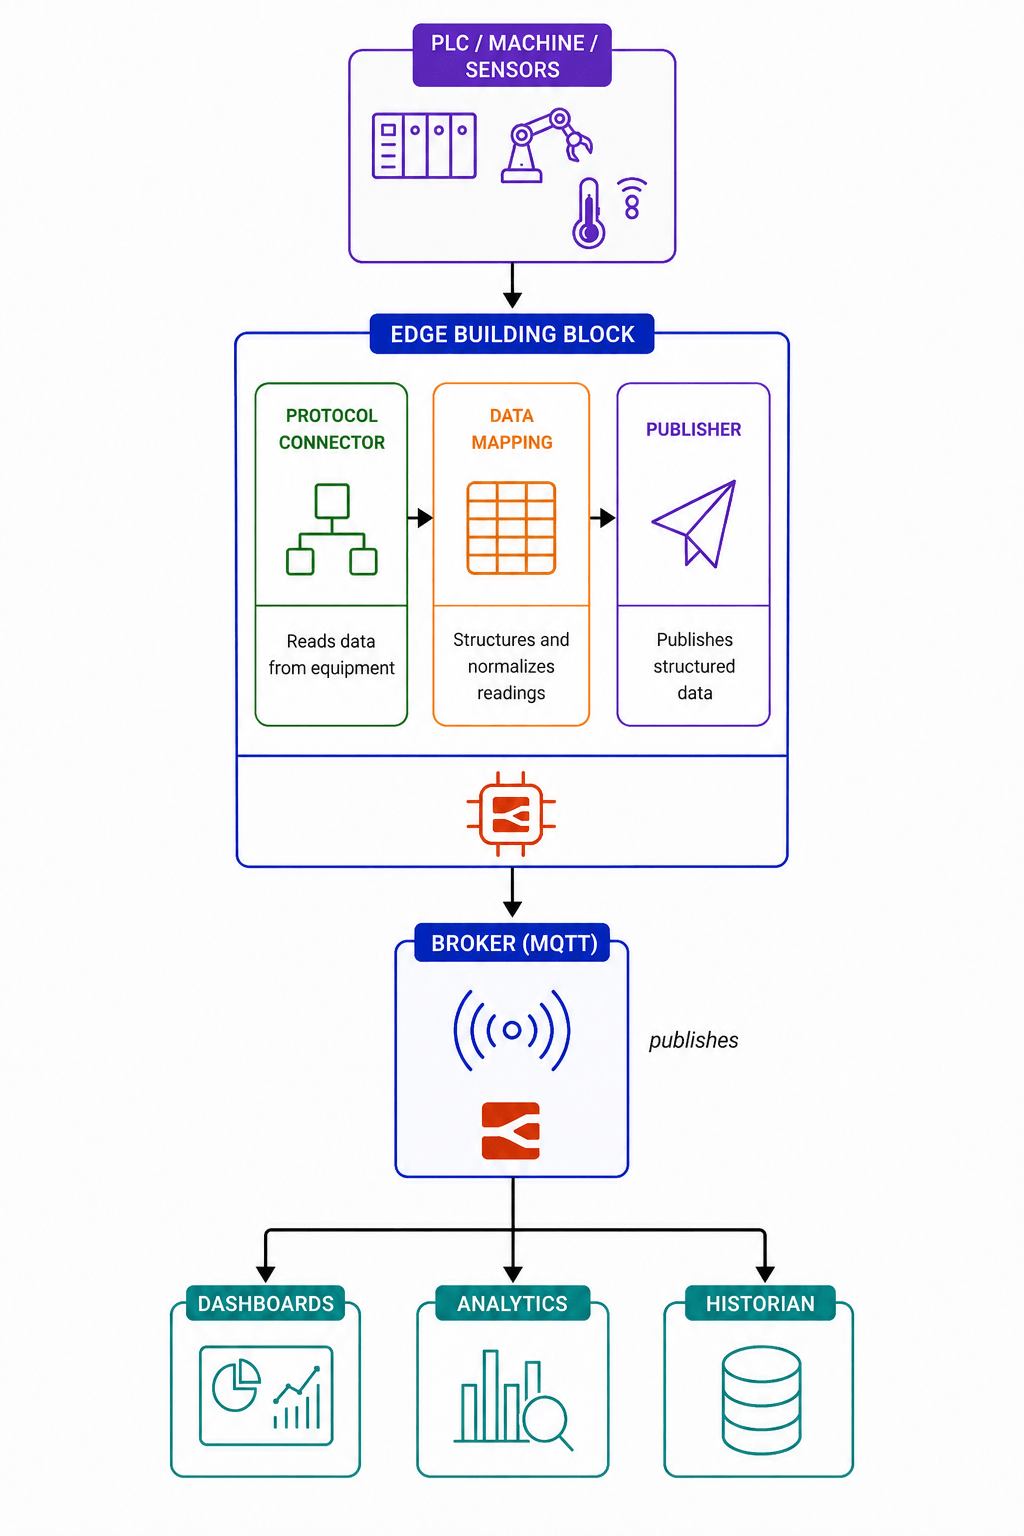
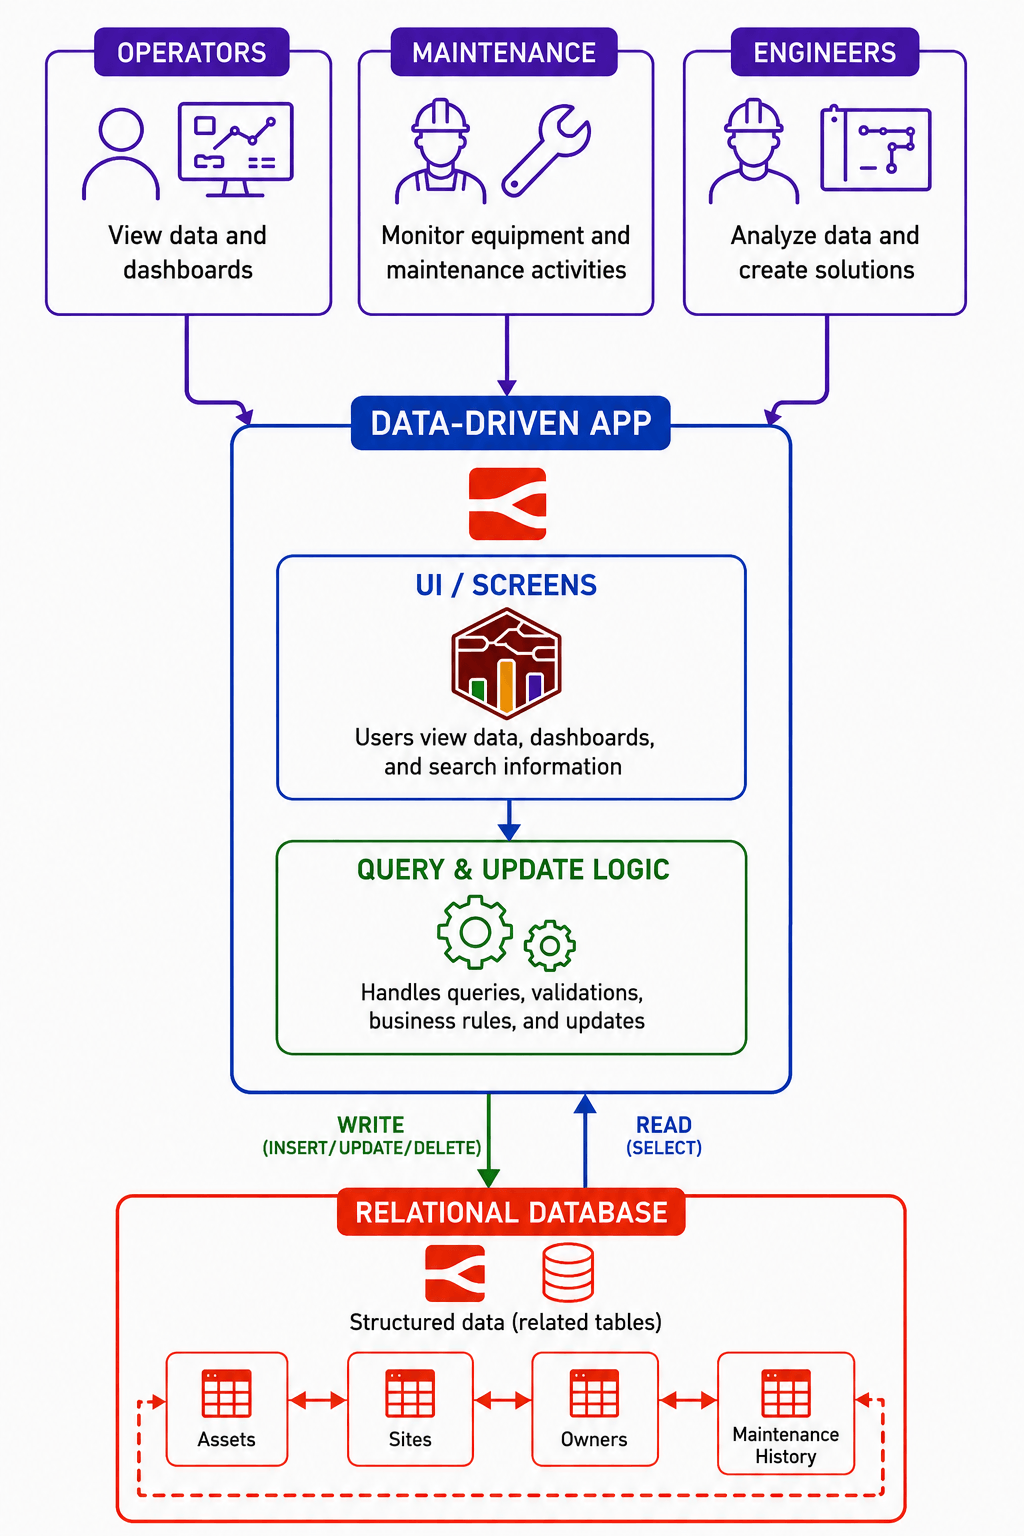
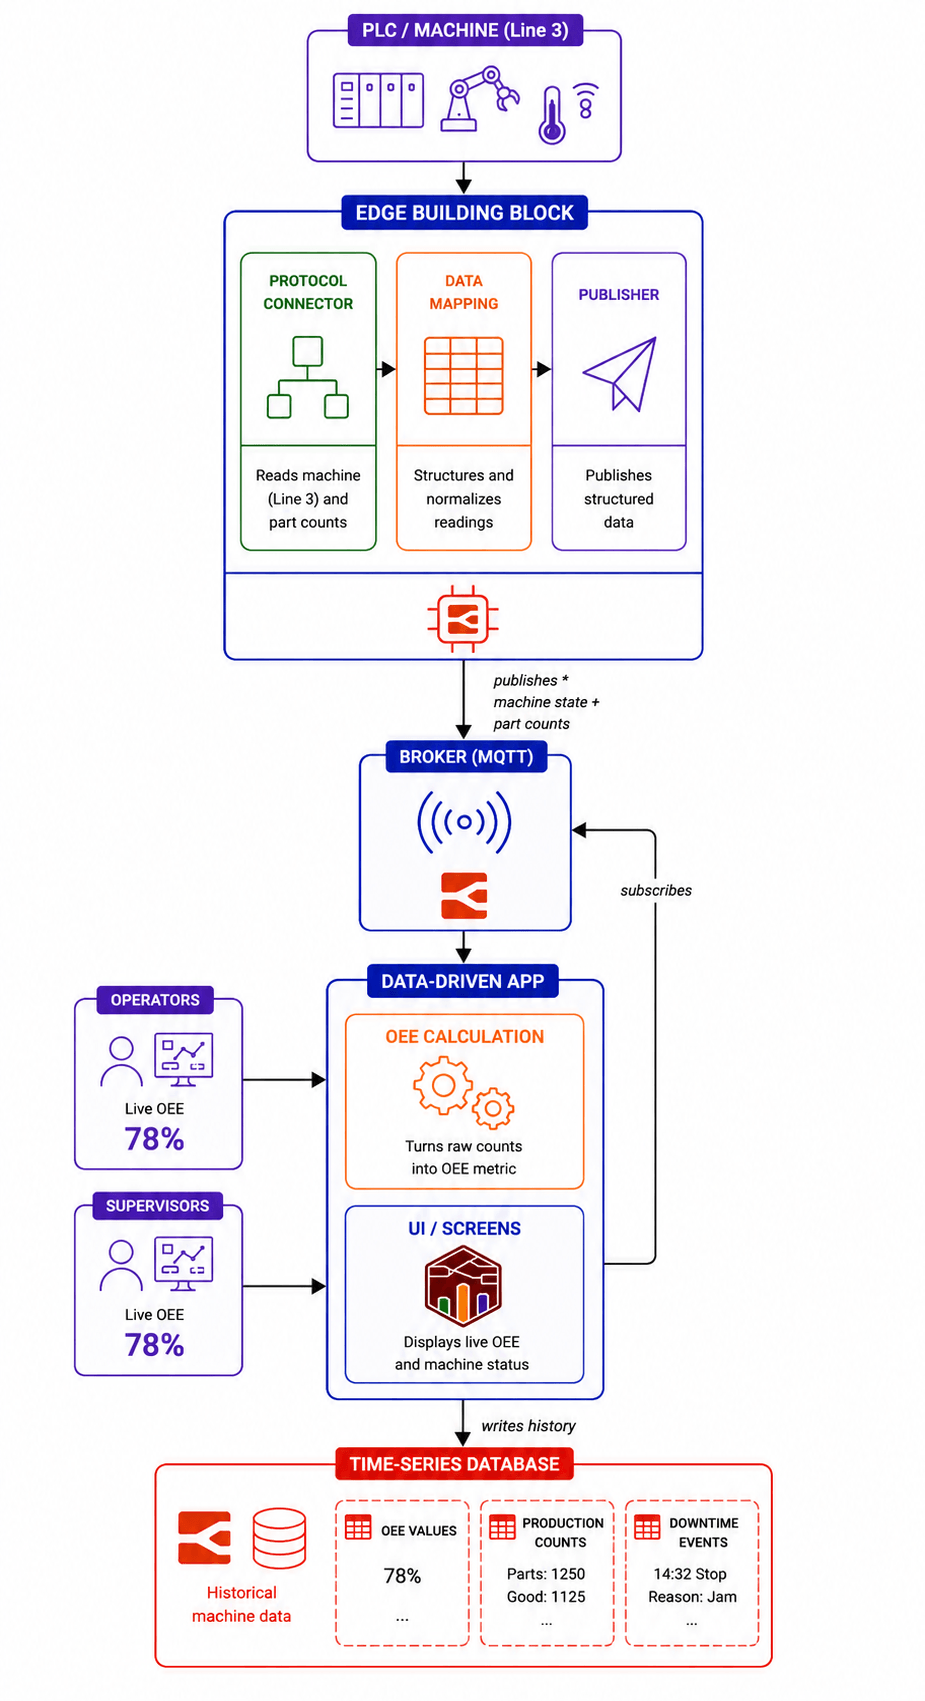
        <updated>2026-06-26T00:00:00.000Z</updated>
        <link href="https://flowfuse.com/blog/2026/06/application-idea-to-architectur/"/>
        
    </entry>
    <entry>
        <id>https://flowfuse.com/blog/2026/06/opcua-to-influxdb/</id>
        <title>Historical Data Logging with OPC UA and InfluxDB</title>
        <summary>Real-time OPC UA values tell you what's happening now; the history is where the value lives. This guide connects OPC UA to InfluxDB in FlowFuse to turn live equipment readings into durable, timestamped history. Install the InfluxDB and FlowFuse Edge Certified OPC UA nodes, configure an OPC UA endpoint and read tags on a schedule, shape each reading into fields and tags with a function node, set the point's timestamp from the server's sample time, and write to InfluxDB with the influxdb out node. Verify the data lands in the Data Explorer, then query it back into FlowFuse Dashboard to chart trends and catch slow drift before it becomes a fault.</summary>
        <content type="html"><![CDATA[<p>Industrial equipment produces data constantly: temperatures, pressures, motor speeds, tank levels, all changing by the second. Real-time values tell you what's happening now, but the history is where the value lives, spotting a degrading pump, proving a batch stayed within spec, tracing the conditions behind a fault. OPC UA gets that data out of your equipment in a vendor-neutral way, and InfluxDB stores it as timestamped history built to query at scale. In this article, you'll connect the two in FlowFuse to turn live readings into a durable record you can query, chart, and analyze.</p><blockquote><p><strong>Note:</strong> If you'd rather not leave FlowFuse and want a good time-series database built in, <a href="https://flowfuse.com/docs/user/ff-tables/">FlowFuse Tables</a> is the answer.</p></blockquote><p><img alt="The finished flow on the FlowFuse canvas: inject → Read (OPC UA) → function → influxdb out" src="https://flowfuse.com/blog/2026/06/images/opcua-to-influxdb-flow.png"/><em>The complete pipeline: an inject node triggers a read, a function node shapes the reading, and the influxdb out node stores it.</em></p><h2 id="what-youll-need">What you'll need</h2><p>Before building the flow, make sure you have:</p><ul><li><strong>A FlowFuse remote instance on an edge device.</strong> OPC UA servers and PLCs sit on the local network, so run this flow on an edge device close to the equipment. Install the <a href="https://flowfuse.com/docs/device-agent/install/overview/">Device Agent</a> and register it as a remote instance.</li><li><strong>An OPC UA server to read from.</strong> Your data source: a PLC, gateway, or device exposing tags over OPC UA. No hardware? The free Prosys OPC UA Simulation Server works for testing.</li><li><strong>A running InfluxDB instance.</strong> Cloud or self-hosted. Create an organization, a bucket, and an API token with write access.</li><li><strong>Endpoint details for both.</strong> The OPC UA endpoint URL (like <code>opc.tcp://192.168.1.10:4840</code>) plus any credentials, and your InfluxDB URL, org, bucket, and token.</li></ul><p>For the OPC UA connection, this guide uses the <strong>FlowFuse Edge Certified Nodes package</strong>, part of the <strong>FlowFuse Edge</strong> offering and vetted, maintained, and tested by the FlowFuse team. <a href="https://flowfuse.com/contact-us/">Contact sales</a> to enable it for your team. Community nodes work too, but they don't get the same vetting, maintenance, or testing, so reliability varies.</p><p>With those ready, the next step is installing the nodes that connect FlowFuse to OPC UA and InfluxDB.</p><h2 id="installing-the-nodes">Installing the nodes</h2><p>You'll install two packages: the InfluxDB nodes and the FlowFuse Edge Certified OPC UA nodes.</p><ol><li>Open the editor on your remote instance.</li><li>From the menu (top right), select <strong>Manage palette</strong>, then switch to the <strong>Install</strong> tab.</li><li>Search for <strong><code>node-red-contrib-influxdb</code></strong> and click <strong>Install</strong>. These nodes write to and query InfluxDB.</li><li>Switch the catalog using the top dropdown to <strong>FlowFuse Edge Certified Nodes</strong>. Once sales enables FlowFuse Edge Certified Nodes for your team, this catalog shows up here; restart any existing instance so it picks up the updated catalogue.</li><li>Search for <strong><code>@flowfuse-certified-nodes/opcua</code></strong> and click <strong>Install</strong>. See the <a href="https://flowfuse.com/node-red/flowfuse/edge/opcua/">OPC UA node documentation</a> for the full node set and configuration options.</li></ol><p><img alt="Manage palette Install tab showing the OPC UA certified package in search results" src="https://flowfuse.com/blog/2026/06/images/opcua-manage-pallete.png"/><em>Install the OPC UA certified package from the FlowFuse Edge Certified Nodes catalog.</em></p><p>Both packages now appear in the palette on the left: an OPC UA group for reading your equipment, and an InfluxDB group for storing the data. Now you're ready to connect to your server and pull live values.</p><h2 id="connecting-to-your-opc-ua-server">Connecting to your OPC UA server</h2><p>With the nodes installed, you'll build the read side of the flow: define the connection, then read your tag values on a schedule.</p><h3 id="define-the-connection">Define the connection</h3><ol><li>Drag a <strong>Read</strong> node onto the canvas.</li><li>Double-click it to open its settings, then click the "+" next to the <strong>Endpoint</strong> field to add a new endpoint configuration.</li><li>Enter your endpoint URL, for example <code>opc.tcp://192.168.1.10:4840</code>.</li><li>Set the <strong>Security Policy</strong> and <strong>Security Mode</strong> to match your server. For a local test server such as the Prosys simulator with security disabled, set both to <code>None</code>. On production equipment, choose the certificate-based policy and mode your server requires, and point the node at your certificate and private-key files.</li><li>If your server needs credentials, enable the login option on the endpoint and enter the username and password. Otherwise leave it anonymous.</li><li>Click <strong>Add</strong>, then <strong>Done</strong>.</li></ol><p><img alt="The OPC UA endpoint configuration dialog with URL, Security Policy, and Security Mode fields" src="https://flowfuse.com/blog/2026/06/images/opcua-config.png"/><em>Point the endpoint at your server's URL and match its Security Policy and Mode.</em></p><blockquote><p><strong>Note:</strong> This guide uses a simulator server for convenience. On production equipment, always enable a certificate-based Security Policy and Mode rather than <code>None</code>, so the connection between FlowFuse and your OPC UA server stays encrypted and authenticated.</p></blockquote><blockquote><p><strong>Note:</strong> Store connection details, endpoint URLs, credentials, InfluxDB tokens, org and bucket names in environment variables rather than hardcoding them in your nodes. This keeps secrets out of your flows and lets you move the same flow between instances without editing each node. See <a href="https://flowfuse.com/docs/user/envvar/">Using Environment Variables</a> for how to set them.</p></blockquote><h3 id="read-the-values-on-a-schedule">Read the values on a schedule</h3><p>The Read node takes the Node ID of the tag from the incoming message, so feed it a message carrying the tag you want and it returns the value. First you need that Node ID, something like <code>ns=3;s=Temperature</code>.</p><ol><li>In the <strong>Read</strong> node, click the tree button next to the <strong>NodeId</strong> field. Enter the Node ID you want to drill into (a root node such as the Objects folder is the usual starting point), and the node renders your server's address space as an expandable tree. Drill down, click the tag you want, and its Node ID fills in automatically.</li><li>Add an <strong>inject</strong> node and set it to repeat at a fixed interval, say every 5 seconds, so each pulse triggers a fresh read. Wire it into the Read node.</li><li>Connect a <strong>debug</strong> node to the Read node's output, then deploy.</li></ol><p><img alt="Opcua read node config" src="https://flowfuse.com/blog/2026/06/images/opcua-read-node.png"/><em>Opcua read node config</em></p><p>Each time a message arrives, the Read node returns more than just the number. The value lands in <code>msg.payload</code>, and the message also carries <code>msg.dataType</code> (such as <code>Double</code> or <code>Boolean</code>), <code>msg.statusCode</code> (<code>Good</code> on success, or an error like <code>BadUnknownNode</code>), <code>msg.sourceTimestamp</code> and <code>msg.serverTimestamp</code> as ISO strings, and <code>msg.nodeId</code> echoing back what was read. Watch that <code>statusCode</code>, it's how you tell a real <code>0</code> reading from a tag that failed to read at all.</p><p>To read several tags at once, pass an array of Node IDs in <code>msg.topic</code> or <code>msg.nodeId</code> and the node returns an array of values in <code>msg.payload</code>, more efficient than running a separate read per tag.</p><blockquote><p><strong>ℹ Tip:</strong> If you ever need the <em>flow itself</em> to discover Node IDs while it's running, say, to enumerate tags on a server whose address space changes, there's a dedicated <strong>Browse</strong> node for that. It's overkill for a fixed set of tags like this one, so we'll skip it here.</p></blockquote><p>Deploy and watch the debug output. You should see a value arriving on each interval. The value itself is in <code>msg.payload</code>, while the timestamp and quality ride along on separate properties (<code>msg.sourceTimestamp</code>, <code>msg.statusCode</code>, and so on), so <code>msg.payload</code> is just the bare reading, like <code>42.5</code>. That's the shape the next step builds on.</p><p><img alt="The debug sidebar showing a reading with msg.payload, msg.statusCode, and msg.sourceTimestamp expanded" src="https://flowfuse.com/blog/2026/06/images/read-output.png"/><em>Each read returns the value in msg.payload, with timestamp and quality on separate properties.</em></p><h2 id="writing-data-to-influxdb">Writing Data to InfluxDB</h2><p>The OPC UA Read node and InfluxDB Out node use different message formats, so add a <strong>Function</strong> node between them to format the data before writing it to InfluxDB.</p><ol><li>Drop a <strong>Function</strong> node after the Read node and open it.</li><li>Configure it to build the payload InfluxDB expects. <code>msg.payload</code> contains the OPC UA value, and <code>msg.sourceTimestamp</code> contains the timestamp from the OPC UA server:</li></ol><pre class="language-javascript shiki shiki-themes material-theme-lighter material-theme material-theme-palenight" code="const value = msg.payload;
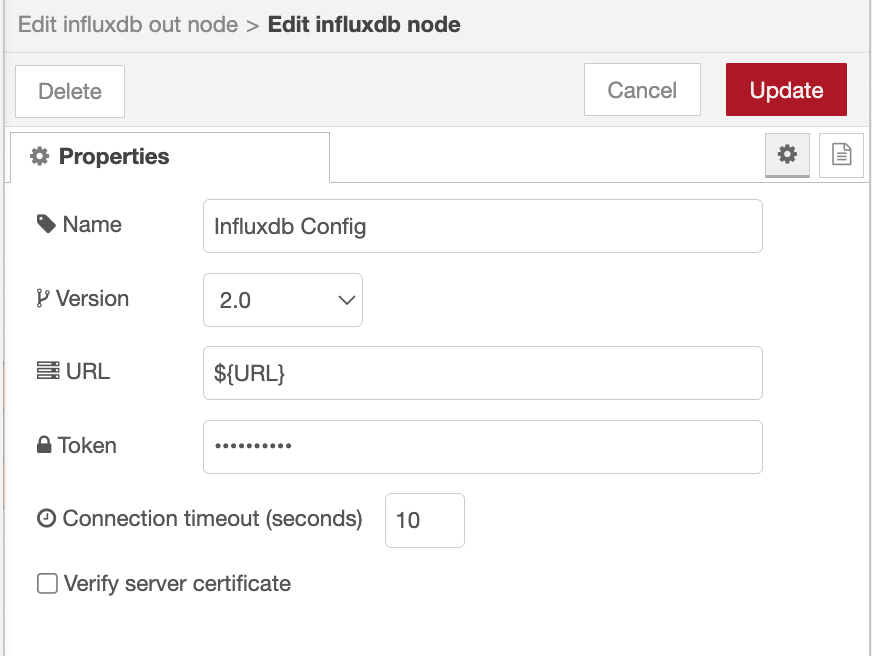
msg.measurement = "equipment_readings";
msg.timestamp = msg.sourceTimestamp;

msg.payload = [
    {
        temperature: value
    },
    {
        sensor: "tank-1",
        location: "plant-floor"
    }
];

return msg;
" language="javascript" meta="" style=""><code __ignore-map=""><span class="line" line="1"><span class="spNyl">const</span><span class="sTEyZ"> value </span><span class="sMK4o">=</span><span class="sTEyZ"> msg</span><span class="sMK4o">.</span><span class="sTEyZ">payload</span><span class="sMK4o">;
</span></span><span class="line" line="2"><span empty-line-placeholder>
</span></span><span class="line" line="3"><span class="sTEyZ">msg</span><span class="sMK4o">.</span><span class="sTEyZ">measurement </span><span class="sMK4o">=</span><span class="sMK4o"> "</span><span class="sfazB">equipment_readings</span><span class="sMK4o">"</span><span class="sMK4o">;
</span></span><span class="line" line="4"><span class="sTEyZ">msg</span><span class="sMK4o">.</span><span class="sTEyZ">timestamp </span><span class="sMK4o">=</span><span class="sTEyZ"> msg</span><span class="sMK4o">.</span><span class="sTEyZ">sourceTimestamp</span><span class="sMK4o">;
</span></span><span class="line" line="5"><span empty-line-placeholder>
</span></span><span class="line" line="6"><span class="sTEyZ">msg</span><span class="sMK4o">.</span><span class="sTEyZ">payload </span><span class="sMK4o">=</span><span class="sTEyZ"> [
</span></span><span class="line" line="7"><span class="sMK4o">    {
</span></span><span class="line" line="8"><span class="swJcz">        temperature</span><span class="sMK4o">:</span><span class="sTEyZ"> value
</span></span><span class="line" line="9"><span class="sMK4o">    },
</span></span><span class="line" line="10"><span class="sMK4o">    {
</span></span><span class="line" line="11"><span class="swJcz">        sensor</span><span class="sMK4o">:</span><span class="sMK4o"> "</span><span class="sfazB">tank-1</span><span class="sMK4o">"</span><span class="sMK4o">,
</span></span><span class="line" line="12"><span class="swJcz">        location</span><span class="sMK4o">:</span><span class="sMK4o"> "</span><span class="sfazB">plant-floor</span><span class="sMK4o">"
</span></span><span class="line" line="13"><span class="sMK4o">    }
</span></span><span class="line" line="14"><span class="sTEyZ">]</span><span class="sMK4o">;
</span></span><span class="line" line="15"><span empty-line-placeholder>
</span></span><span class="line" line="16"><span class="s7zQu">return</span><span class="sTEyZ"> msg</span><span class="sMK4o">;
</span></span></code></pre><p>The first object contains the field values, while the second contains tags used for filtering and grouping data during queries.</p><ol start="3"><li>Wire the Function node to an <strong>InfluxDB Out</strong> node.</li><li>Open the InfluxDB Out node and click the "+" icon next to <strong>Server</strong> to configure the connection. Enter your InfluxDB URL and select the appropriate version (1.x or 2.0).</li><li>For InfluxDB 2.0, provide your <strong>Token</strong>, <strong>Organization</strong>, and <strong>Bucket</strong>. For InfluxDB 1.x, enter the database name and any required credentials.</li><li>If you did not set <code>msg.measurement</code> in the Function node, specify the measurement name (for example, <code>equipment_readings</code>) in the InfluxDB Out node configuration.</li><li>Deploy the flow.</li></ol><p><img alt="The influxdb node configuration with URL and version fields" src="https://flowfuse.com/blog/2026/06/images/influxdb-config.png"/><em>Configure the server connection with your InfluxDB URL and version.</em></p><p><img alt="The influxdb out node configuration with token, org, and bucket fields" src="https://flowfuse.com/blog/2026/06/images/influxdb-write-node-config.png"/><em>Set the token, organization, and bucket so readings are written to the correct destination.</em></p><p>Your readings are now flowing into InfluxDB. On each interval, the Read node retrieves the OPC UA value, the Function node formats it, and the InfluxDB Out node writes the timestamped data point to your bucket.</p><h2 id="verifying-your-data">Verifying your data</h2><p>Confirm the history is actually landing before you rely on it.</p><ol><li>Open the InfluxDB UI and go to the <strong>Data Explorer</strong>.</li><li>Select your bucket, your <code>equipment_readings</code> measurement, and the <code>temperature</code> field.</li><li>Set the time range to the last few minutes and run the query.</li></ol><p><img alt="InfluxDB Data Explorer showing the temperature filling in" src="https://flowfuse.com/blog/2026/06/images/influxdb-explorer.png"/><em>InfluxDB Data Explorer showing the temperature filling in</em></p><p>You'll see your readings listed in a table, one row per read interval. If new rows keep appearing as time passes, your pipeline is working end to end: equipment to OPC UA to FlowFuse to InfluxDB.</p><p>Storing data is only half the story. The InfluxDB In node lets you query readings back from InfluxDB, whether you need the latest values, historical trends, or aggregated metrics. You can then feed the results directly into a <a href="https://dashboard.flowfuse.com" rel="nofollow">FlowFuse Dashboard</a> to build charts, tables, and real-time monitoring views of your OPC UA data.</p><h2 id="where-to-go-from-here">Where to go from here</h2><p>You now have a durable, queryable record of your equipment's behavior. From here you can read more tags, tag each reading with its machine or line so you can slice the data later, and build dashboards on top of InfluxDB to chart trends and spot the slow drift that real-time values hide.</p><p>The real payoff comes when you stop reacting to problems and start seeing them coming. A pump that's drawing a little more current each week, a tank that's taking longer to fill, a temperature that's creeping past its usual range, all of it now sits in a history you can query, instead of vanishing the moment it happens.</p><style>html pre.shiki code .spNyl, html code.shiki .spNyl{--shiki-light:#9C3EDA;--shiki-default:#C792EA;--shiki-dark:#C792EA}html pre.shiki code .sTEyZ, html code.shiki .sTEyZ{--shiki-light:#90A4AE;--shiki-default:#EEFFFF;--shiki-dark:#BABED8}html pre.shiki code .sMK4o, html code.shiki .sMK4o{--shiki-light:#39ADB5;--shiki-default:#89DDFF;--shiki-dark:#89DDFF}html pre.shiki code .sfazB, html code.shiki .sfazB{--shiki-light:#91B859;--shiki-default:#C3E88D;--shiki-dark:#C3E88D}html pre.shiki code .swJcz, html code.shiki .swJcz{--shiki-light:#E53935;--shiki-default:#F07178;--shiki-dark:#F07178}html pre.shiki code .s7zQu, html code.shiki .s7zQu{--shiki-light:#39ADB5;--shiki-light-font-style:italic;--shiki-default:#89DDFF;--shiki-default-font-style:italic;--shiki-dark:#89DDFF;--shiki-dark-font-style:italic}html .light .shiki span {color: var(--shiki-light);background: var(--shiki-light-bg);font-style: var(--shiki-light-font-style);font-weight: var(--shiki-light-font-weight);text-decoration: var(--shiki-light-text-decoration);}html.light .shiki span {color: var(--shiki-light);background: var(--shiki-light-bg);font-style: var(--shiki-light-font-style);font-weight: var(--shiki-light-font-weight);text-decoration: var(--shiki-light-text-decoration);}html .default .shiki span {color: var(--shiki-default);background: var(--shiki-default-bg);font-style: var(--shiki-default-font-style);font-weight: var(--shiki-default-font-weight);text-decoration: var(--shiki-default-text-decoration);}html .shiki span {color: var(--shiki-default);background: var(--shiki-default-bg);font-style: var(--shiki-default-font-style);font-weight: var(--shiki-default-font-weight);text-decoration: var(--shiki-default-text-decoration);}html .dark .shiki span {color: var(--shiki-dark);background: var(--shiki-dark-bg);font-style: var(--shiki-dark-font-style);font-weight: var(--shiki-dark-font-weight);text-decoration: var(--shiki-dark-text-decoration);}html.dark .shiki span {color: var(--shiki-dark);background: var(--shiki-dark-bg);font-style: var(--shiki-dark-font-style);font-weight: var(--shiki-dark-font-weight);text-decoration: var(--shiki-dark-text-decoration);}</style><p><strong>Build on a foundation you can trust</strong></p><p>FlowFuse Edge Certified Nodes are vetted, maintained, and tested by the FlowFuse team, so your OPC UA connections stay reliable in production. Contact sales to enable them for your team.</p><p><a href="https://flowfuse.com/contact-us/">Contact Us</a></p>]]></content>
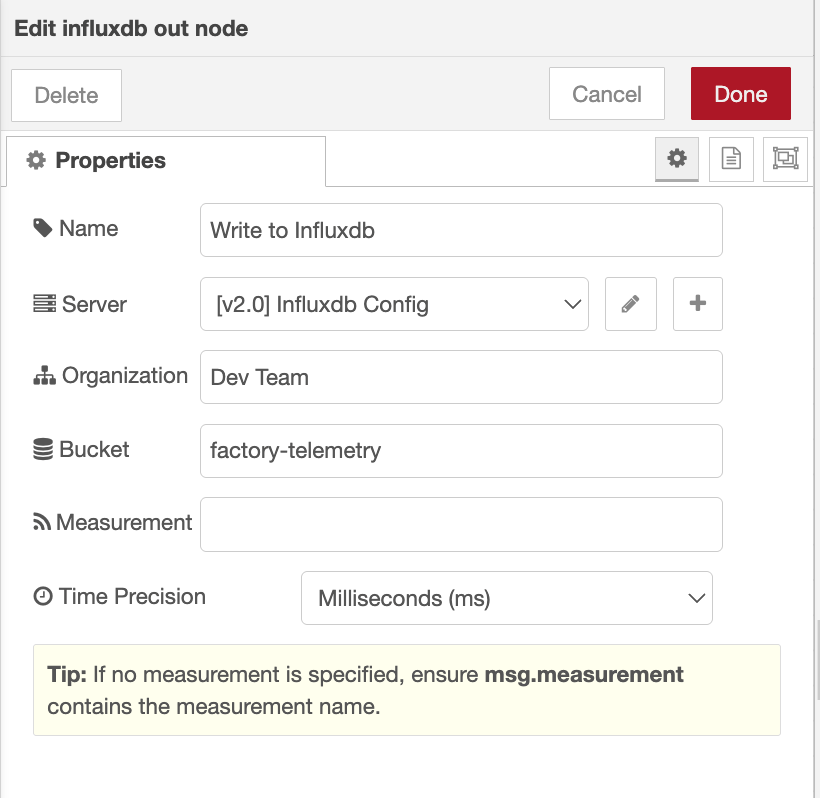
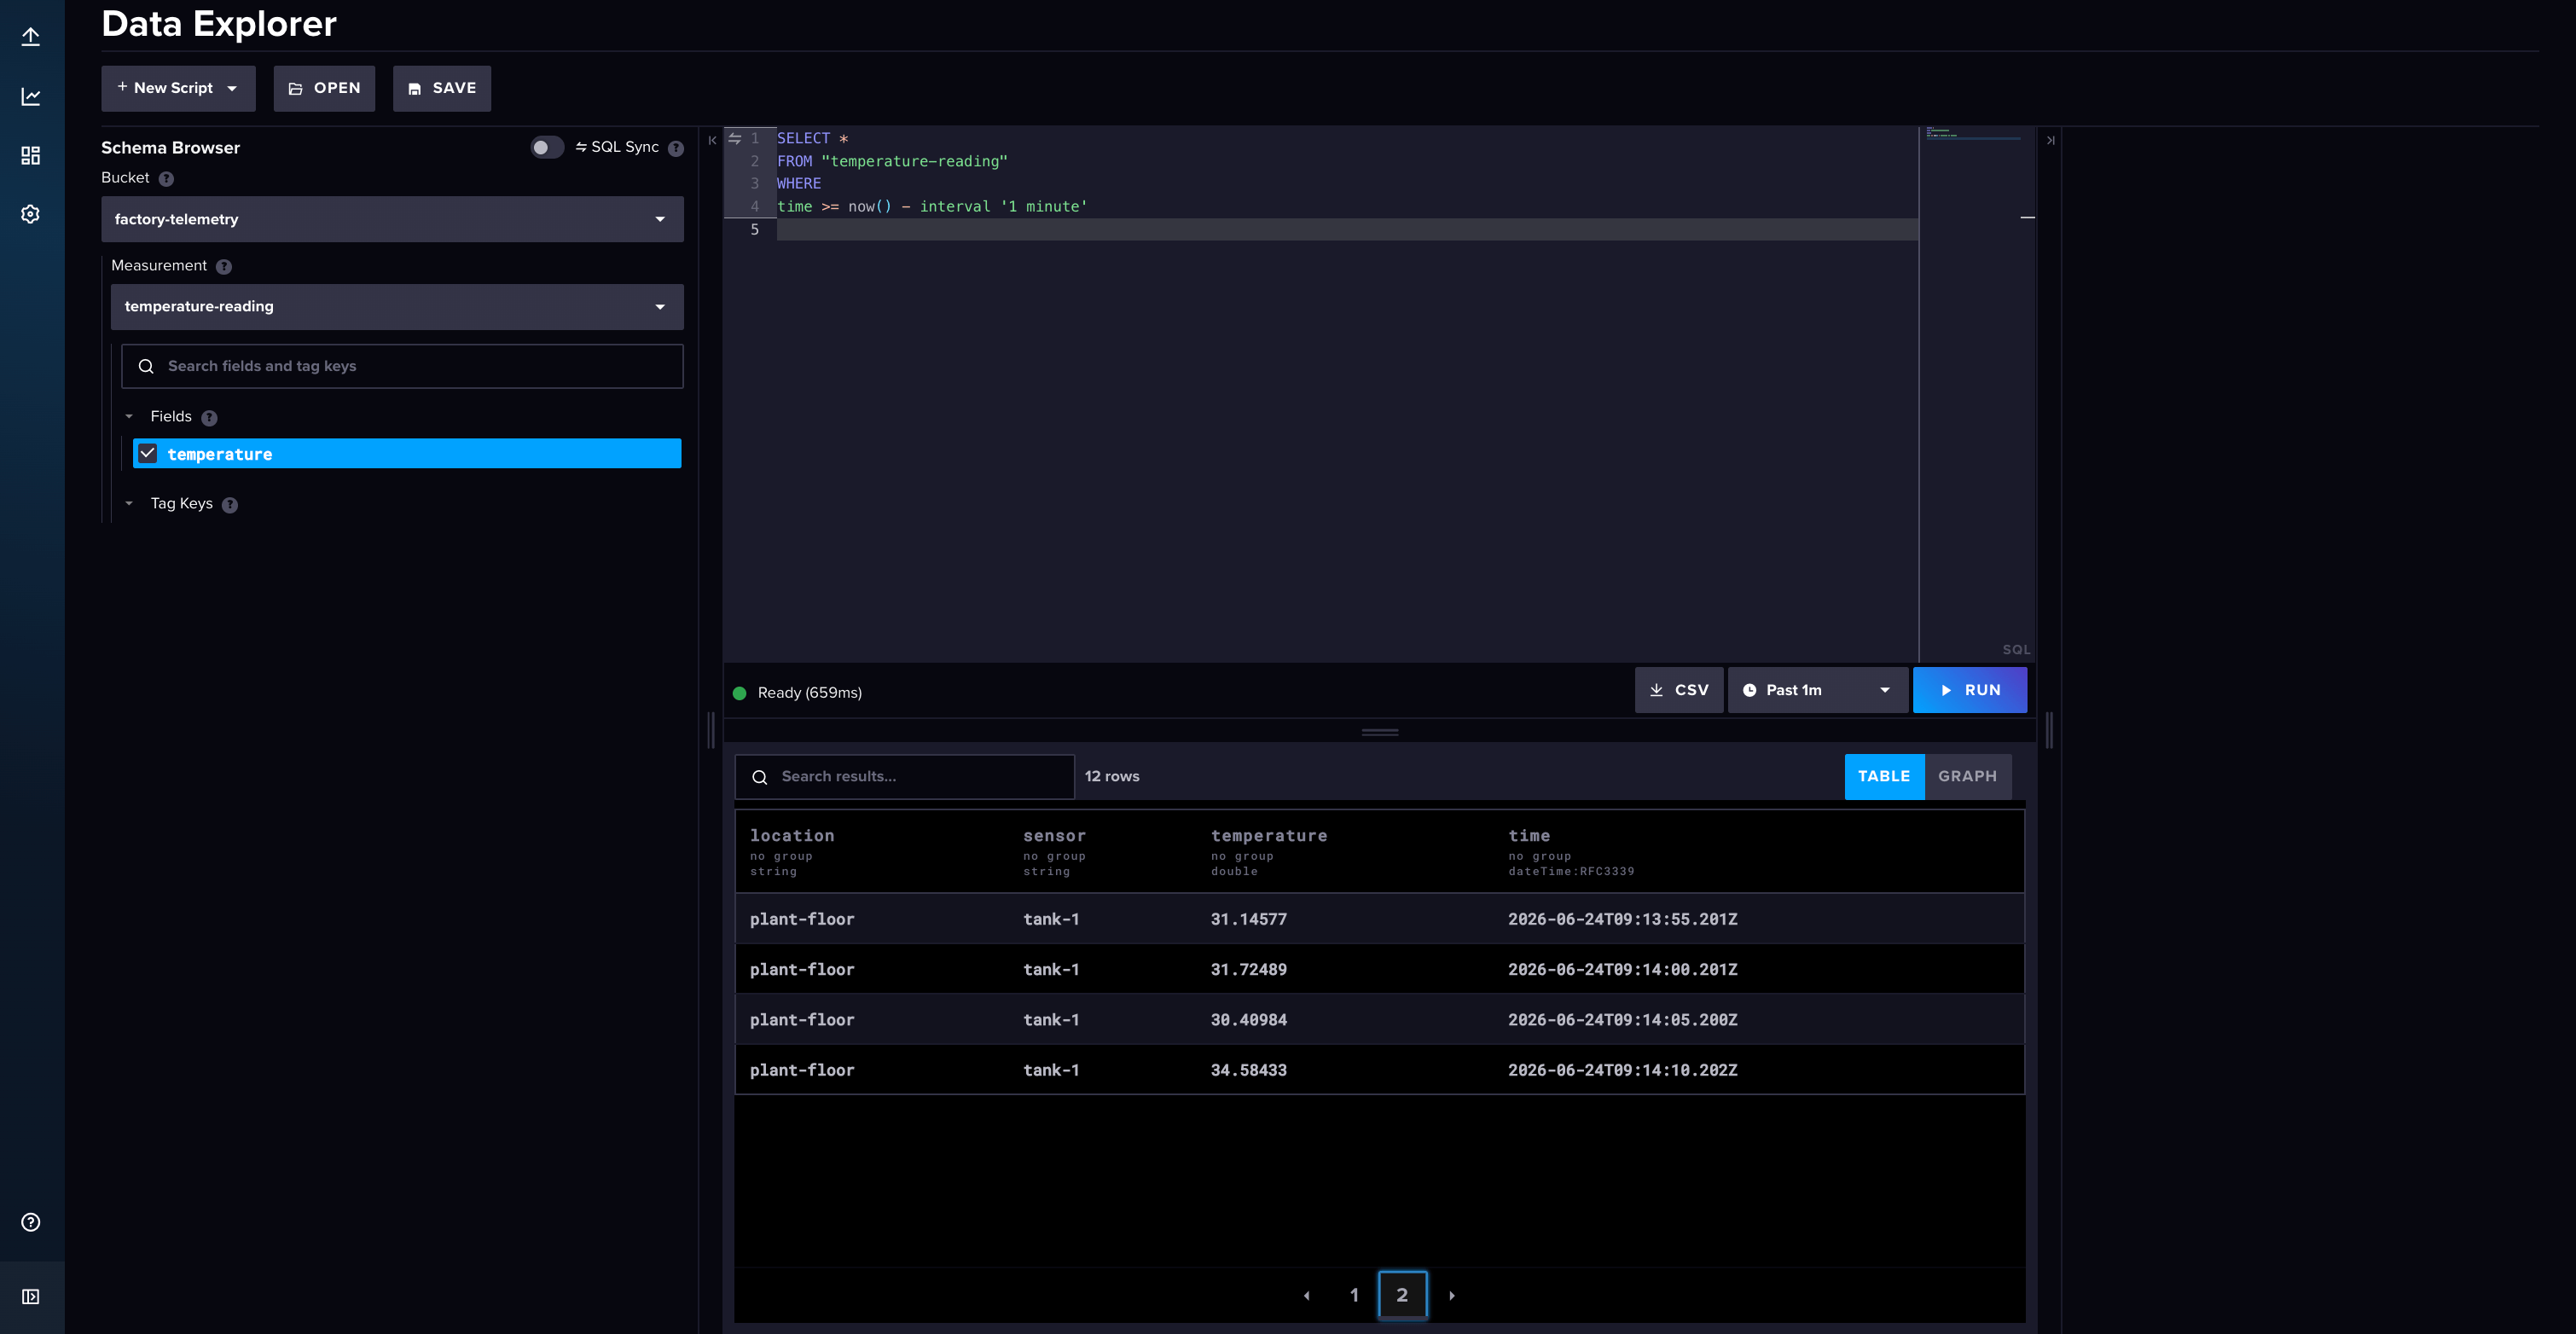
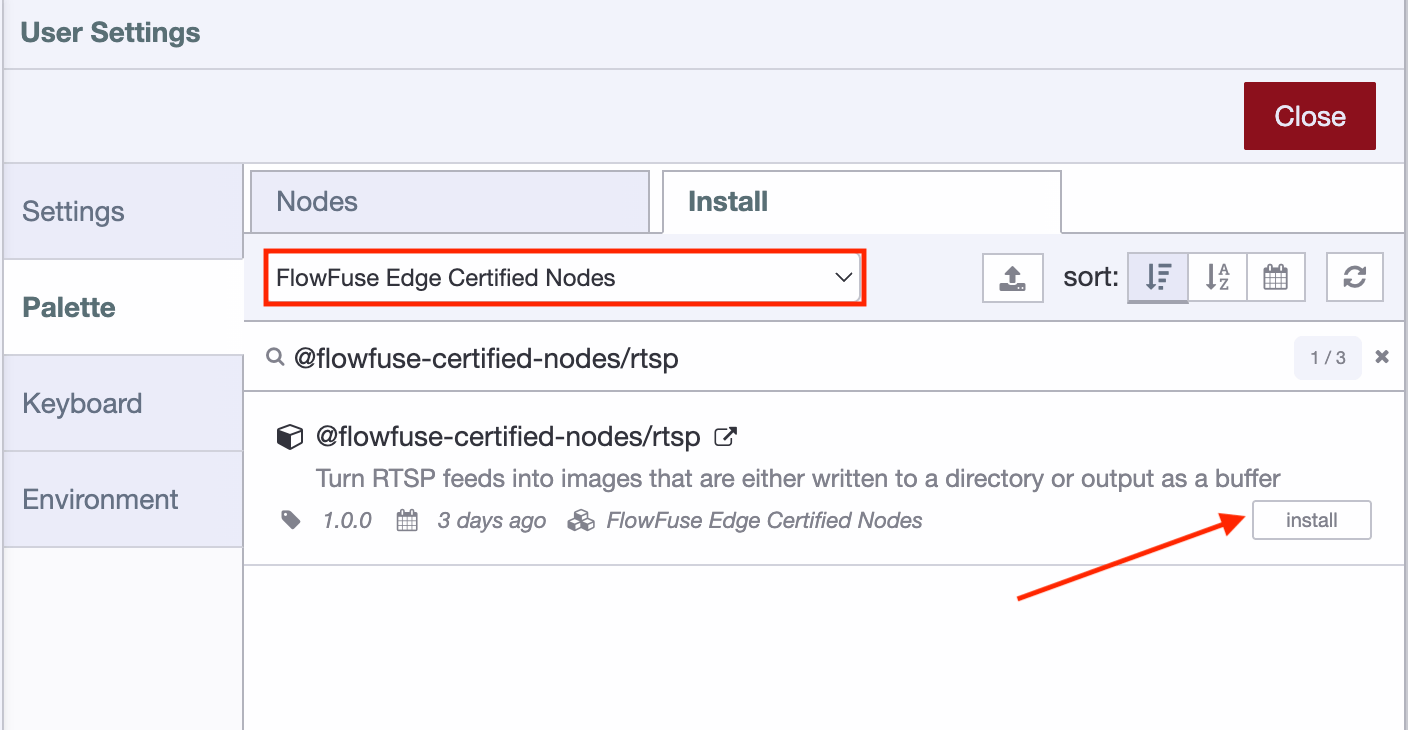
        <updated>2026-06-24T00:00:00.000Z</updated>
        <link href="https://flowfuse.com/blog/2026/06/opcua-to-influxdb/"/>
        
    </entry>
    <entry>
        <id>https://flowfuse.com/blog/2026/06/process-rtsp-camera-feeds-at-the-edge/</id>
        <title>Processing RTSP Camera Feeds at the Edge</title>
        <summary>Camera feeds usually sit idle in an NVR. The new RTSP Video Feed node turns an RTSP stream into still frames you can route through your flows, display on a dashboard, or pass to local AI nodes, all at the edge with nothing leaving the plant.</summary>
        <content type="html"><![CDATA[<p>RTSP is the protocol used by most IP cameras to deliver video streams over a network. While these streams are easy to view in an NVR or camera application, they're much harder to integrate into dashboards, automation, or AI workflows.</p><p>The <strong>RTSP Video Feed</strong> certified node published by FlowFuse solves that problem by converting a live RTSP stream into individual image frames that can be processed directly within your flows. Once a frame is available as a message, you can display it on a dashboard, send it to AI models for analysis, trigger actions based on its content, or store it locally.</p><p>In this tutorial, you'll connect to an RTSP camera and display the live feed on a dashboard. You'll also see how the captured frames can be passed to local AI models or recorded straight to disk.</p><h2 id="prerequisites">Prerequisites</h2><p>Before you begin, ensure the FlowFuse Device Agent is installed and running on an edge device that can access the camera. This device will be managed through FlowFuse and serves as the environment where you'll install the required nodes and build the flow. If you haven't configured a device yet, complete the <a href="https://flowfuse.com/docs/device-agent/quickstart/">Device Agent Quickstart</a> before continuing.</p><p>The RTSP Video Feed node is part of the <strong>FlowFuse Edge Certified Nodes</strong>, which are part of the <strong>FlowFuse Edge</strong> offering and aren't enabled by default. This applies to FlowFuse Cloud customers too, so the catalogue won't appear in your Palette Manager until it's switched on for your team. <a href="https://flowfuse.com/contact-us/">Talk to our sales team</a> to get access before you start.</p><h2 id="how-the-node-works">How the node works</h2><p>The <strong>RTSP Video Feed</strong> node does one job well: it connects to a camera and pulls still frames out of the stream as PNG images. It uses <code>ffmpeg</code> under the hood to handle the video decoding and frame extraction.</p><p>You give it an RTSP URL, credentials if the camera needs them, and a capture rate. It can then run in one of two modes: emit each frame as a message with the PNG in <code>msg.payload</code>, ready to wire into anything that takes an image, or write a numbered sequence of PNGs straight to disk for plain on-site recording. We'll use the message mode for most of this tutorial, since we want the frames in the flow, and cover disk recording at the end.</p><p>The capture rate and image resolution have a direct impact on performance. While <code>ffmpeg</code> handles the video decoding, higher frame rates and resolutions result in more images being generated, transferred, and processed by downstream nodes, increasing CPU, memory, and I/O usage. For best results, configure the node to capture only as many frames as your application requires.</p><h2 id="build-it-a-live-line-view">Build it: A Live Line View</h2><p>Let's turn a camera into something an operator can actually monitor, without ever opening the NVR.</p><h3 id="installing-the-node">Installing the node</h3><blockquote><p>The catalogue must be enabled for your team before you can install the node (see the note above). Once it is, enabling the certified nodes package updates the catalogue, but existing devices and hosted instances won't see the new nodes until they restart. Restart any device or hosted instance you plan to install the node on so it picks up the updated catalogue.</p></blockquote><ol><li>In the FlowFuse editor, open the Palette Manager from the top-right menu.</li><li>Switch to the Install tab and find the "FlowFuse Edge Certified Nodes".</li><li>Locate the <code>@flowfuse-certified-nodes/rtsp</code> and click install. <code>ffmpeg</code> is pulled in automatically, so there's nothing else to set up.</li></ol><p><img alt="FlowFuse Palette Manager open on the Install tab, with the FlowFuse Edge Certified Nodes catalogue selected and the RTSP node's Install button highlighted" src="https://flowfuse.com/blog/2026/06/images/rtsp-edge-catalog.png"/><em>Installing the RTSP Video Feed node from the FlowFuse Edge Certified Nodes catalogue in the Palette Manager.</em></p><p>Once it's installed, you'll find the <strong>RTSP Feed</strong> node in the left palette sidebar, ready to drag onto your canvas.</p><h3 id="configuring-the-node">Configuring the node</h3><ol><li>Drag the <strong>RTSP Feed</strong> node onto your canvas and double-click to open its settings.</li><li>In the RTSP URL field, enter your camera's stream address, for example <code>rtsp://192.168.1.50:554/ballmill-a2</code>.</li><li>If the camera requires a login, fill in Username and Password. These are stored as credentials and are never written into the flow file.</li><li>Set FPS to 10. Ten frames a second is smooth enough to watch a line in near real time. If your use case doesn't need that, lower it to ease the load: 1 is plenty for periodic monitoring. You can always raise it later.</li></ol><blockquote><p><strong>FPS drives the load.</strong> In message mode, every captured frame becomes a message in your flow, so a high FPS means more, larger messages to move and process; keep it no higher than your use case needs. In disk-writing mode no messages are emitted, so the rate instead governs how fast frames pile up on disk.</p></blockquote><ol start="5"><li>Leave Output image as <code>msg.payload</code> enabled so each frame is emitted as a message.</li></ol><blockquote><p>You'll also see a <strong>File path</strong> field. In this mode, the node keeps a single working image in that location, or falls back to the operating system's temporary directory if the field is left blank. You can safely ignore it for now, as it only becomes important in disk-writing mode, covered in <a href="#recording-frames-to-disk">Recording frames to disk</a>. In that mode, frames are written to the specified path and are not automatically deleted.</p></blockquote><p><img alt="The RTSP Feed node settings panel showing the RTSP URL, optional Username and Password credential fields, the FPS selector set to 10, and the Output image as msg.payload option enabled" src="https://flowfuse.com/blog/2026/06/images/rtsp-config.png"/><em>The RTSP Feed node settings panel showing the RTSP URL, optional Username and Password credential fields, the FPS selector set to 10, and the Output image as msg.payload option enabled</em></p><ol start="6"><li>Click Done, name the node <strong>RTSP Feed</strong>, wire a debug node to the output, and deploy.</li></ol><p>Once the node connects, it shows a green Running status underneath it on the canvas. Capturing begins the moment the flow is deployed, and within a second PNG buffers start arriving in the debug sidebar, confirming the camera is connected and frames are flowing.</p><p><img alt="Debug sidebar showing a stream of PNG buffer messages arriving from the RTSP Feed, one per captured frame" src="https://flowfuse.com/blog/2026/06/images/rtsp-debug-output.png"/><em>A buffer per frame in the debug sidebar. The feed is connected and the frames are now inside the flow.</em></p><h3 id="putting-the-feed-on-a-dashboard">Putting the feed on a dashboard</h3><p>A buffer in the debug sidebar confirms the feed works, but it's no use to an operator. Let's get the frame onto a screen anyone can open in a browser.</p><p>This assumes you have FlowFuse Dashboard 2.0 installed. If you don't, follow the <a href="https://dashboard.flowfuse.com/getting-started.html#installation" rel="nofollow">Getting Started guide</a> to add it and set up your first page, then come back.</p><p>FlowFuse Dashboard has no built-in widget that takes a raw image buffer, so we turn each PNG into a base64 data URI and render it with a standard image tag. The conversion is handled by the <strong>base64</strong> node, which you'll need to install: add <code>node-red-node-base64</code> from the Palette Manager.</p><ol><li>Add a <strong>base64</strong> node after the <strong>RTSP Feed</strong> node. With its default action, it converts the incoming PNG buffer into a base64 string.</li><li>Add a <strong>Change</strong> node after it. The RTSP Video Feed node outputs the image as a Base64-encoded string. To display it in a dashboard image widget, prepend the required Data URI prefix using the following JSONata expression:<pre class="language-text" code=""data:image/png;base64," &amp; payload
" language="text"><code __ignore-map="">"data:image/png;base64," &amp; payload
</code></pre></li><li>Add a <strong>ui-template</strong> node and assign it to a dashboard group and page. Set its Type to <em>Widget</em> and drop in a single image element bound to the payload:<pre class="language-html shiki shiki-themes material-theme-lighter material-theme material-theme-palenight" code="&lt;template&gt;
  &lt;img
    :src="msg?.payload"
    v-if="msg?.payload"
    style="max-width: 100%; display: block; margin: 0 auto;"
    alt="Live frame from the A2 ball mill camera"
  /&gt;
&lt;/template&gt;
" language="html" meta="" style=""><code __ignore-map=""><span class="line" line="1"><span class="sMK4o">&lt;</span><span class="swJcz">template</span><span class="sMK4o">&gt;
</span></span><span class="line" line="2"><span class="sMK4o">  &lt;</span><span class="swJcz">img
</span></span><span class="line" line="3"><span class="spNyl">    :src</span><span class="sMK4o">=</span><span class="sMK4o">"</span><span class="sfazB">msg?.payload</span><span class="sMK4o">"
</span></span><span class="line" line="4"><span class="spNyl">    v-if</span><span class="sMK4o">=</span><span class="sMK4o">"</span><span class="sfazB">msg?.payload</span><span class="sMK4o">"
</span></span><span class="line" line="5"><span class="spNyl">    style</span><span class="sMK4o">=</span><span class="sMK4o">"</span><span class="sfazB">max-width: 100%; display: block; margin: 0 auto;</span><span class="sMK4o">"
</span></span><span class="line" line="6"><span class="spNyl">    alt</span><span class="sMK4o">=</span><span class="sMK4o">"</span><span class="sfazB">Live frame from the A2 ball mill camera</span><span class="sMK4o">"
</span></span><span class="line" line="7"><span class="sMK4o">  /&gt;
</span></span><span class="line" line="8"><span class="sMK4o">&lt;/</span><span class="swJcz">template</span><span class="sMK4o">&gt;
</span></span></code></pre></li><li>Deploy and open your dashboard. If you're working on the edge device, browse to <code>http://&lt;flowfuse-agent-ip&gt;:&lt;port&gt;/dashboard/</code>, using the IP and port your instance runs on. The view refreshes with every new frame.</li></ol><p>That's a live line view anyone can pull up in a browser, with no NVR login and no separate video client.</p><p><video auto-play loop muted plays-inline aria-label="FlowFuse Dashboard 2.0 page showing a live frame from the mill camera, with the grinding mill, feed conveyor and flotation line visible" width="800" height="434" preload="none"><source src="https://flowfuse.com/blog/2026/06/images/dashboard-view.webm" type="video/webm"></source></video><em>FlowFuse Dashboard 2.0 page showing a live frame from the mill camera, with the grinding mill, feed conveyor and flotation line visible</em></p><blockquote><p><strong>Watch the message size.</strong> FlowFuse Dashboard sends data over a socket connection capped at about 1 MB per message by default, and a full-resolution frame can exceed that. When it does, the message is silently dropped and the image just doesn't appear. If that happens, lower the camera resolution, keep the FPS low, or raise <a href="https://dashboard.flowfuse.com/user/settings.html#maxhttpbuffersize" rel="nofollow"><code>maxHttpBufferSize</code></a> in your instance settings.</p></blockquote><h2 id="from-a-view-to-a-decision">From a view to a decision</h2><p>A live view is a real win, but notice what you have now: the camera's output is a PNG buffer moving through your flow, one message per frame. Once a frame is just another message, you can do more than display it. You can ask what's in it.</p><p>That's what the <a href="https://flowfuse.com/node-red/flowfuse/ai/"><strong>FlowFuse AI</strong> nodes</a> are for. They run vision models locally, inside your flow, with nothing sent to an outside service. The <strong>Object Detection</strong> node takes a PNG buffer as its input, which is exactly what the camera node outputs, so you wire the camera straight into it, no conversion step in between. From there the flow stops watching and starts acting: counting material on the conveyor, flagging a person near the flotation cells, or catching a stopped belt before the line backs up. Each detection comes back as structured data, a label, a confidence score, and a position, which you handle like any other signal in FlowFuse.</p><h2 id="recording-frames-to-disk">Recording frames to disk</h2><p>One last mode worth knowing. Sometimes you don't need frames in the flow at all, just a local record of what the camera saw. Turn off <strong>Output image as <code>msg.payload</code></strong> and the node stops emitting messages. Instead <code>ffmpeg</code> writes a continuous numbered sequence of PNGs (<code>rtsp-&lt;node-id&gt;-&lt;counter&gt;.png</code>) straight to disk.</p><p>Where they land is set by the <strong>File path</strong> field. Point it at a directory you control and the frames are written there. Leave it empty and the node falls back to the OS temp directory, typically <code>/tmp</code>. On many modern Linux distributions <code>/tmp</code> is a RAM-backed disk, though not on all, so frames there consume memory rather than disk and are cleared on reboot. Either way it's fine for a quick test but not for anything you need to keep.</p><h2 id="wrapping-up">Wrapping up</h2><p>Camera feeds don't have to sit in a silo while the rest of the floor gets connected. With the <strong>RTSP Video Feed</strong> node, a stream becomes still frames; with a dashboard, those frames become a live view; and with the <strong>FlowFuse AI</strong> nodes, they become decisions, all at the edge, with nothing leaving the plant.</p><style>html pre.shiki code .sMK4o, html code.shiki .sMK4o{--shiki-light:#39ADB5;--shiki-default:#89DDFF;--shiki-dark:#89DDFF}html pre.shiki code .swJcz, html code.shiki .swJcz{--shiki-light:#E53935;--shiki-default:#F07178;--shiki-dark:#F07178}html pre.shiki code .spNyl, html code.shiki .spNyl{--shiki-light:#9C3EDA;--shiki-default:#C792EA;--shiki-dark:#C792EA}html pre.shiki code .sfazB, html code.shiki .sfazB{--shiki-light:#91B859;--shiki-default:#C3E88D;--shiki-dark:#C3E88D}html .light .shiki span {color: var(--shiki-light);background: var(--shiki-light-bg);font-style: var(--shiki-light-font-style);font-weight: var(--shiki-light-font-weight);text-decoration: var(--shiki-light-text-decoration);}html.light .shiki span {color: var(--shiki-light);background: var(--shiki-light-bg);font-style: var(--shiki-light-font-style);font-weight: var(--shiki-light-font-weight);text-decoration: var(--shiki-light-text-decoration);}html .default .shiki span {color: var(--shiki-default);background: var(--shiki-default-bg);font-style: var(--shiki-default-font-style);font-weight: var(--shiki-default-font-weight);text-decoration: var(--shiki-default-text-decoration);}html .shiki span {color: var(--shiki-default);background: var(--shiki-default-bg);font-style: var(--shiki-default-font-style);font-weight: var(--shiki-default-font-weight);text-decoration: var(--shiki-default-text-decoration);}html .dark .shiki span {color: var(--shiki-dark);background: var(--shiki-dark-bg);font-style: var(--shiki-dark-font-style);font-weight: var(--shiki-dark-font-weight);text-decoration: var(--shiki-dark-text-decoration);}html.dark .shiki span {color: var(--shiki-dark);background: var(--shiki-dark-bg);font-style: var(--shiki-dark-font-style);font-weight: var(--shiki-dark-font-weight);text-decoration: var(--shiki-dark-text-decoration);}</style><p><strong>Bring vision to the edge with FlowFuse</strong></p><p>Put your idle camera feeds to work at the edge, from live views to local AI, all without sending video off-site, with FlowFuse</p><p><a href="https://flowfuse.com/contact-us/">Contact Us</a></p>]]></content>
        <updated>2026-06-23T00:00:00.000Z</updated>
        <link href="https://flowfuse.com/blog/2026/06/process-rtsp-camera-feeds-at-the-edge/"/>
        
    </entry>
</feed>